How to Securely Delete Files on macOS

Before we start
Having spent some years coding applications for macOS, we’ve created a tool that everybody can use. The all-round problem fixer for Mac.
So here’s a tip for you: Download CleanMyMac to quickly solve some of the issues mentioned in this article. But to help you do it all by yourself, we’ve gathered our best ideas and solutions below.
What is secure erasing a file on Mac?
Secure erasing a file is removing the file completely from your Mac. What this means is, is that a file that is securely erased cannot be recovered by you or any third-party applications; it's the ultimate way to completely get rid of files.
See, when you typically empty the Trash, you're just deleting the access point to the file. Think of it like… a file is written on paper (your Mac) in pencil, and you erase the file with an eraser — You can still see the marks that were made on the paper! But, when you secure erase, you rewrite gibberish over the original pencil marks, and then erase it: there's no way to read it (it can't be recovered)!
So, there are two ways we can securely erase a file: one is via a Mac utility with a secure eraser and the other is with the Trash.
How to securely erase files using the "rm" command
Previously, you could securely delete files on your Mac using the “rsm” command in Terminal. Apple has eliminated this option with the introduction of the macOS Sierra. But, there is still a way to safely delete files using the “rm” command.
Firstly, you need to enable some settings in System Preferences.
- Open System Preferences (Apple menu > System Preferences)
- Select the Keyboard.
- Go to the Shortcuts tab.
- Enable New Terminal at Folder and New Terminal Tab at Folder.

Now, you need to go to Finder and find the folder that stores the file you want to delete securely. Right-click it and choose New Terminal at Folder. Now the Terminal window should open.
In the Terminal window:
- Enter
rm -P PrivateFile.txtcommand, but instead of “PrivateFile” use your file name. Instead of “txt” use the extension your file has. - Press Enter.

And your file is gone!

How to securely erase files with CleanMyMac X
CleanMyMac X has a secure eraser called the Shredder. It makes it incredibly easy to securely erase files. With CleanMyMac, all you have to do is:
- Download CleanMyMac X and launch it.
- Click Shredder.
- Select your file with "Select Files…"
- And click Shred.

And that's how you securely erase files with a secure eraser like CleanMyMac X. Plus, CleanMyMac X has a bunch of other features that help you keep your Mac clean and up to speed. Download CleanMyMac X and see what a difference it makes on your Mac right now!
How to securely delete files on flash drives/SD cards
macOS comes with a built-in feature that allows you to erase your flash drive, SSD, or SD card. To start, you need to connect your drive to your Mac. Then, follow the instructions:
- Open Disk Utility (Applications > Utilities > Disk Utility).
- Select your drive in the External category on the left. Make sure you don’t erase your internal hard drive. It contains all your data and you won’t be able to restore it once erased.
- Click the Erase button.
- Type a name for your drive and choose a format. Apple recommends using ExFAT format.
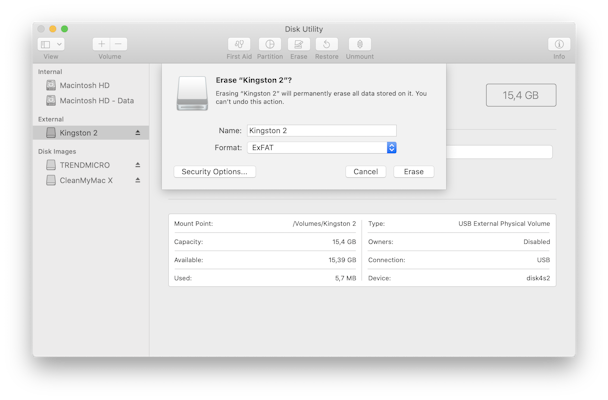
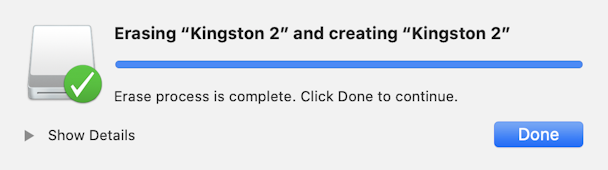
- Press Erase to confirm. If you drive is successfully erased, you should see a message like this:


Safely erase multiple files using an encrypted disk image
Disk images (.dmg) provide a secure way to store and share your private files. You can store your disk image in any cloud storage, on your Mac or external hard drive. And given the fact that you can encrypt the disk image, no one will be able to access your data.
If you want to delete multiple sensitive files and data in one go, you can use a disk image as well. You’ll need to create an encrypted .dmg file and transfer your files there. Then, you can lock the disk and delete it, making your data unrecoverable for anyone. Here’s how to do that step-by-step:
- Open Disk Utility (Applications > Utilities > Disk Utility).
- Go to File, select New Image, then, Blank Image.
- Type your disk name in the Save As field. Make sure to add the .dmg extension.
- Type size and choose format.
- Select the Encryption method. Apple recommends the first method (128-bit AES encryption).
- Provide a password to encrypt your disk image and press Choose.
- And press Save.

Now you can drag and drop the files you want to delete to the disk image. Then, right-click the disk image and press Eject to lock it.
Move this disk image to the Trash and you’re done. Though your files are now in the Bin, no one can access them without your encryption key. Empty the Trash to let your sensitive files be gone forever!
How to securely erase files on Mac OS X
It's not difficult, but it does take some time. Just remember that when you securely erase a file, it will take a bit longer than if you were to normally empty your Trash. To secure erase files in the Trash, just:
- Control-click on the Trash icon in your Dock, at the bottom of your screen.
- Press the Command button.
- Click Secure Empty Trash.
- And again, select Secure Empty Trash.
These instructions work with OS X Yosemite. Secure Empty Trash feature isn't available since the El Capitan OS X update. If you are running an older version, instead of pressing the Command button in step 2, you might have to press Ctrl or Alt/Option.
But again, secure erasing files is even easier with CleanMyMac X. There's no holding buttons or deleting one file (or all the files) at a time. Just select or drag your file(s) to the Shredder and click Shred. Voila — That's it! Plus, CleanMyMac X does so much more than just securely erase files. It helps you clean your entire Mac, run basic Mac maintenance, monitor its hardware health, and even completely uninstalls apps. Download for free now and see what a difference it makes on your Mac.