Autofill is a built-in feature that comes with most popular Mac browsers. It is designed to automatically fill in passwords, usernames, addresses, or payment details. Convenient as it is, preserving autofill data can pose severe privacy and security risks, especially if you share your device with others or leave it unwatched in public places. For this reason, it is essential to know how to delete autocomplete data in all browsers you actively use and how to change autofill settings. Keep on reading, and you’ll learn all you need to know about tweaking autofill settings in Safari, Chrome, and Firefox.
How to clear autofill data from all browsers in one click
First, we’ll show you how to delete autofill data stored on your Mac. There are two ways to do it — a quick one with the help of a Mac cleaner app and a manual one.
Let us begin with the easy way to clear autofill data. CleanMyMac makes it incredibly simple to clean up autofill on any browser you have installed on your Mac. And all of them in one go as well. To delete your autofill entries, follow these steps:
- Download and open CleanMyMac (click here for free download).
- Go to Privacy from the sidebar and click Scan.
- Click the browser you use in the middle menu and select the checkbox next to Autofill Values. Note: if you use several browsers, select it for all of them.
- Click Remove.
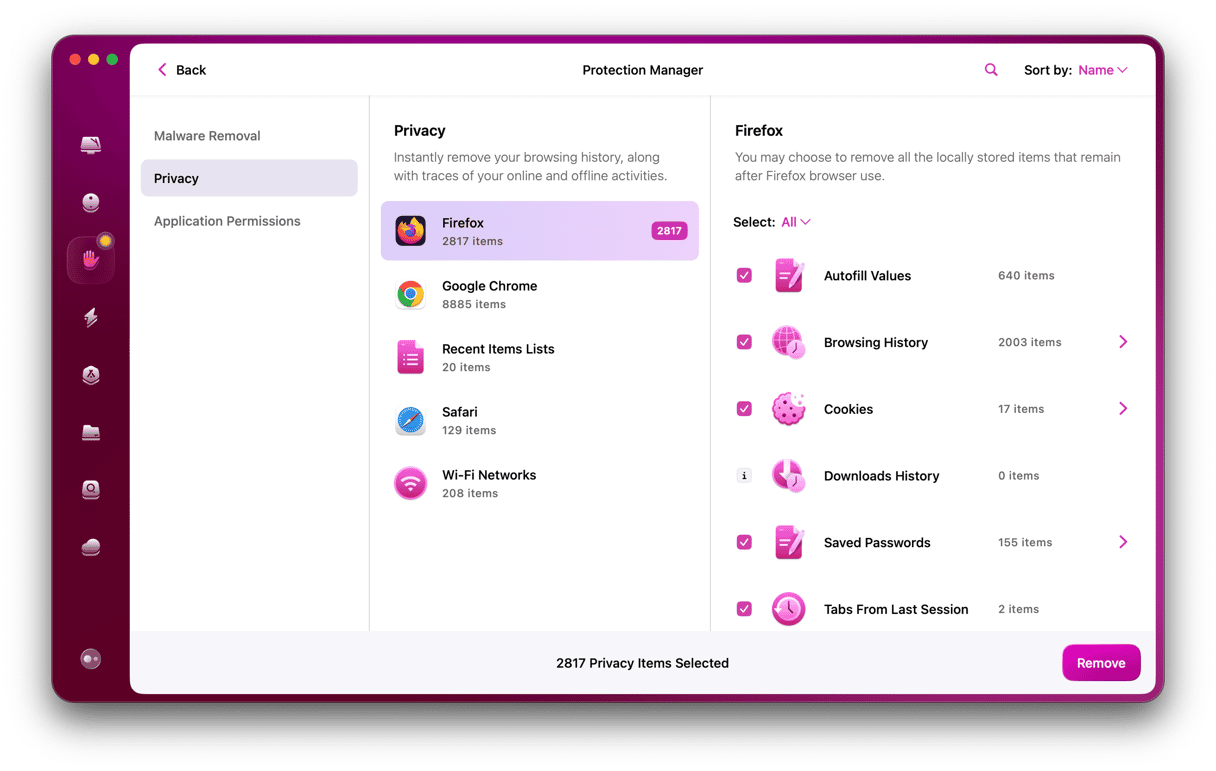
And that’s all it takes to clean up autofill forms in all your browsers. As you can see, CleanMyMac makes it incredibly simple to clean your Mac of not-so-common junk. It helps you clean up your Mac system by removing junk files, large and old files, and mail attachments. CleanMyMac also has tools for protecting and optimizing your Mac. Best of all, it has an unlimited 7-day free trial, so you can check out all of its features first. Download CleanMyMac and get yourself a faster, cleaner Mac right now!
If you decide that using a third-party app is not for you, keep on reading and learn how to clear autofill data manually and how to change autofill settings in browsers.
How to manage autofill settings in Chrome
The first step is to clean autocomplete history. Here’s how to do it:
- Open Chrome.
- Click History > Show Full History from the menu bar.
- Now, click Delete Browsing Data > Advanced.
- Choose All time from Time range.
- Select the checkboxes next to Passwords and other sign-in data and Autofill form data. You can choose other options as well.
- Click Delete data.
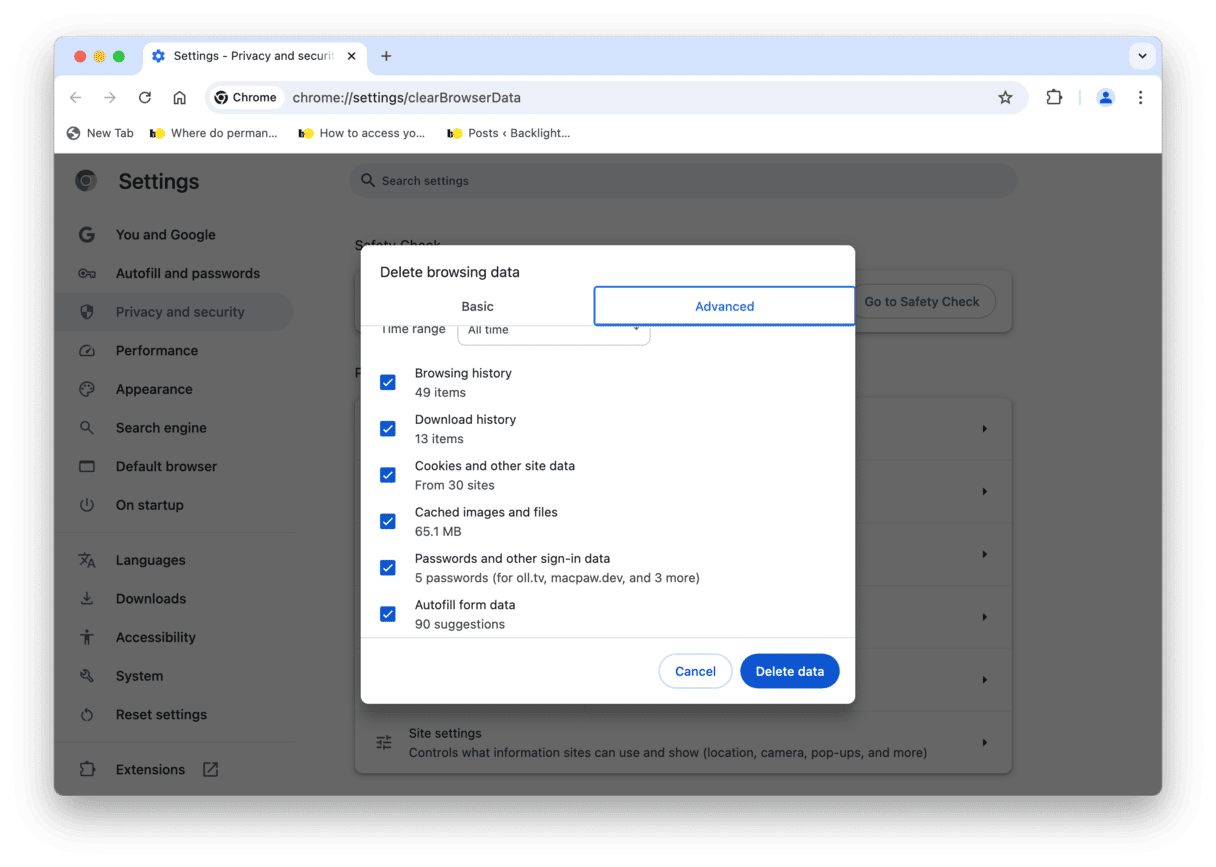
Once you’ve deleted autofill data, you may want to change its settings so that this information is not stored. Here’s what you need to do:
- Open Chrome and click three dots top right.
- Go to Settings > Autofill and passwords.
- Check settings for Payment methods and Addresses and more — make sure to disable the option that says Save and fill [...].
- Click Google Password Manager > Settings and disable Sign in automatically.
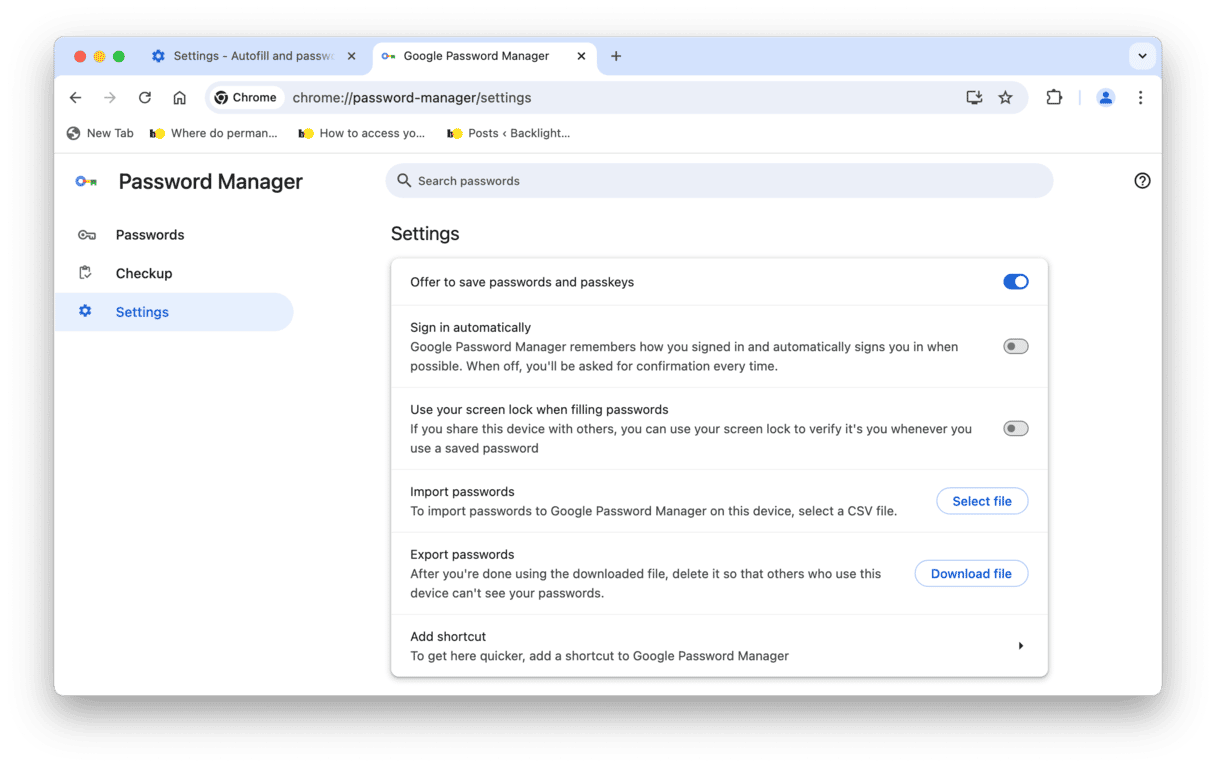
And you’re done! Be sure to follow steps for other browsers if you use any.
How to change or turn off autofill in Safari
Like with Chrome, you can delete your entire autocomplete lists from Safari with a few steps:
- Open Safari.
- Click Safari at the top left of the menu bar > Clear History.
- Next to Clear, choose All History.
- Click Clear History.

And that’s it for deleting autofill in Safari. You can also tweak settings:
- Open Safari and go to Settings from the menu bar (you can also press Command + comma).
- Click AutoFill.
- Deselect the checkboxes next to all four options.
- You can also click Edit next to each of them and further customize AutoFill.
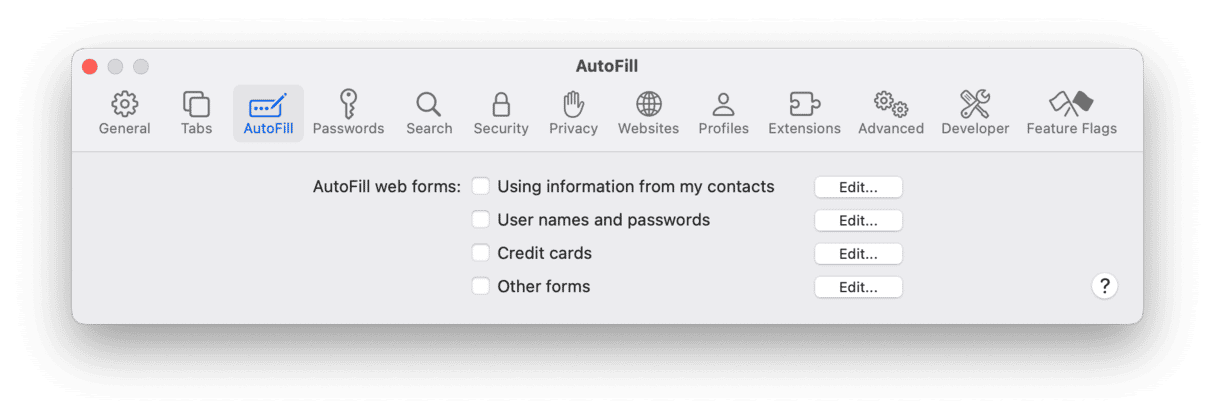
And you’re done. Now is the time to proceed with Firefox if you use it on your Mac.
How to manage autocomplete settings in Firefox
Clearing autocomplete in Firefox is, as you may have guessed, a few steps:
- Open Firefox.
- From the menu bar, click History > Clear Recent History.
- Choose Everything next to When.
- Select the checkbox next to History and anything else you want to remove.
- Click Clear.
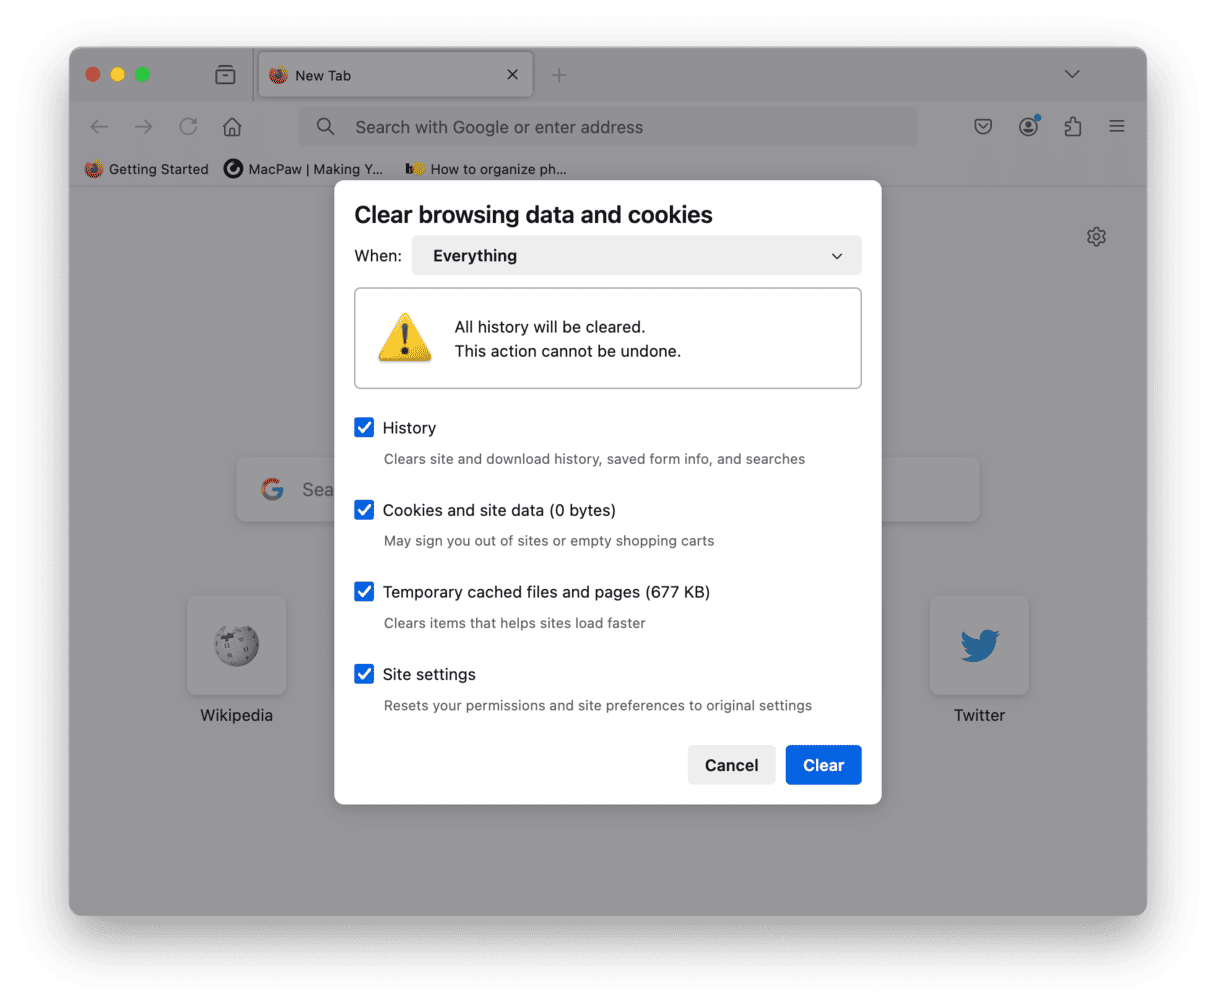
If you want to change autofill settings in Firefox, you can do it by following these steps:
- Open Firefox, click three lines top right, and go to Settings.
- Navigate to Privacy & Security and scroll down to Passwords.
- Deselect the checkbox next to Fill usernames and passwords automatically.
- Now, scroll down to History.
- Next to Firefox will, click Use custom settings for history.
- Deselect the checkbox next to Remember search and form history.
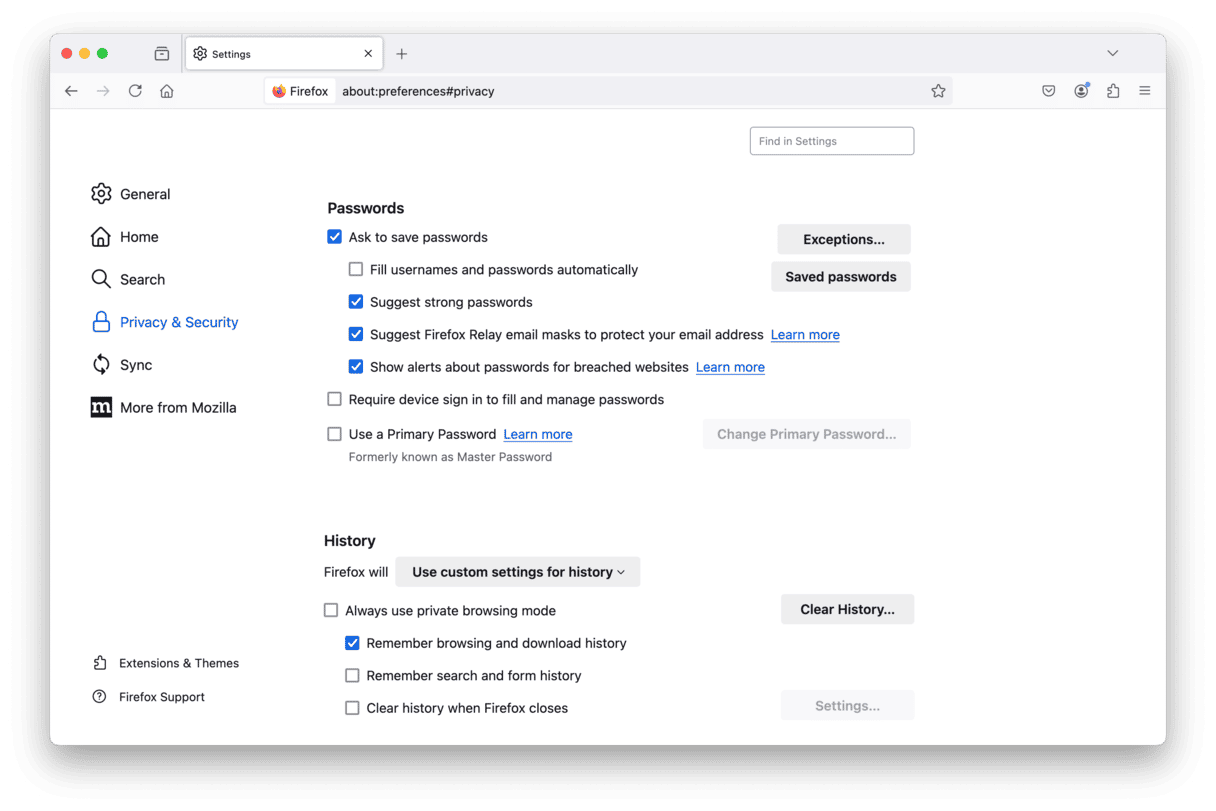
And just like that, you’ve managed to clean autocomplete data in all the browsers you use and change autofill settings. It may seem like a lot of work, but it is an investment in improved privacy and security. Thank you for reading, and stay safe.


