Did you know that a clean Mac works better and virtually without a flaw? Some people may be surprised to learn that a MacBook needs a regular cleanup. With our tips, you can make your Mac tidier in less than an hour. You can start by cleaning up your Desktop, but there’s more to it. Keep on reading to learn the best ways to clean up Mac on the inside and on the outside.
What really takes up space on your Mac
Have you ever wondered what clogs up your Mac the most? These are different files and data, and they can be classified into the following groups: large and old files, system junk, app leftovers, old backups, photos junk, trash bins, and mail attachments. By the way, they are mentioned in order from the most space-consuming ones to the least hungry storage eaters.

How to check storage on Mac and why you should do it
Let’s start with a quick reminder of how to check storage on Mac:
- Go to System Settings > General > Storage.
- Look at a colored graph — hover over each segment to see how much space each category takes up.
- Note System Data (known as Other storage in older macOS versions) — it can take up gigabytes of space, and all that storage can be reclaimed since it mainly consists of old, unneeded files.

Now that you know how to check storage, the main question is why and when you should do it. There are three possibilities:
- Regular maintenance — we suggest cleaning up your Mac regularly (say, once a month), as it is a great way to prevent software glitches
- Update issues — you cannot update your Mac because there’s not enough free space to install a new macOS version
- Troubleshooting — your Mac’s performance has dropped significantly, overheating, frequent app crashes and beach balls, or slow startup, and freeing up some space may help fix them all
How to clean & optimize your Mac [expert tips]
If you have never performed an automatic or manual system cleaning — it means that your Mac has been collecting unnecessary files and clutter for years. You can quickly clean up your Mac with these easy steps. For your convenience, we provide them based on their potential effectiveness, starting with the most effective ones. However, if you want to perform a full clean, make sure to follow all of the steps we mention here.
But before you jump into cleaning, make a backup — just in case your cleaning effort is too aggressive and you lose any important files.
1. Completely uninstall apps you don’t use
The applications you’ve installed on your Mac take up space, of course. And over time, when your Mac becomes full of different apps, it may start running slowly. How to clean MacBook? In the first place, you need to remove the apps you no longer use or need. To do this, right-click on the app you want to remove and choose Move to Trash/Bin.

You may be surprised to find out that sending an app to Trash/Bin will not uninstall it completely because the app leftovers still remain on your Mac, taking up a lot of storage. So, if you want to be a responsible Mac user, you need to uninstall applications the right way. Here’s a step-by-step guide on how to uninstall apps on a Mac.
While removing apps you no longer need, you can take a step further — manage apps launching at startup. Go to System Settings > General > Login Items & Extensions and disable those you no longer need. It is not necessarily a cleanup-related tweak, but it does reduce strain on the macOS and helps it work smoothly.
2. Clean up system, user, and application cache
You’ve probably heard “remove your cache” as a web browser troubleshooting tip. In fact, your Mac stores a lot of information in files called caches, allowing fast access to that data and reducing the need to get it from the original source again. Unfortunately, those files take up a lot of space on your Mac, and instead of speeding things up, they slow your computer down. Therefore, if you want to give your system a boost, clean your Mac from the cache files.
There are two ways to do that: you can delete them manually or use a MacBook cleaner like CleanMyMac to do the job for you. If you decide to clean up the cache manually, check out a comprehensive guide on how to clear cache on a Mac. Here, you’ll find steps to delete different types of cache files: system cache, user cache (including app cache), and browser cache.
If you want to get rid of cache the easy way, use CleanMyMac:
- Open the app (get your free trial here).
- Navigate to Cleanup in the sidebar and click Scan.
- Now, click Clean. Or you may click Review to choose what will be deleted from your Mac.

That’s all it takes to get rid of cache. Note that the app is notarized by Apple, which means that it is absolutely safe to use. Also, it is a smart cleaner, meaning that no vital files will be removed.
Tip: If you use the Cleanup feature, you will also remove other categories of space hoggers — mail attachments, unneeded language files, and Xcode junk. The latter is known to take up around 20 GB for one file only. Imagine how much space it eats up if you regularly use Xcode!
3. Empty the Trash [important but frequently ignored]
Even though you’ve deleted the files, they reside in your Trash bin, taking up a lot of storage on your Mac. They are just waiting to be removed completely. If you want your precious hard drive space back, you need to empty the Trash/Bin.
Here’s how to clean your MacBook from the trash:
- Click and hold the Trash/Bin icon in the Dock.
- Click Empty Trash.

4. Optimize your storage with a built-in tool
Apple has already thought about the clutter that can be generated on Macs and provided a possible solution. Here’s how to reduce clutter on your Mac:
- Go to System Settings.
- Click General and then Storage. Here, you can see how much free space is left on your computer.

Here are also some recommendations for saving space on your Mac. These are known as built-in Optimize Storage tool. You can choose to Store in iCloud to transfer your data to the cloud or Optimize Storage to remove large media files. Besides, you can enable iCloud Drive in System Settings > Apple Account > iCloud > Drive. You can then either choose which apps sync to iCloud Drive or copy files into the iCloud Drive you will be able to access from the Finder's sidebar.
Also, you can remove unneeded files from here. Just click the info icon next to any category (Applications, Trash/Bin, Documents, etc.), and you’ll see the list of files or apps stored. Select an item and click Delete to remove it and optimize space. Look through other recommendations and make the necessary changes to use your Mac’s space more efficiently. Do not forget to check Messages in this list — this way, you will remove unneeded attachments.

5. Delete large and old files [strategic step]
It has always been a rule of thumb among computer geeks that you should keep a minimum of 15-20% of free space on your main hard drive. This is just a rough estimation, but the more free space you have, the faster your Mac works. A computer magazine once performed a test on this, which concluded that the difference in speed could reach as much as 35%. If you work with heavy graphics or video rendering, even more free space is recommended.
How to have more free space? Delete large and old files.
It can be totally manual and require you to find them one by one. But there is a second way — you just need to make two clicks, and CleanMyMac will do the job for you:
- Get your free CleanMyMac trial.
- Open the app.
- Go to My Clutter and click Scan > Review All Files > Large & Old Files.
- Select what to clean, and then click Remove.

That’s it! You can also check Similar Images, Duplicates, and Downloads to delete even more unnecessary stuff.
6. Delete unneeded Downloads and declutter Desktop
Do you also download things and never get rid of them? Then, your Downloads folder probably needs a good old sort-out. If you’re too scared to face that enormous pile of files, here’s a quick trick: sort all your downloaded items by the date added. Then, scroll till the end of the folder, and you’ll see the dusty files that have been there for a while. Command-click to highlight multiple files and send them to the Trash.

Now that you’re done with the Downloads folder, do the same with the Desktop. As an extra organizing tip, you can use Stacks to make your Desktop look tidy, but remember to declutter it — files quickly pile up under those stacks.
7. Remove old backups [iOS and Mac]
Having your files backed up is a wonderful thing. But over time, your Mac becomes overloaded with old backups that take gigabytes of storage on your hard drive. That’s why you should consider removing the old iOS backups you no longer need.
Each backup remains stored on your computer. To delete the old backups, you need to do the following:
- Choose the Apple menu and then select System Settings.
- Go to General and click Storage.
- Click the “i” icon next to iOS Files.
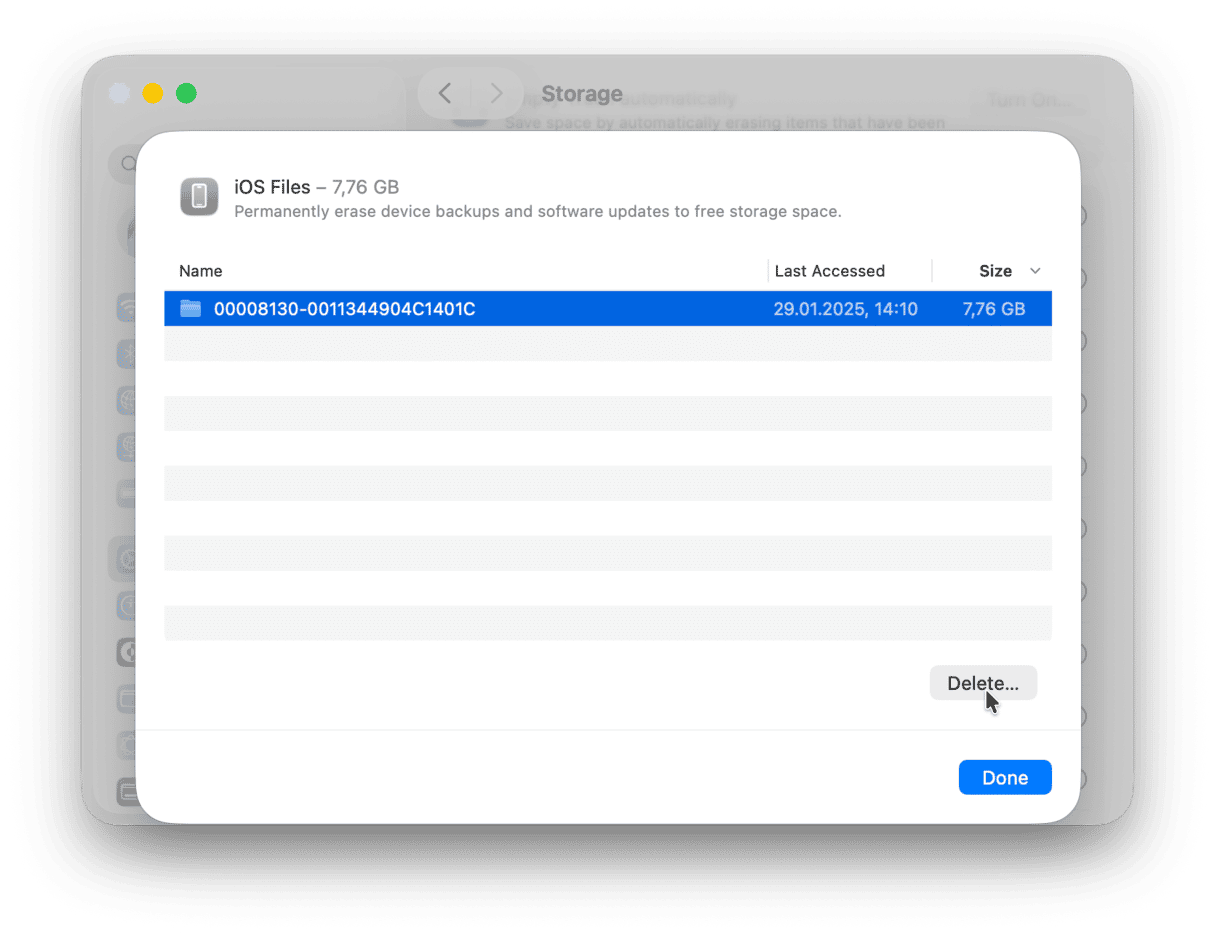
- Select the backup you want to remove and click Delete.
- Click Done to close the window.

That’s it! The backup files are gone from your Mac forever.
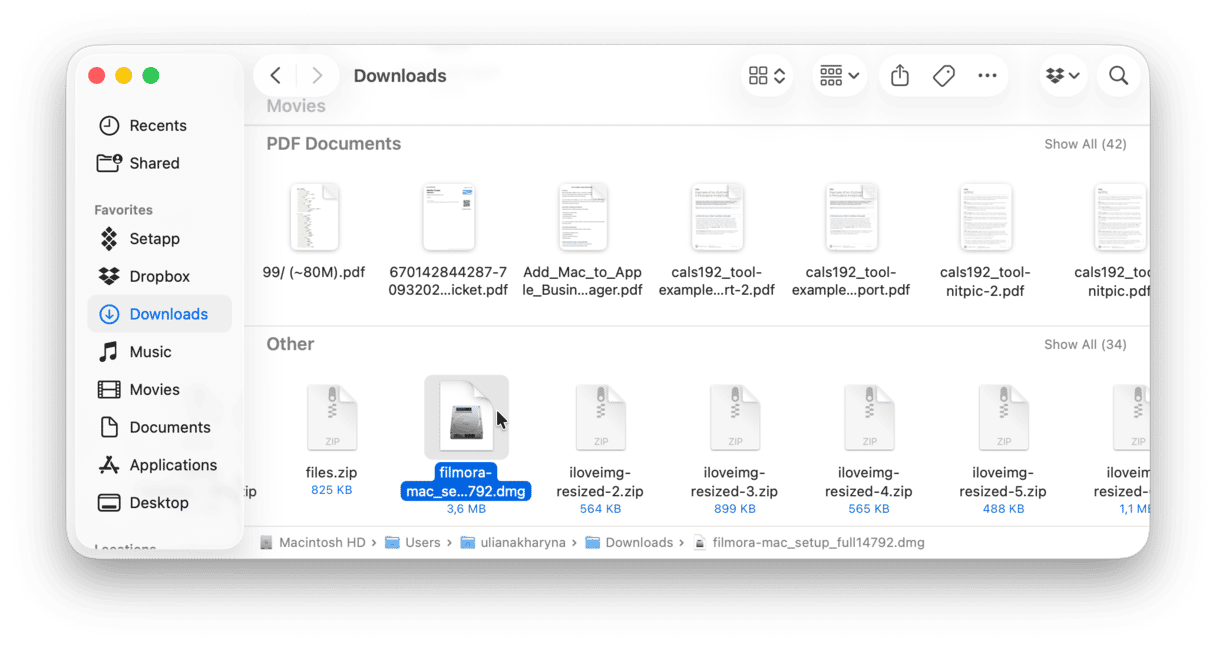
8. Delete old DMGs
Disk images (DMGs) often take up valuable space on your Mac. Here’s how to perform a Mac cleanup and get rid of those files:
- Open the Finder and type “.dmg” in the search bar.
- Then delete all files that have .dmg extensions. Don’t forget to remove them from Trash/Bin as well.

CleanMyMac allows you to locate and delete DMGs quickly. With its Applications module, you can remove unused disk images with a single click of a button. Just open the app and run a scan. Now, click Manage My Applications > Leftovers > Installers. Select DMGs for deletion and click Remove.

9. Clear System Data storage
Another significant space hogger is System Data storage. You may have noticed this mysterious category when you went to System Settings > General > Storage to check how much space you had on your computer. If you haven’t, consider doing it now and clearing it out as a final step in cleaning up your MacBook.
System Data storage contains application leftovers, temporary files, cache, disk images, Time Machine backups and snapshots, browser extensions, and other similar files. But how do you clean it? You’ll have to browse system folders:
- Open a new Finder window and press Command+Shift+G.
- Paste each of the following paths and press Return:
/Library/System~/Library~/System

Go through subfolders and delete files. Be sure to double-check what you send to the Trash and never delete folders themselves. If you’re not sure what a specific file is responsible for, it is better to keep it.
For more ways to clear System Data Storage on Mac, check out this handy guide.
10. Use Mac cleaner apps [automatic cleaning]
If you feel that following all these steps is a lot of work, there’s a quicker way to keep your Mac in top shape — let a Mac cleaner app do it for you. We’ve already introduced our favorite app in this article, and it is CleanMyMac. However, there are other apps out there you can try.
To choose a utility that best suits your needs, check out this article on best Mac cleaner software. Remember to always conduct a quick research about an app’s developer to ensure that it can be trusted and avoid installing malicious software.
11. Wipe your keyboard
Now, it’s time to physically clean your Mac. First, wipe your Mac’s keyboard. As you use your keyboard daily, it quickly gets dirty. Moreover, all those crumbs may live under the keys forever!
If you were wondering how to clean Mac’s keyboard, there are no special rules here. You can try blowing the dust and other particles out of your keyboard once in a while. Disinfecting wipes and alcohol-based sprays may also prove useful. Just choose the piece of fabric and wipe the keys gently to make them clean and shiny.
12. Clean your screen
Also, do not forget about cleaning the screen. It may seem spotless, but it’s rarely the case. So, take some time to clean it — all you need is any soft tissue and distilled water. Make sure that you spray water on the fabric, not the screen, and wipe it gently. That’s it.
If you’re in the mood for some major cleaning, here’s our article on how to clean other Mac accessories.
Bonus tips
Once you’ve followed these steps, your Mac should be as good as new. But there are a few more things to keep in mind:
- Do not ignore post-cleaning maintenance: as we’ve mentioned before, develop your own cleaning schedule and stick to it. This will help avoid clutter buildup.
- Monitor your Mac’s performance: if anything goes wrong, you can restore from Time Machine backup. But remember, if you’ve removed cache files, apps may seem slower at first.
- Keep your Mac up-to-date: update both the macOS (System Settings > General > Software Update) and the apps. This way, you'll have all the latest features and performance enhancements.
- Always be cautious: do not delete anything you think may be vital; always double-check what you send to the Trash or quickly google what the files are for before removing them.
- If cleanup went wrong: restore your files using the most recent Time Machine backup.
Happy cleaning!
Frequently asked questions
1. How do I use Terminal commands to clean up my Mac?
You can run the rm -rf command and drag the file into Terminal window to delete it. For system files, you will need to run sudo rm -rf and enter your password to complete it. But note that, this way, you delete the file immediately, meaning that it is not sent to the Trash, so always check what you remove.
2. What is the rm -rf command and is it safe to use?
This command deletes a file or folder you drag into Terminal window from your computer. Generally, it is safe to use if you are 100% sure what you delete. If you’re not, it is better to use a conventional deletion method — dragging an item to the Trash. Better still, run a scan with a dedicated cleaner app that removes only safe-to-delete items if you want to use this command to clean up system files.
3. Should I erase and reinstall macOS to clean up my Mac?
The short answer is no. The only good reasons to do it are selling or giving away your MacBook or dealing with a particularly nasty piece of malware that a reputable antimalware tool could not remove.
4. What should I do before using any cleaning utilities?
In most cases, nothing. However, if you are afraid that a cleaning utility removes anything you might need in the future, back up your Mac before using a cleaner.


