Have you ever checked the Storage settings of your Mac? You may have noticed a colored bar segment named ‘System Data.’ Sometimes, it can be over 100 GB. But what is it, why is Mac System Data large, and how do you clear it? We’ve got all the answers here. Keep on reading, and you’ll learn 7 effective ways to delete System Data on Mac and reclaim over 50 GB of space. Let’s dive in!
What is System Data on Mac?
System Data in macOS once used to be Other storage. It includes all types of data that do not fall into other categories of storage: Applications, Documents, iCloud Drive, iOS files, Photos, etc., along with other system files, downloaded items, and cache.
So, what does System Data include?
- Application leftovers: Files that remain in the system after you delete an app
- Temporary files & cache: Application caches, browser caches, system cache, etc.
- Disk images: Application installer files
- Browser plug-ins & extensions: Tools for customizing apps and web browsers
- Other files: Backups, macOS data, system log files, system application files
macOS System Data is mainly stored in both the System and Library folders.
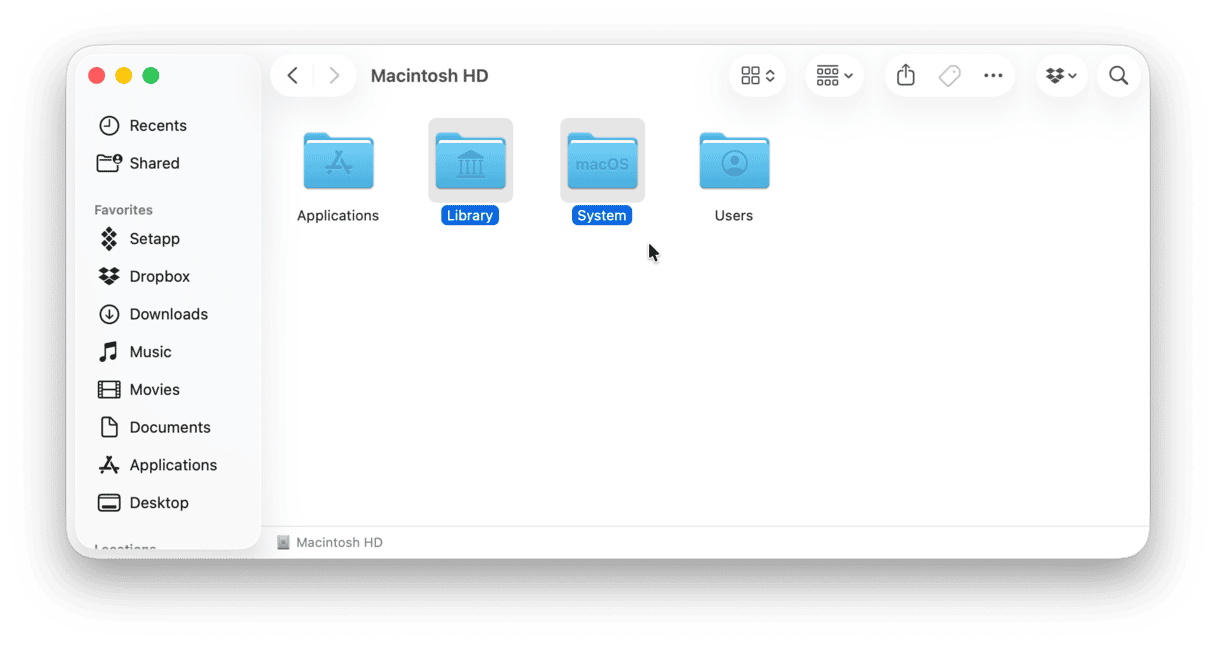
How to check System Data storage on Mac
Now that you know what System Data is, let’s find out how to check it. The steps are pretty straightforward:
- From the main Apple menu, go to System Settings.
- Click General > Storage, and you’ll see what’s taking up space on your Mac.
- Check the colored graph — hover over the gray segment to see how much space System Data occupies. Alternatively, scroll down to the bottom of the window and find that System Data category.
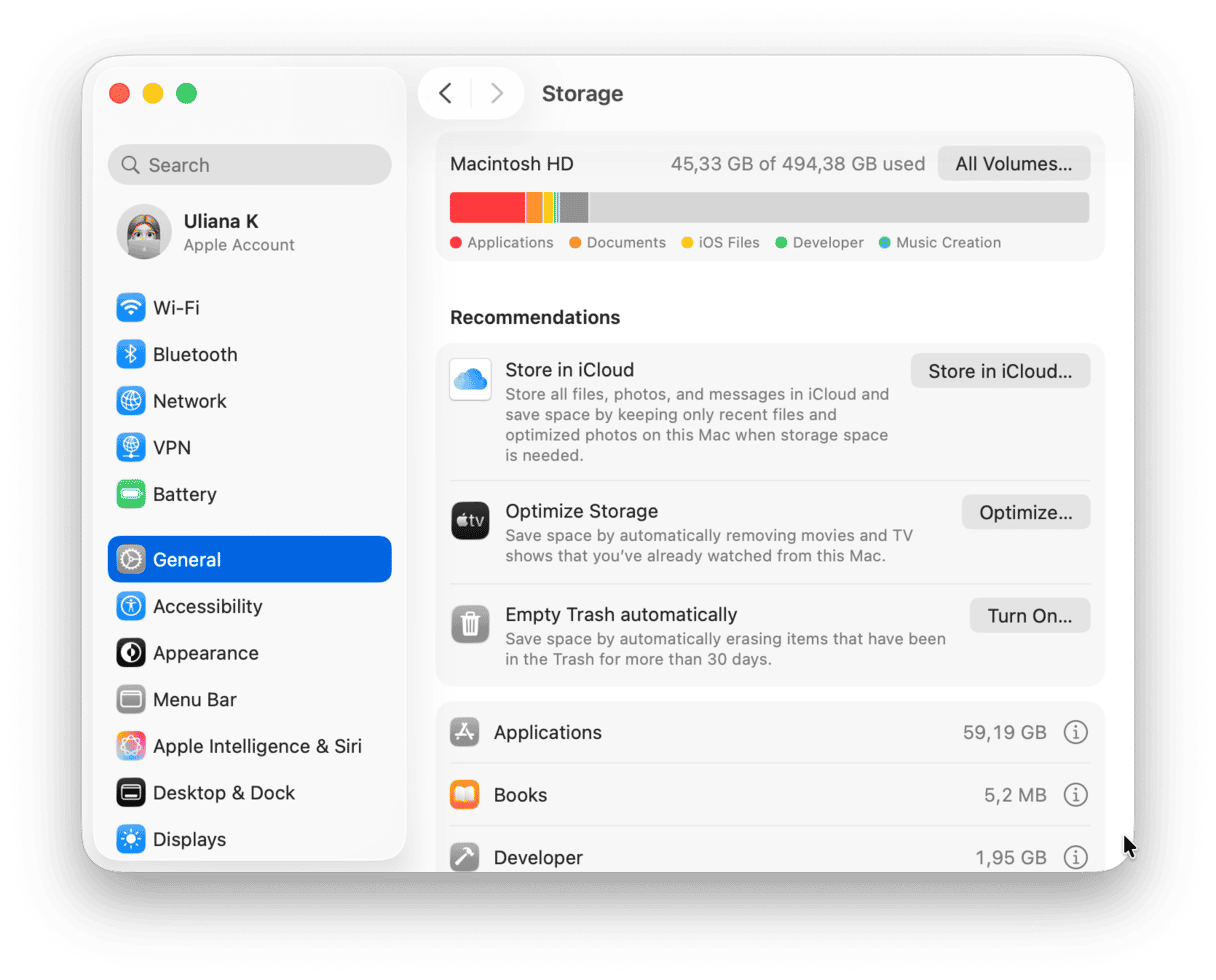
Now, we’re going to show you what to do when Mac System Data grows too large.
Can you delete system data on Mac?
Yes, but make sure that you follow the step below accurately. Also, always double-check everything before sending it to Trash.
How to clear System Data on Mac: 7 proven ways
1. Check for unnecessary files
Much of the storage space used by the OS for system-related tasks is cleared when macOS deletes the files automatically, but sometimes, that doesn’t happen, which is why the System Data category can grow very large. Apple doesn’t explain what comprises this category of storage, but it’s likely that the following are part of it:
- Time Machine backups
- App cache files
- Unused disk images
Not knowing what files are included in System Data storage makes finding them tricky. However, it’s far from impossible. Our favorite tool for clearing unnecessary system junk from Mac is CleanMyMac. It has lots of tools for clearing out junk files, but for our purposes, there’s one that really helps — Cleanup. This handy feature scans your Mac and identifies things like temporary files, translation files in apps, broken preferences files, and system cache files that are no longer needed. You can then remove them with one click. Or you can choose which ones you want to get rid of and remove just those. Get your free CleanMyMac trial.
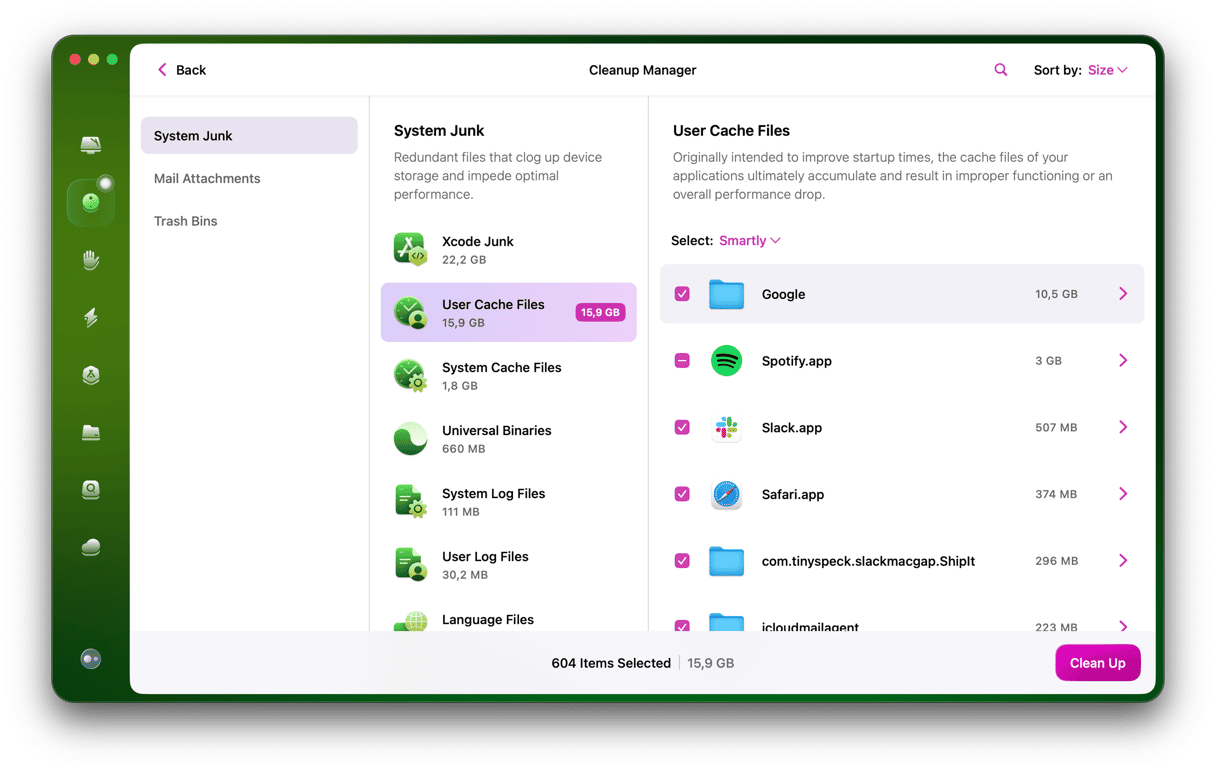
Once you’ve downloaded and installed it, here’s how to see what is in System Data and reclaim some space with the help of CleanMyMac:
- Open CleanMyMac.
- Choose Cleanup in the sidebar and click Scan.
- Once it’s finished, click Clean.
- If you want to know what will be removed, click Review and go through the list of results.
- Deselect the checkboxes next to any items you don’t want to delete and click Clean Up.
That will help you clear System Data storage on Mac.
If you use Photoshop or another media editor, you’ll see the option to delete Document Versions — intermediate edits of your files. Also, you can remove unused language files, Xcode cache and other derived data, VM-related cache, Microsoft cache, and other similar stuff. In other words, you have many options for freeing up space at your disposal.
Why use CleanMyMac
- On average, users find and remove 15 GB of safe-to-delete junk files with the help of the Cleanup tool
- An average Cleanup scan/clean process takes up just 6 seconds
- 25+ tools to clean, maintain, and protect your MacBook
Try CleanMyMac for free — see the difference it can make for your Mac.
2. Manually remove Time Machine backups
Aside from using CleanMyMac, one of the most straightforward ways to clear System Data on a Mac is to get rid of Time Machine backups. Wait, what? You thought Time Machine backups were stored on an external or network drive? They are! But macOS also keeps a copy of your backup on your startup drive in case the external drive isn’t available when you need to restore files. That way, you can restore data on a MacBook even when you’re on the move.
macOS should delete Time Machine backups when your Mac runs low on storage, but it doesn’t always work out that way. And besides, you might not want to wait until your Mac is short of space before you delete them. So, here’s how to delete System Data on a Mac by removing Time Machine backups. Remember, that will remove local copies of your backups, so if you think you might need them, don’t do it.
- Go to Applications > Utilities and open Terminal.
- When a Terminal window opens, type:
tmutil listbackupsand press Return. - You will now see a list of stored Time Machine backups sorted by date.
- Choose what you want to delete and paste the following command:
sudo tmutil deletefollowed by the path to the backup — it would include [user name]/[disk name]/[YYYY-MM-DD]. Press Return.
Also, delete Time Machine snapshots. It also requires working with Terminal.
- Open Terminal and paste
tmutil listlocalsnapshots /with the space before /. - Press Return and wait until you see the list of snapshots.
- Type
tmutil deletelocalsnapshots xxxxxxxwhere ‘xxxxxxx’ is the name of one of the backups listed. This will take the form of a date followed by a text string. - Press Return.
- Repeat steps 1 and 2 for as many backups as you want to remove, checking the Storage tab in About This Mac > More Info > Storage Settings each time to see how much space you’ve cleared.
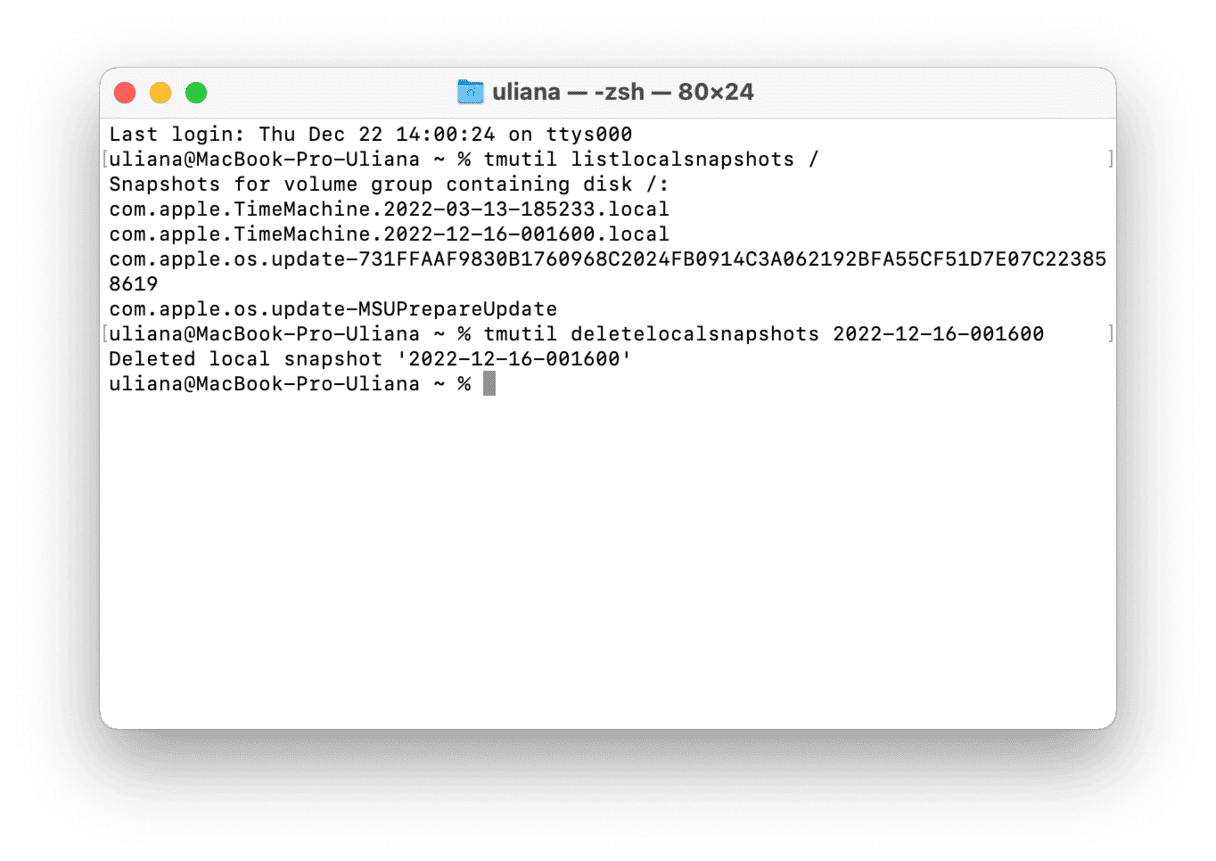
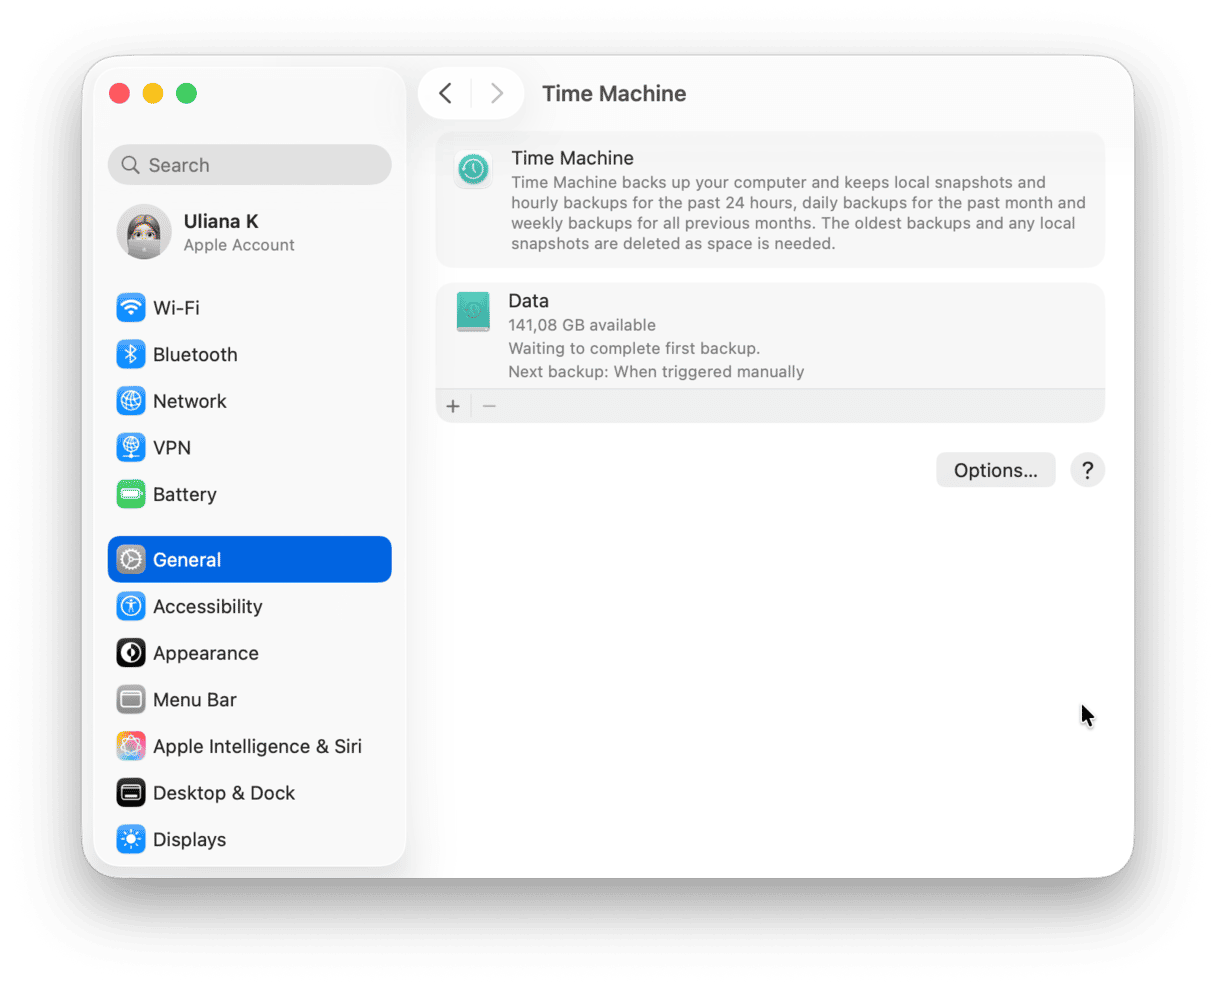
Once you’ve removed local snapshots, you may want to prevent the creation of new ones. To do it, follow these steps:
- Go to System Settings > General > Time Machine.
- Make sure that automatic backups are turned off.
You can always turn them on later from System Settings.
What to do if you cannot delete Time Machine backups and snapshots
- Disable automatic backups as described above and enable them again after a few minutes. Run respective Terminal commands.
- Reformat the drive you use for backups — make sure to copy files you think you might need later.
Tip: Remove Spotlight index while in Terminal
Did you know that Spotlight index can take up gigabytes of space? Some users even shared that it ate up over 400 GB! While in Terminal, you can remove it with a simple command. Worry not, it is safe, and macOS will re-create it. Run these commands:
sudo du -hs /System/Volumes/Data/.Spotlight-V100/ to check the size of Spotlight index (you will need to enter your admin password)
sudo rm -rf /System/Volumes/Data/.Spotlight-V100/ to remove it
3. Optimize your storage
If you’ve faced a cluttered storage situation, there’s another way to fix it. Apple has anticipated such an issue and equipped the macOS with some features to optimize your space.
macOS Ventura and later
Go to the Apple menu and select About This Mac > More Info. Select Storage Settings. In the window that appears, you can see some useful suggestions. “Store in iCloud” lets you transfer all your data to cloud storage and reclaim some GBs on your Mac. The second option allows you to delete the heaviest files, like movies and apps.
Turning on “Empty Trash Automatically” can be a useful option if you forget to do it regularly.
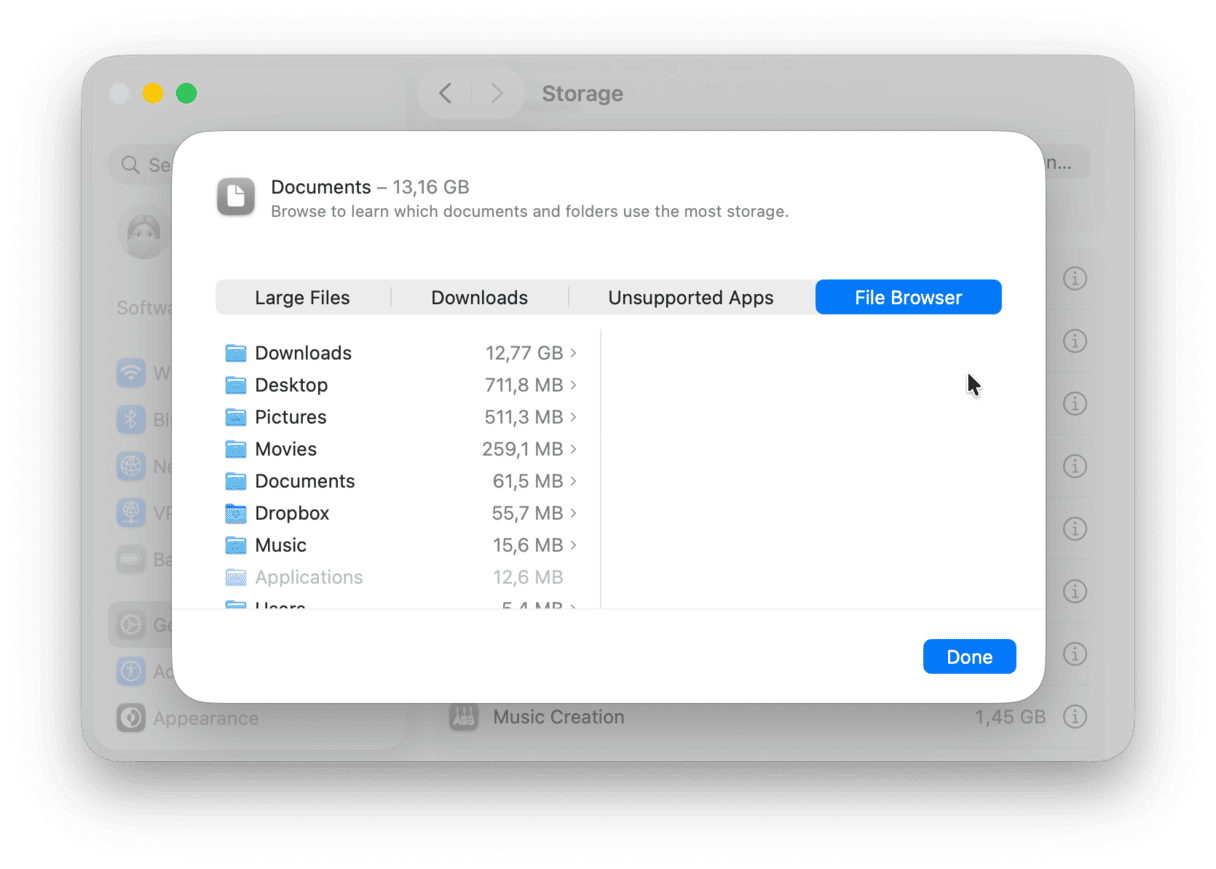
By clicking the i icon, you will jump into the Documents section. Review the files that are stored on your Mac and pay attention to the Unsupported Apps category. It can contain some apps that can no longer run on your macOS version.
Pre-Ventura
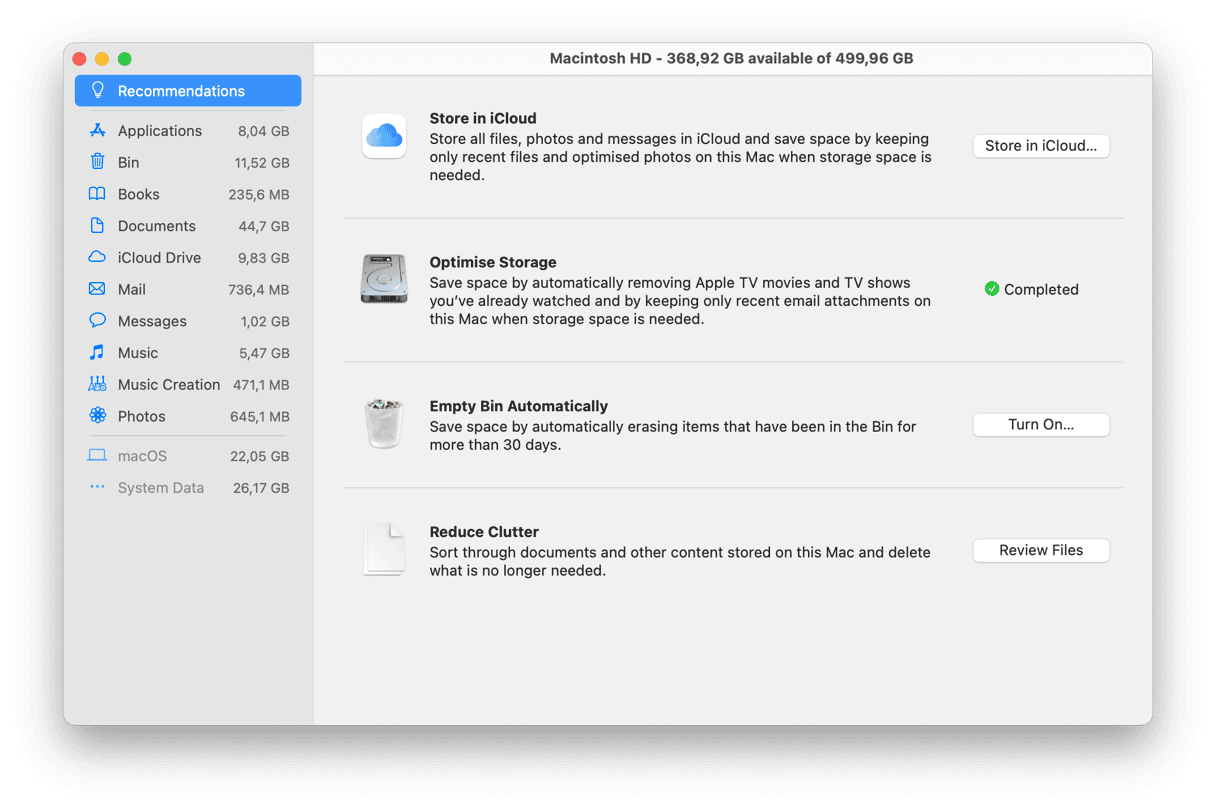
If you're still running macOS Monterey or older, the steps for optimizing storage are a bit different. Here's what you need to do:
- Go to the main Apple menu and choose About This Mac.
- Click Storage > Manage.
- In a window that opens, work your way through the recommendations.
4. Clear application logs and support files
Apps generate lots of files. They help improve your experience within the app, but when you remove the application, those leftover files may still be stored on your Mac.
Here’s how to check if you still have them:
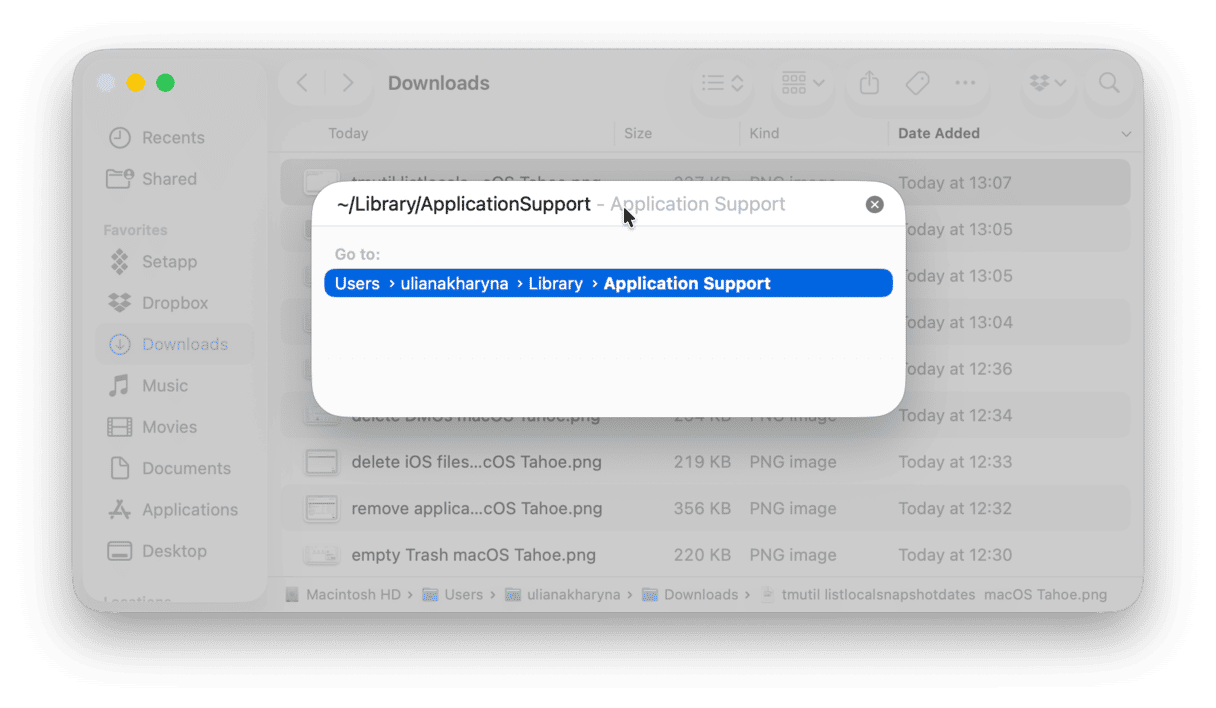
- Open the Finder.
- Click Go menu > Go to Folder.
- Type
~/Library/Application Supportand press Return.
Each app’s folder has a corresponding name: you can remove the folders that belong to apps you’ve already deleted.
You can also search for app-related data in these locations:
~/Library/Caches
~/Library/Logs
~/Library/Containers
~/Library/Cookies
Make sure you only delete leftover files; it’s better to keep files of the apps you still use.
What to do if you cannot delete files
- Restart your MacBook.
- Quit all apps running in the background — they may be using a particular file and not letting you remove it.
- Run this Terminal command followed by Return and your admin password:
sudo rm path to file you want to delete— you can drag it to Terminal window. Always double-check that the file you dragged if the one you want to remove.
These tips work for any files, not only those in the Library or System folder.
5. Clean up your Downloads folder
The Downloads folder is a place we all rarely clean up. Eventually, it gets filled with all sorts of items — photos, movies, PDFs, installers, and dusty files you downloaded a long time ago. They can add to your System Data storage. Here’s how to clear them up:
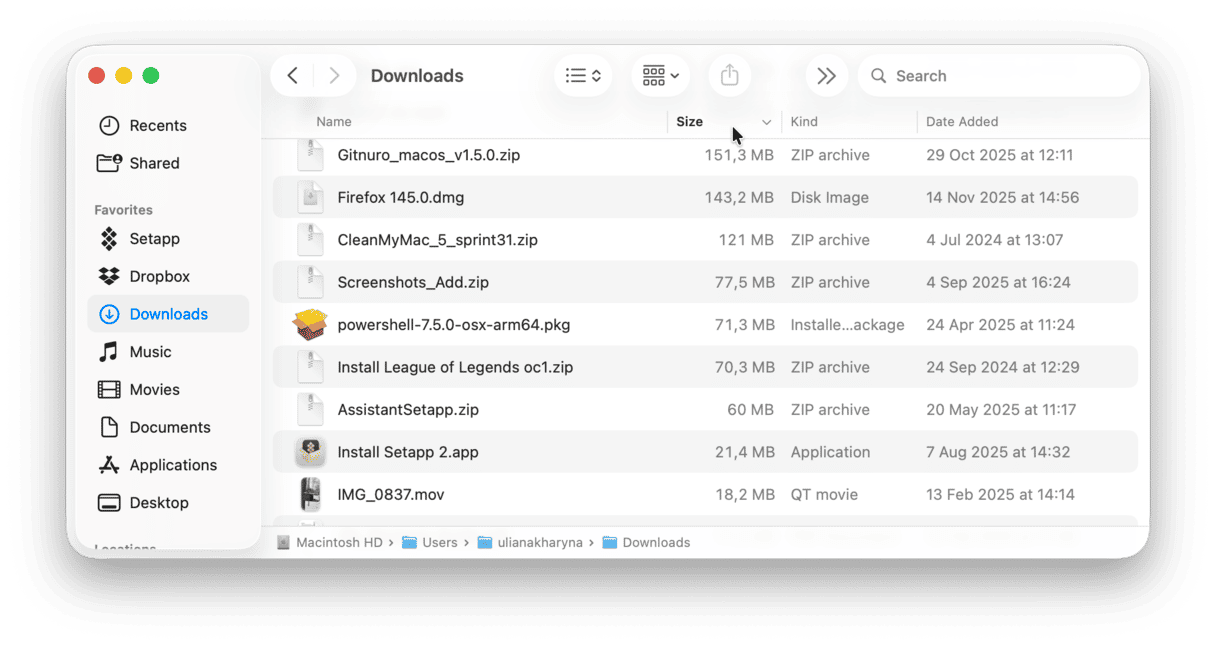
- Go to Finder > Downloads.
- Sort by Size by clicking arrows next to the Size pane.
The largest files will appear on the top of your list — move the ones you don’t need to the Trash.
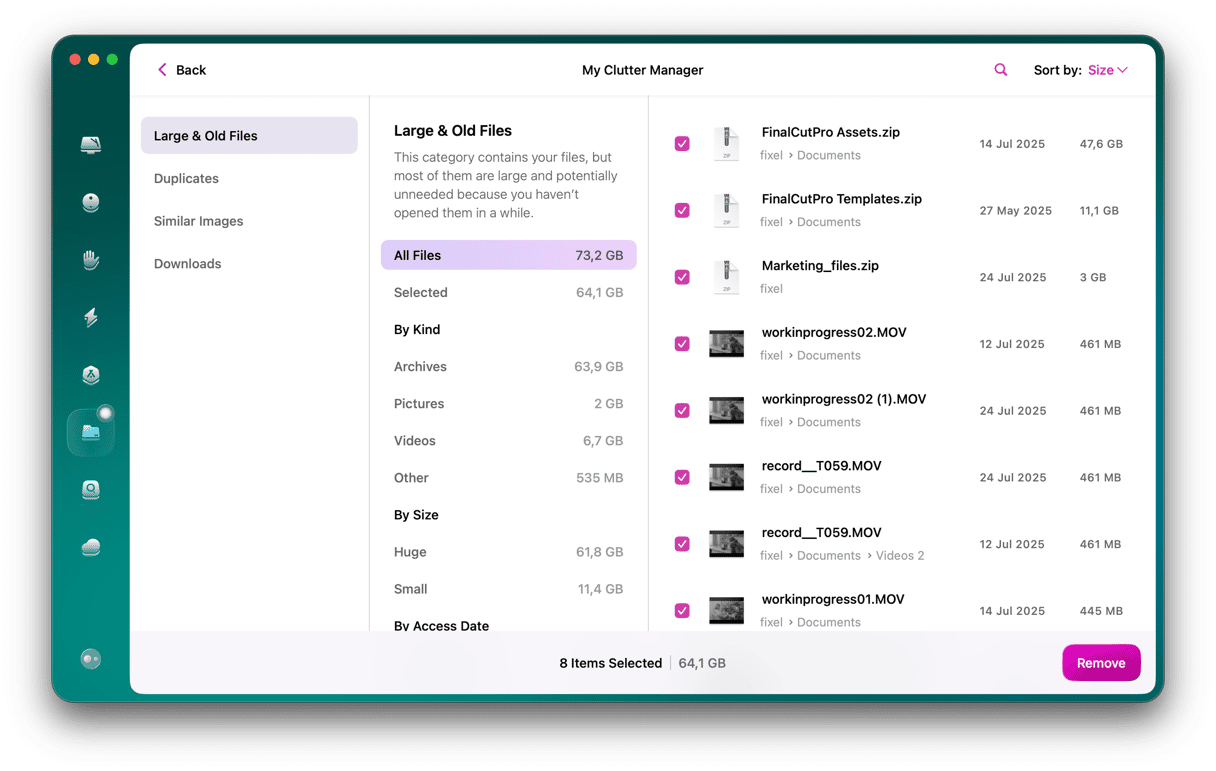
Downloads is probably one of the largest folders that falls into the System Data category. But what are other files that take place? To find out that, you’ll need to browse your storage. The easiest way to do it is to use CleanMyMac. This app has a tool named My Clutter that scans your Mac for the files that you haven’t opened for a while as well as the largest ones. It can also find similar images, duplicates, and app downloads. Basically, CleanMyMac can do the browsing for you:
- Get started with a free CleanMyMac trial.
- Install and open the app.
- Click My Clutter > Scan > Review All Files.
- Review the files it found, select what you want to delete, and click Remove.

6. Browse system folders
Believe it or not, one thing you can do is wait. When you first choose the Storage tab in About This Mac, macOS seems to allocate quite a lot to System Data that it then reallocates elsewhere. For example, some users have reported that after waiting for a few minutes, much of the storage labeled ‘System Data’ is moved to the iCloud label. So, if you wait, you might find that the System Data isn’t taking up disk space in the huge quantities that it seemed to be at first.
The other thing you can do is investigate what files are designated as ‘System Data.’ We’ve already talked about Time Machine backups, but everything stored in your Mac’s System or Library folders comes under the ‘System Data’ heading in About This Mac. That is:
/Library
/System
~/Library
~/System
Click on the Go menu in Finder and select Go to Folder, then paste in each of the paths above in turn.
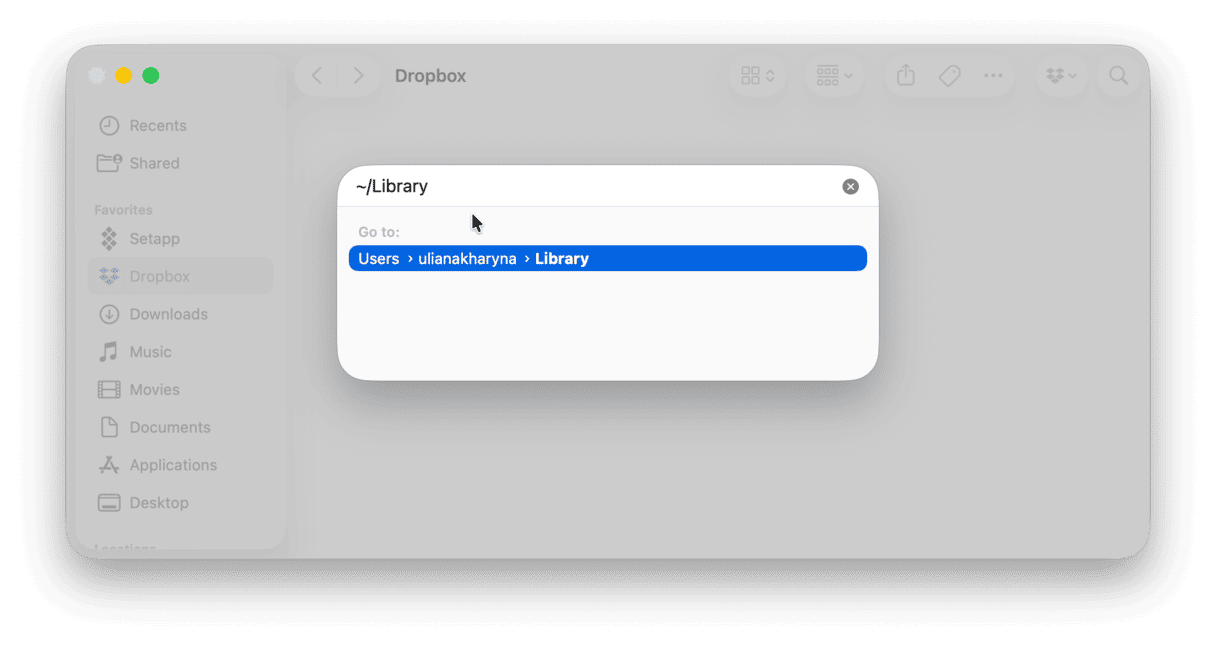
Go through the subfolders in each and press Command-I to Get Info and check how much data is in each. You’ll quickly discover where your precious storage has gone.
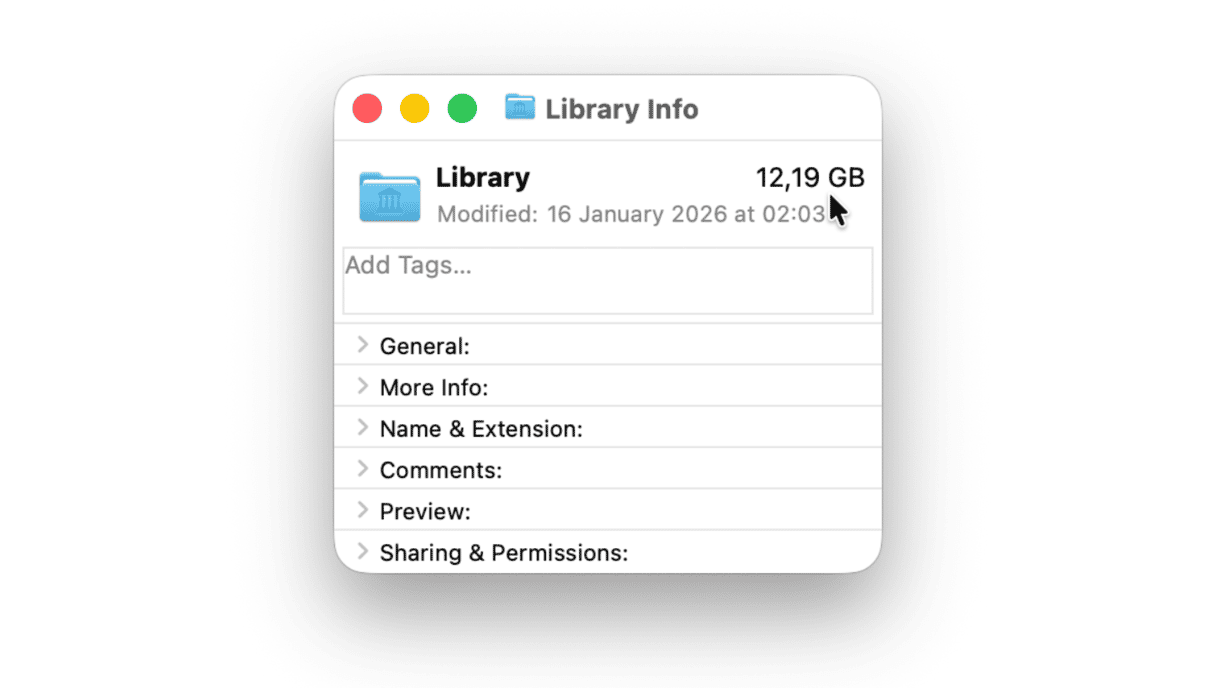
It’s likely that much of it is accounted for by cache files for apps like Photos and Safari. macOS caches as much data as it can to avoid having to re-download it, which boosts performance. And it’s smart enough to know that it must delete cache files when you run low on storage.
If you decide that you don’t want to leave it up to the operating system to free up storage, don’t just start trashing cache files or folders randomly, you might delete something you shouldn’t. So be careful.
7. Delete iOS backups
Another space hogger that adds to the System Data size on Mac is old iOS backups. However, if you don’t use your Mac for backing up your mobile devices, like iPhone, iPad, or iPod touch, you don’t need to follow these steps. If you do, here’s how to delete old iOS backups:
- Go to System Settings > General > Storage.
- Find iOS Files on the list under Recommendations and the colored graph.
- Select the backup you want to remove and click Delete. Make sure to keep the latest backup for each device that you back up to your Mac.
- Once you’ve removed unneeded backups, click Done and quit System Settings.
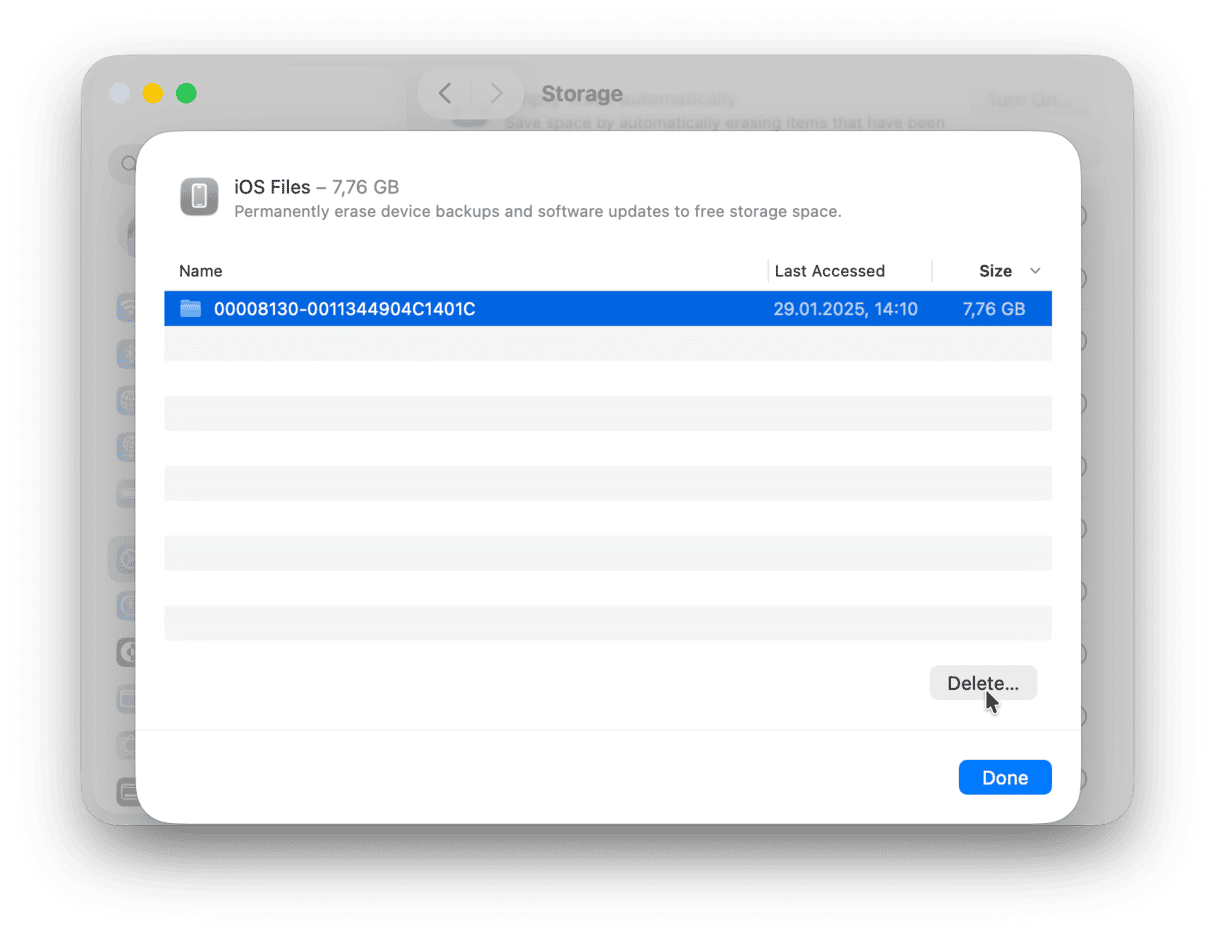
There is another way to remove iOS backups:
- From the Finder, click Go > Go to Folder.
- Copy and paste the following path and press Return:
~/Library/Application Support/MobileSync/Backup - Send unneeded backups to trash and empty it. Don’t forget to keep the latest backup for each device.
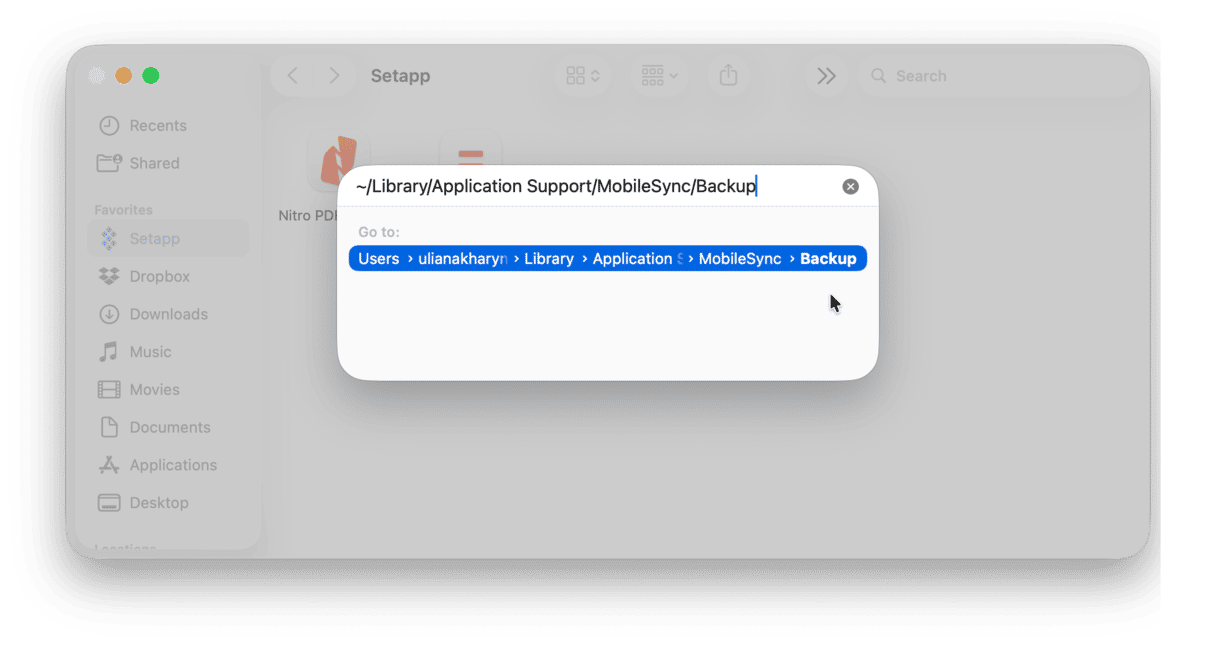
Or you can use CleanMyMac’s Cleanup tool as described above — it finds unnecessary iOS backups and safely removes them.
What to do if you cannot delete iOS backups from Mac
- Make sure you are not restoring an iPhone from a backup you are trying to remove.
- Check if a backup is locked (press Command + I and look if the checkbox next to Locked (under General) is selected) and unlock it if it is.
- Ensure that the name of the backup does not contain special characters — rename it if it does.
Why System Data won’t decrease
So, you’ve followed all the steps above, and System Data still won’t decrease? Make sure that you’ve emptied the Trash, especially after manual cleaning. If you have multiple apps open in the background, it may be that they have already re-created their cache files, and these files continue to take up space you thought you’ve reclaimed.
System Data storage can occupy tens of gigabytes of space on your Mac for Time Machine backups and cache files. It should be managed by macOS, so you’re never short of space. But if you want to do a System Data cleanup or just free up more space on your Mac, follow the tips above. You might be surprised by how much space you get back.
Frequently asked questions
Why does System Data take up so much space on Mac?
The easiest answer is that you use your Mac quite a lot and haven’t cleaned it in a while. Or it may be that some apps, like photo and video editors, generate a lot of cache.
Why do I need to clear System Data on Mac?
If you have enough Mac storage and your MacBook is fast, you don’t. But deleting some unnecessary files is a sure way to make your computer snappier and ensure that apps work flawlessly. So, if you feel that the performance of your Mac or applications has dropped, consider managing System Data storage and see if it helps.
How to prevent System Data from growing too large?
You can do it if you develop the habit of regularly cleaning it by following the steps we outlined in this article. For example, devote every first Monday of the month to this task, and System Data huge will no longer be an issue for you.
Is it safe to reduce the size of System Data on Mac?
Generally, yes, as long as you double-check everything you send from the Library and System folders to the trash. If you want to make sure that no file that is unsafe to delete is removed, use a trusted Mac cleaner app like CleanMyMac.
Can I remove all System Data?
No, you cannot and you should not because some files are vital for the proper work of macOS. In fact, macOS won’t let you clear some files.
What tools are available for Mac cleaning/storage management?
You can use the built-in Optimize Storage feature, but it does not let you remove System Data as effectively as a third-party app because it won’t let you access the Library and System folders. The reason is that deleting any files from these folders may affect the work of the macOS. For a safe System Data deletion, use CleanMyMac or a similar cleaner app. Just make sure to download a trusted app from the developer’s official website to avoid infecting your Mac with malware.
What are other ways to free up space if System Data is not too large?
Indeed, deleting System Data does not always help reclaim the amount of space you were hoping for. If that is your case, take up a few more steps to free up space: delete unused apps from the Applications folder or Storage settings, remove macOS installers (they are also in the Applications folder) and .dmg files (found in the Downloads folder), and get rid of old media files (photos or videos). You can move the latter to an external drive or cloud storage (e.g., store your files in iCloud). If you are sure you no longer need any of the files, settings, and apps, you can even format your Mac and start afresh, but this step is usually too radical.


