Setting up a single Mac to connect to a network and keeping it connected is simple enough, especially if it’s in a home or small office. Troubleshooting problems is equally simple. The problem is either with the Mac, the router, or the broadband provider, and identifying which is the culprit is usually very straightforward. Scale that up to a large organization with lots of Macs and multiple network access points in several locations, and it becomes much more complicated. In this article, we’ll explain how to manage network settings on multiple MacBooks.
The bad news
First, the bad news. There’s no silver bullet — no alternative to setting up a MacBook to sitting in front of it, installing the necessary software, like an MDM or VPN client, and configuring it to connect to your network. The good news is that it only has to be done once, and managing network settings after that can often be done remotely — sometimes with the help of the user.
Planning network settings for multiple MacBooks
Whether you need to deploy multiple Macs for the first time, scale up a network, reset network settings on MacBook, or set everything up from scratch (e.g., enable network access for Mac), there are several things you should consider before you begin.
Security
Perhaps the most important consideration of all is how you are going to keep the network secure and prevent malicious access via the MacBooks you’re setting up. If you’re using an enterprise management solution like Jamf or Intune, you’ll need to integrate with that, too. At the very least, you’ll need a VPN or ZTNA solution (learn how they differ here), antimalware software, and a robust authentication system to prevent access to your network from unauthorized sources.
Remote management
With many companies now operating hybrid working or work-from-home policies and many more with multiple office locations, the ability to manage network settings on multiple MacBooks remotely is essential. It’s important that IT support staff can access Macs on the network remotely and take control of them in order to access System Settings and configure network settings. Things break, whether it’s certification, a VPN client playing up, or single-sign-on passwords failing to update, and when they do, you need to be able to fix them remotely.
Monitoring
Once you’ve set up MacBooks on the network, you should implement a monitoring system so that you can see which parts of the network are working as they should and check for security threats. If you use ZTNA, monitoring systems can be set up for inventory management, too, which allows you to see which resources are used most often and when.
Managing Mac network settings on multiple MacBooks
Managing network settings, whether on one MacBook or multiple MacBooks, is done in the Network section of System Settings. By accessing a MacBook remotely and taking control of it, a support team member can check that network settings are configured correctly.
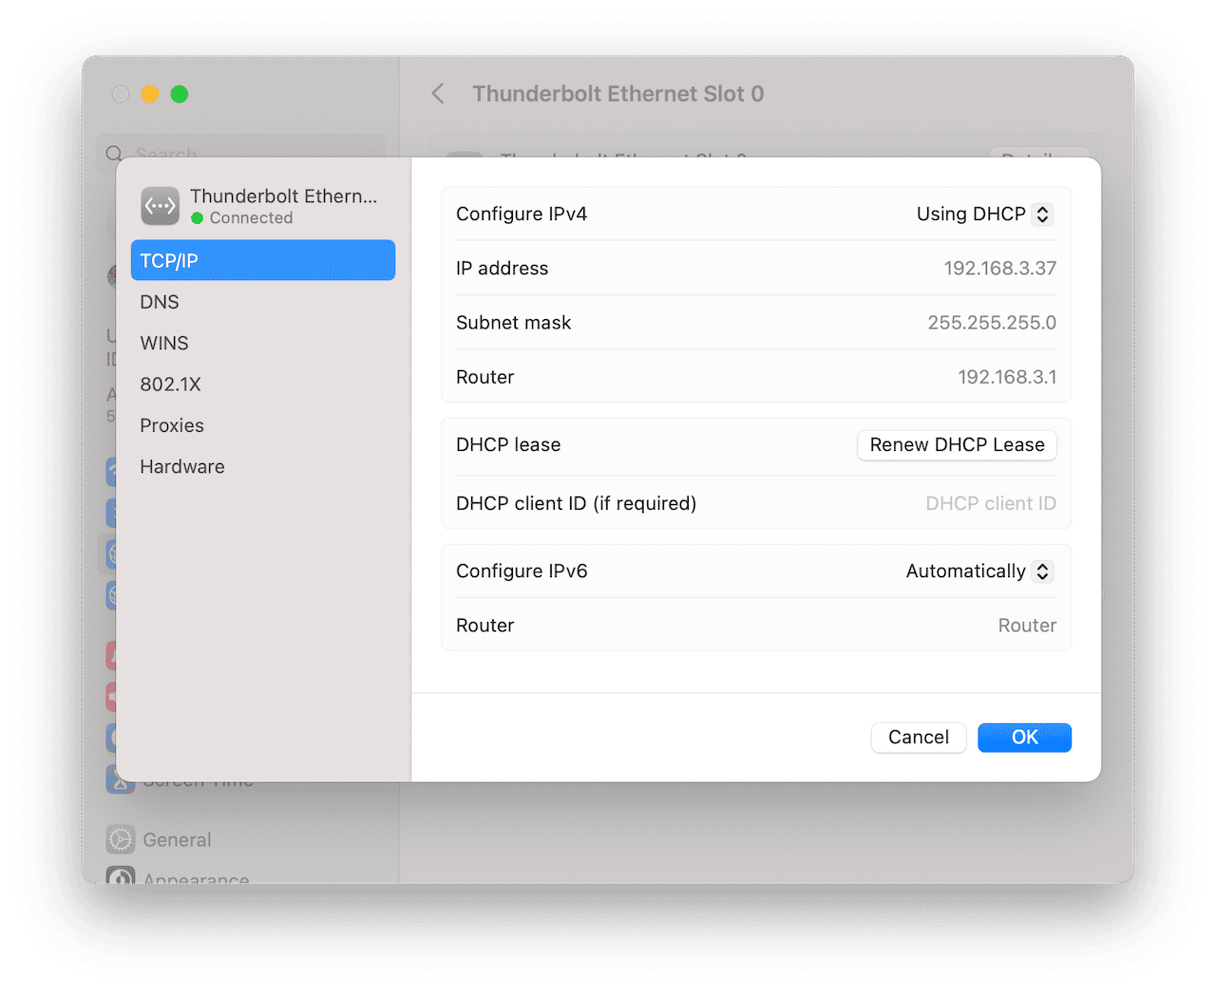
One common issue with network connections is a failure to get an IP address from a router. This can be identified by an orange light next to a network connection where there should be a green light. One solution to this is to renew the DHCP lease. Here’s how to do that:
- Click on the Apple menu and choose System Settings, then Network.
- Select the currently active network – it has a green dot next to it.
- Click Details, then in the sidebar, TCP/IP.
- Click the Renew DHCP Lease button.
- Quit System Settings.

The DHCP lease will be renewed, and the router should allocate an IP address.
Apple Remote Desktop and networksetup
You can manage network settings on multiple MacBooks remotely using Apple Remote desktop and the networksetup tool in Terminal. The networksetup tool allows admin users to configure network settings for a client Mac from the command line interface in Terminal, as long as the Mac is running macOS Big Sur or later.
Using networksetup, you can:
- List all the network connections on the Mac.
- Set the primary network service.
- Enable and disable network services.
- Configure TCP/IP, DNS, and proxy settings.
- Create and delete network locations.
- Manage Wi-Fi settings.
- Troubleshoot network problems.
For someone with a good understanding of Unix commands and who is comfortable using a command line interface, networksetup is a quick and easy way to both set up a Mac for network access and troubleshoot problems.
Configure and reset Wi-Fi settings
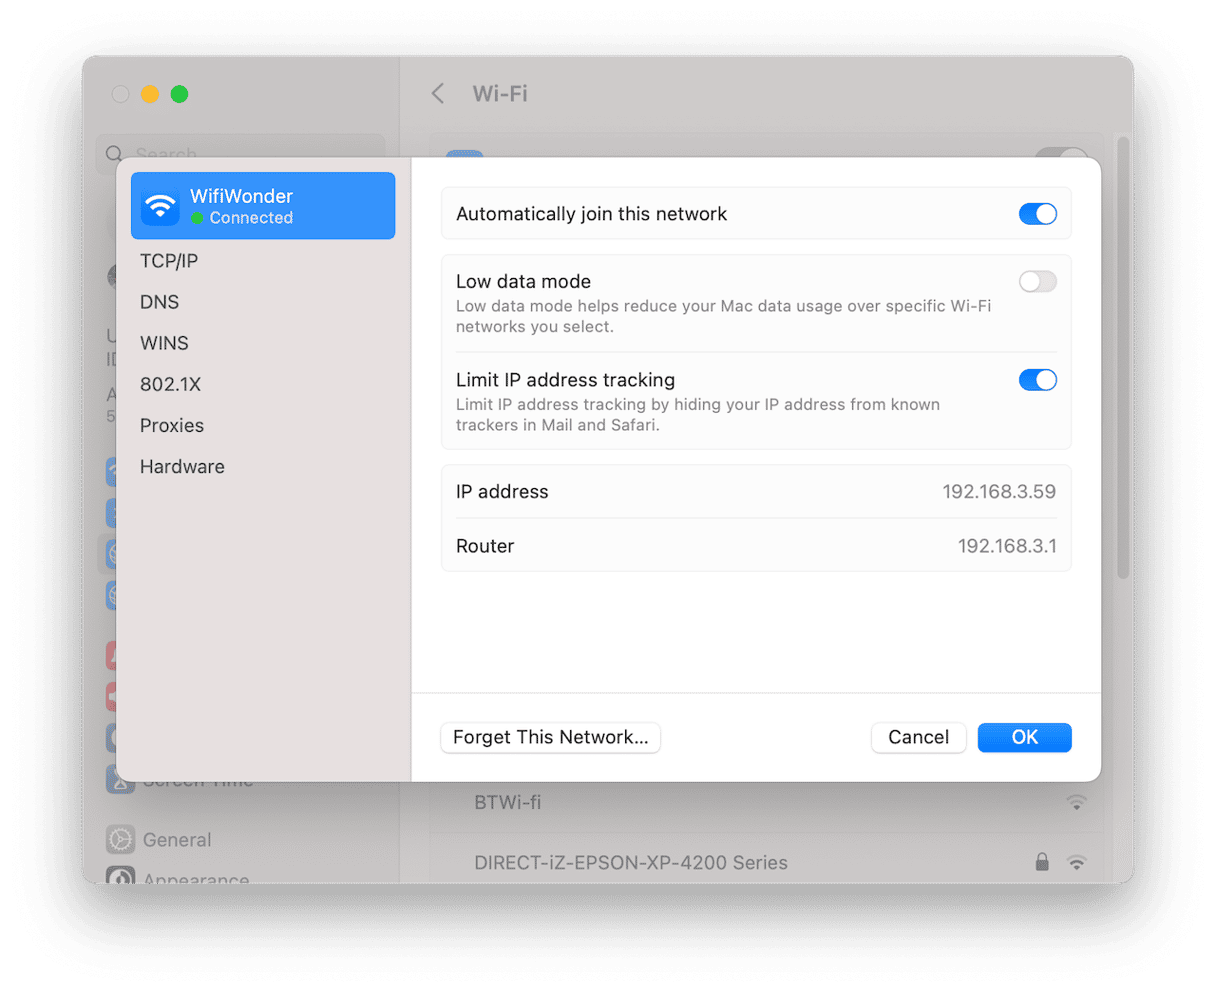
There are a couple of settings in recent versions of macOS that are worth being aware of. One allows you to reduce the amount of data that travels over a Wi-Fi network, and the other prevents the Mac’s IP address from being tracked in Mail and Safari.
- Go to System Settings > Network and choose the Wi-Fi connection that’s currently active.
- Click Details.
- You’ll see two settings, one for low data mode and the other to limit IP address tracking. Enable them.
The first step in troubleshooting Wi-Fi connection is to turn off Wi-Fi on the Mac and turn it back on again. You can do that from the Control Center in the menu bar or from System Settings > Network. If turning off Wi-Fi and turning it on again doesn’t work, you can reset settings and reconnect to the Wi-Fi network from scratch.
Here’s how to reset Wi-Fi settings on Mac:
- Go to System Settings > Network.
- Choose the currently active Wi-Fi network and click Details.
- Click Forget this Network.

You can then connect to it again using the list of Wi-Fi networks under ‘Other networks.
As more and more organizations use Macs as part of their IT inventory, it’s important to know how to manage network settings on multiple MacBooks. There are a number of ways to do it, depending on the systems you already use. But however you do it, you’ll need to plan it well and think about using the networksetup tool in Terminal to configure settings remotely.


