One of the least-known features of macOS is its ability to share folders with other computers — Macs and PCs — on the same network. Once you set up a folder to allow it to be shared, you can control who has access to read and write files from and to it. And you can control how the folder is accessed. In this article, we’ll provide steps on how to set up a shared folder Mac users can easily follow.
Why create a shared folder on your Mac?
The main reason for creating a shared folder on your Mac is to allow colleagues and family members to access files stored on your Mac without giving them access to your whole Mac. It’s cheaper to create a shared folder on a Mac you already have than to buy a file server and set that up on your network. And you’ll have more control over a shared folder on your Mac than a shared drive in the cloud.
What are the limitations of having a shared folder on your Mac?
The main limitation of sharing a folder on your Mac compared with having a dedicated file server or using cloud sharing is that your Mac must be switched on and connected to the network in order for other people to access the folder. That’s OK if the Mac on which you create the shared folder is a desktop Mac like a Mac mini, Mac Studio, or iMac – those machines typically sit on a desk and can be set to wake up when network activity is detected. However, if you use a MacBook Pro or MacBook Air, it’s likely that you close your computer and put it away when you’re finished using it, meaning the shared folder won’t be available.
How to create a shared folder on your Mac

The first thing you need to do is enable file sharing.
- Click on the Apple menu and choose System Settings.
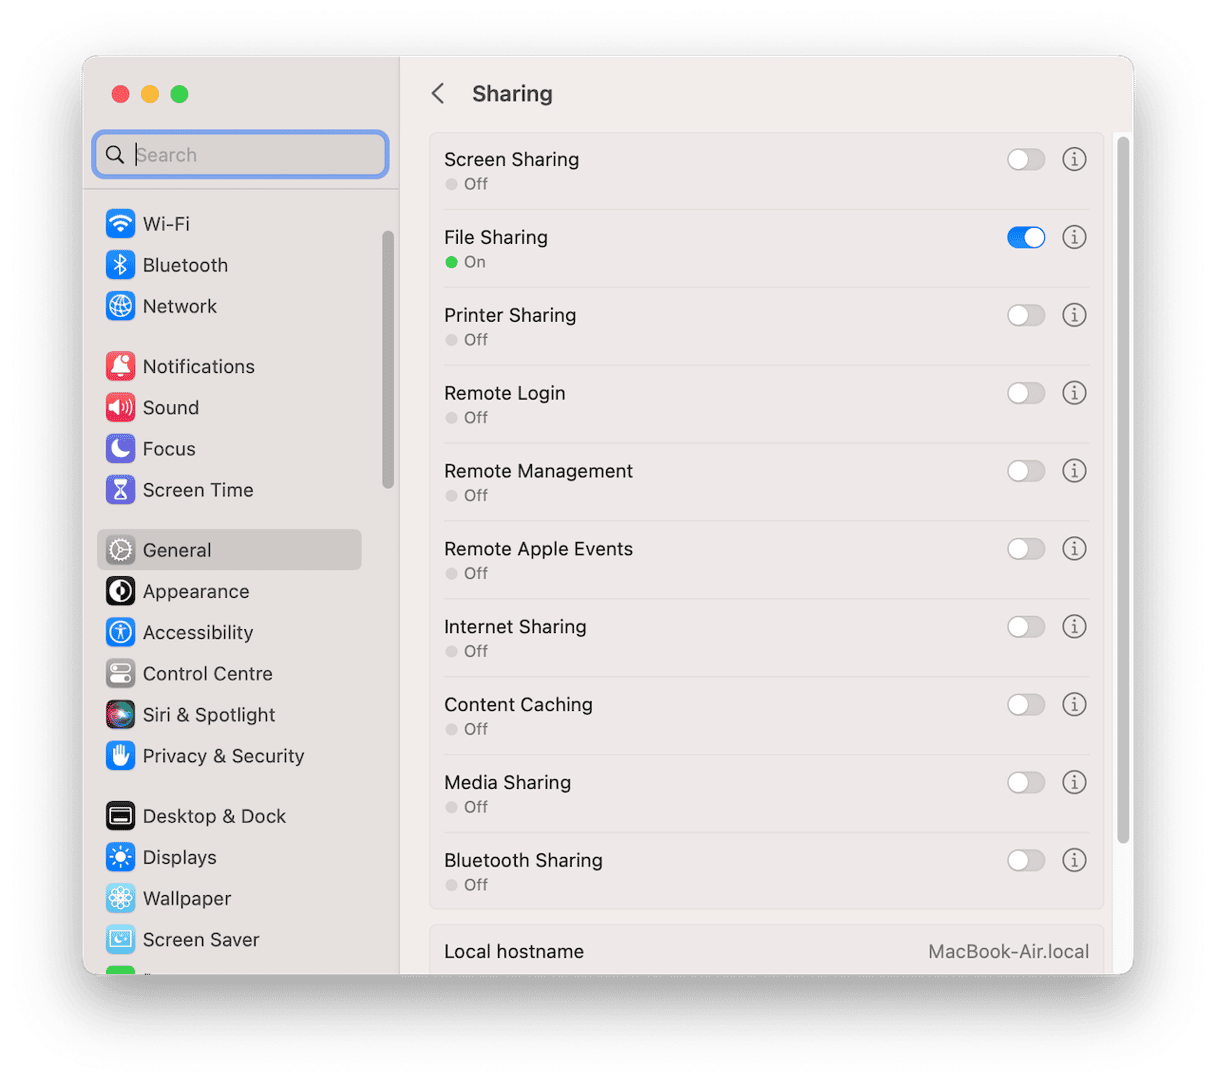
- Select General > Sharing, then set File Sharing to On.
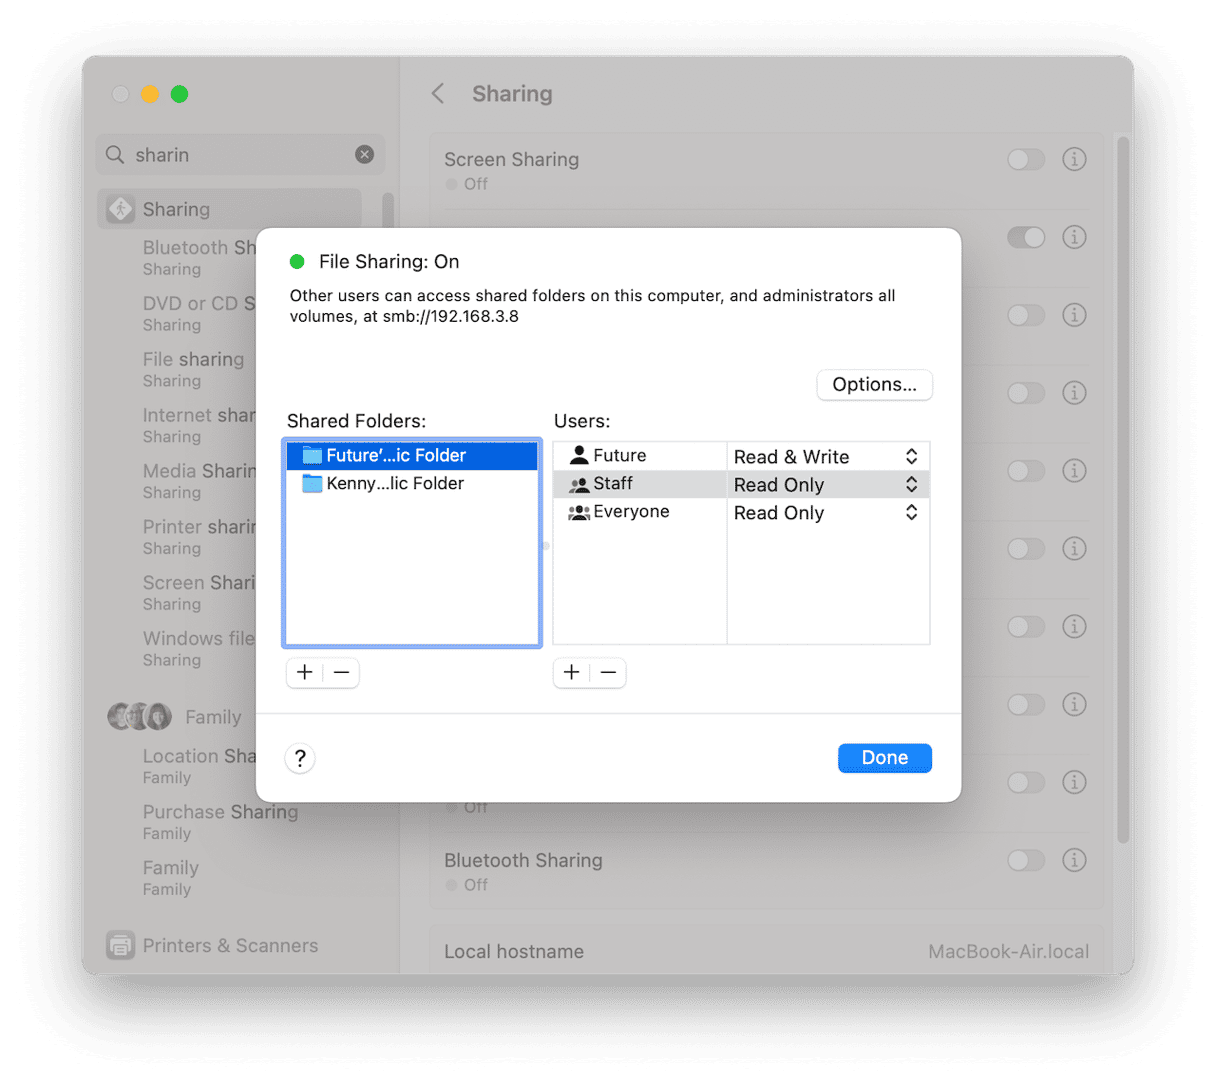
- Click the ‘i’ icon next to the File Sharing switcher, and you will see that a folder called [your username]’s Public Folder has been created. To share another folder, click the ‘+’ beneath the folders window, navigate to the folder, and click Add.
Alternatively, you can navigate to any folder in the Finder, press Command-I to access the Get Info window, and select the box next to Shared Folder.
How to configure a shared folder

Once you’ve enabled sharing for a folder, you should configure the access settings to control who can read files in it and who can write files to it. For example, you might be happy for anyone to open and read files in the shared folders but restrict writing and editing files so that only you can do it.
To configure a Mac shared folder, just follow these steps:
- Go to System Settings > General > Sharing and click the ‘i’ icon next to File Sharing.
- Click on the shared folder you want to configure.
- You’ll see three settings options: one for your user account, one for ‘Staff,’ and one for ‘Everyone.’ Make sure the setting for your user account is set to ‘Read & Write.’
- Choose the options you want for Staff and Everyone.
- To add permissions for a specific user (who must be listed in the Contacts app), click ‘+.’ Then select them in the window that opens and click Add.
- To access further settings, Control-click on the shared folder.
Creating a Mac shared folder is a good way to share files with colleagues or family members. You can choose on a user-by-user or group basis whether the people you share with can read and write to the folder, just read, or just write to the folder. Follow the instructions above to set up and configure a shared folder.


