With all the latest revelations of how large tech companies abuse our privacy and sell our personal information to advertisers, lots of us started thinking of ways to protect ourselves. After all, personal correspondence should be confidential no matter what, and, sadly, if you’re using one of the most popular email providers — it’s not.
Don’t worry, there are a few ways to make your private life private again. Let’s break down how to send a secure email using various platforms and also send files securely from any of your devices.
Best ways to send encrypted emails
While there’s a hack to send encrypted emails in Outlook and Gmail, the best path to stay secure is to switch to an email provider that was built with encryption in mind from the ground up. Some popular examples include ProtonMail and Tutanota.
Another way to complete security is to switch away — at least, for the most private conversations — from using email entirely and embrace messaging apps like WhatsApp and Signal that use end-to-end encryption by default.
Unfortunately, most of us can’t simply jump ship and leave major email providers due to work commitments or other email integrations not available elsewhere. Luckily, we can make encryption work with Outlook or Gmail as well.

How to send encrypted email Gmail could open
Chances are, most of us use Gmail in both private and professional lives. And it might be a surprise to some that their Gmail emails are not encrypted at all. In fact, Gmail used to scan your email content to better target you with ads, but after significant criticism, they said they stopped doing so.
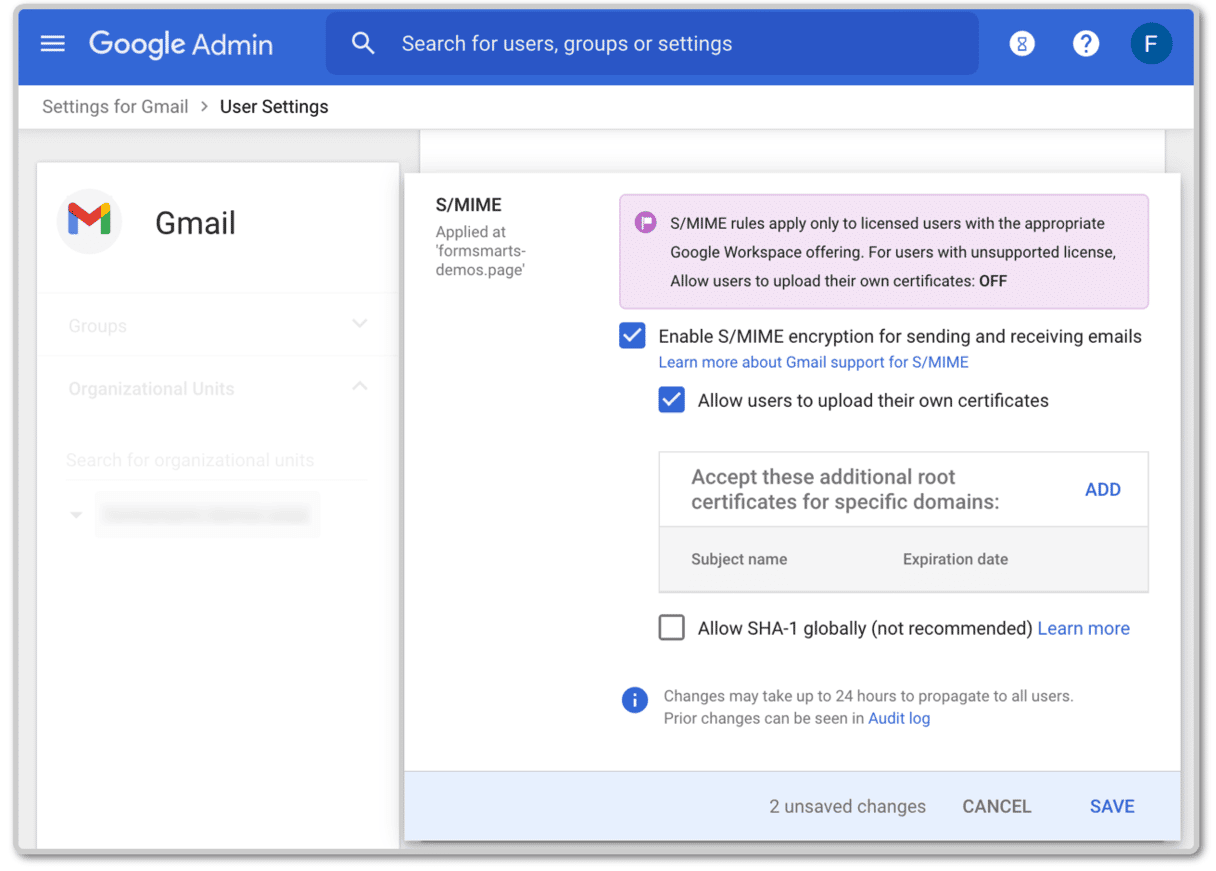
There is, however, a way to enable S/MIME encryption protocol within Gmail, with the caveat that it needs to be turned on for both sender and recipient to actually work.
Here’s how to send encrypted email in Gmail in just five steps:
- In Google admin console, go to Apps > G Suite > Gmail > User Settings.
- Scroll down to the S/MIME tab and check “Enable S/MIME encryption for sending and receiving emails.”
- Log out and log back into Gmail to see the new setting enabled.
- Go to Settings > Accounts and then edit “Send mail as” to upload a certificate that adheres to all the current cryptographic standards.
- Exchange keys with each of your recipients by sending S/MIME-signed message with a signature that includes your public key. Done!

When the S/MIME encryption is working, you’ll see a green lock icon next to your recipient’s address.
How to send encrypted email in Outlook
If you don’t use Gmail at work, then it’s probably Outlook. The good news is Outlook also allows for S/MIME encryption, although the setup is a bit more complicated.
Here’s how to send an encrypted email in Outlook:
- To use Outlook at work, you first need to get a digital certificate from your organization’s admin.
- Create a new message, go to the three-dot menu > “Message options” and select “Encrypt this message (S/MIME).” In a different Outlook version, you may need to press Options > Encrypt >“Encrypt this message (S/MIME).” Click Run to install the required software.
- Open the gear menu next and choose to “Encrypt contents and attachment of all messages I send.”
- If you want to turn off encryption on a particular message, click the three-dot menu again > “Message options” and deselect “Encrypt this message (S/MIME).”

Keep emails secure without extra attachments
Encrypting your emails and messages is as close to perfect security as you can get — they are virtually impossible to decrypt. Then you can, for example, securely send the password that’s important to you and not worry about anyone snooping on it.
However, not everyone is able to turn on encryption for various reasons. Maybe it’s just your recipients that are against the idea. Nevertheless, there are still a few things you can do to improve your email experience.
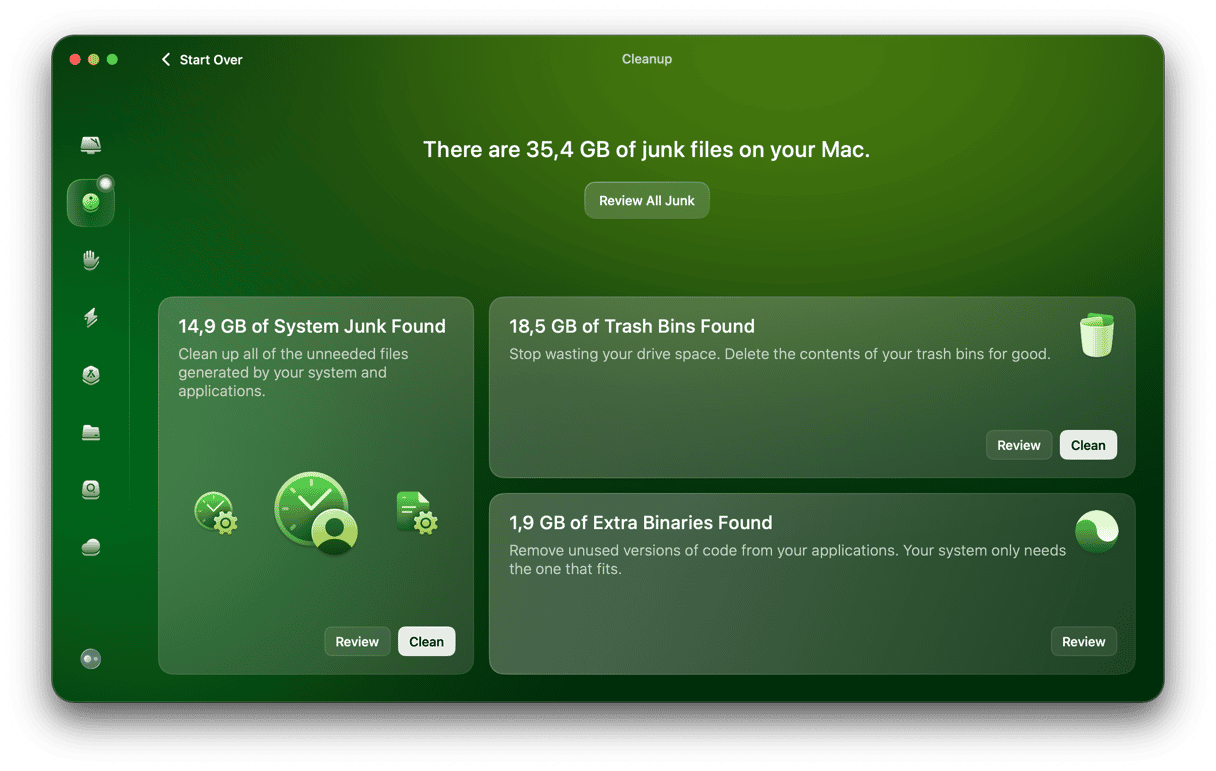
It’s likely that, even if you have encryption now, you haven’t reviewed mail attachments saved locally in a while — meaning all that information is still out in the open and vulnerable to anyone who gains access to your Mac. But where to find it? And how to sift through years of data quickly? Here, you need CleanMyMac.
CleanMyMac is a world-class Mac optimization software able to enhance nearly any aspect of your daily work in just a few clicks. Here’s how to use it to locate and review all your offline mail attachments:
- Download a free edition of CleanMyMac.
- Navigate to the Mail Attachments tab under Cleanup.
- Hit Scan > Review Details.
- Check all unneeded attachments and click Clean.

All the deleted attachments are now gone from your Mac but still accessible on your email provider’s servers, so while nothing is permanently lost, everything just got way more secure.
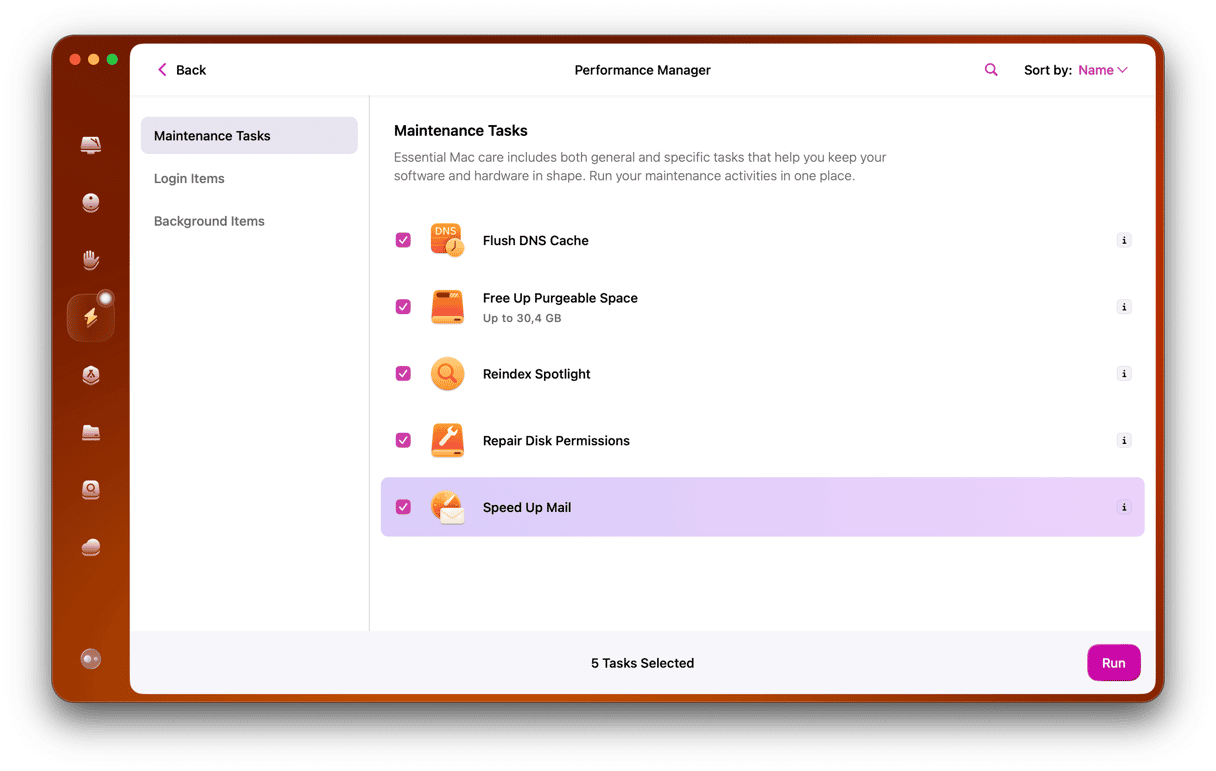
Another healthy habit to develop with CleanMyMac is to occasionally run a few optimization processes, such as Speed Up Mail, which resolves a variety of accumulated errors and makes searching within the Mail app on your Mac much faster. To do that:
- Equip yourself with a free edition of CleanMyMac (if you haven’t already done so).
- Select Maintenance under Speed and check Speed Up Mail.
- Hit Run.

Now, your Mac is both faster and more secure! Additionally, you finally know how to send encrypted emails via Outlook and Gmail to ensure that privacy always comes first. Just remember to use CleanMyMac every few weeks or so to review your mail attachments and speed up your email client as well as run dozens of other incredible shortcuts and scans the app offers. Feels good to be free of all the privacy stress!


