Mac users have a love/hate relationship with Stage Manager. Despite the fact that it has been part of macOS for several years, many Mac users don’t really understand what it does or how to use it. So, in this article, we’ll explain exactly what Stage Manager on Mac is and show you how to use it.
What is Stage Manager on Mac?
Stage Manager is a feature in macOS that is designed to help you be more productive and keep your Desktop organized. It puts the app you are working in in the centre of the screen and places thumbnails of the apps you have used recently on the left of the screen — off-stage. You can arrange multiple apps in a group in the middle of the screen and resize or overlap windows however you want. When you switch to a group, all the apps in the group open in the center of the screen.
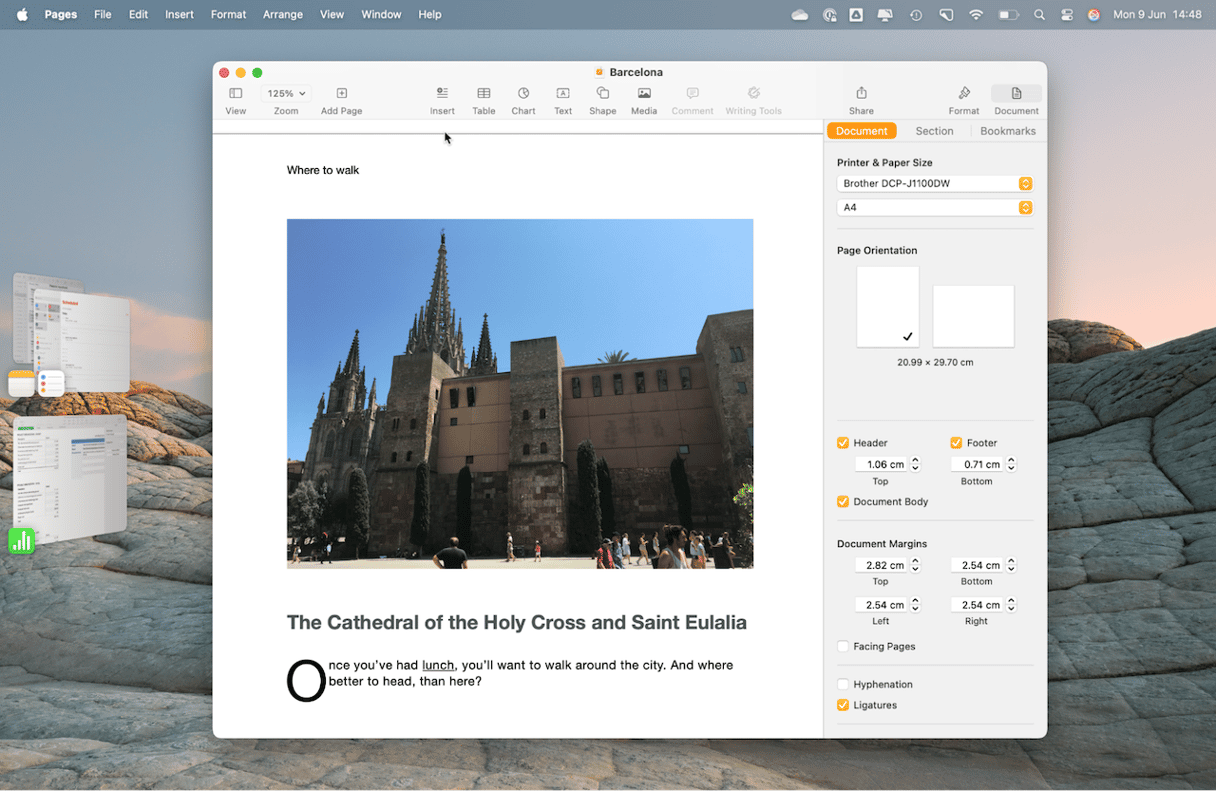
Whether you like Stage Manager or not will depend on how you use your Mac. If, like me, you tend to have apps in full-screen mode on your MacBook and swipe on the trackpad to move between them, you might not find it very useful. If, however, you have a large display and frequently have a Desktop cluttered with windows, you might find it makes you more productive. The only way to find out is to try it out for yourself.
How to use Stage Manager on your Mac
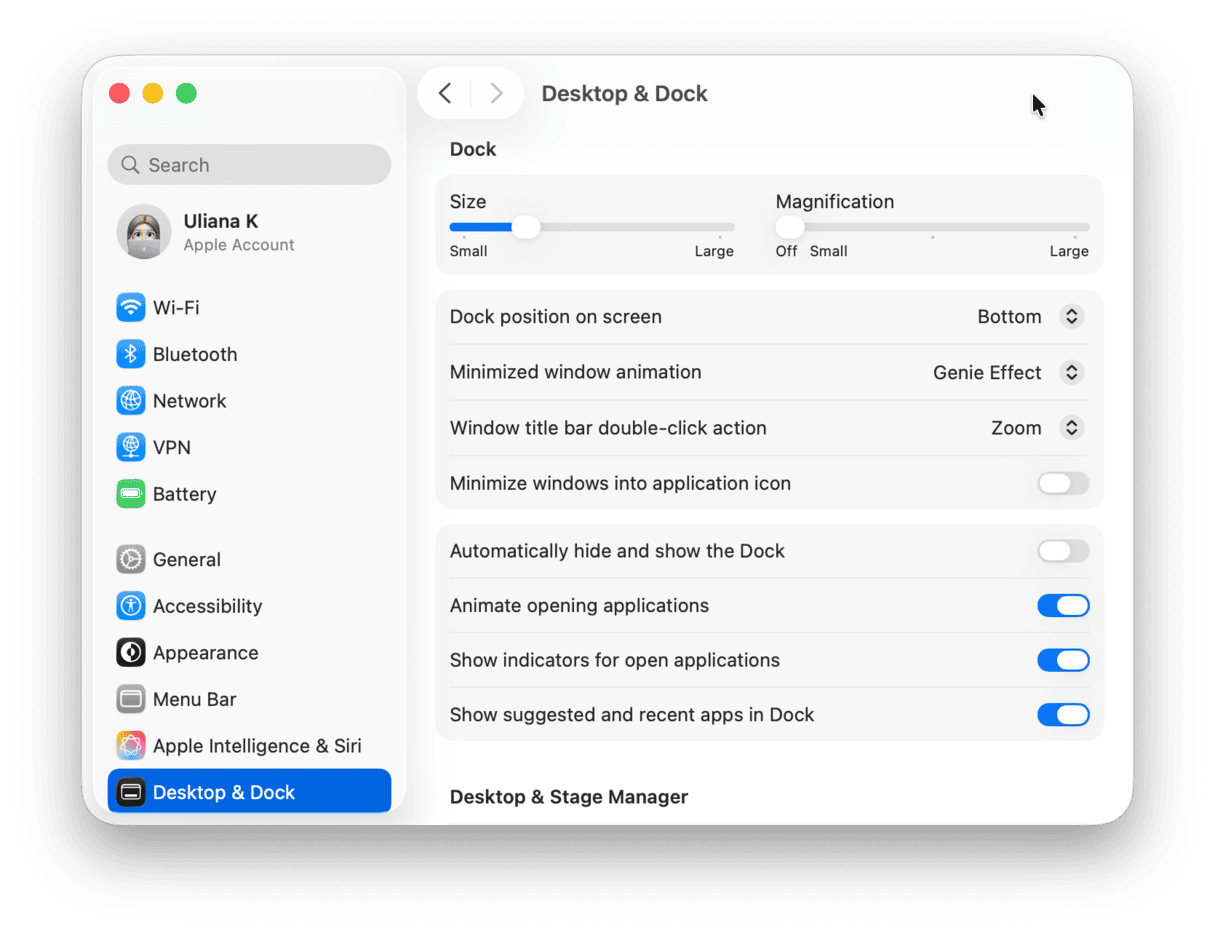
Before you can start using Stage Manager, you need to turn it on. Here’s how to do that:
- Click the Apple menu and choose System Settings.
- Select Desktop & Dock.
- Scroll down to Stage Manager.
- Set the switch to on.
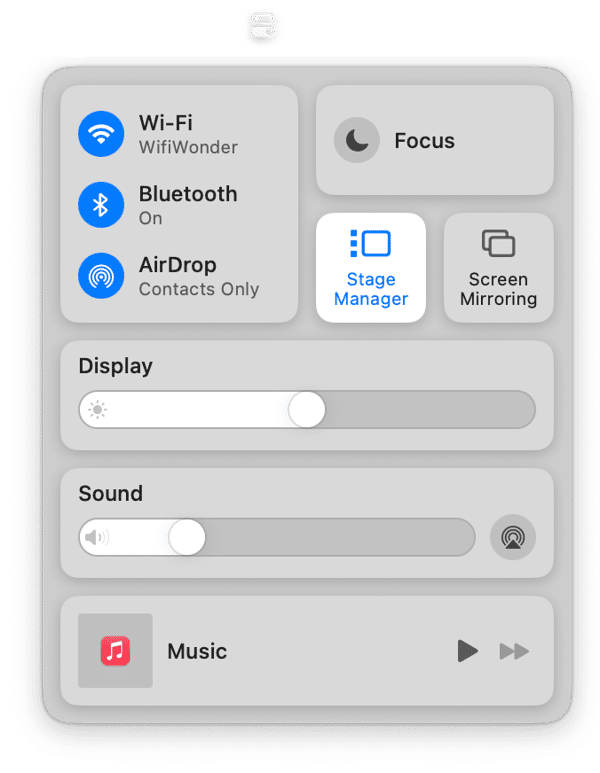
Alternatively, you can turn Stage Manager on or off from Control Center:
- Click Control Center in the menu bar.
- Click Stage Manager to turn it on.
- If you want to turn it off, repeat steps 1 and 2.
If Stage Manager won’t turn on, go to System Settings > Desktop & Dock, scroll down to Mission Control, and turn on ‘Displays have separate Spaces.’ You will have to restart your Mac.
Arrange apps
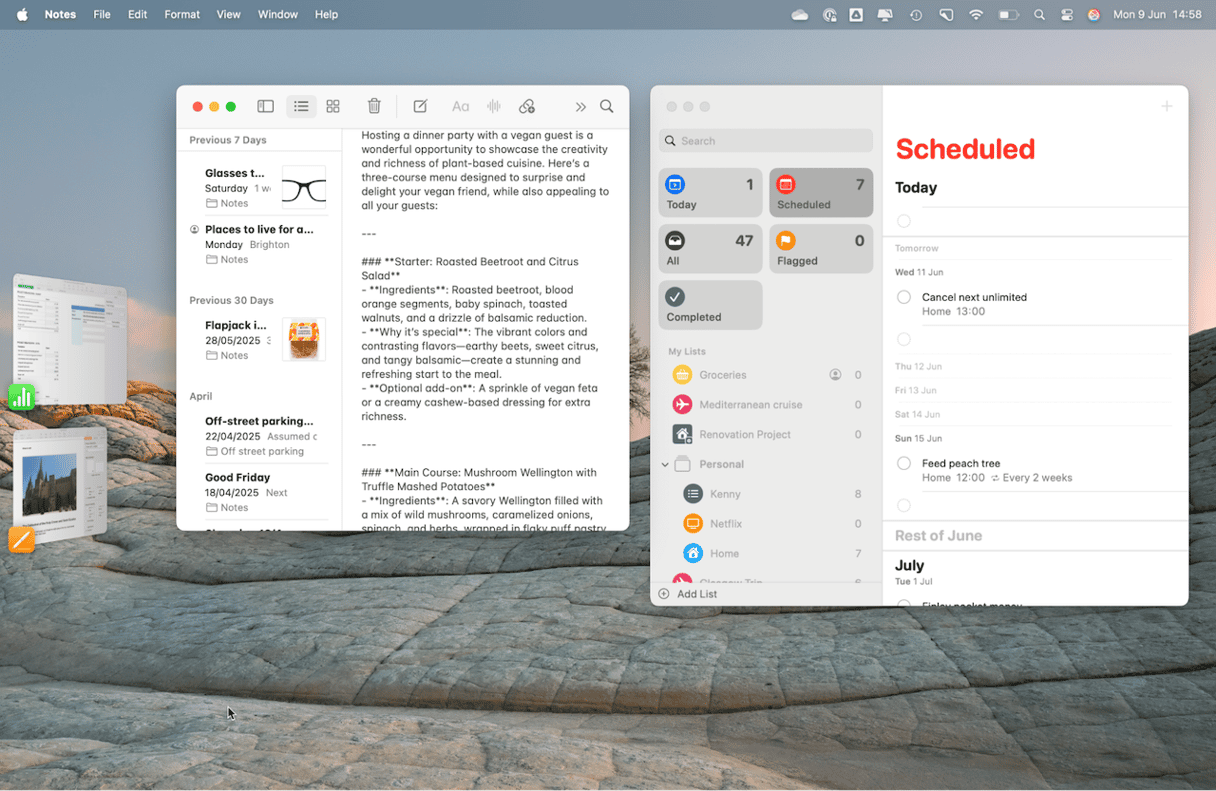
To start using Stage Manager, open an app on the Desktop. With that app displayed on the screen, open another app. You will see the original app slide to the side of the screen, and the new one will occupy the center of the screen. If you open a third app, the second one will join the first at the side of the screen, and so on. If you want to arrange apps in groups, do the following:
- Start with the first app you want in the group on the screen and drag another app you want to include in the group from the side of the screen to the center.
- You can then resize the windows on the screen and move them to where you want them.
- If you want to add another app to the group, drag it from the left of the screen and arrange the apps by dragging and resizing them.
- To remove an app from a group, just drag it back to the left of the screen.
Create multiple groups
By combining Mission Control and Stage Manager, you can create multiple groups in different spaces.
- Tap the Mission Control key in the media keys row or swipe up over your trackpad with three fingers.
- Click the ‘+’ at the right of the screen to create a new Desktop.
- Drag the new Desktop to where you want it in the Mission Control row.
- Select the new Desktop in Mission Control.
- Repeat the steps above for creating a group to create a new one.

You can then move between groups by choosing the relevant desktop in Mission Control or swiping left or right with three fingers on the trackpad.
You can also create multiple groups in one space. Just create a group by following the steps under ‘Arrange apps’ and click an app that’s not in the group, or open it if it’s not already open. Then, drag other apps you want in that group onto the screen and arrange them. You will see the first group you created on the left of the screen as a stack of windows. To switch between groups in Stage Manager, just choose the one you want from the left of the screen.
Change settings in Stage Manager
There are several different settings for Stage Manager that allow you to configure it exactly the way you want it.
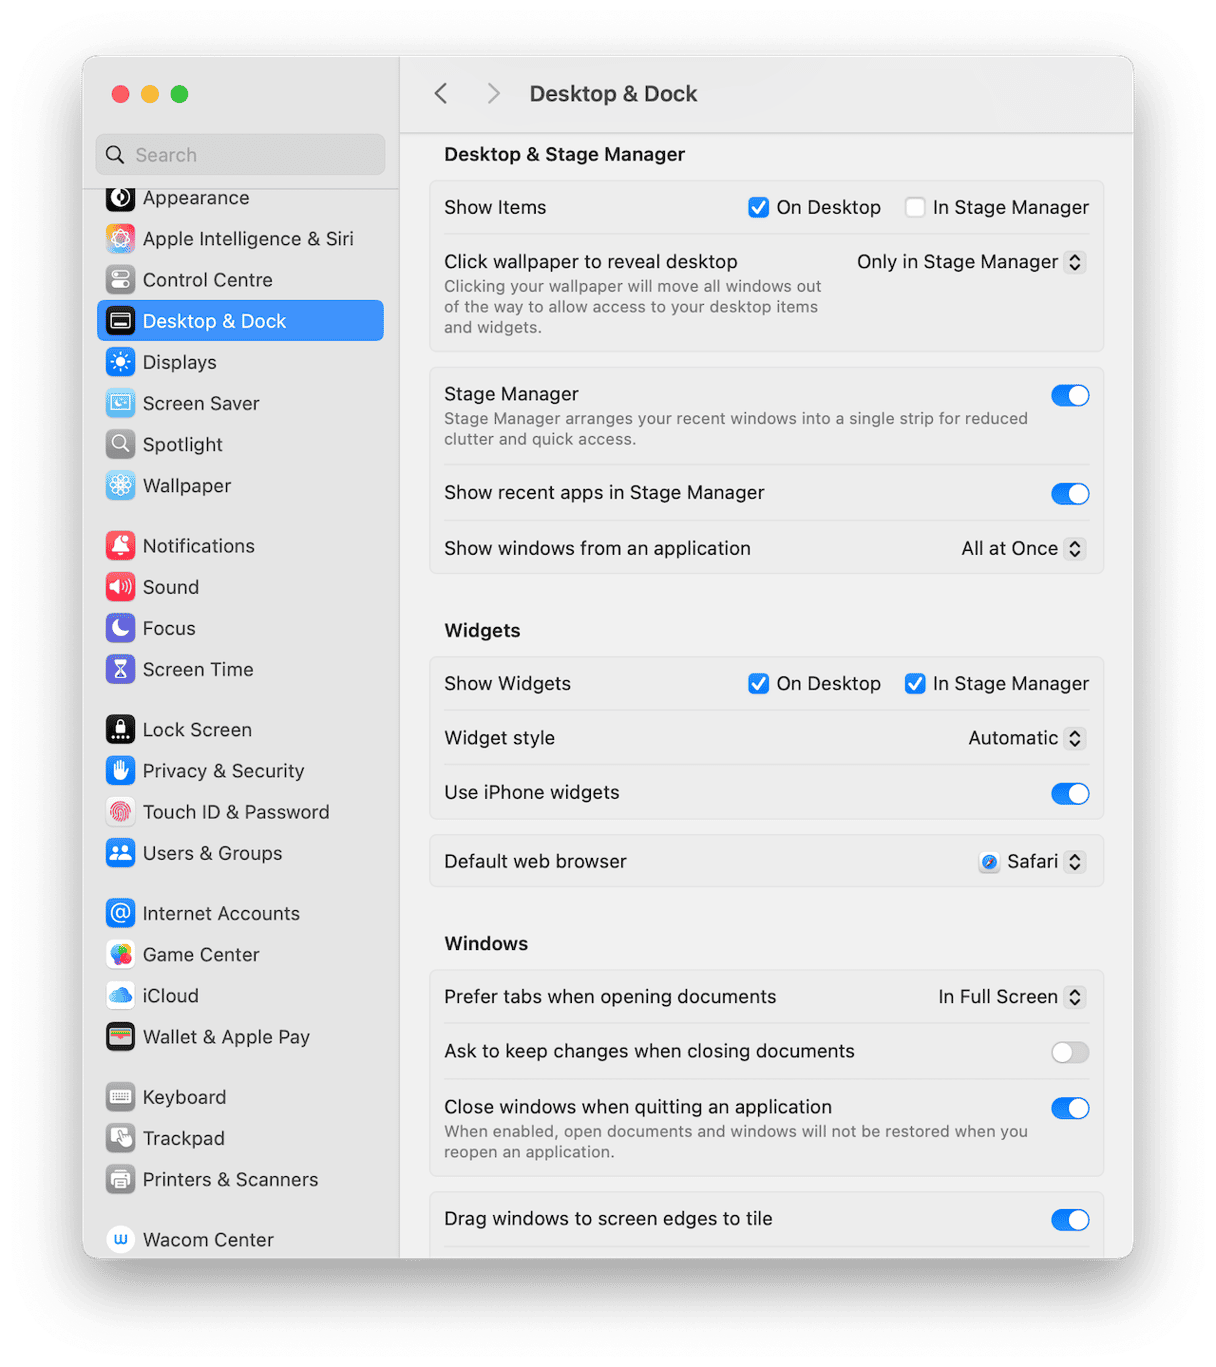
- Click the Apple menu and choose System Settings, then Display & Dock.
- Under Desktop & Stage Manager, you can choose whether you want to see items like files, folders, and Stacks on the Desktop when you are using Stage Manager. If you want to see them, select the checkbox next to Stage Manager in Show Items. If not, leave it deselected. If you do that, you can see items by clicking the Desktop.
- If you don’t want to see recent apps at the left side of the screen in Stage Manager, deselect the checkbox next to ‘Show recent apps in Stage Manager.’ If you want to see recent apps when this is turned off, you can move the pointer to the left edge of the screen.
- If you have multiple windows open in an application, you can choose whether to see them all in Stage Manager or only the most recent window. To see them all, choose ‘All at once’ from Show windows from an application. Otherwise, choose ‘One at a time’. If you choose ‘One at a time,’ you can cycle through the other windows by clicking the application at the left of the screen.
- If you have Widgets on your Desktop and want to see them in Stage Manager, go to the Widgets section of Desktop & Dock and choose ‘In Stage Manager’ next to ’Show Widgets.’
Is Stage Manager better than Spaces?
That depends on how you use your Mac and, to a large extent, on whether you use a large display, multiple displays or just the screen on your MacBook. For the latter, creating full-screen spaces in Mission Control might work better because you can then just swipe from one app to another. You can also combine Spaces with the new window tiling feature in macOS Sequoia and create a space with multiple windows arranged in a way that stays the same when you move to a different space and then back again.
If you have a large display and use a mouse instead of a trackpad, Stage Manager might work better because you don’t have to activate Mission Control each time you want to move between spaces. You can create multiple groups on the same Desktop and then just select the one you want to work in from the left of the screen.
If you have multiple displays, you can use Stage Manager to create groups and arrange apps across all your displays.
Pro tip
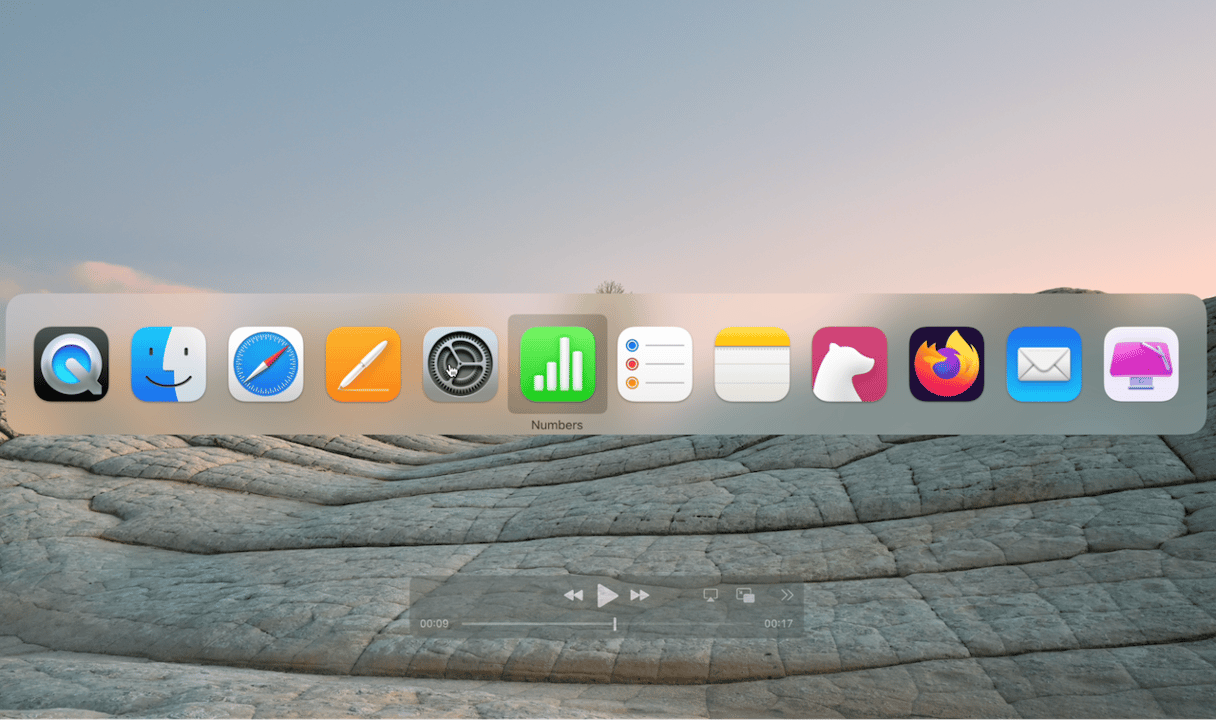
If you don’t want to use Stage Manager, there is another way to quickly move from one app to another. It’s called the Application Switcher. If you press Command-Tab, you will see it appear on the screen with an app highlighted. Press Tab again to move to the next app in the row. When you reach the one you want, let go of the keys.
How to improve your Mac’s performance when using Stage Manager
One of the criticisms of Stage Manager when it was first released was that it was very slow and used up lots of resources like memory and GPU cycles. So, if you’re going to use it, it’s a good idea to make sure your Mac is running at optimum performance before you start. CleanMyMac’s Performance feature can help you do that.
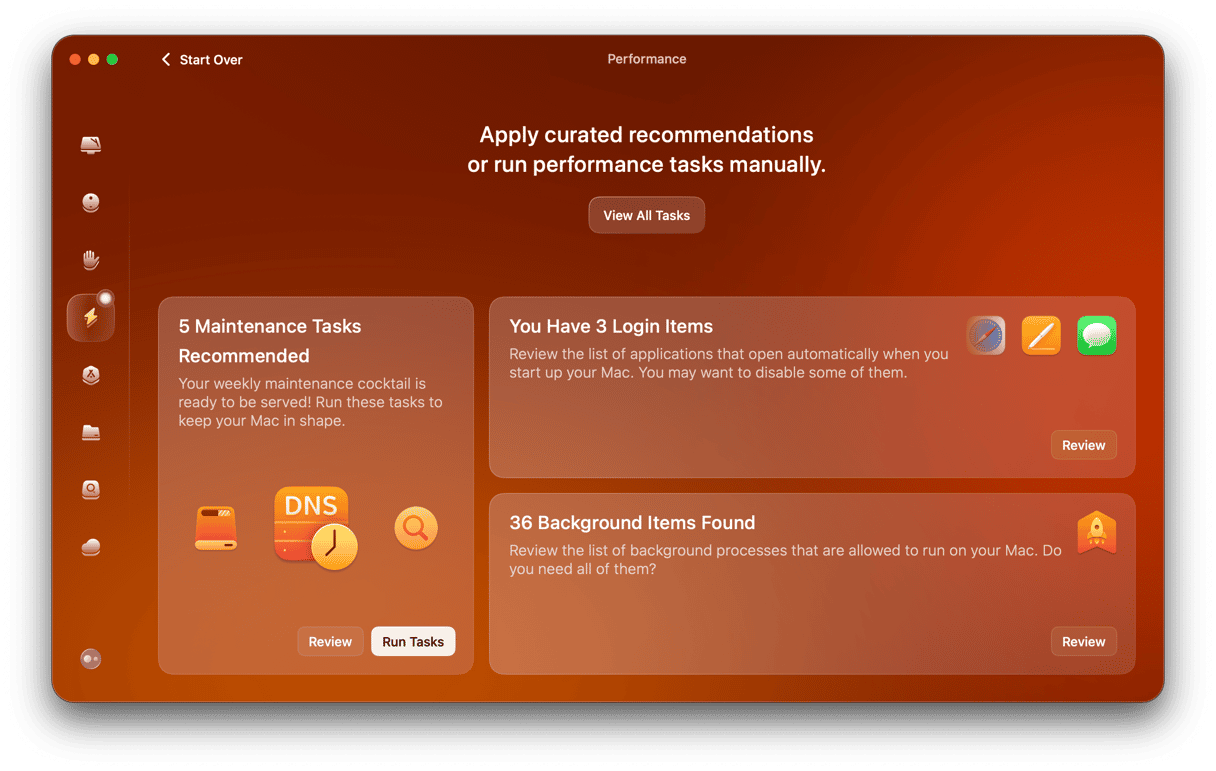
Once it has scanned your Mac, it will recommend maintenance tasks to run, such as thinning out Time Machine snapshots, reindexing Time Machine, and repairing disk permissions. Running the tasks is as easy as selecting them in CleanMyMac and clicking Run.
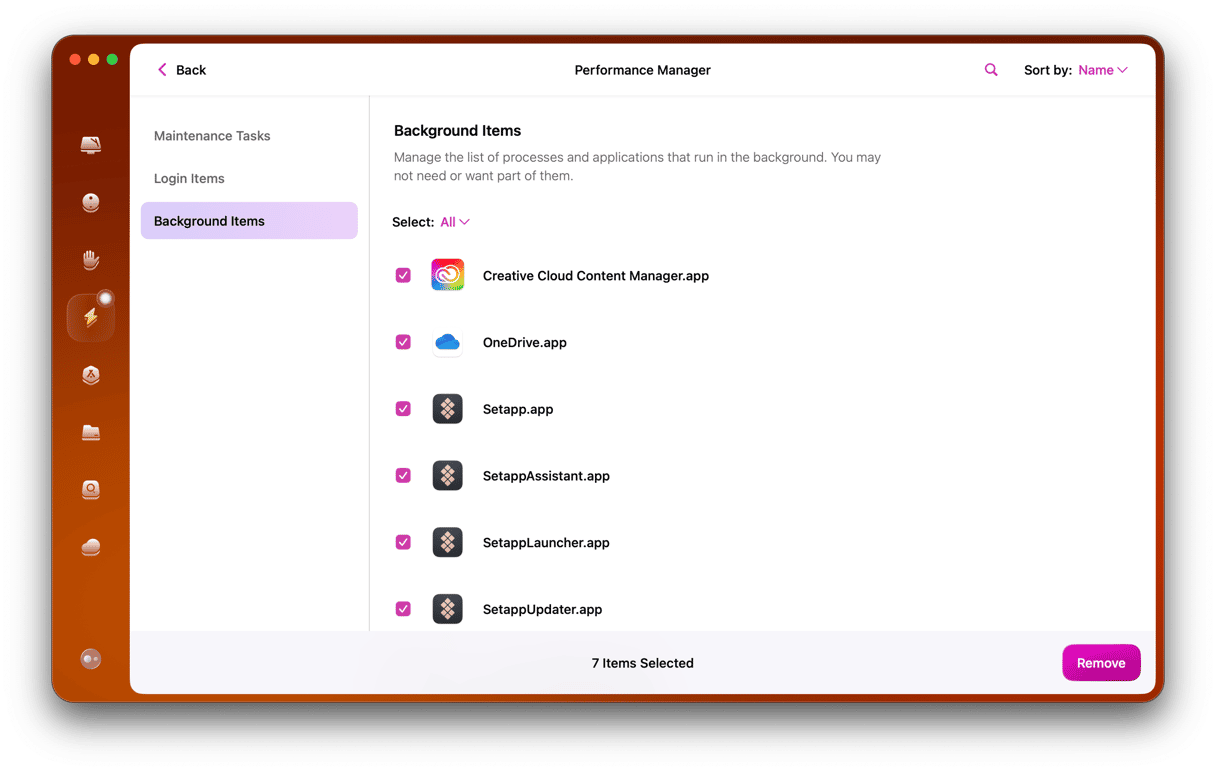
The Performance Manager also makes it easy to review login and background items that can use lots of resources without you realizing it and remove them if necessary. Get your free CleanMyMac trial.
Stage Manager is a feature in macOS that is designed to allow you to focus on working in one app while keeping others you need close at hand. You can have one app front and center or a group of apps together, with other apps or groups tucked away at the side of the screen. It’s best suited to a larger display but also works on MacBooks with smaller screens. Follow the steps above to set up and use Stage Manager on your Mac.


