One of the most useful features of Zoom’s video conferencing tool is the ability to record meetings and store them on your Mac or in the cloud. The recordings are great for sharing with people who couldn’t attend a meeting, but they are also a good way of, say, recording a meeting for inclusion in a podcast or YouTube video. If you’ve ever recorded a meeting on Zoom or are thinking about it, you’re probably wondering, ‘how to find Zoom recordings on Mac’? We’ll answer that question in this article and show you how to get the most from Zoom recordings.
How to record meetings on Zoom
Recording meetings on Zoom is easy: you just click the Record button at the bottom of the meeting window. Depending on the type of account you have and the configurations you’ve set, the meeting recording will either be stored on your Mac or in the cloud. If you’re on the free Zoom tier, you can only store recordings on your Mac. If you have a paid-for Zoom One plan like Pro or Business, you will be able to store 5GB of recording data on Zoom’s servers. At the highest tier, Enterprise, customers get unlimited storage. You may also be able to choose where to store recordings, and in some cases, meetings may be recorded automatically.
Where are Zoom recordings stored on Maс?
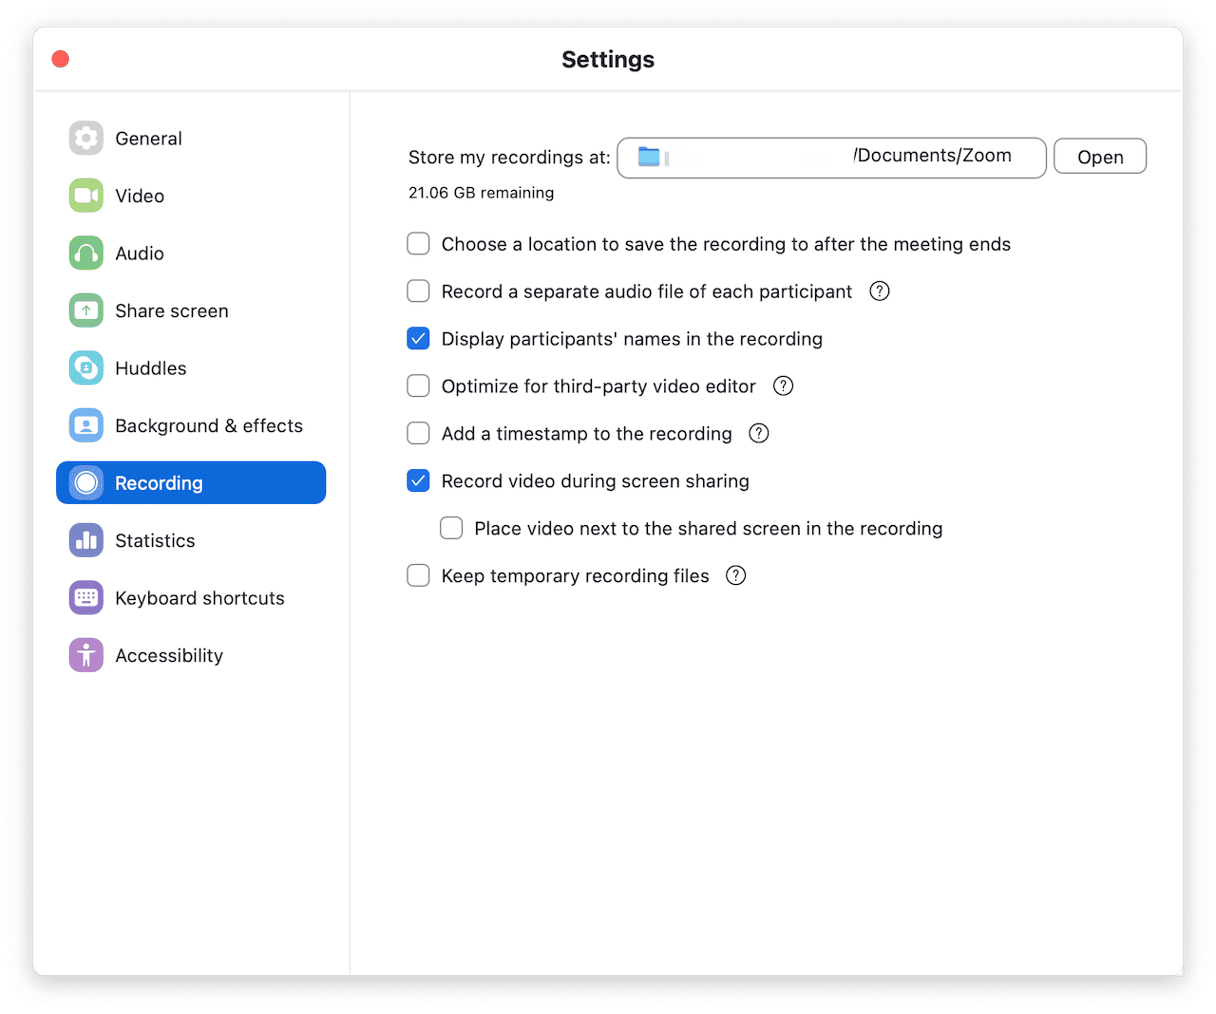
By default, Zoom recordings are stored in your Documents folder inside your Home directory in a folder named Zoom. The path for that is ~/Documents/Zoom. However, you can change that to wherever you like in Zoom’s Settings.

How to change where Zoom recordings go on your Mac
To change the location of Zoom recordings, do the following:
- Open Zoom.
- Click the Zoom menu and go to Settings > Recording.
- At the top of the window, you will see ‘Store my recordings at:’ followed by a folder path. Click the folder path.
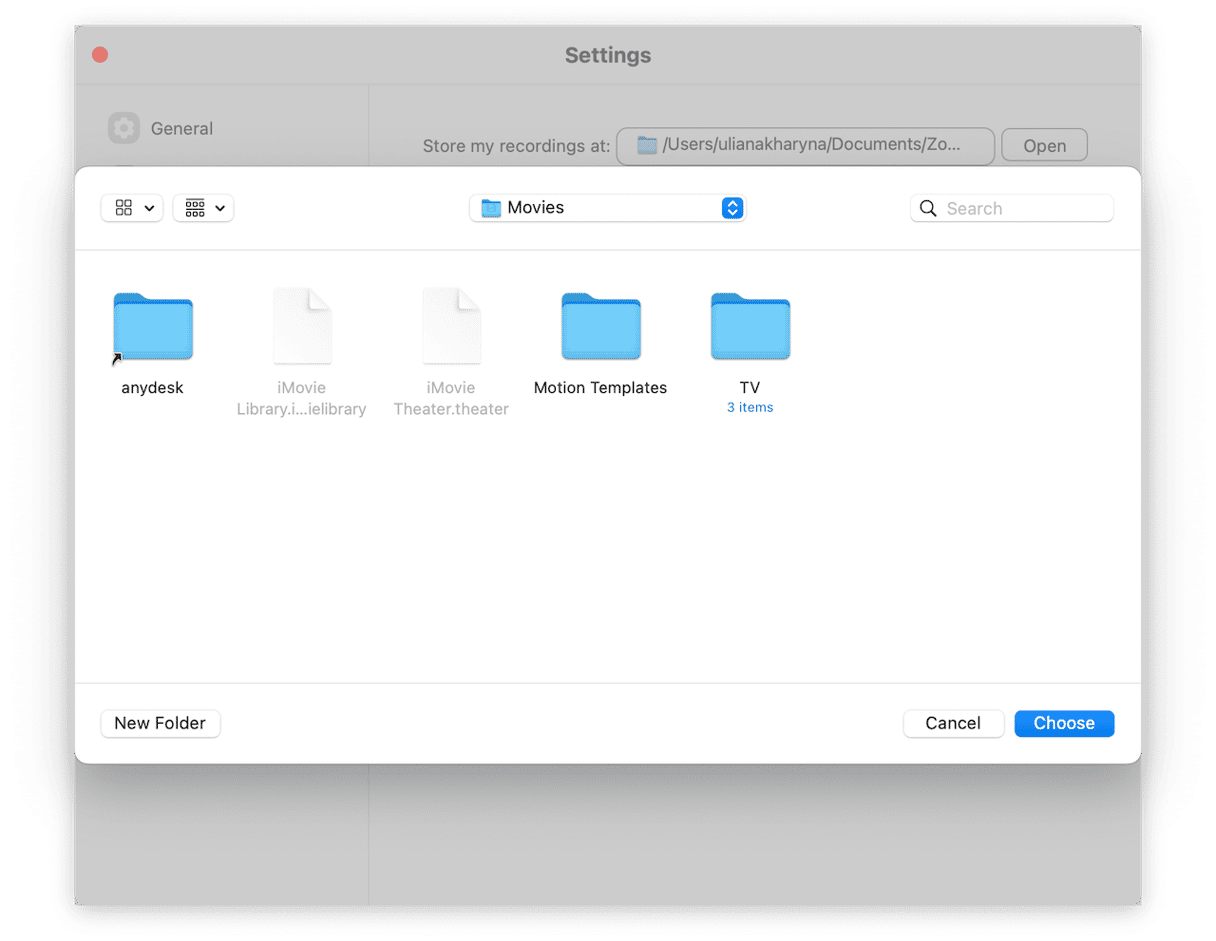
- Select Choose a new location.
- Navigate to the folder where you want to store recordings.
- Click Choose.
- Alternatively, you can put off the decision about where to store recordings and decide each time you press Record where you want to store that recording. To do that, check the box labeled ‘Choose a location to save the recording to after the meeting ends’.

How to manage Zoom recordings in the cloud
If you have a paid-for Zoom account, you can also store recordings in the cloud. Here’s how to find them.
- In a web browser, go to zoom.us
- Log in to your Zoom account.
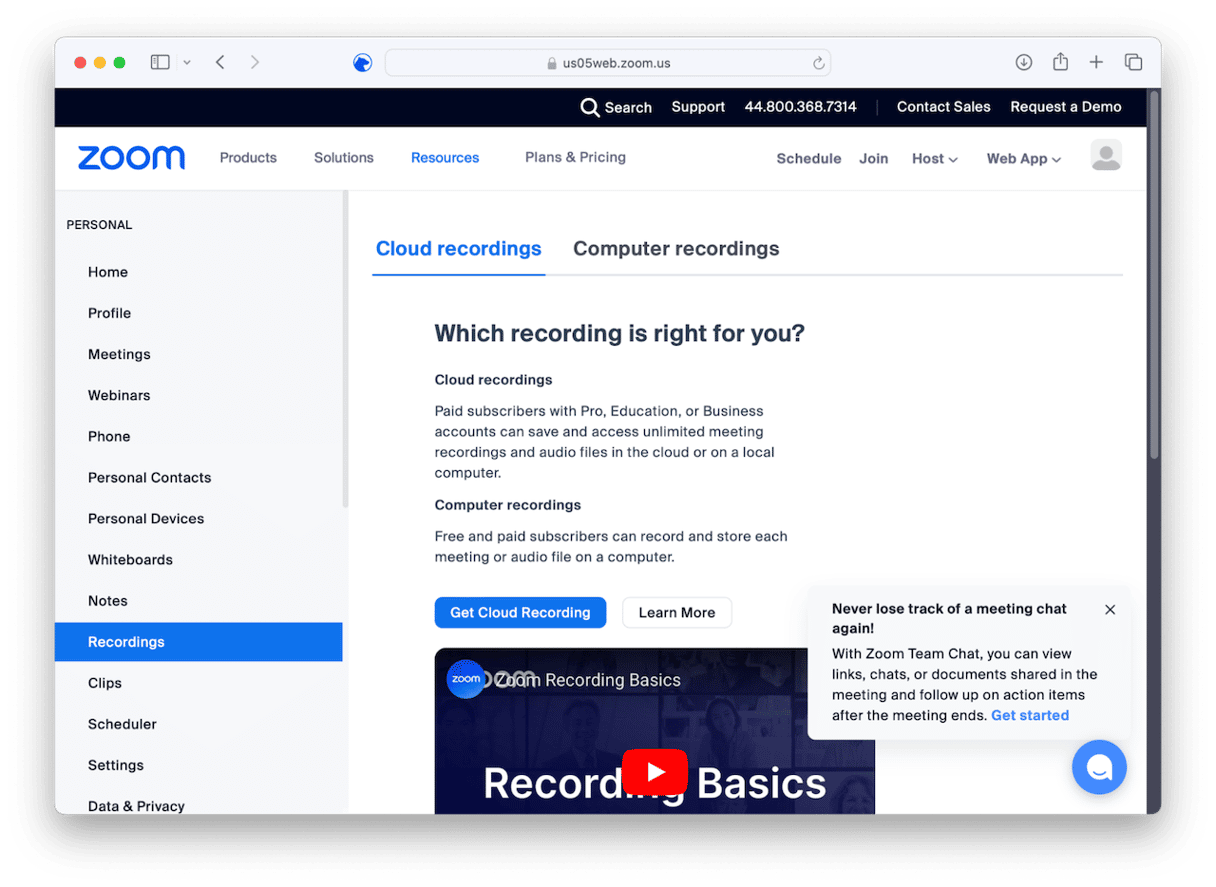
- Click My Account > Recordings.
- You will see two options: local recordings and cloud recordings.
- Choose Cloud recordings, and you will see all the meetings you have recorded. You can sort them by date, title, or meeting ID. You can also share them with others.
- If you’re an administrator for a business account, the process is slightly different. Log in to your account, choose Account Management, and you will see all the recordings made by people who share that account.

If you want to switch from cloud recordings to locally stored recordings, or vice versa, you can do that, too. You can also set it up so that meetings are recorded automatically and so that you can choose when you schedule a meeting where recordings should be stored.
How to manage large and old files on your Mac
If you record Zoom meetings on your Mac and you host lots of them, your Mac will very soon have lots of large video files tucked away in your Documents folder. If you don’t check it regularly, those files will soon accumulate and take up lots of space on your startup disk. That’s also true of all kinds of other video files, as well as large images and even spreadsheets. Keeping track of all those large and old files is difficult, which means you give up all that free space you could have if you got rid of them or stored them somewhere else.
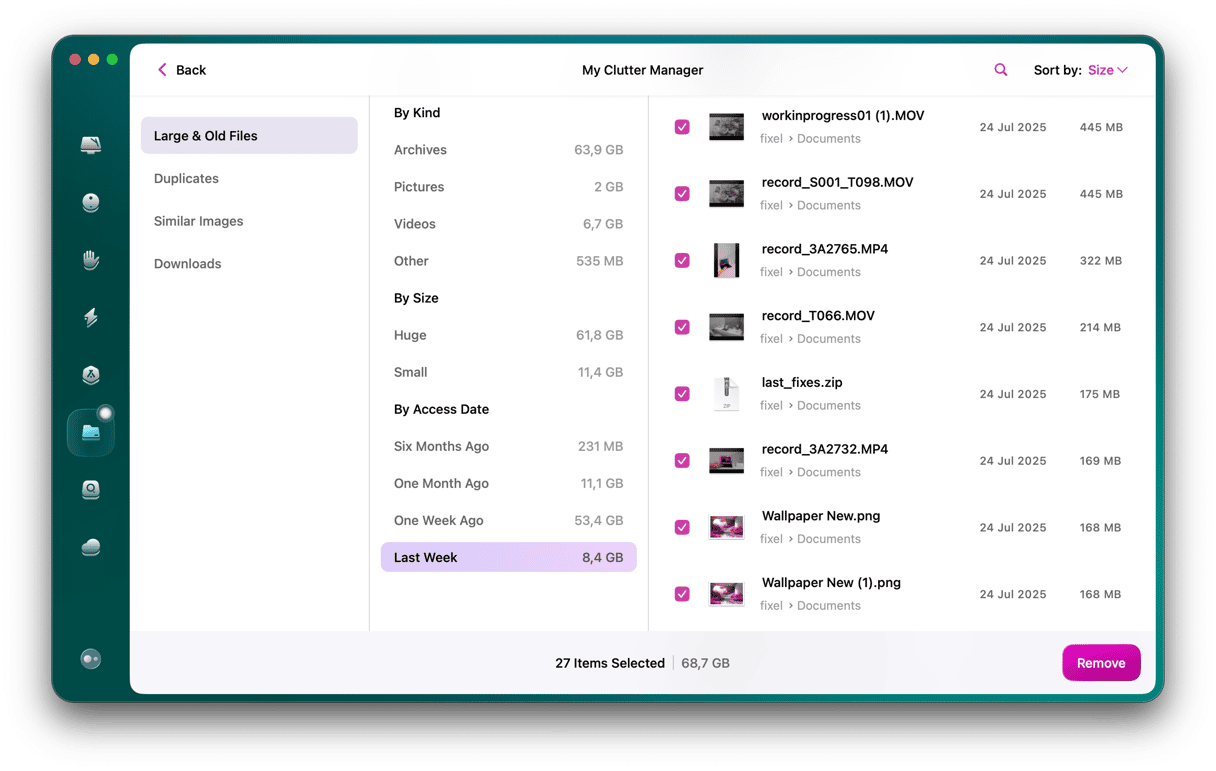
One solution is to use CleanMyMac’s Large & Old Files module. It scans your Mac, taking note of the size of your files and the date they were last opened. It then presents them to you in a way that makes it easy to view them by type (just click a button to see all your video files wherever they are on your Mac) or by when they were last opened. That way, you can quickly delete or move the files that are taking up the most space on your Mac’s startup disk and those you don’t open very often. You can download CleanMyMac for free here. Once you’ve done that, follow the steps below:
- Open CleanMyMac.
- Click Large & Old Files > Scan.
- When it’s finished, choose an option from the middle column to filter files.
- Select a file from the list on the right and click the Remove Immediately menu.
- Choose an option and click the button.

Can Zoom recordings be stored on an iPhone or iPad?
No. Local recording is only available on desktop or laptop computers like Mac and PC. If you host Zoom meetings on your iPad or iPhone, the only recording option available is to save recordings in the cloud, and for that, you will need a paid-for Zoom account.
There are a lot of options when it comes to where to find Zoom recordings on Mac. If you have a free Zoom account, they will have to be saved to your Mac, but they can go to any folder you choose. Though, by default, they are stored inside a Zoom folder in your user Documents folder. If you have a paid-for Zoom account, you can also store recordings on Zoom’s servers, with the total storage space available to you determined by the type of account you have.


