Have you noticed files missing after a macOS Tahoe update? If so, don’t panic. There’s very probably a logical explanation and it’s likely your files haven’t just disappeared. There are a number of possibilities for what happened and why it happened. In this guide to data recovery, we’ll show you where those files probably are and how to get them back.
Why are files missing after macOS update?
Good question! There are a number of possible answers:
- The files are stored in iCloud and haven’t synced with your Mac since the update.
- You have more than one user account on your Mac and are logged into a different one from the one that houses the files that are missing.
- A software conflict or bug caused the files to be moved somewhere else or deleted.
- There’s an issue with the disk on which the files are stored.
- The files are on a server and you haven’t reconnected to it since you updated.
How to fix it when files are missing after a Tahoe update
1. Check the Trash
It’s unlikely that your files have been put in the Trash and just left there, but it’s easy to check, so do it before you try anything else. Just click the Trash can in the Dock to see its contents. If the files are there, select them, right-click, and choose Put Back.

2. Use iCloud Data Recovery
If the files that are missing were stored in iCloud Drive or used in an app that uses iCloud for storage, you may be able to recover them using iCloud’s Data Recovery feature.
- In a web browser, go to icloud.com/iclouddrive/ for files that were stored in iCloud Drive.
- Sign in with your Apple account.
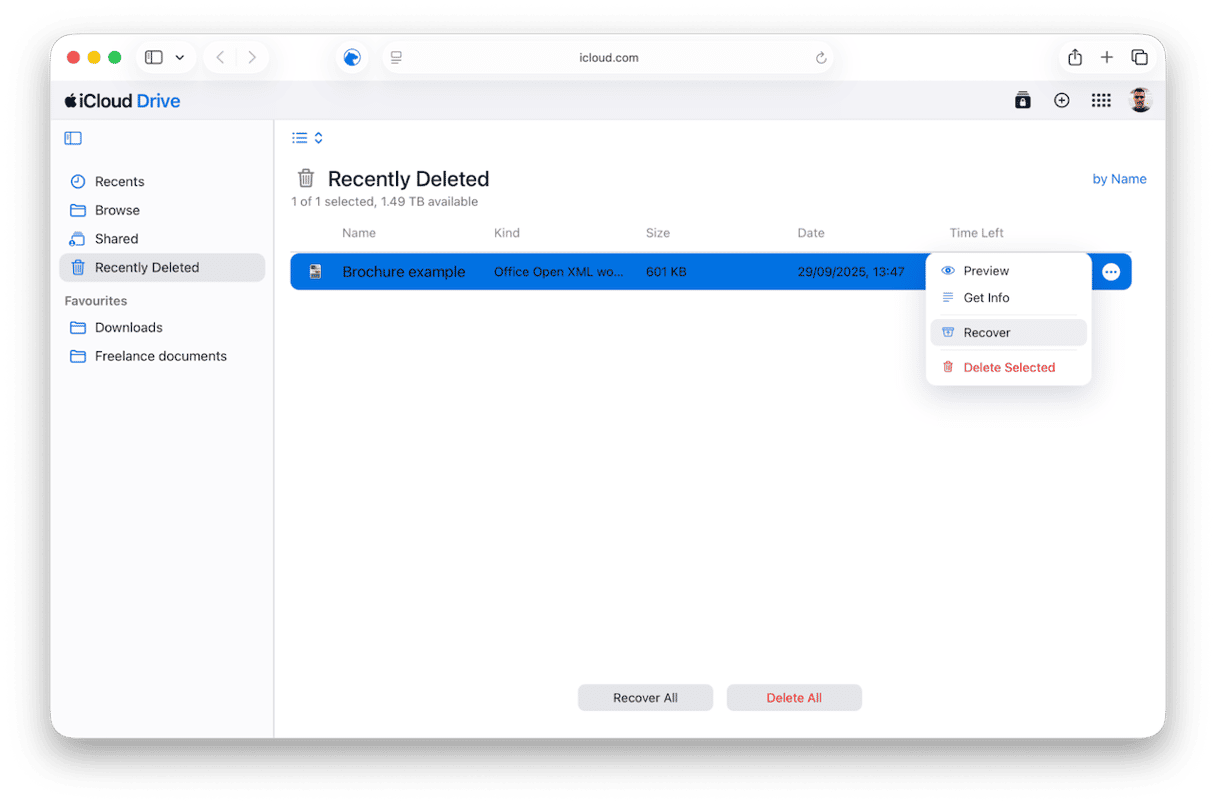
- Click Recently Deleted on the left of the screen.
- If your files are there, select the ones you need and click Recover.
- If the files were from an app that uses iCloud for storage and syncing, go to icloud.com/recovery/ and sign in.
- Choose Restore files.
- If the files you need are there, select them and choose Restore.

3. Restore from Time Machine
If you use Time Machine to back up your Mac regularly, you should have a backup from just before you updated to Tahoe.
- Click the Time Machine icon in the menu bar.
- Choose Browse Time Machine backups.
- Scroll through the backups until you get to the one just before you update macOS.
- Click the Finder window and navigate to the file you need.
- Click Restore.
- Repeat steps 4 and 5 for other missing files.
It’s possible that the files on your Mac that have gone missing have done so because of a conflict with other files or some other problem on your Mac. To avoid that problem, among many others, it’s a good idea to carry out regular maintenance on your Mac, as well as check it for malware, update your applications, and get rid of junk files and clutter. Doing all that yourself is time-consuming and laborious, which is why most of us don’t bother. But it doesn’t have to be. CleanMyMac’s Smart Care feature can do it for you.

It scans your Mac looking for maintenance tasks that should be run, as well as malware, junk files, and vital applications that have updates available. And it only needs a few clicks from you to do all that.
- Get your free CleanMyMac trial — you can use it free for seven days.
- Choose Smart Care in the sidebar.
- Click Scan.
- When it’s finished, click Run to carry out all of its recommendations or choose Review to see what it has found and decide for yourself what to run.
4. Show hidden files
It’s unlikely, but not impossible, that the files you think have gone missing are still there but have been designated as ‘hidden’ by macOS. There are lots of files hiding in plain sight on your Mac because they have a period at the start of their name. If something has caused the files you’re looking for to gain a period at the beginning of their file name, you won’t be able to see them.
The solution is to show hidden files:
- Go to the folder where the files were stored — for example, the Desktop.
- Press Command-Shift-period (.).
- Hidden files will now be visible, so if the files you’re looking for are hidden, they should now appear.
- When you’ve checked, press Command-Shift-period again to re-hide those files.

5. Take a different approach
If you can’t find the files that are missing, you might be able to find duplicate versions of the same image or file, or older versions of the files you need. CleanMyMac’s My Clutter feature can help with that. It scans your Mac, looking for duplicate files and similar images and flags them up, along with a preview of the file’s contents.

If there is a duplicate of the file you’ve lost lurking somewhere on your Mac, it will find it. Likewise, if there is an image on your Mac that’s very similar to the one that’s gone missing, it will show you where it is.
6. Try third-party data recovery software
If you don’t have a backup of your data to restore from, you can try a third-party data recovery tool like Disk Drill. You may be able to download a free trial that will scan your Mac and tell you if it can recover the files you need. But you will need to pay for the full version in order to recover your data. These tools work best immediately after data has been lost. So, try to only use your Mac to download and install the data recovery software — not for anything else — after you discover the files are missing.

If nothing so far has worked and you desperately need the files that are missing, the final step is to take your Mac to a data recovery company. These companies have specialist tools that can do more. than commercially available software. However, they tend to be very expensive so this should be a last resort for files that have either a high financial or personal value.
Usually, when you upgrade to a new version of macOS, everything goes smoothly and there are no problems. If, however, you have noticed files missing after a Tahoe update, follow the steps above to identify what has happened and recover your data. And remember, the quickest and safest method is to back up your Mac before you upgrade, so if the worst happens, you can get your files back in a minute or two.


