Despite the rise in the popularity of messaging using tools like WhatsApp and the messaging features on social media like Instagram, email still plays a hugely important part in most of our lives, especially regarding work. It’s still so central to everything we do that many of us get hundreds of weekly emails to our work and personal accounts. That can make keeping track of everything difficult. In this article, we’ll show you how to organize email in Outlook, Gmail, and the built-in Apple Mail app so you can find what you need easily.
12 smart ways to organize emails on Mac
Tip 1. Use separate accounts for work and personal email
Some of us have no choice when it comes to this one. If you work for a company, your work email will automatically be separate from your personal messages. But if you work for yourself or have a side gig, you might use the same account for everything.
Keeping a separate address for work makes it much easier to keep work and personal stuff separate. You might even do what I do and use a different email client for work and personal email. That way, there’s no chance of sending work email from your personal account or vice versa.
Tip 2. Create new mailboxes or folders
Mailboxes in Apple Mail are the same as folders in other email applications. Creating folders to store different types of email messages will make your inbox much less cluttered. You could have one to house emails from friends and another to store emails from utility companies.
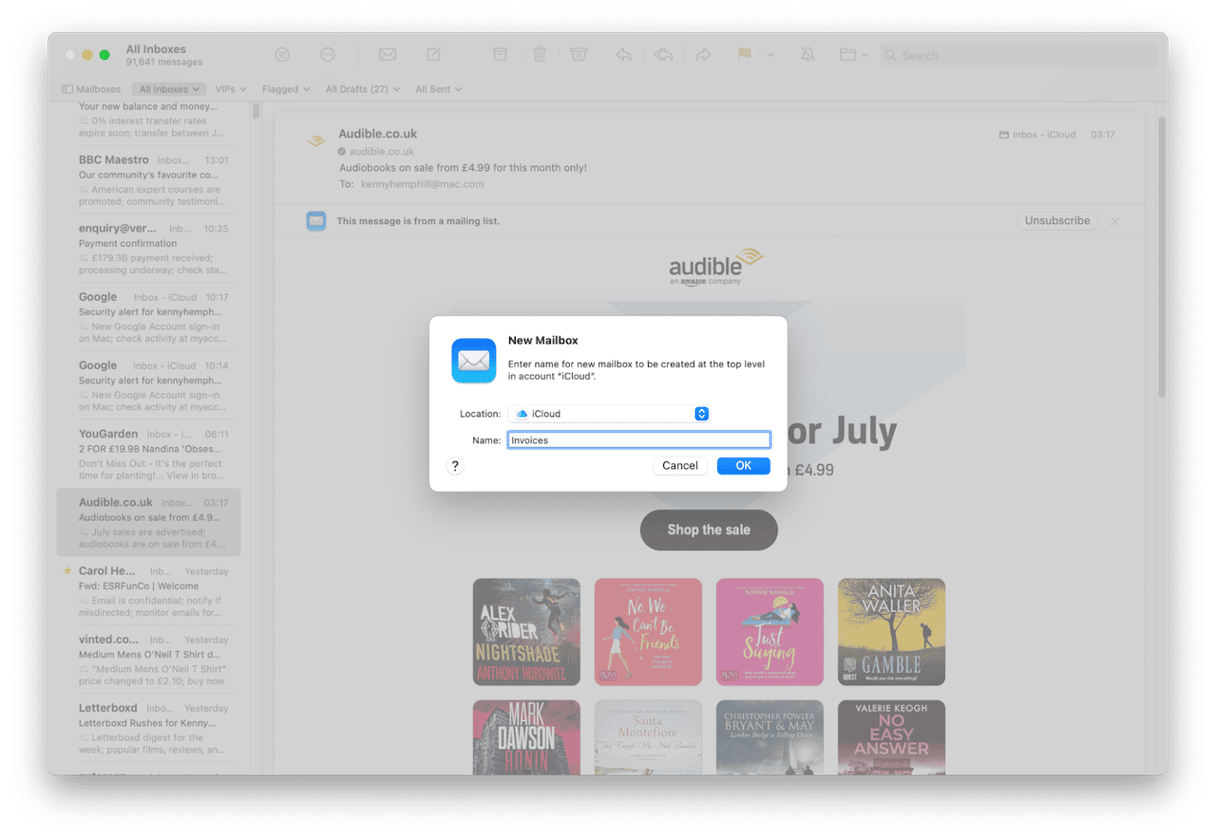
To create a new mailbox in Mail, click the Mailbox menu and choose New Mailbox. Next, choose whether you want the mailbox to exist only on your Mac (choose On My Mac) or on every device you use with that email account (choose iCloud or whatever the account provider is). Then, give the mailbox a name and click OK. To use the mailbox, just drag a message from your inbox onto the new inbox, and it will be moved there.
Tip 3. Declutter your mail attachments
Attachments from your messages are often downloaded and stored locally on your Mac. Over time, these files can quietly pile up and consume valuable disk space, especially if you receive a lot of large documents or media files.
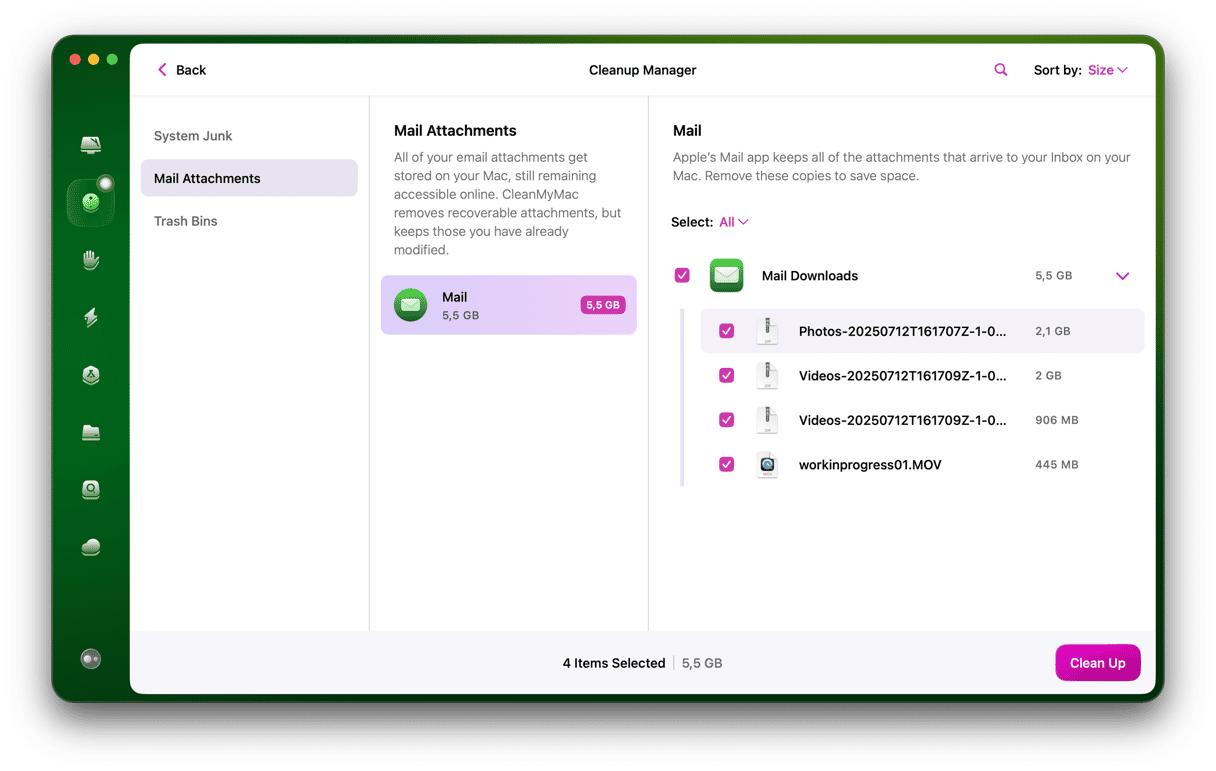
You can safely delete these attachments from your Mac without losing access to them. They remain stored on the email server and can be re-downloaded whenever needed. Hunting down attachments to free up space can be tedious, even with filters. Fortunately, there’s a simpler way. CleanMyMac’s Cleanup feature scans your Mac and locates all the attachments, letting you delete them to reclaim space. Here’s how to use it.
- Get your free CleanMyMac trial.
- Select Cleanup in the sidebar.
- Click Scan.
- When the scan is complete, you’ll see how much junk has been found.
- Click Review All Junk to review and remove all the attachments.
Tip 4. Use Smart Mailboxes
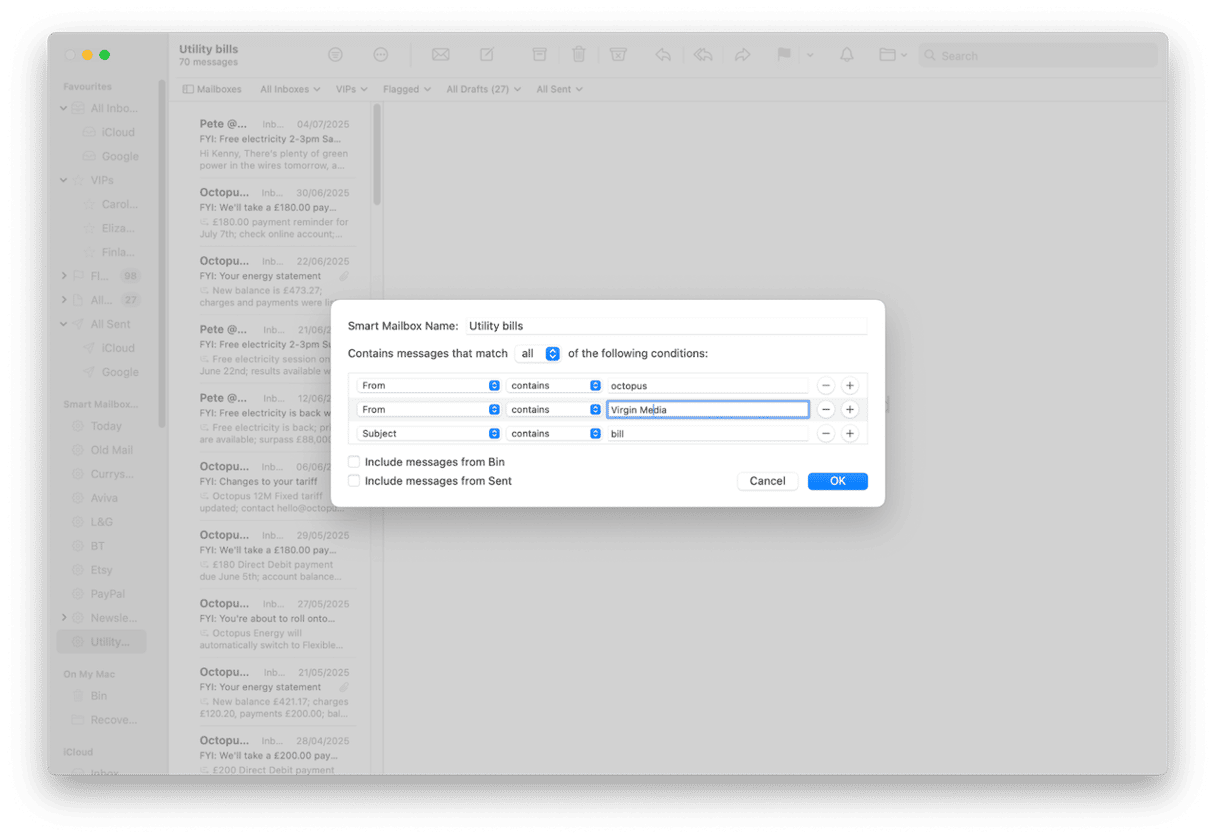
In Mail, Smart Mailboxes display messages dictated by the criteria you set. For example, you could create one to display all the messages from a specific sender. The messages aren’t moved from your inbox to the Smart Mailbox, so Smart Mailboxes don’t reduce clutter. They filter messages so that only those that meet the criteria are displayed.
To create a new Smart Mailbox in Mail, click the Mailbox menu and choose New Smart Mailbox. Give the Smart Mailbox a name and then choose the first criterion that should be used to select messages to display. If you want to add more criteria, click the ‘+’. When you’ve finished, click OK.
Tip 5. Create rules for incoming mail
Most email applications, including Mail, allow you to create rules for incoming mail that dictate what happens to it. You could, for example, create a rule that moves all messages from a recipient or a group of recipients to a specific folder. Or one that automatically deletes messages that have a specified word in the subject line.
Create rules in the Mail app
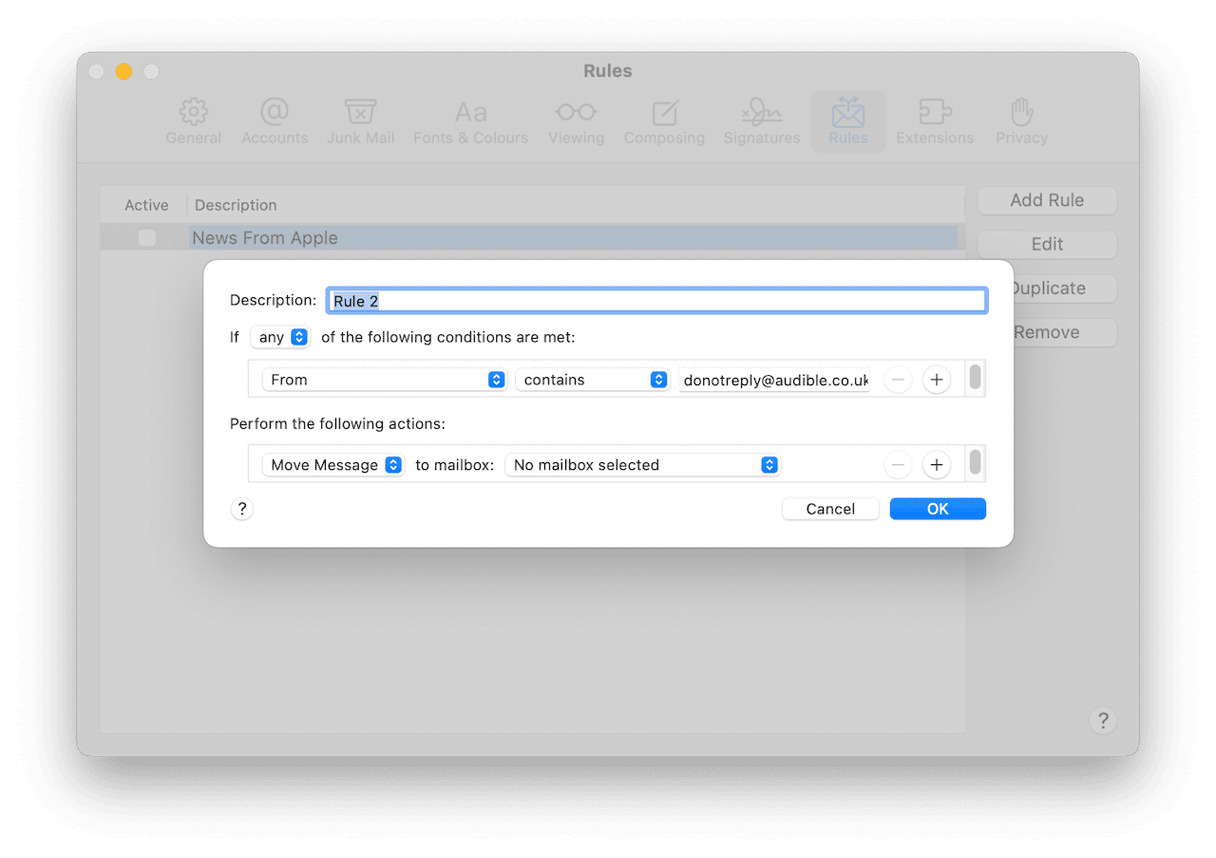
- In the Mail app, hit Command-Comma to display Mac Mail settings.
- Select the Rules tab and click Add Rule.
- In the Description box, type a name for the rule.
- Use the menus to set the first criterion for the rule.
- To add more criteria, click the ‘+’ and choose whether the rule should run when all criteria are met or when any of them are met.
- Choose the action that should be performed if the criteria are met.
- Click OK to save the rule.
If you want to apply the rule to existing messages already in your inbox, click Apply. Otherwise, click Don’t Apply in the dialog box that opens.
Create rules in Outlook
You can configure Outlook to automatically sort your emails using simple rules. For example, you can create a rule that moves all messages from a specific sender into a designated folder.
- Right-click any message and click Rules.
- Choose Always move messages from [name of sender].
- Pick a folder or select New to create a new one and click OK.
Create rules to filter emails in Gmail
Filters in Gmail are searches that you save, and they can also apply rules to matching messages, such as archiving them, marking them as read, or forwarding them. They’re a powerful tool if you're looking for how to organize your emails in Gmail more efficiently.
To create a filter:
- Go to gmail.com and log in to your Gmail account
- Click on the inbox and the settings icon to the right of the search bar.
- Fill in the text boxes to create a filter and choose from the options.
- Click Create Filter.
- Next, select from the options in the box so Gmail knows what to do with messages that meet the filter criteria.
- Click Create Filter.
Tip 6. Use Categories in Apple Mail
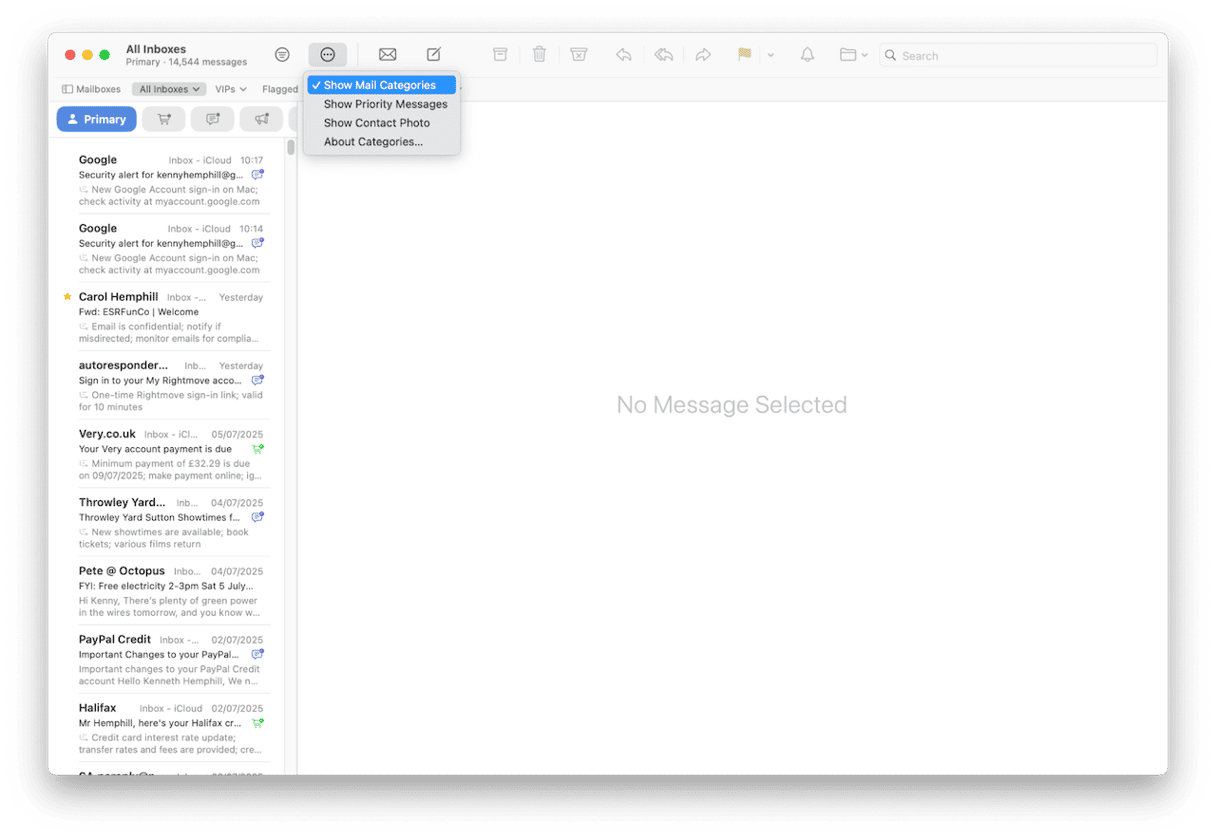
The macOS Sequoia version of Apple Mail introduced a new feature that allows you to categorize messages automatically. It uses Apple Intelligence to figure out what an email is about and categorizes it accordingly. You can then choose the category you want to view. For example, Primary is the messages Mail thinks are most important, but if you want to see an online shopping receipt, you can tap the trolley icon to see emails relating to transactions. To enable categories, go to your Apple Mail inbox, click the three dots at the top, and choose Show Categories.
Tip 7. Let Apple Mail prioritize your Mail
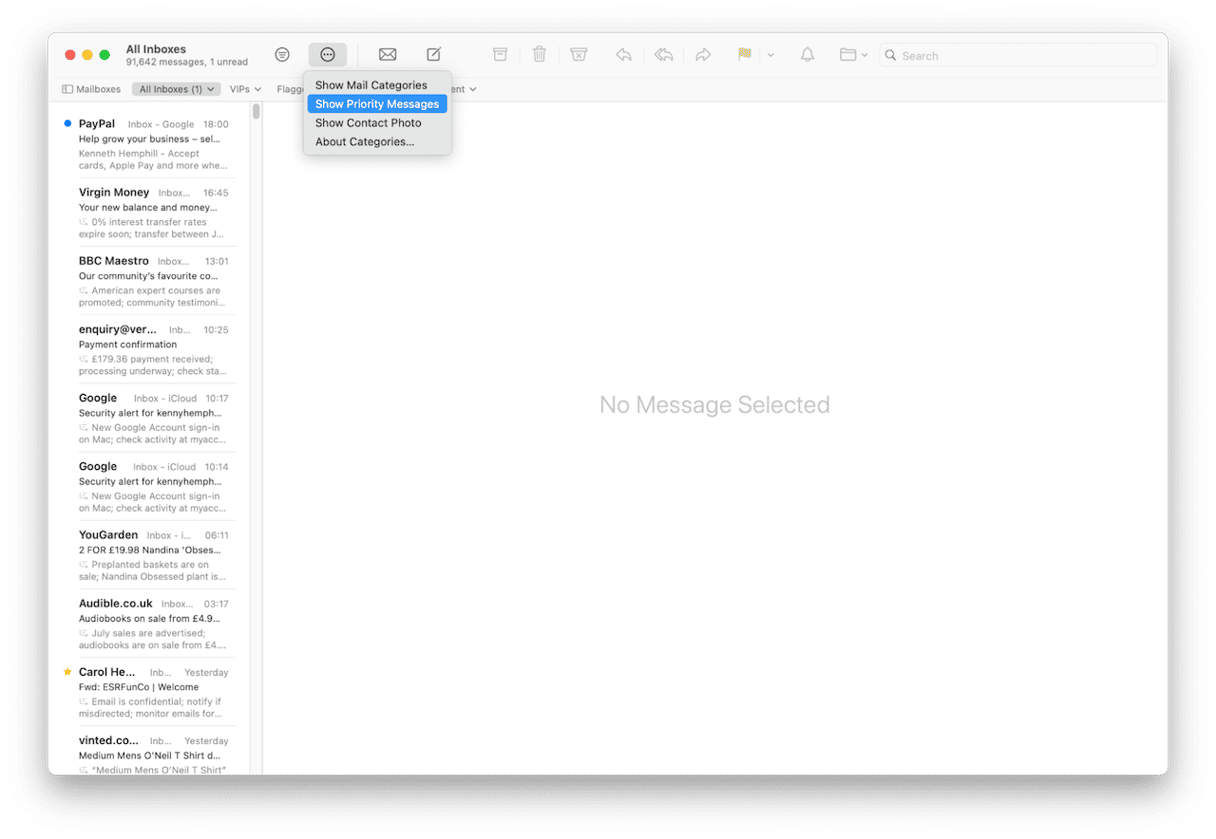
Another way to organize messages in macOS Sequoia Mail is to use the Show Priority feature. This feature uses Apple Intelligence to choose which email messages will likely be most time-sensitive. It puts those at the top of your inbox, above the most recently received messages. To switch it on, click the three dots in the toolbar and choose Show Priority Messages.
Tip 8. Assign contacts as VIPs
Assigning a contact as a VIP puts a star against their messages in your inbox and displays them in a Smart Mailbox called VIPs. To make a contact a VIP, click on their name in an email they’ve sent and from the drop-down menu, choose Add to VIPs.
Tip 9. Use Remind Me
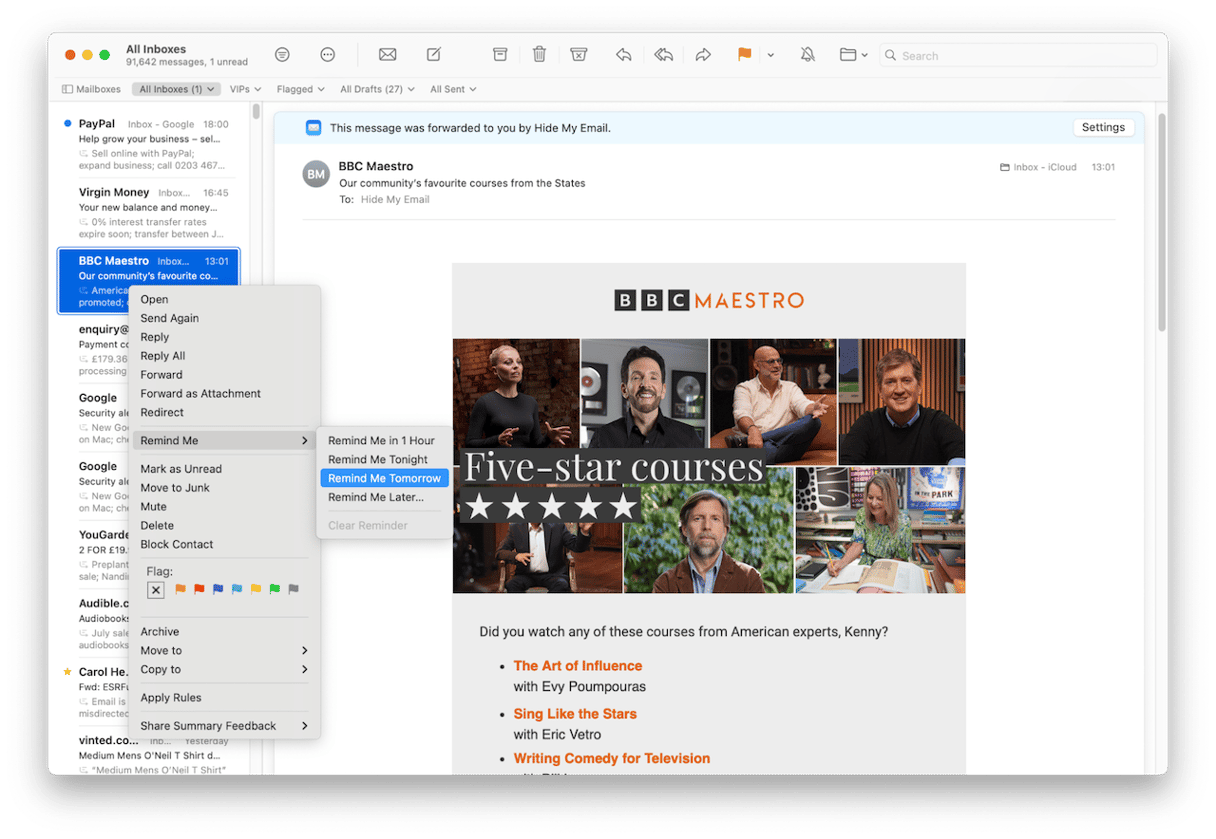
Apple Mail has a feature that allows you to be reminded of important emails at a later time, when you are in a position to be able to respond to them. Other email applications have a similar feature, sometimes called Snooze. To use Remind Me in Apple Mail, either swipe right with two fingers over a message in your inbox and choose Remind Me, and select a period for the reminder, or right-click on the message, choose Remind Me, and then select the time period. You will get a notification when the time arrives, and the message will appear at the top of your inbox. By using Remind Me and diligently archiving messages in folders or mailboxes, you can keep your inbox clear while ensuring you don’t forget to respond to an important message.
Tip 10. Flag messages so you can find them more easily
If you don’t want to clear out your inbox or move messages to folders, you can flag them so you can find them more easily later. Right-click or Control-click a message and choose a flag color to display in the Flag section.
Tip 11. Unsubscribe from newsletters you don’t read
Using Show Categories or Smart Mailboxes to keep newsletters and promotional emails from cluttering your inbox is great. But even better is unsubscribing from those you never read. You can do that in Mail by clicking unsubscribe at the top of a newsletter or promotional email. If the button isn’t there, there should be an unsubscribe link at the bottom of the email.
Tip 12. Use Hide My Email
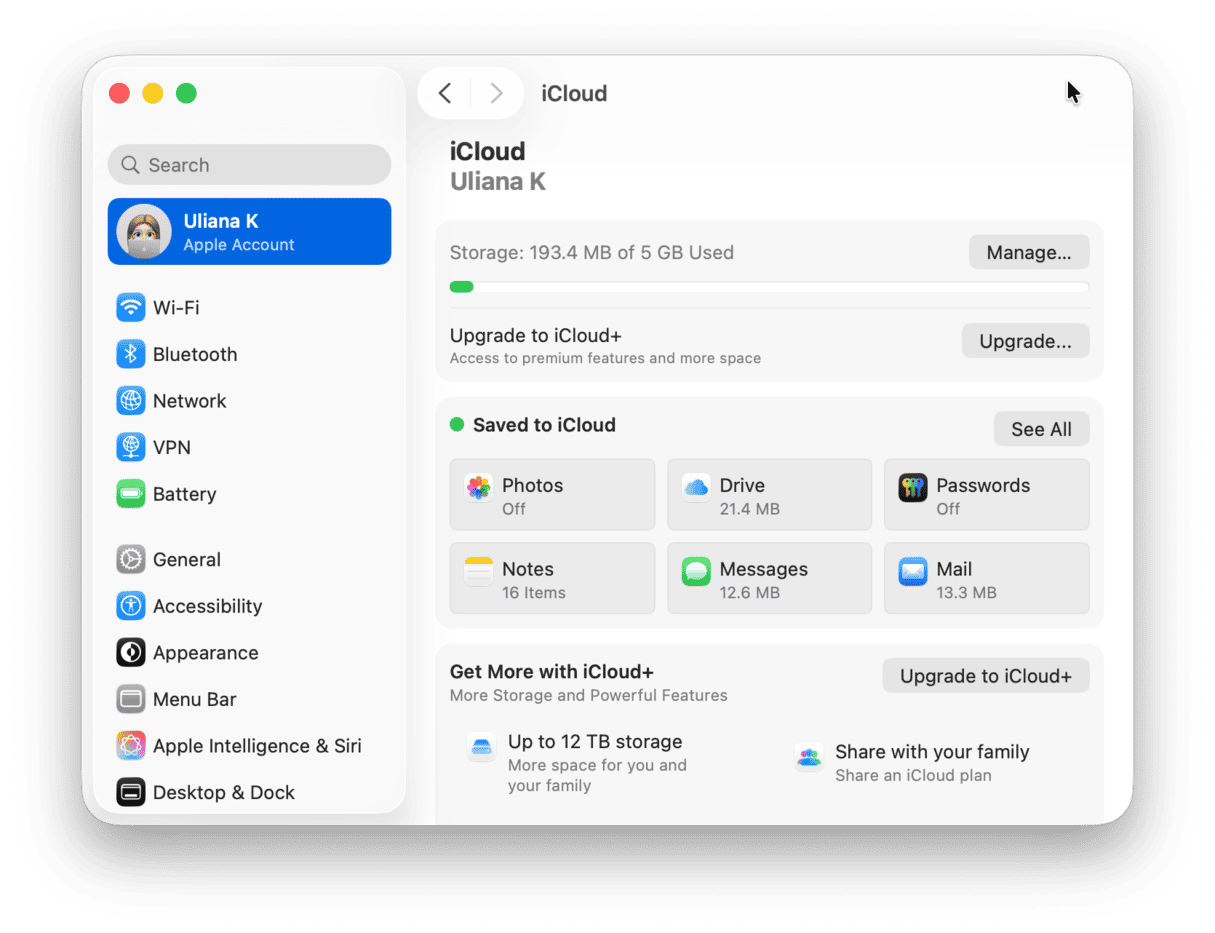
If you’re an iCloud+ subscriber, you can use the Hide My Email feature to create a new email address for each newsletter or promotional email you sign up for. When asked to enter your email address, macOS should prompt you to use Hide My Email. It will then generate a unique address and prompt you to auto-fill it. All messages to that address will be forwarded to your inbox, but you can turn that off or delete the email address altogether in System Settings > [YOUR NAME] > iCloud > Hide My Email.
If you receive a lot of emails every day, your inbox can quickly become cluttered and even overwhelming. However, it doesn’t have to be that way. There are many things you can do to make finding messages easier. Follow our tips above for the best ways to organize emails on your Mac.


