While many Mac users may prefer Apple’s FaceTime, Microsoft’s Skype is the most popular platform for connecting people on Mac computers with those on PCs, Android devices, or tablets. Many of us have been using it for years, or at least have had it on our Mac for years, without giving it a second thought.
However, if it starts misbehaving or you realize it’s taking up space on your Mac that you want to recover, it may be time to uninstall it. Uninstalling Skype and then reinstalling it may also fix problems that the update can’t resolve. So, in this article, we’ll show you how to uninstall and reinstall Skype. We’ll also look at how to do the same with Skype for Business — the edition designed for use by large organizations.
How to uninstall Skype on Mac?
Skype started life as a way for people to make voice over IP (VOIP) calls from their computers. It allowed us to make calls from computer to computer for free. You can also call regular landline and mobile numbers. Over the years, Skype has become a popular tool for making audio and video calls from lots of different devices, including smartphones and tablets.
If it crashes or doesn’t work properly, the best solution might be to uninstall Skype and start again. Also, Skype installs lots of different files on your Mac that take up space, so if you’re not using it, it might be best to uninstall it.
Uninstall Skype – super quick removal
Before I show you how to uninstall Skype from your Mac manually, I want to introduce a really easy way to remove it and all of its associated files with just a couple of clicks. I’ve been using CleanMyMac for a while, and its Uninstaller tool comes in handy when removing programs from your Mac.

- Get your free CleanMyMac trial.
- Open CleanMyMac from your Applications folder.
- Click Applications > Scan > Manage My Applications.
- In the Uninstaller tab, select Skype.
- Click Uninstall.
You may ask: why would you need an app like CleanMyMac if you can drag and drop an app to the Trash? The reason is that by simply moving an app like Skype to the Trash, you only remove the program while its data and leftovers are still left on your Mac, taking up space.
CleanMyMac removes Skype and its leftovers — all at once. But if you want to do it manually, here’s how.
How to uninstall Skype manually
If you want to remove Skype manually, it is also possible:
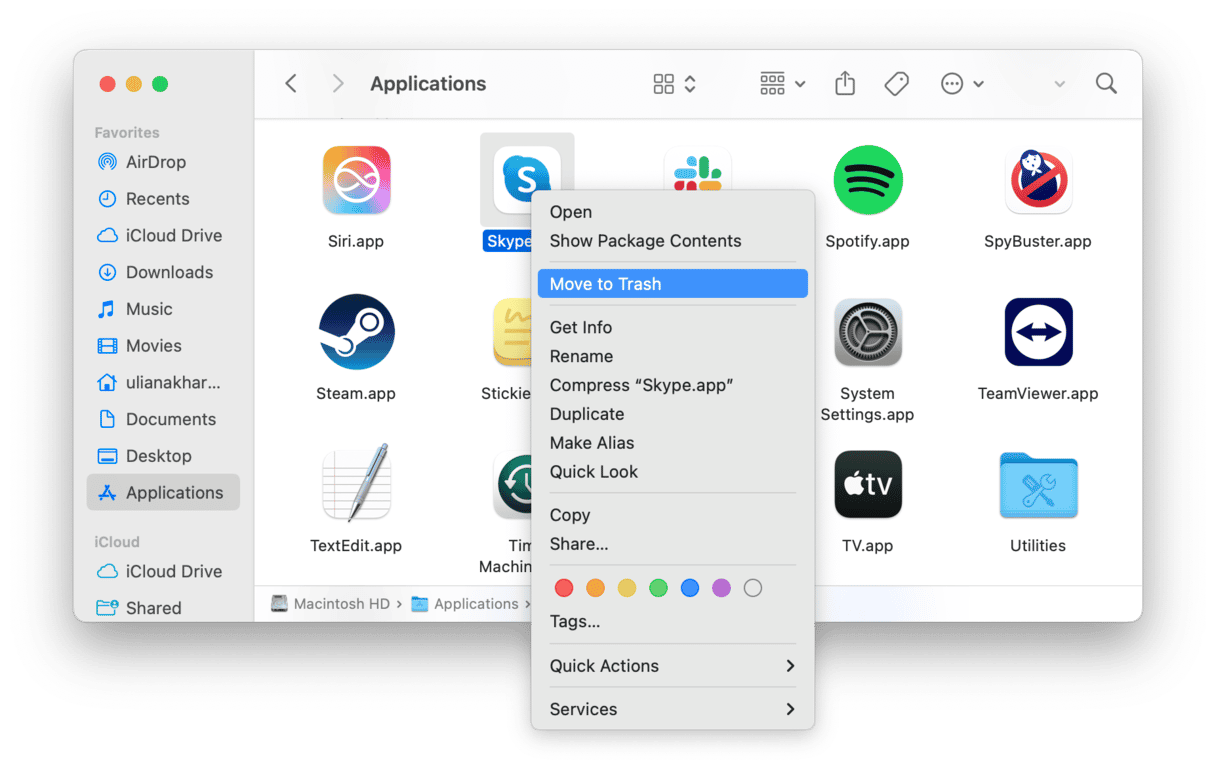
- Quit Skype if it’s running.
- Navigate to your Applications folder, locate Skype and send it to the Trash.
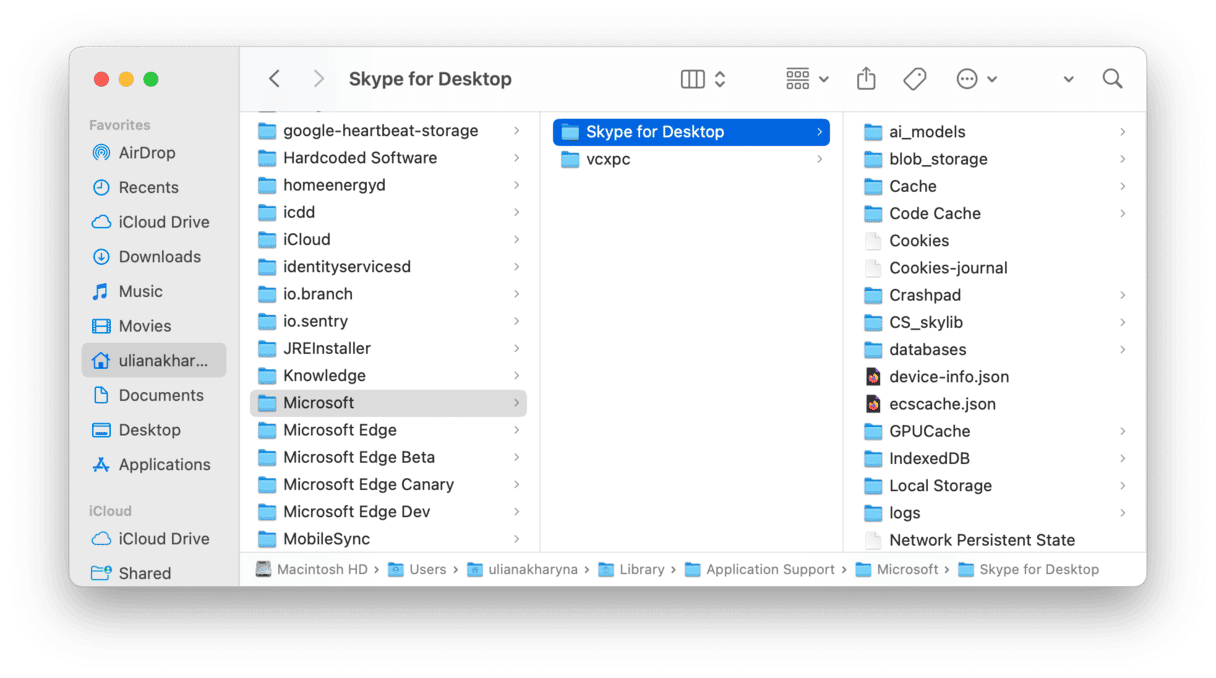
- Now, you need to get rid of all those additional files I mentioned, so go to the Finder and click Go menu.
- Choose Go to Folder.
- In the box, type
~/Library/Application Support/Microsoft - Locate the“Skype for Desktop” folder and drag it to the Trash.
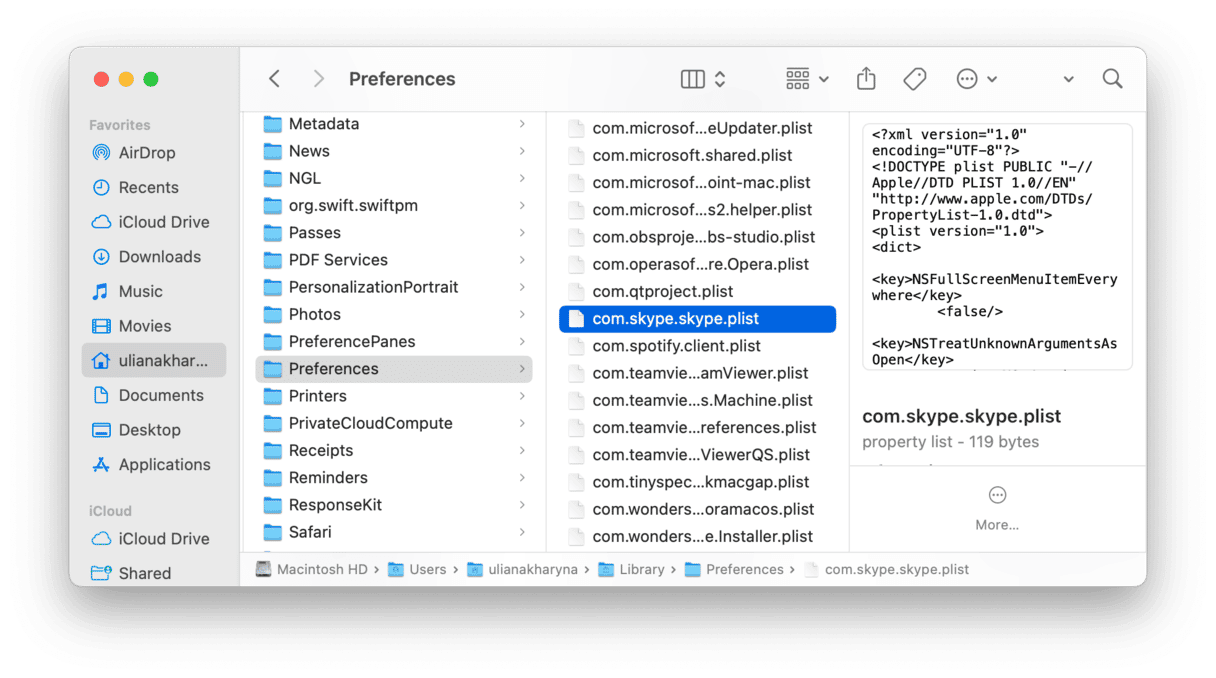
- Go to
~/Library/Preferences - Locate “com.skype.skype.plist” and “com.skype.skype.Helper.plist” files and move them to Trash. Empty it.


Skype has now been completely uninstalled from your Mac.
How to uninstall Skype for Business
The first steps for removing Skype for Business are the same as those for Skype — quit the app and drag it from the Applications folder to the Trash. However, Microsoft recommends removing the rest of the files using the Terminal. Here’s how to do that:
- Go to Applications > Utilities and double-click Terminal to open it.
- Type
sudo rm -rf /Library/Internet\ Plug-Ins/MeetingJoinPlugin.plugin - Press Return and enter your admin password also followed by Return.
- Type
defaults delete com.microsoft.SkypeForBusiness || true - Hit Return.
- Then, enter each of the following locations, one at a time, pressing Return after each:
- The last step is to remove the Skype for Business login from your keychain. Go to Applications > Utilities and open Keychain Access or open the Passwords app if you have macOS Sequoia.
- Search for Skype for Business and delete it.
rm -rf ~/Library/Containers/com.microsoft.SkypeForBusiness
rm -rf ~/Library/Logs/DiagnosticReports/Skype\ for\ Business_*
rm -rf ~/Library/Saved\ Application\ State/com.microsoft.SkypeForBusiness.savedState
rm -rf ~/Library/Preferences/com.microsoft.SkypeForBusiness.plist
rm -rf ~/Library/Application\ Support/CrashReporter/Skype\ for\ Business_*
rm -rf ~/Library/Application\ Support/com.apple.sharedfilelist/com.apple.LSSharedFileList.ApplicationRecentDocuments/com.microsoft.skypeforbusiness*
rm -rf ~/Library/Cookies/com.microsoft.SkypeForBusiness*
sudo rm -rf /private/var/db/receipts/com.microsoft.SkypeForBusiness*
rmdir ~/Library/Application\ Scripts/com.microsoft.SkypeForBusiness
find -f /private/var/db/BootCaches/* -name "app.com.microsoft.SkypeForBusiness*" -exec sudo rm -rf {} +
As with the regular version of Skype, it’s much quicker and easier to remove Skype for Business by using a dedicated uninstaller like CleanMyMac.
What to do if Skype won’t uninstall
If you’ve done everything above, but you still see remnants of Skype on your Mac, or if any of the steps above fails to complete, the first thing to do is to check that Skype isn’t still running on your Mac. The next step is to restart your Mac and try again.
If that doesn’t work, try restarting your Mac in safe mode. This will eliminate the possibility that other processes that launch automatically are preventing Skype from uninstalling. To do that, follow the steps below based on the model of the Mac you own.
Intel-based Mac
- Shut down your Mac and wait for 10 seconds.
- Restart your Mac and hold down the Shift key.
- Release Shift when you see the Apple logo.

Mac with Apple silicon
- Shut down your Mac and wait for 10 seconds.
- Press and hold the power button. Do not release them until you see the startup options window.
- Select a startup disc.
- Press the Shift key and hit Continue in Safe Mode.
- Now, release the Shift key.

How to reinstall Skype on your Mac
If you need to reinstall Skype or Skype for Business, go to the relevant web page for the version you want and download it, then follow the instructions to install.
There are several reasons why you might want or need to uninstall Skype or Skype for Business. It may be misbehaving, or you may just not need it anymore. Whatever the reason, following the steps above carefully will make sure it’s uninstalled completely. And if you use CleanMyMac, it will be done in a couple of clicks. Hope that helped you!


