Taking screenshots on a Mac, or screengrabs, is useful for a number of reasons. Whether you need to record message details, make a copy of an order confirmation, record a web chat with a customer service representative, or send a funny meme to your friends.
Screenshots are one of the easiest and quick ways to capture and keep a record of anything you do on your Mac. However, those are potentially large files that can take up lots of space. So, it’s good practice to get rid of them when they become useless. I’m about to show you how to do that, keep reading.
How to take a screenshot on a Mac
Before we get to deleting screenshots, let’s recap how to take a screenshot on a Mac. There are several different keyboard shortcuts depending on what you want to capture.
- Command-Shift-3 captures the whole screen.
- Command-Shift-4 allows you to drag crosshairs over the area you want to capture.
- Command-Shift-4 followed by spacebar allows you to capture a window.
- Command-Shift-5 allows you to specify what kind of screenshot you want to take, record a video of the screen, set a timer for the screenshot, and choose where to store it.
Where are screenshots stored on the Mac?
By default, screenshots are stored on the Desktop. If you use a recent version of macOS and have Stacks enabled in the Finder, they have their own stack on the Desktop.

Unlike screenshots on an iPhone or iPad, screenshots on a Mac are not added to the library in the Photos app.
How much space do screenshots take up?
The answer to that depends on several things, including the size of the area you’re taking a screenshot of, the resolution of your screen, and the amount of detail in the image. However, expect each screenshot to take up anything from a few K to three or four megabytes. As you can tell, if you have lots of screenshots at 3-4MB each, the amount of space they occupy quickly adds up.
How to delete a screenshot on your Mac manually
There are a number of ways to delete screenshots on your Mac.
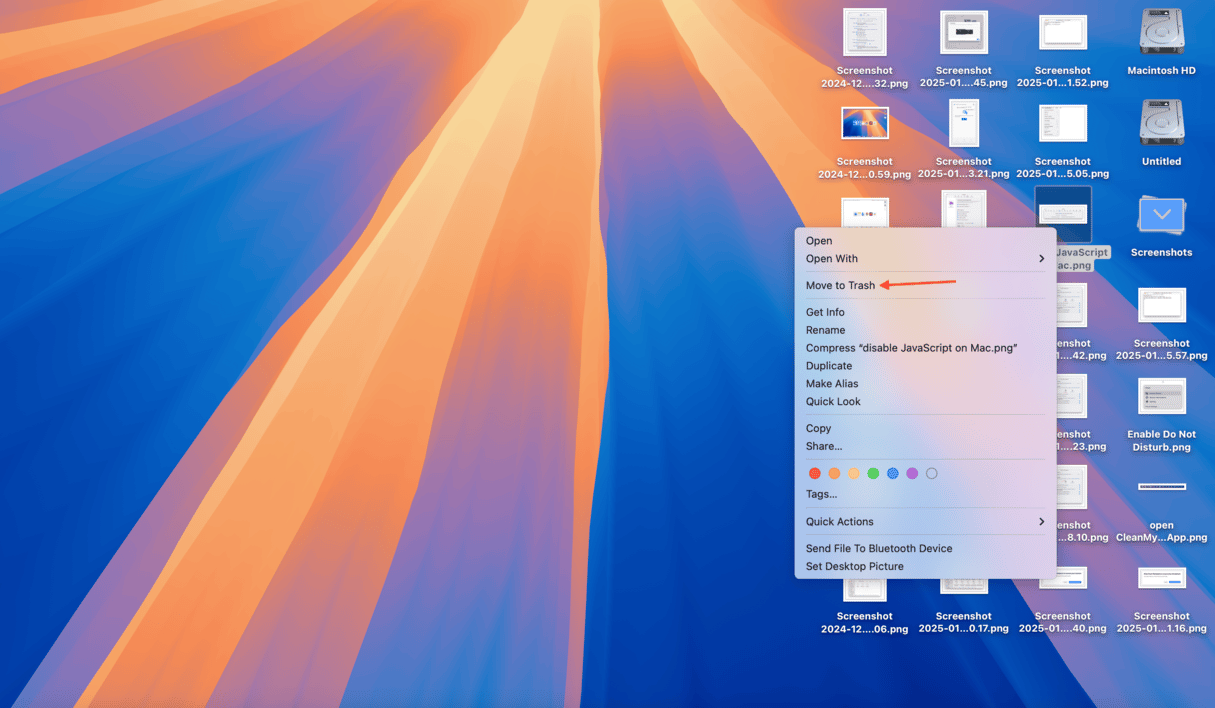
- For screenshots on the Desktop, click the stack to see all the screenshots.
- To delete one, click it and drag it to the Trash, or Control-click it and choose Move to Trash.
- To delete more than one, click the Desktop and drag over the screenshots you want to delete until they are all selected. Then, drag them to the Trash.
- Empty the Trash.

If you have screenshots stored in other locations, navigate to the folder in which they are stored and drag them to the Trash.
How to automatically delete screenshots on Mac
There is an even easier way to delete screenshots on your Mac, using a handy tool called CleanMyMac, which specializes in keeping your Mac free from unneeded files. Its My Clutter feature allows you to remove similar and duplicate images, including screenshots.
Get started with a free CleanMyMac trial. Once installed, here’s how to use it to delete screenshots:
- Open CleanMyMac and choose My Clutter in the sidebar.
- Click Scan — you can change the folder you want to scan.
- Click Review All Files.
- Check Duplicates, Similar Images, and Downloads. Write ‘screenshot’ into the search bar to find screenshots. It will identify even those screenshots that have a custom name.
- Select files for deletion and click Remove.

While you can use this tool to remove screenshots, we recommend you to review other similars and duplicates as well and also run a Cleanup scan to delete junk files.
Want an alternative? Check out the Space Lens feature. It allows you to see clearly where the disk space on your Mac has gone and what’s occupying it.
- Go to Space Lens and run a scan.
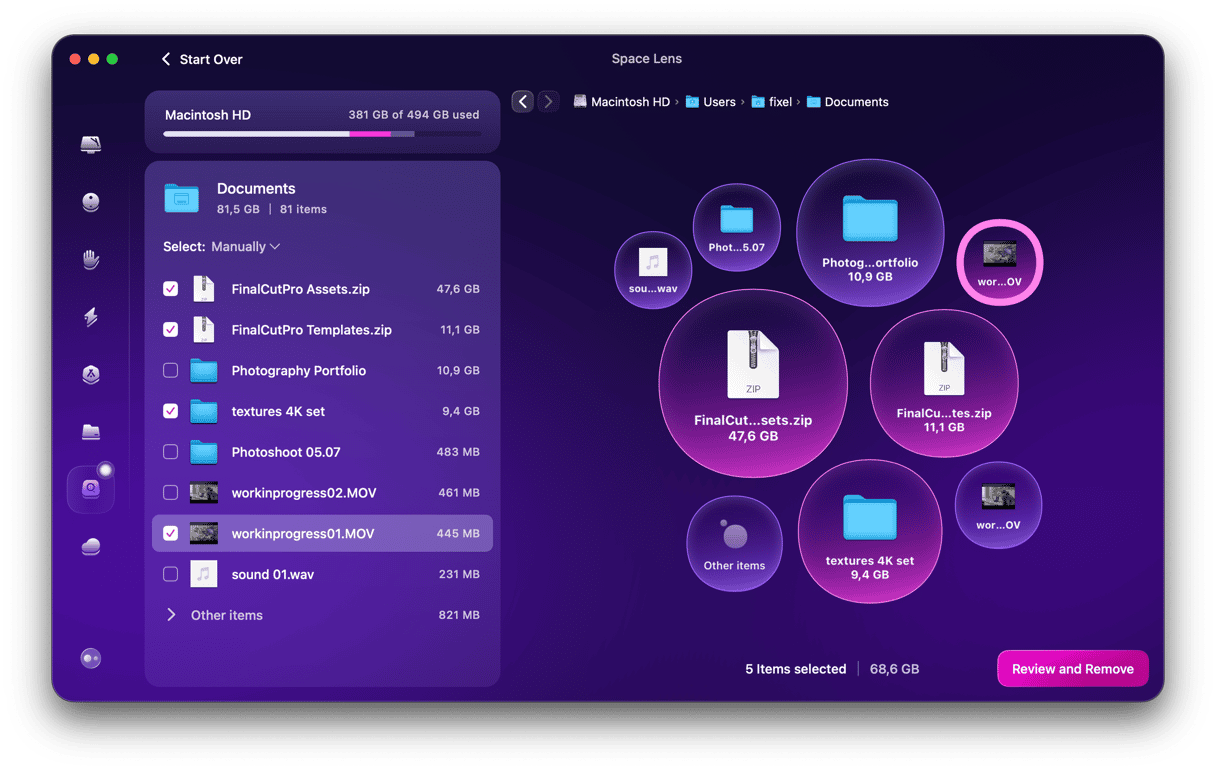
- Double-click the Users folder, then your user folder.
- Scroll to the Desktop folder and double-click it
- Select the screenshots you want to delete and click Review and Remove.
- Once happy with the selection, click Remove.


Deleting screenshots is a good way to free up space on your Mac because it’s easy to take lots of them and forget about them sitting in a Stack on your Desktop. Follow the steps above to delete the ones you don’t need on a regular basis.