Apple has introduced several security measures in recent macOS versions and Macs, including the T2 security chip in later Intel-based Macs, the secure enclave in Macs with Apple silicon, and the separation of system and data volumes in recent versions of macOS. All that security is great, but it does sometimes mean that things go wrong, and when they do, you can be locked out of your Mac. In this article, we’ll show you how to remove the “enter a password to unlock the disk Macintosh HD” message that might appear on the screen when you boot your Mac.
Why does “enter a password to unlock the disk Macintosh HD” appear?
There are a couple of circumstances in which you might expect to have to enter a password to access a disk, such as when FileVault is turned on or the disk is formatted as APFS encrypted. However, that’s not what’s happening here.
The issue here is that something has gone wrong:
- The Mac you are trying to log in to had a previous owner who didn’t erase it properly. For example, if they erased the system volume but not the data volume, that would cause the error.
- You are trying to log in using the same account details as the previous owner, but a different Apple Account (formerly Apple ID).
- You have booted from an external disk and are trying to access the internal SSD and FileVault is turned on.

Tip: How to erase and reset your Mac correctly
If you need to erase your Mac before giving it away or selling it, the correct method is to use the Transfer or Reset option in System Settings. It works on a Mac with Apple silicon or an Intel-based Mac with the T2 security chip running macOS Monterey or later. Remember to back up your data first. In macOS Monterey, open System Preferences, click System Preferences in the menu bar, and choose Erase All Content. In macOS Ventura or later, launch System Settings and choose General > Transfer or Reset > Erase All Content and Settings. Follow the instructions on the screen to complete the reset. When it’s done, your Mac will restart, and you can set it up as you would a new Mac.

How to fix “enter a password to unlock the disk Macintosh HD”
1. Type in your admin password
Once you’ve typed in the password, you should see an invitation to ‘remember’ it in keychain. Select the checkbox and press Return. If your admin password doesn’t unlock the disk, try the admin password of the person who owned the Mac before you, if you know it.
If that worked, you will have to erase the data volume that is causing the message to appear. See step 2 for how to do that. If it didn’t work, you will need to boot your Mac in recovery mode. We’ll show that, too, later in the article.
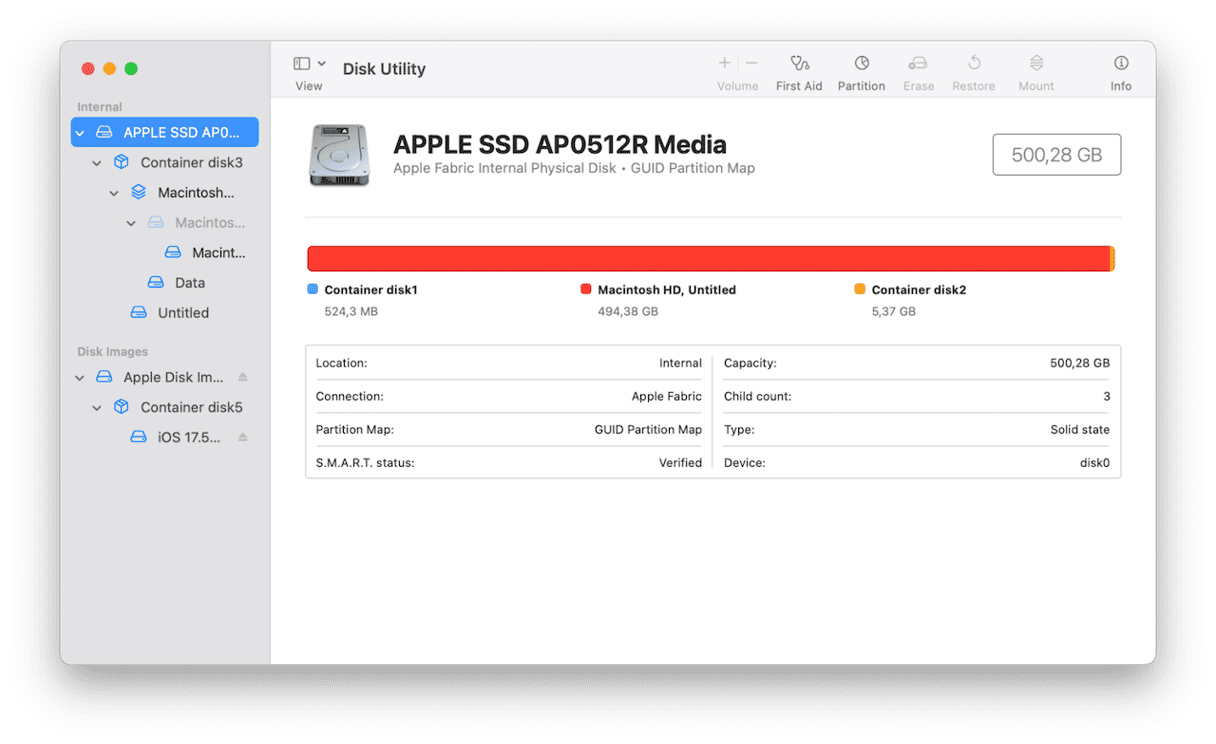
2. Delete the old data partition
If “enter a password to unlock the disk Macintosh HD” keeps popping up, it may be that the previous owner didn’t erase the Mac correctly. So, it’s likely there is an old data partition as well as the one that belongs to your account. Here’s what to do:
- Go to Applications > Utilities and open Disk Utility.
- Select the Data volume that is grayed out in the sidebar (Make sure you don’t choose the one that is not grayed out).
- Above Volume in the toolbar, click the ‘-’ button.
- Quit Disk Utility.

Important: keep your Mac free from malware
While the “enter a password to unlock the disk Macintosh HD” isn’t caused by malware, it doesn’t mean that your Mac is safe from malicious files that could steal your data or cause your Mac to be unusable. It’s a good idea to use specialist software to scan for malware, as well as manage browser data and application permissions. The easiest way to do all of that with just a couple of clicks is CleanMyMac’s Protection feature. You can set it up to run a deep scan, a quick scan, or a balance between the two, and choose different scan options. Start your free CleanMyMac trial. Then, open the app and click Protection > Scan. If malware has been found, click Remove.

3. Reinstall macOS
If the options above didn’t work, the last option is to erase your startup disk completely and reinstall macOS from scratch. Before you do that, you should back up your Mac, preferably using Time Machine because that makes it easier to restore your data compared with third-party options.
- Boot your Mac into recovery mode by using the instructions on this page on Apple’s support site. Make sure you choose either a Mac with Apple silicon or an Intel-based Mac, depending on which chip you have.
- When you are asked to log in, use your admin name and password.
- Choose Disk Utility from macOS Utilities and click Continue.
- Click View in the top left corner and choose Show all Devices.
- Select ‘Apple SSD’ at the top of the list of volumes.
- Click Erase in the toolbar.
- Give the disk a name and choose APFS as the format and GUID as the scheme.
- Click Erase and wait for the disk to be erased.
- Quit Disk Utility.
- Choose Reinstall macOS from macOS Utilities.
- Once macOS has installed, you will be able to restore your data and settings from Time Machine when your Mac restarts.


The message “enter a password to unlock the disk Macintosh HD” could be an indication that the previous owner of your Mac hasn’t erased it correctly. Or it could be an issue with FileVault or the keychain. If you see the message on your Mac, follow the steps above to get rid of it.