iCloud is a great place to store photos, as it means you can access them on all of your devices from anywhere in the world. But downloading photos to your Mac has its benefits, too.
First of all, Mac has greater disk space than other iOS devices and dwarfs the 5GB of free storage offered by iCloud. You can also easily connect an external hard drive for extra storage whenever you need it. As it’s recommended to back up your photos in more than one place, keeping them on your Mac makes sense. That way, you’ll be able to access them offline.
Secondly, Mac is the best platform from which to organize, manage, and edit your photos. Apps such as Spotlight and iMovie and third-party tools like Adobe Photoshop give you control over your images that no other device can offer.
But whatever your reasons, you’ve come here to find out how to get pictures from iCloud, so let’s get into showing you how to do exactly that.
First, make sure your Mac has enough disk space
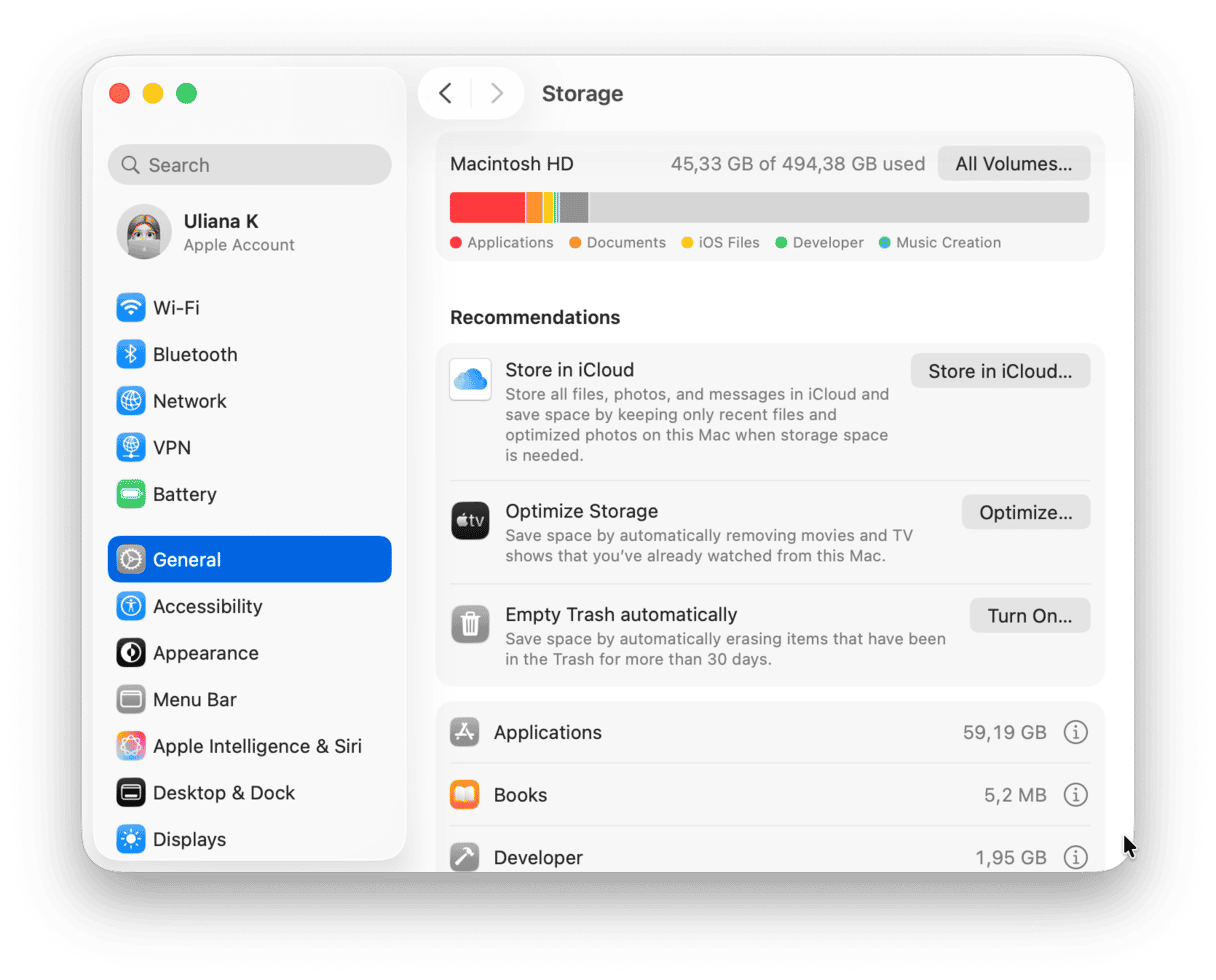
If you plan on downloading all of your iCloud photos to your Mac, you could be looking at quite a few gigabytes, particularly if you’re on one of the paid iCloud storage plans. So before you download, you need to check that you have enough space on your disk.
How to check your available hard drive space
On macOS Ventura or later:
- Go to System Settings > General.
- Navigate to Storage.
On macOS Monterey or older:
- Select About This Mac from the Apple menu.
- Click More Info, then click Storage.
How to clean up your startup disk
If you’re running macOS Sierra or higher, Mac has a built-in Optimize Storage feature that stops from your hard drive becoming full by moving files over to the cloud. The problem is that it moves them to iCloud, which might well be already full with photos. So it’s not ideal.
Fortunately, you don’t have to rely on Optimize Storage. You can go ahead and free up space yourself by cleaning up cache files, getting rid of localization files, removing old iOS backups, and emptying out the Trash. Be warned, though, not all of these methods are quick and straightforward.
If you like to know how to free up disk space manually, check out our article “What is Startup Disk Full on Mac OS?”
Right now, though, we’re just going to show you the easy way to get rid of old files and free up space. This way involves CleanMyMac. This utility tool scans your entire system for junk files and removes them in minutes to free up gigabytes of space.
You can test CleanMyMac for 7 days at no extra charge — get your free trial here. Do it now.
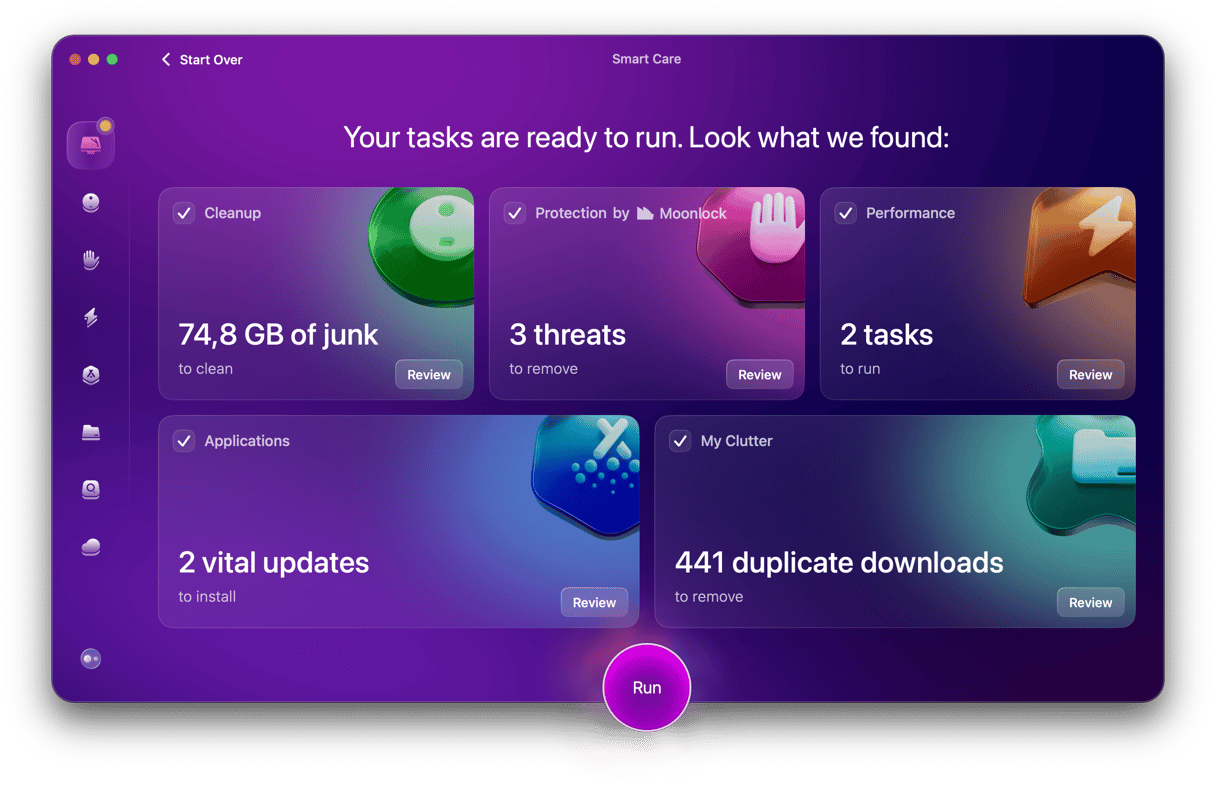
...Done it? Great! Here’s how to perform a smart cleanup to rid your system of unneeded files as well as optimize your Mac in a few clicks.
- Open CleanMyMac.
- Click Smart Care from the sidebar.
- Click Scan and wait while CleanMyMac scans your system for junk files that can be safely removed and maintenance tasks that can be run.
- Click Run and enjoy a whole lot more disk space.
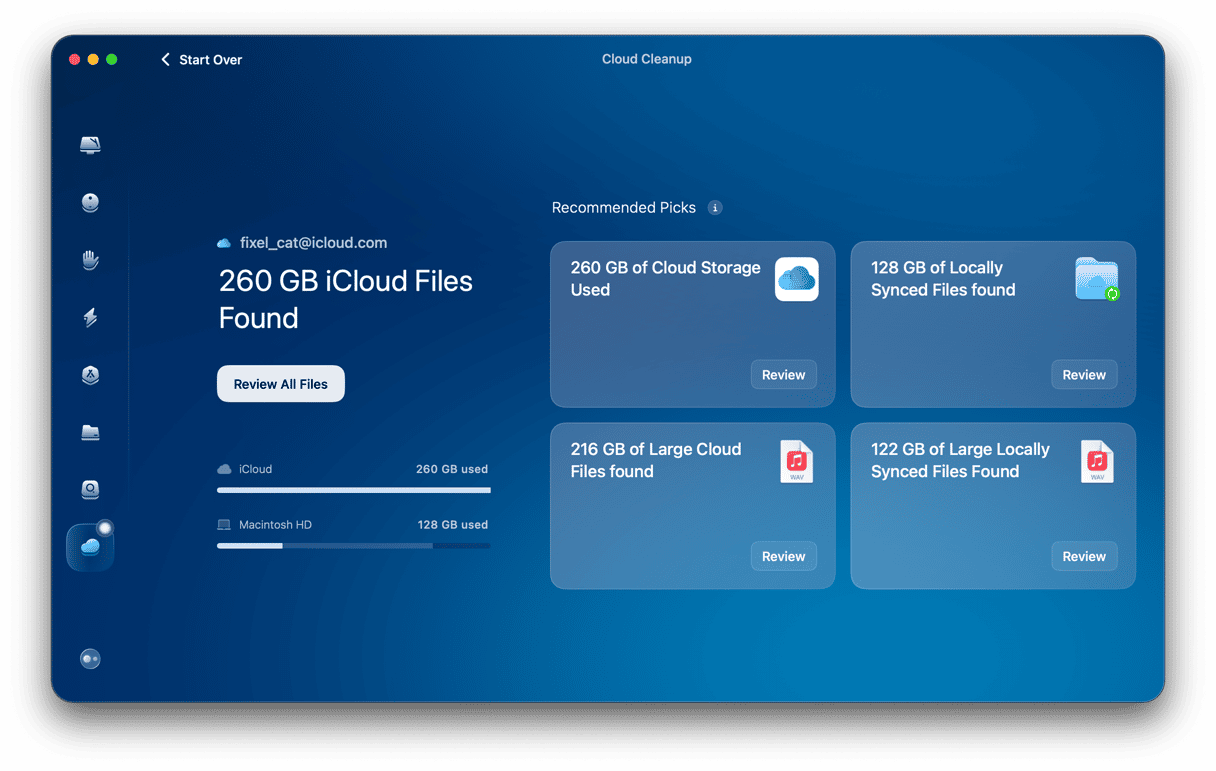
If you still want to use the Optimize Storage feature, make sure that iCloud Drive is not cluttered with unneeded files. CleanMyMac can help you out, too. It comes with the Cloud Cleanup feature that lets you scan your connected cloud storage (iCloud Drive, in this case) and reveal the largest files stored either in the cloud or locally. You can then choose what to remove or unsync to reclaim some space.
How to download individual photos from iCloud
Now that you’ve made room for your photos, let’s look at how to download from iCloud to Mac. If you want to pick and choose which photos to save to your computer, you’ll need to download images individually.

Here’s how it’s done:
- Open a browser and go to icloud.com, then log in with your Apple Account (aka Apple ID).
- Click Photos.
- Click any photo that you want to download. When it loads, click the download icon in the top right corner of the screen (a cloud with a down arrow) > Allow.
- Repeat with every photo that you want to download.
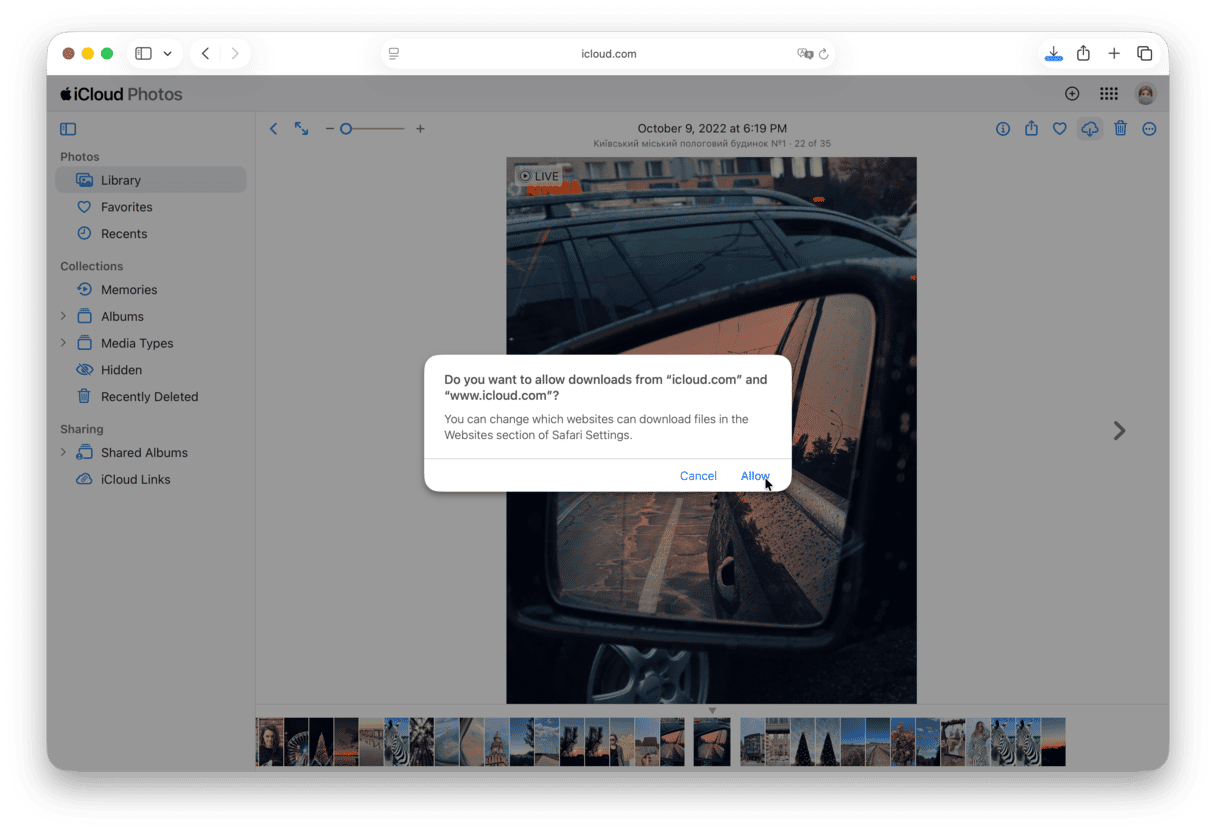
Any photo that you download will be sent to your Downloads folder unless you’ve specified otherwise. Note that it may be saved as a .zip archive, and you will need to unzip it.
How to download all photos from iCloud
Downloading individual photos is quick and easy. Unfortunately, when clicking on the download icon, there is no “download all” option. That’s because no such button exists. We wish it existed, and we hope that Apple will include it in future versions of iCloud, but for now, we have to make do with a workaround.
Because Apple also decided to remove the ability to Shift+click in iCloud.com, you’ll need to download files in bulk from the Photos app on your Mac.
Here’s how:
- Open Photos.
- When all of your images load, use Command+A to select them all.
- Once again, click the download icon > Allow.
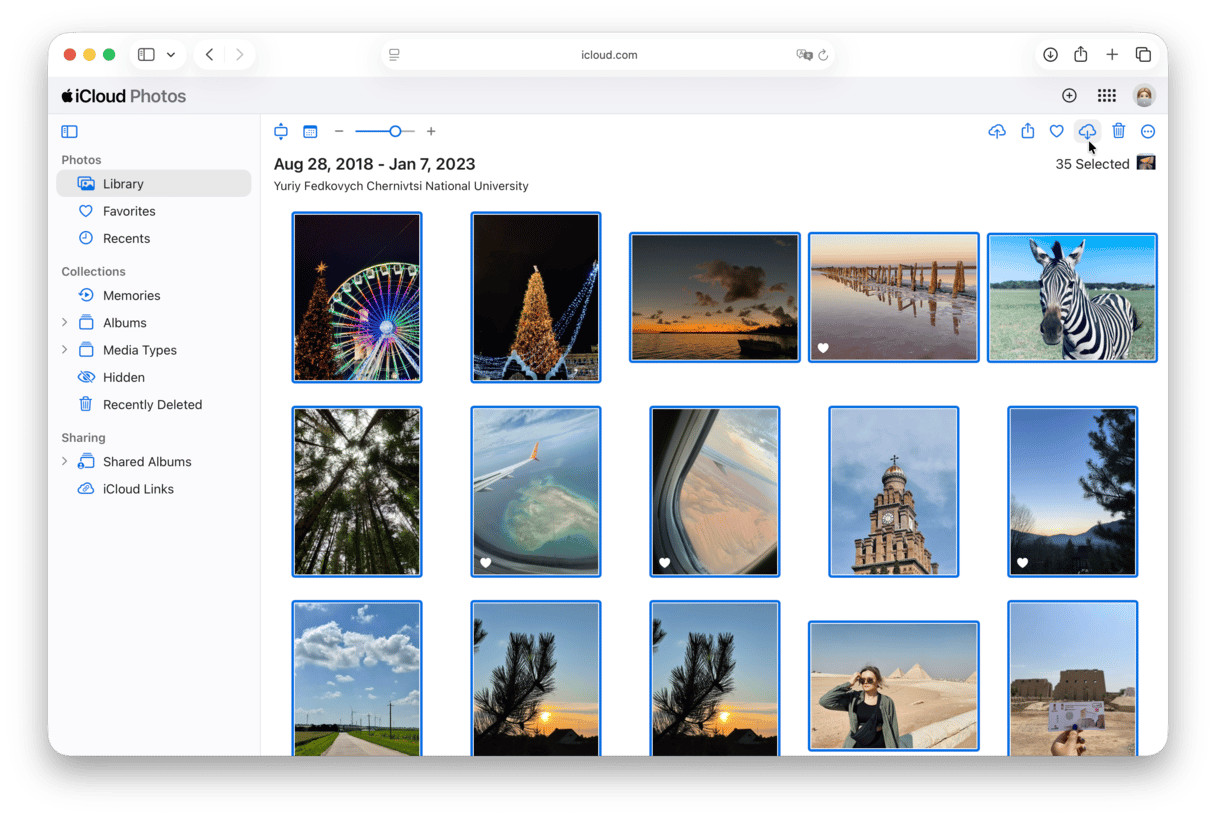
That’s it, job done!
You should make a regular habit of downloading images from your iCloud account to your Mac or external hard drive as an additional method of backup. It’s easy to do and ensures you can access your precious photos even if you have no internet connection. Before downloading in bulk, make sure to check how much disk space you have available and use CleanMyMac to quickly free up a few gigabytes.


