If there’s one piece of hardware that’s become essential in the latest years, it’s the webcam, or, as Apple calls it, FaceTime HD camera. All MacBook Airs and MacBook Pros come with a built-in camera, as does the iMac. But what do you do when you try to use that camera with FaceTime, Zoom, or Skype, and you get an error telling you there’s no connected camera on your MacBook or iMac? We’ll answer that question here.
What does ‘there is no connected camera on Mac’ error mean?
The good news is that in almost all cases, the error ‘no connected camera’ means that there is a software rather than hardware problem, and that can usually be fixed quite easily. It may mean that an application that was using the camera still appears to macOS to be using it or, more likely, that the app that wants to use it doesn’t have the necessary permission. One other possibility is that Screen Time is preventing the camera from being used.
If there is a hardware problem, the green light that indicates the camera is in use may flash. If that happens, you should contact Apple.
How to fix it when the camera is not working
The first thing to check is that the app you’re trying to use with the camera and macOS itself are up to date. Then, check that the app has permission to use your camera.
1. Update software
The first thing to do when you have any kind of problem, like the camera not working on your Mac, is to check that both macOS and the application you are using are up to date.
To check macOS, click on the Apple menu and choose System Settings > General > Software Update.

To check the app, if it’s one you downloaded from the App Store, find it in the Store, and it will tell you if there is an update.

If not, click on the application’s name in the menu bar and choose Check for Updates.
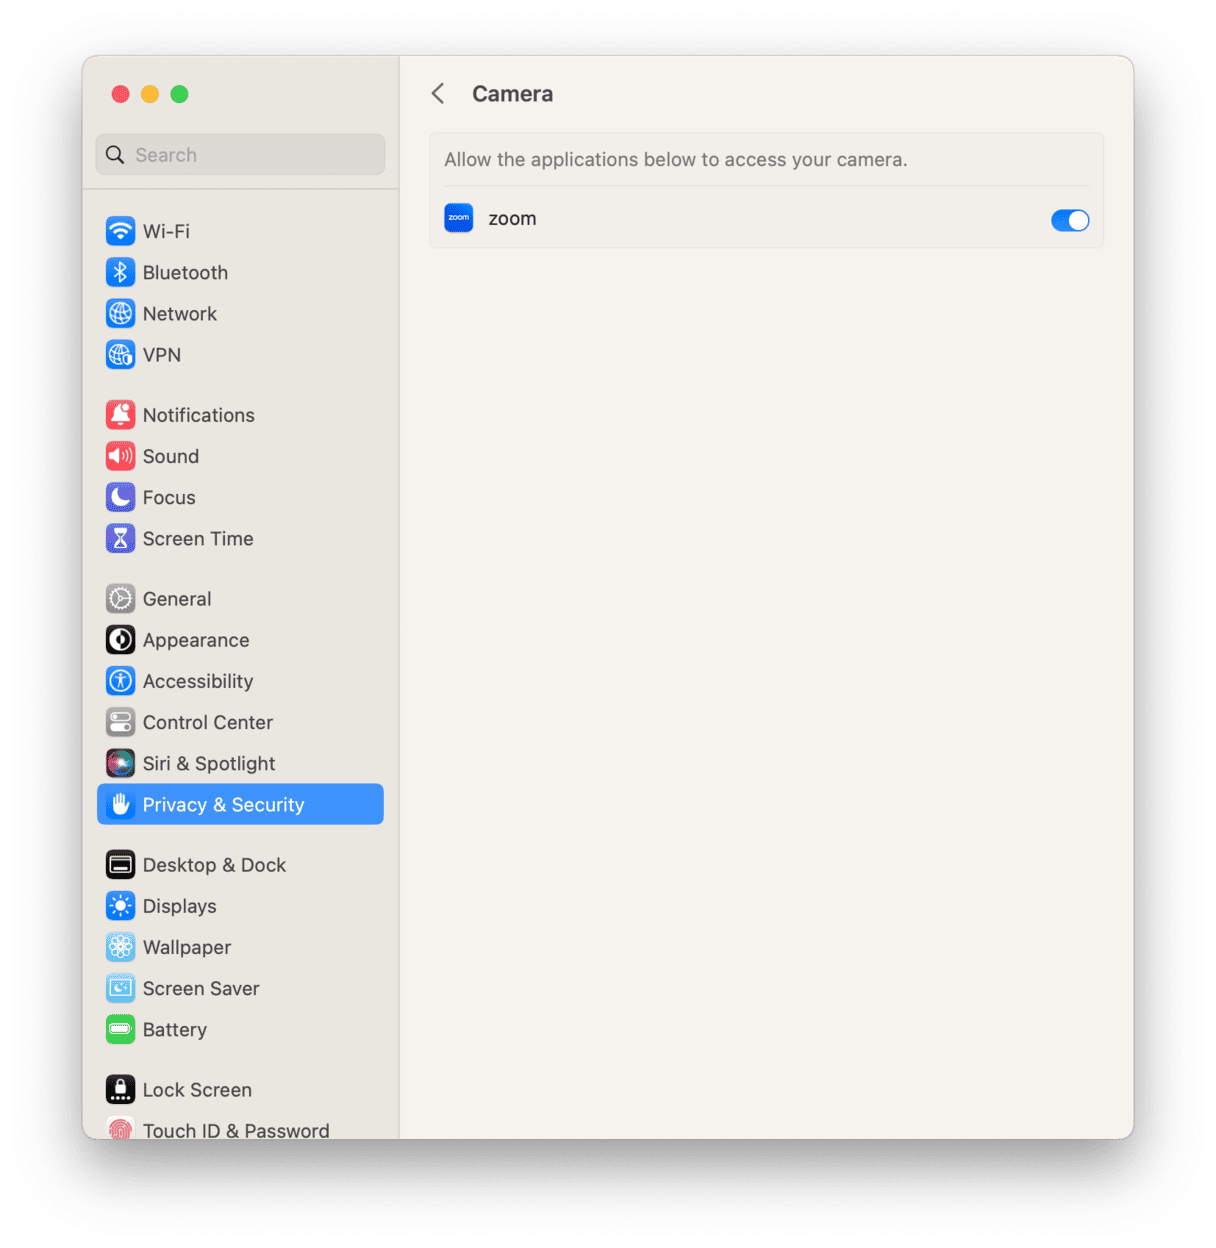
2. Check Permissions
Sometimes, you may see this error message due to corrupted permissions. Here’s how to check app permissions:
- Click on the Apple menu and choose System Settings.
- Choose the Privacy & Security pane.
- Click Camera in the list.
- Make sure the box next to the application you want to use is checked.
- You might be told you have to quit the application and reopen it to use the camera. If so, do that.

You can also use CleanMyMac’s Performance module to run maintenance tasks that can fix lots of problems on your Mac, including issues with the camera. You can download it for free here.

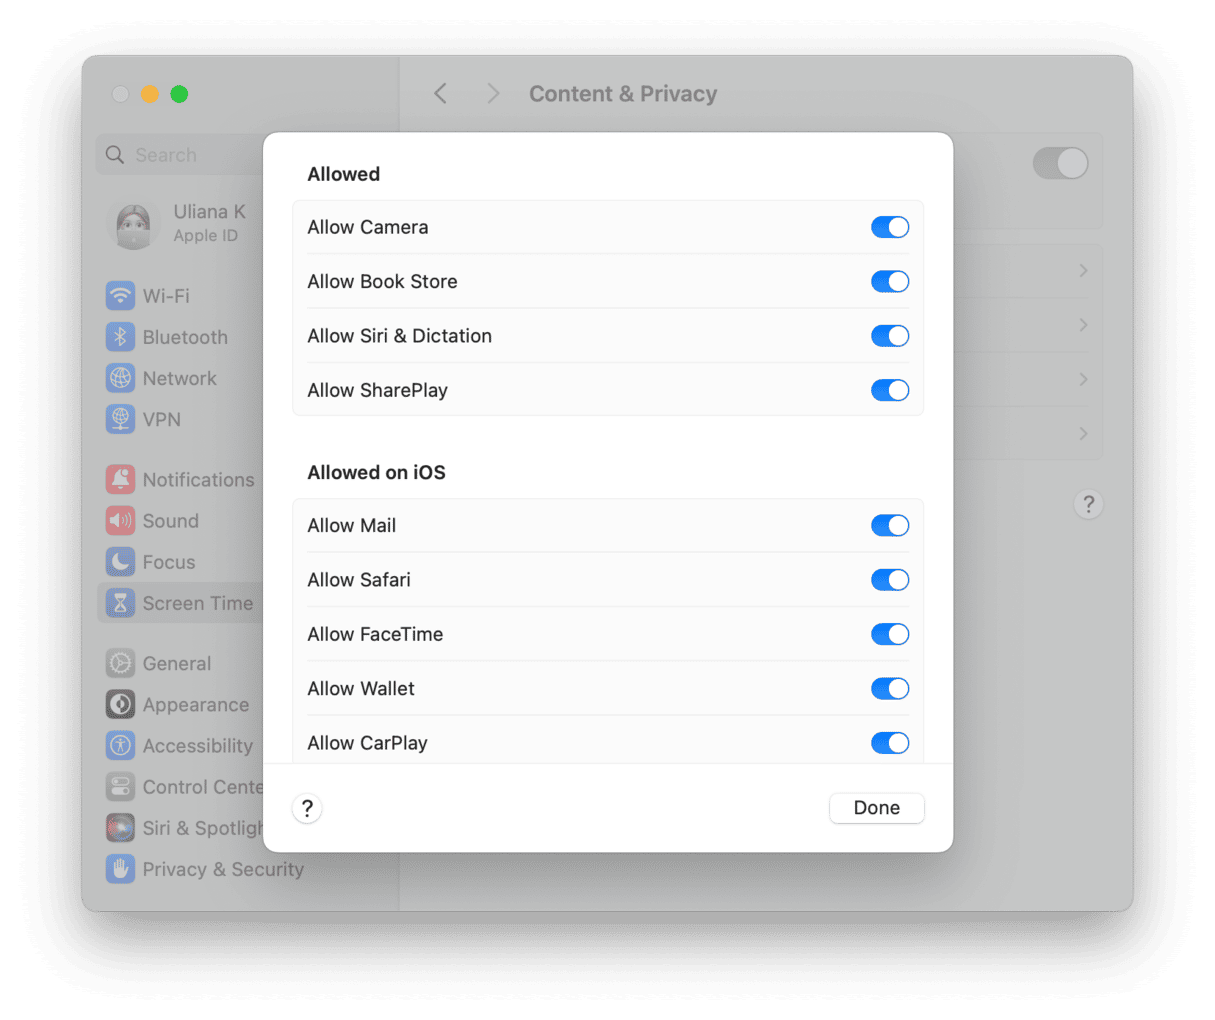
3. Turn off Screen Time
If you use Screen Time, it may be preventing the camera from being used. If you don’t use Screen Time, the options below will be greyed out, and it won’t be the cause of the problem.
- In System Settings, select the Screen Time pane.
- Click Continue if prompted.
- In the list, choose Content & Privacy.
- In the App Restrictions section, make sure Allow Camera is turned on.
- Select App Limits in the sidebar.
- If there’s an app in the list that you need to use with the camera, make sure to remove the limit for this app.


4. Reset the SMC
Resetting the system management chip (SMC) may fix the problem if you have an Intel-based Mac. The method for resetting the SMC depends on whether you have a desktop Mac with a T2 security chip, a MacBook with a T2 chip, or a Mac without a T2 chip. You can find detailed instructions on Apple’s website here.
It may be alarming when you see a message telling you that there is no connected camera on your Mac. But if you follow the steps above, you should be able to fix it and get up and running again with your camera very quickly.