Running into the dreaded macOS Tahoe not enough disk space message? I knew macOS Tahoe was big, but I didn't expect the installer to completely halt because of space issues. I've been testing this on my own Mac for a few days, figuring out what actually works and what doesn't, so I could share some real solutions.
If you've been wondering how much space you'll need for the latest macOS, I'll walk you through the requirements, how to check your storage, and the exact steps I used to clear enough space without messing up my files. So let's start by walking through the storage requirements.
macOS Tahoe storage requirements
You'll be able to check Apple's lists of official requirements, but honestly, I found they can be misleading. According to my testing, macOS Tahoe's size isn't just about the installer itself. The full installation requires:
- Installer size: 14 GB (download)
- Temporary installation space: 20–25 GB free
- Post-installation buffer: At least 10 GB for smooth performance after upgrading
So, realistically, how much space does macOS Tahoe need? Well, I recommend at least 40 GB of free space before upgrading. When I tried using only 28 GB free, the installer failed halfway through. On my second attempt, after clearing more space, it worked flawlessly.
How to check storage on a MacBook
I know it sounds basic, but before even considering installing macOS Tahoe, you need to check your current storage situation. Here's a quick reminder:
- Go to Apple menu > System Settings > General > Storage.
- Wait a moment for the calculation to show.
- Take a look at the categories listed below, and keep an eye out for System Data. If it's huge (mine was over 60 GB), that's a sign to clean caches and logs.

If your storage already looks tight or System Data is bloated, don't jump into the installation just yet. Freeing up space now can save you from a failed upgrade later. Here's exactly what worked for me to clear enough space for Tahoe.
How to free up space on Mac (7 tested tips)
Ok, so you know the macOS Tahoe size and how to check your storage, now it's time to cover tips on freeing up space, so you can start a successful download. I tried a mix of methods and tools, and this is what worked for me.
1. Restart and clear temporary caches
Yes, the oldest trick in the book still works. And whenever gigabytes count, there's no reason not to run a quick restart. Head to your main Apple menu and hit Restart.

2. Remove your system junk
This has to be my biggest win of the entire Mac cleanup process. I used the Cleanup feature from CleanMyMac, and it cleared gigabytes of outdated caches, broken login items, and app leftovers that I had no idea existed. Yes, I've tried manual cache deletion, but this tool is simply way faster; plus it doesn't touch essential system files, you can't accidentally delete anything important, and locates the hard-to-reach stuff that a manual search just might not uncover. Here's how to use it:
- Get your free CleanMyMac trial — check out how all tools work for 7 days at no cost.
- Open and select Cleanup > Scan.
- Click Clean.

3. Delete your iOS backups
If you've ever synced your iPhone or iPad, then it's a good idea to check how much space backups are taking up. Here's how:
- Connect your iPad or iPhone and open the Finder.
- Select the device under Locations.
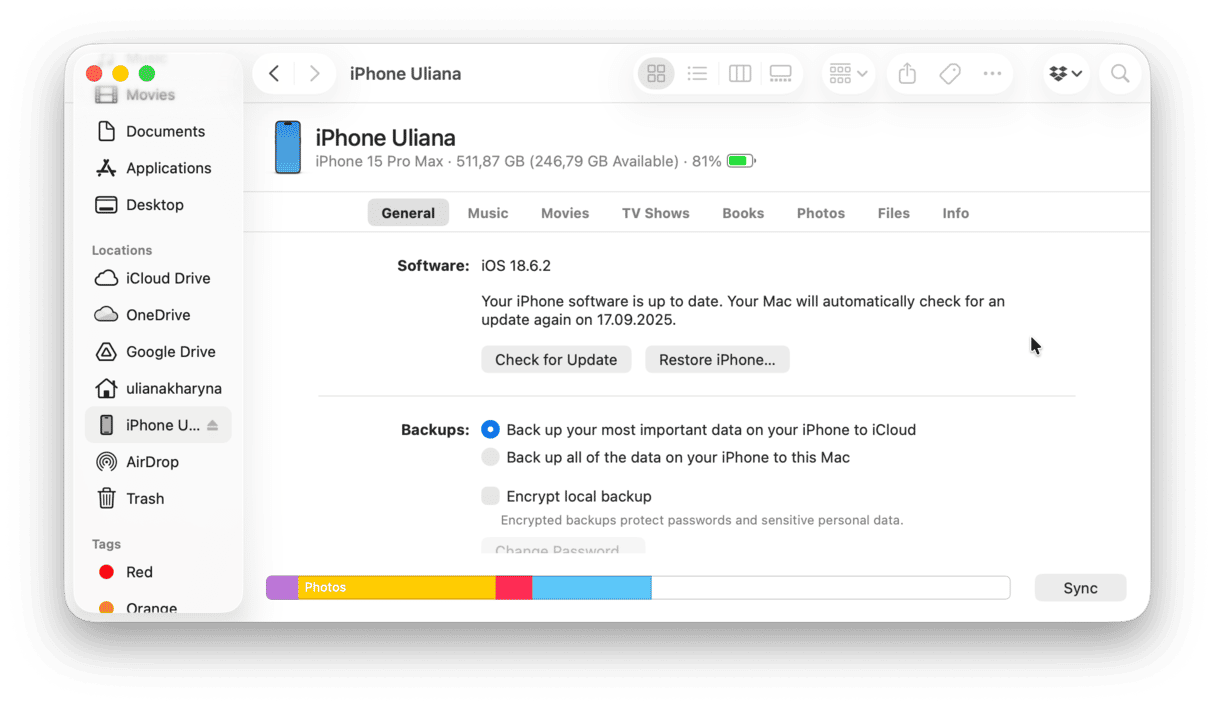
- Then, in the General tab, find the Backups section.
- Click Manage Backups. (A list of stored device backups will pop up.)
- Delete the old ones you don't need, right-click, and select Delete.


I kept only the latest backup and immediately freed up over 10 GB.
4. Hunt down duplicate or oversized media files
I used the Finder's built-in search filters to find large media files; here's how:
- Open the Finder and next to the search bar, select the three dots > Show Search Criteria (you may need to start typing anything to see this option).
- At the top, change "Kind" to "Other…", then select "File Size."
- Set it to "is greater than" and type 1000 MB (1 GB).
- Add a second filter for Kind > Movie or Images to narrow it down.

I immediately spotted two old duplicate videos, together over 15 GB, that were already in cloud storage. Deleted them without a second thought. If you shoot RAW photos or video, this step alone can free tens of gigabytes.
5. Clean out old forgotten files
Although the above tip works and is really useful, it's a lot of manual digging, and it has limitations. Honestly, I normally avoid scanning my whole Mac manually because it's too easy to miss stuff buried in obscure folders. CleanMyMac comes with a useful feature called My Clutter, which can clean your entire system in minutes, listing all files by size and type, and even last accessed for really simple removal. Here's how it works:
- Open the app again and click My Clutter > Scan.
- Click Review All Files.
- Browse the categories, select items you don't want, and click Remove.


6. Remove Time Machine local snapshots
This one is rarely mentioned, but it freed up more than 8 GB for me. If you use Time Machine, macOS stores local snapshots even if you have an external drive. They build up quietly.
How I cleared them:
- Open Terminal and type:
tmutil listlocalsnapshots / - Delete each one with:
sudo tmutil deletelocalsnapshots [snapshotname]

7. Clear your Downloads folder
The Downloads folder is a silent space that I hadn't touched in months, and it was stuffed with old DMG installers, PDFs, and random ZIP files, over 8 GB just sitting there.
- Open Finder > Downloads.
- Sort by Size or Date Last Opened (View > Show View Options > enable these columns).
- Delete or move anything you don't need, especially old DMG or ZIP files you've already used.

Make sure you empty your Trash afterwards.
So, now you know exactly what the macOS Tahoe space requirements are and how to prep your Mac.