Mac users download lots of files daily, such as docs, PDF invoices or receipts, music, images, supporting application files, and more. Keeping track of them can be tricky and exhausting. This tempts us to let them sit in the Downloads folder forever. There is only one problem with that — they take up lots of space on your Mac. In this article, we’ll show you how to find the files you’ve downloaded and keep them organized.
How to find downloads on your Mac
The default location for most downloads on your Mac is the Downloads folder located inside your user folder. You should be able to see your Downloads folder in the Finder sidebar under ‘Favorites.’ If not, do the following:
- Click the Finder in the Dock.
- Choose the Finder menu, then Settings.
- Select Sidebar, then check the box next to Downloads.
- Quit Settings.

In addition to the Finder sidebar, there are alternative ways to find the Downloads folder:
- In the Finder, click Go > Downloads.

- With the Finder open, press Command + Shift + G and paste the following path: ~/Users >[your username] > Downloads. Press Return.

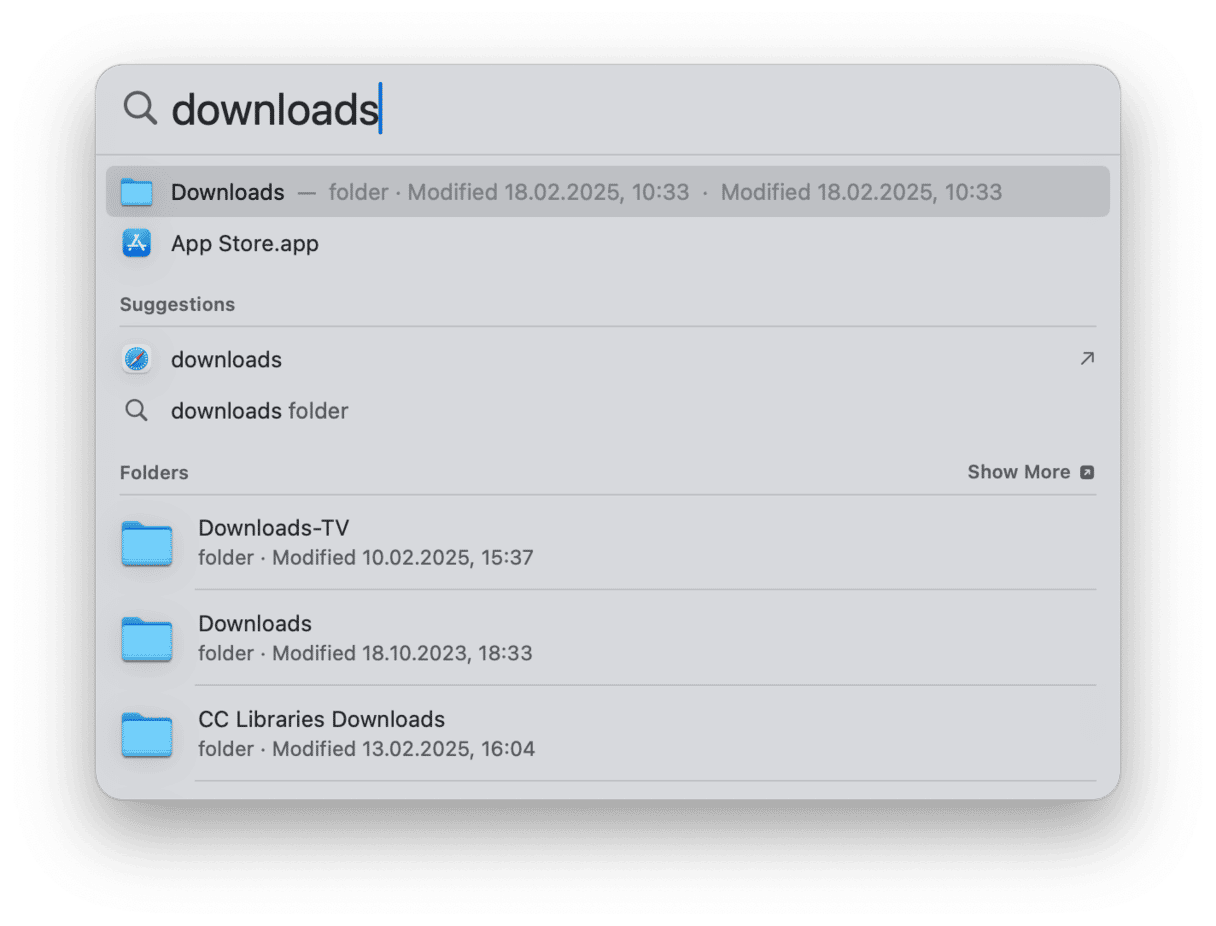
- Use the Spotlight search — just type Downloads and choose folder. If you know the exact name of the downloaded file you are trying to find, you can type that.

When you open the Downloads folder, drag it to the Dock — right next to Trash bin. Make sure not to send it to Trash, though. Or simply right-click Downloads from the sidebar and choose Add to Dock. macOS will now create a link to this folder. Next time you need to open it, all you have to do is click it from the Dock. You will no longer have to open it from the Finder.
Furthermore, you can check Downloads lists in browsers and open files you downloaded from there:
- In Safari, click an arrow next to the Share icon. Right-click a file and choose Show in Finder or double-click a file to open it.
- In Chrome, click three vertical dots > Downloads. Select a file and click Show in Finder.
- In Firefox, click three horizontal lines > Downloads. Right-click a file and choose Show in Finder. You can also double-click a file to open it.
Besides downloads, files transferred to your Mac via AirDrop are also stored in the Downloads folder. There are exceptions, like music downloaded from Apple Music. In this case, files are placed in Music > Music > Media > Apple Music inside your user folder. Mail attachments can be saved anywhere you like, but if you don’t manually save them, they are automatically stored in your user Library.
How to change downloads location on Mac
The process of changing where downloads are saved differs depending on which application was used to download them. Generally, that application is a web browser. So here’s a guide on how to change the download location in the most common browsers on the Mac.
Change the download locations in Safari
- Open Safari.
- Click the Safari menu and choose Settings.
- Select the General tab.
- Click the menu next to ‘File download location.’
- Choose Other and navigate to the folder where you want to save downloads.
- Click Select.
- You can also choose ‘Ask for each download’ at step 5, and you will be able to choose the download location for every download.

Change the download location in Chrome
- Open Chrome and click the three dots on the right of the address bar.
- Choose Settings.
- Click Downloads. You can also type chrome://settings/downloads in the address bar to navigate directly to downloads settings.
- Click Change and navigate to the folder where you want to save Downloads.
- Click Select.

Change the download location in Firefox
- Open Firefox.
- Click the three lines on the right in the address bar and choose Settings.
- Choose General in the menu on the left.
- Scroll down to Downloads.
- Click Choose and navigate to the folder where you want to save downloads.
- Choose Open.
How to organize your Downloads folder on Mac
It’s good practice to transfer your files out of your Downloads folder as soon as you can simply because it wasn’t intended to be a place where you store files. And the more files you download, the quicker it becomes cluttered.
The easiest way to move files is to drag them into another folder. However, there are some additional tips for you.
1. Organize the Downloads folder with a cleaner app
The easiest way to organize files on your Mac is to use CleanMyMac. This app has the My Clutter feature designed for this purpose. All you have to do is run a scan: the app will identify large & old files, duplicates, similar images, and downloads letting you remove unneeded items and tidy up your Mac. You can also choose the Downloads folder as a target location for the scan.

Get your free CleanMyMac trial.
2. Change the view of the Mac Downloads folder
If you have a heap of files in your Downloads folder and aren’t ready to move them yet, you can at least make it easier to find the ones you need. Try this simple hack:
- Open your Downloads folder and click the three-dot circle in the toolbar.
- Click Use Groups.
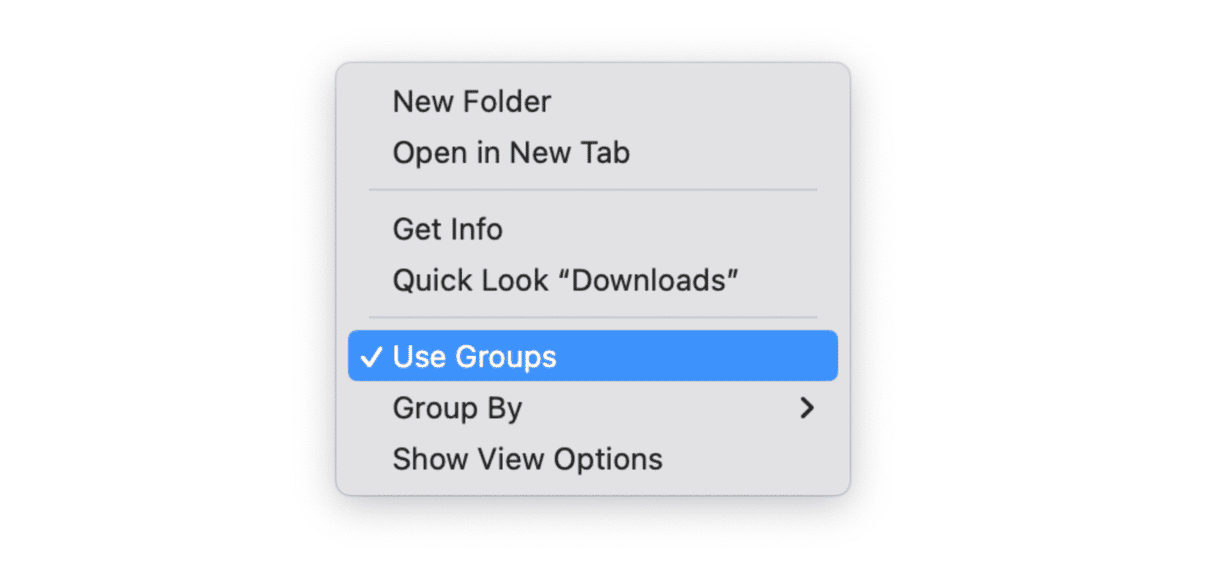
- Once again, click three dots and choose how to group files (e.g., by type).
- Press and hold the Option key and click the same menu again. This time, choose how to sort files within each group (e.g., by date added).


You can use Groups with a list, column, or icon view. Groups make it crystal clear to view and locate files in your Downloads folder.
3. Delete large and old downloads on your Mac manually
Above, we introduced an automatic tool to remove large and old files from your Mac. So, you can use either CleanMyMac or another reputable Mac cleaner app. For additional tips, check out this review of best cleaner software.
But you can also do it manually, and all you have to do is find and drag files manually from your Downloads folder to the Trash. Simple as it may sound, it’s a lengthy process because you have to go through all the files, deciding which one to trash and which one to keep. Then, you need to drag a big chunk of files, risking deleting those you want to keep.
To make the process somehow faster, you can use built-in tools that come with the Finder:
- Open a new Finder window.
- Start typing something in the search bar top right and press Return.
- Now, click + choose Kind from the filter that appears. Choose the file type you need to find.
- You can click + and choose Other to add the size parameter (enter File Size in the search bar). Choose a proper file size for the search.
- You can also add Created date and any other parameters that will make the search easier and more accurate.
- Send files you don’t need to the Trash.

Hopefully, you recognized the importance of clearing and organizing the Downloads folder on your Mac. To do that, you can either follow the steps described in this article or use CleanMyMac to spot, organize, and eliminate downloads and other files for good.


