Apple has made impressive improvements to Mac and macOS in recent years, and they have led to many more games being available for Mac users to play natively than there were previously. But there are still a great many popular games that don’t have native versions for Mac. Does that mean you can’t play them on your MacBook or iMac? No. It just means you’ll need to take a few extra steps to get there. In this article, we’ll show you how to play one of those games, Schedule 1, on your Mac.
What is Schedule 1?
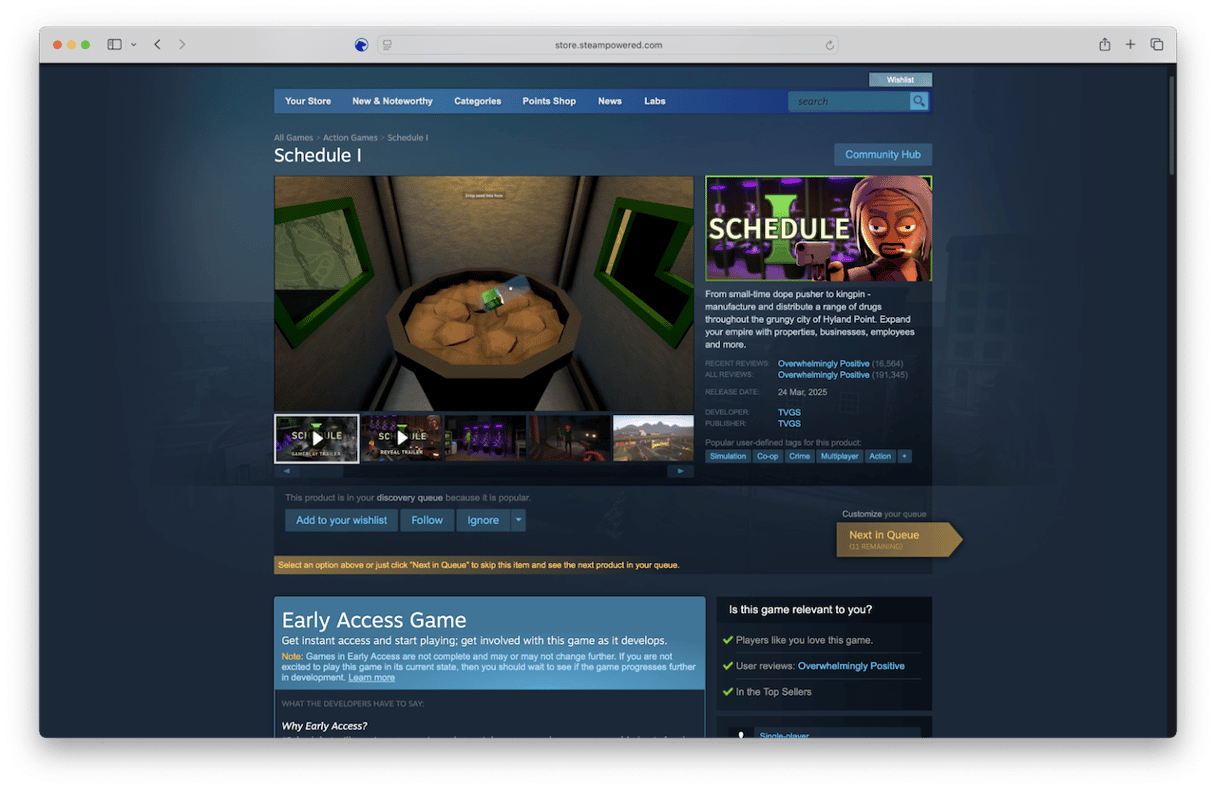
Schedule 1 is a first-person management sim that combines the underworld crime elements of GTA with the cozy feel of Stardew Valley or Animal Crossing. Your task as a player is to grow, harvest, and sell cannabis. You start off as a small cannabis farmer selling their wares locally, and the objective of the game is to grow that business into a huge empire. The emphasis is on goofy, cozy fun rather than the out and out thrills and spills of GTA. It’s available to download from Steam, but not for Mac.

Can I play Schedule 1 on Mac
Yes! As with other non-Mac native games, there are a number of different options for playing Schedule 1 on Mac.
- Use a compatibility layer like CrossOver.
- Install Windows on your Mac using a virtualization tool like Parallels Desktop.
- If you have an Intel-based Mac, create a Boot Camp partition and install Windows on that,
- Play it on a cloud gaming service like Boosteroid, Shadow, or AirGPU,
How to prepare your Mac for playing Schedule 1
Playing Schedule 1 on your Mac is likely to put pressure on its resources like RAM, GPU and CPU. So, before you start, it’s a good idea to prepare by running maintenance tasks and reviewing log in and background items (which can slow your Mac down). Maintenance tasks include reindexing Spotlight, thinning out Time Machine snapshots, repairing disk permissions, and flushing DNS cache.
The easiest way to do all of that and review login and background items is to use the Performance feature in CleanMyMac. It scans your Mac and then recommends tasks to run. You can run them with just a click. It will also show you all the login items and background items that are running and allow you to remove them.
Here’s how to optimize your Mac for game:
- Get your free CleanMyMac trial.
- Open the app and click Performance > Scan.
- Click Run Tasks.


If you want to choose tasks before running them, click View All Tasks. Also, review background extension and login items using the same tool. Now, to the fun part!
How to play Schedule 1 on Mac
There are several different ways to play Schedule 1 on Mac. We’ll show you them all below.
1. Use CrossOver
CrossOver is a compatibility layer that allows you to run Windows apps on your Mac without installing Windows itself. There are several compatibility layers available, including some that are free. But CrossOver is the easiest to use and the most suitable for most people.
Here’s how it works:
- Go to Codeavers’ website and download CrossOver. If you don’t want to buy it just yet, there’s a free trial available.
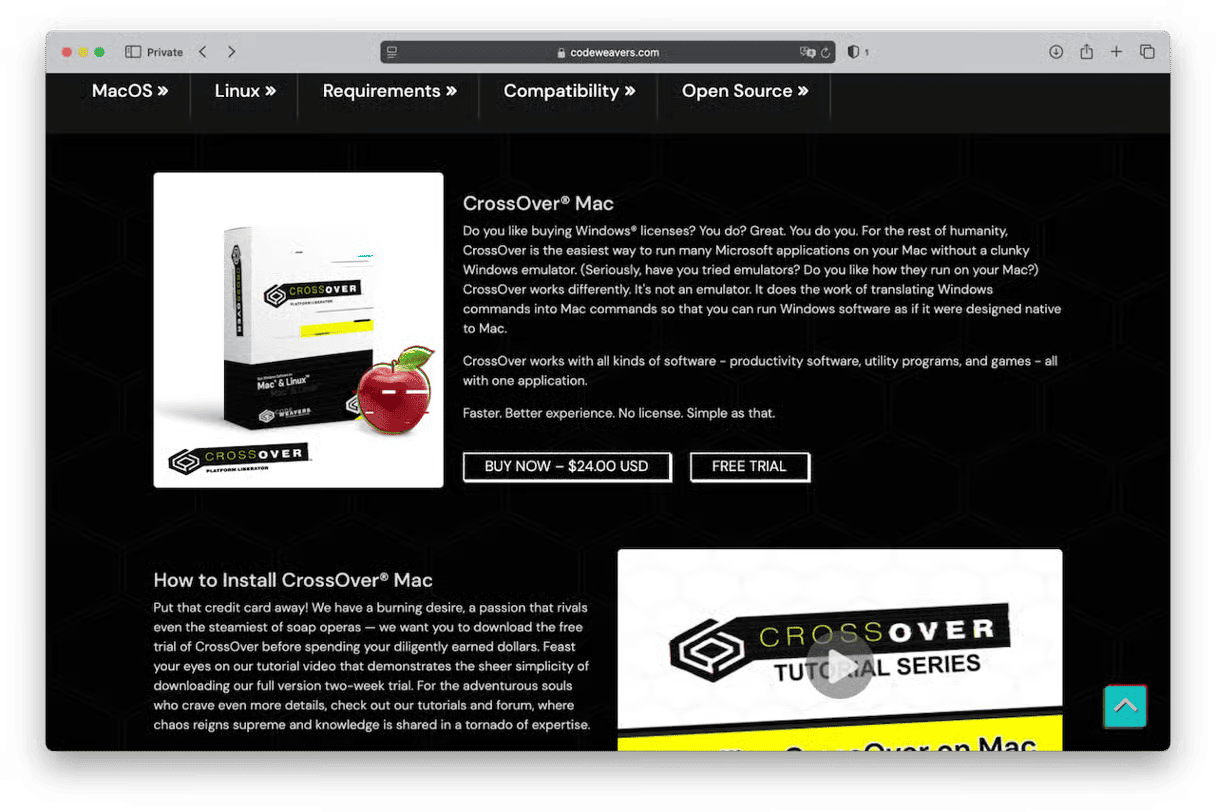
- When it has finished downloading, drag it to your Applications folder.
- Double-click CrossOver to open it.
- At the bottom right of the CrossOver window, click Install.
- Search for Steam. When it appears, install it.
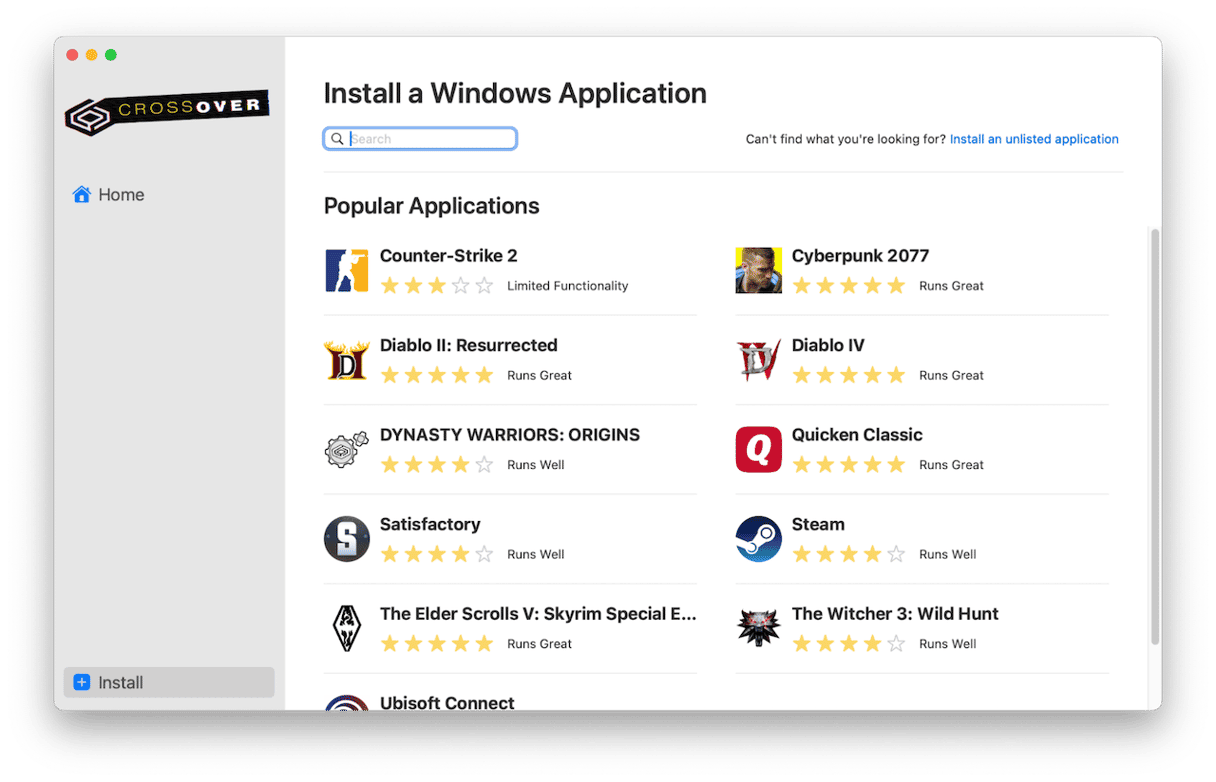
- Once Steam has installed in CrossOver, launch it and search for Schedule 1.
- When Schedule 1 has installed in Steam, launch it and start playing.


Pro Tip: Boost CrossOver performance
Playing a game using a compatibility layer can place demands on your Mac’s resources. However, there are a couple of settings in CrossOver you can change to help with that.
- Quit Schedule 1 and Steam.
- Click the CrossOver menu and choose Settings.
- Enable D3DMetal and MSync for the Steam app.
- Restart Steam and launch Schedule 1.
2. Use Parallels Desktop
This is only a good option if you already have Parallels Desktop or another virtualization tool installed. If not, it’s better, and cheaper, to use a compatibility layer like CrossOver or Whisky. If you do have a virtualization tool installed, all you need to do is open a web browser in Windows, log in to your Steam account, download Schedule 1, and start playing.
3. Use Boot Camp
If you have an Intel-based Mac, you can create a Boot Camp partition, install Windows on it, then open a web browser, log in to your Steam Account, and download Schedule 1.
- Go to Applications > Utilities and double-click Boot Camp Assistant to launch it.
- Follow the instructions on the screen.
- If Boot Camp Assistant asks you, plug a USB stick into your Mac. That will be used to install Windows.
- When you are asked to specify the size of the partition you want to use for Boot Camp, set it to at least 64GB.
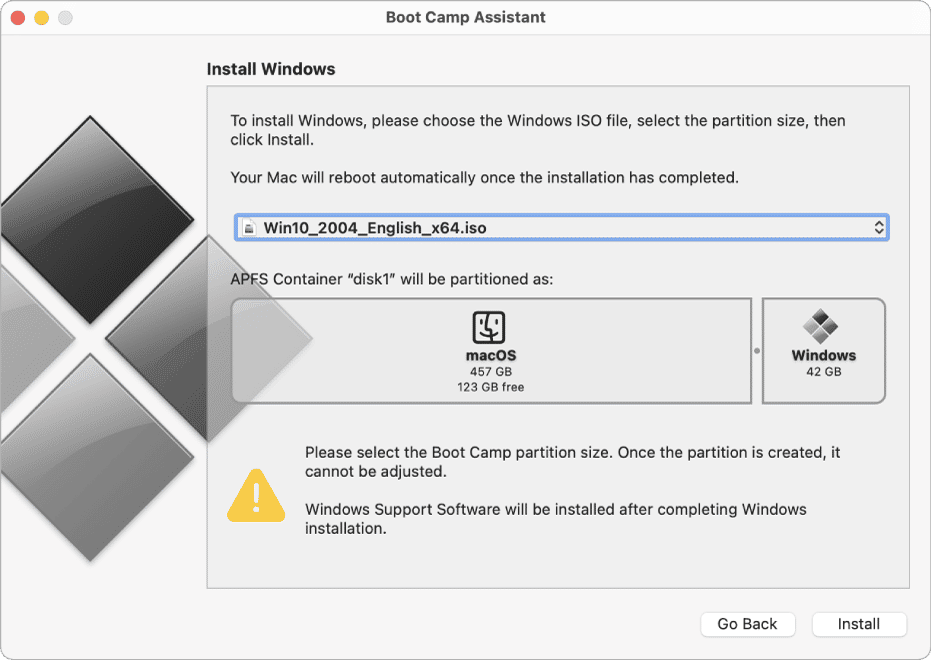
- Wait for Boot Camp Assistant to finish creating the partition.
- Your Mac will restart, and you will be asked where you want to install Windows. Select the Boot Camp partition.
- Unplug any USB devices you have connected (except for the USB stick).
- Click Next and follow the onscreen instructions to install Windows.
- When your Mac reboots, follow theon screen instructions to set up Windows and start using it.

Creating a Boot Camp partition and installing Windows needs quite a lot of space, as you will see below. The partition needs to be at least 64 GB, preferably 128 GB. If you’re struggling to find that much space, CleanMyMac can help. Its Cleanup feature scans your Mac, looking for junk files, clutter, old installers, and other files you don’t need. When it’s finished, you can get rid of them easily and free up several gigabytes’ worth of space.

4. Use a cloud gaming service
There are different cloud gaming services out there, and they allow you to ‘rent’ a PC online and play Schedule 1 on it.
For example, to use Boosteroid, all you have to do is go to boosteroid.com, sign in, and start playing. Easy!

So, how to get Schedule 1 on Mac? You’ll need to jump through a few hoops first, but it can be done. Just choose the method above that you want to use and follow the steps to get started with the game.