Backing up data is something we should all do regularly, and anyone who has ever lost important files when their Mac crashed will agree. There are several different options for backing up, one of which is Apple’s own Time Machine. It’s free and easy to use, so no surprise that most Mac users chose this option.
When it comes to restoring files from a Time Machine backup, there are lots of different options depending on whether you want to restore one or two files or your whole Mac. We’ll go through them all here and show you how to restore your Mac from Time Machine.
What is Time Machine?
Time Machine is Apple’s tool for backing up your Mac. Once you’ve set it up in System Settings > General, you can forget about it until you need to restore data. It runs incremental backups (meaning it only copies files that are new or have changed since the last backup) at scheduled intervals. It also allows keeping several versions of backed up data so you can restore your Mac to the way it was an hour ago, a month ago, etc.

Time Machine is also built into macOS Utilities in the Recovery Partition, so if your Mac can’t start up normally and you need to start up in Recovery mode, you can restore it from a Time Machine backup. Also, Migration Assistant can use Time Machine to allow you to move data easily from an old Mac to a new one.
Always make sure that you have a recent backup. However, if you back up your device without first clearing out the junk files, you will move the junk files from your old Mac to your new one. Surely, no one wants to do that. The solution is to clear out the junk before you run the backup. And the best way to do that is to use CleanMyMac.

CleanMyMac has several features, including Cleanup and My Clutter, that can help you clear out gigabytes of data you don’t need. Cleanup scans your Mac for cache files, language files (languages you don’t use), and other useless files and gets rid of them effortlessly. My Clutter highlights the files that are taking up too much storage space on your Mac, as well as those you haven’t opened for a long time, duplicates, and similar images. Get your free CleanMyMac trial.
How to restore individual files in Time Machine
If you accidentally overwrite a file, move it to the Bin, or change its contents and need to revert back to a previous version, use Time Machine.
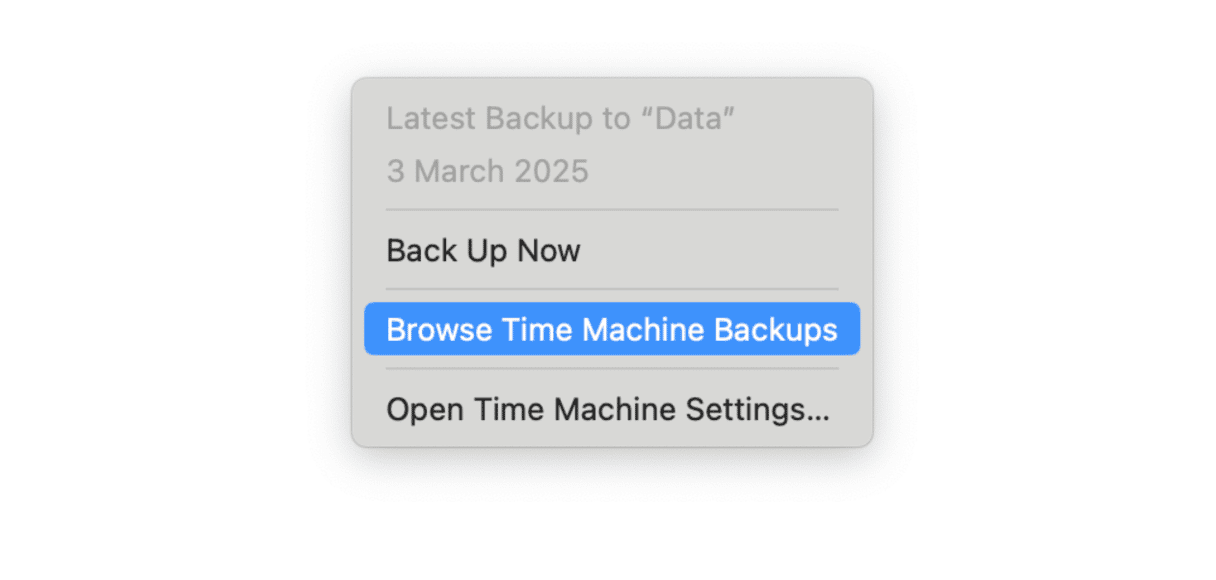
- Click Time Machine in the menu bar and choose Enter Time Machine or Browse Time Machine backups — depending on your macOS version, you may see either of these options.
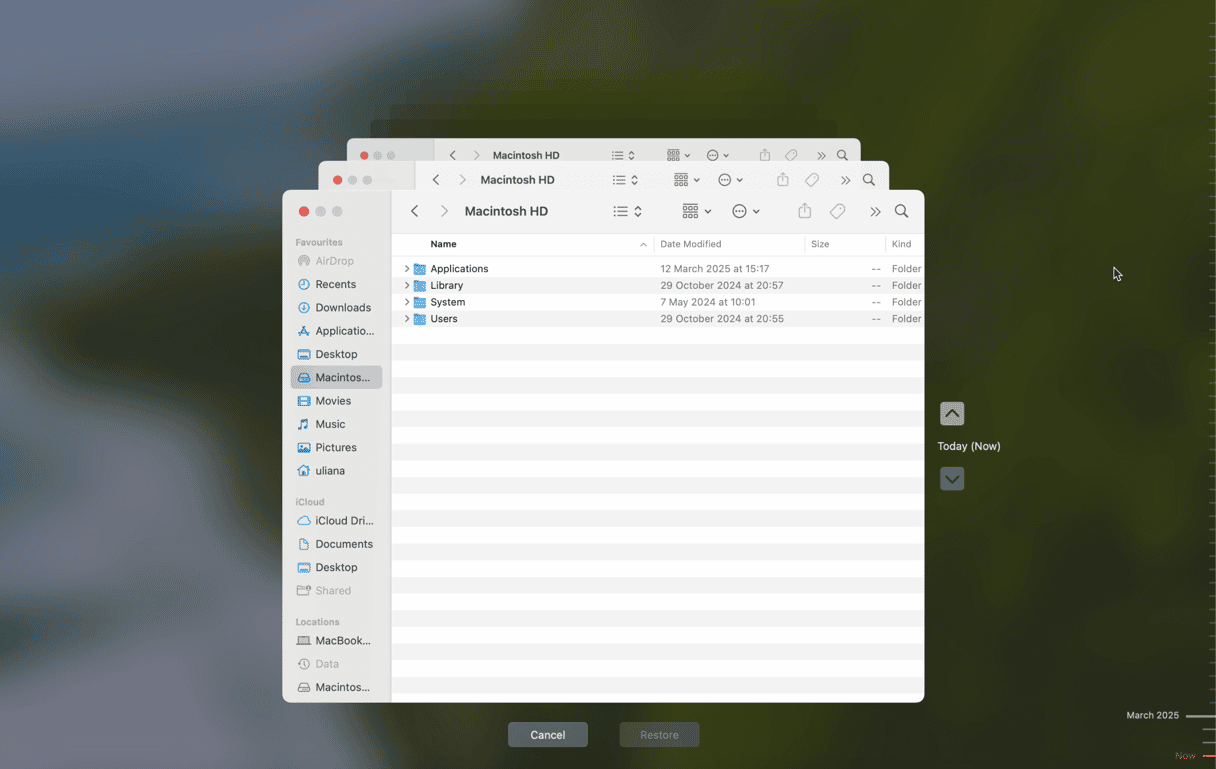
- Use the arrows in the middle of the screen to navigate to the date you want to restore from.
- Click on the Finder window and navigate to the file.
- Press Spacebar to preview the file and check if that version is correct.
- Click Restore to restore the file.


How to restore Mac from a Time Machine backup
Restoring your Mac using a Time Machine backup means bringing it back into the state it was in when the backup was made. All files in the backup will go back to the initial state, deleted files will be restored, and files created after the backup will be removed.
Please consider this before restoring your Mac: if there are any files you have modified (and you wish to keep the modified versions) or created after the point you’re going to restore from, you should copy those to an external disk or USB stick.
To restore your entire Mac from a Time Machine backup, you need to boot into Recovery mode because you will be making changes to system files on the boot partition. The way you boot into Recovery mode differs depending on whether you have an Intel-based Mac or a Mac with Apple silicon. We’ve explained both below.
Intel-based Mac
- Shut down your Mac.
- Press the power button and hold down Command-R.
- Release Command-R when you see the Apple logo or a spinning globe.
- When prompted, type in your admin username and your password.
- When macOS Utilities appears, choose Restore from Time Machine backup.
- Follow the instructions on the screen.

Mac with Apple silicon
- Shut Down your Mac.
- Press the power button and hold it down as your Mac boots.
- Let go of the power button when you see startup options on the screen.
- Click Options.
- Type in your admin username and password.
- Choose Restore from Time Machine backup from macOS Utilities.
How to use Time Machine with Migration Assistant
When you use Migration Assistant to move data and settings from one Mac to another, you can do it directly from Mac to Mac, or you can restore to the new Mac from a Time Machine backup of the old Mac. Here’s how to do that.
Run Time Machine on your old Mac to create an up-to-date backup.
- Disconnect the Time Machine disk from the old Mac (unless it’s a network disk).
- Connect the Time Machine disk to your new Mac using cable or Wi-Fi if it’s a network disk.
- On the new Mac, go to Applications > Utilities and open Migration Assistant.
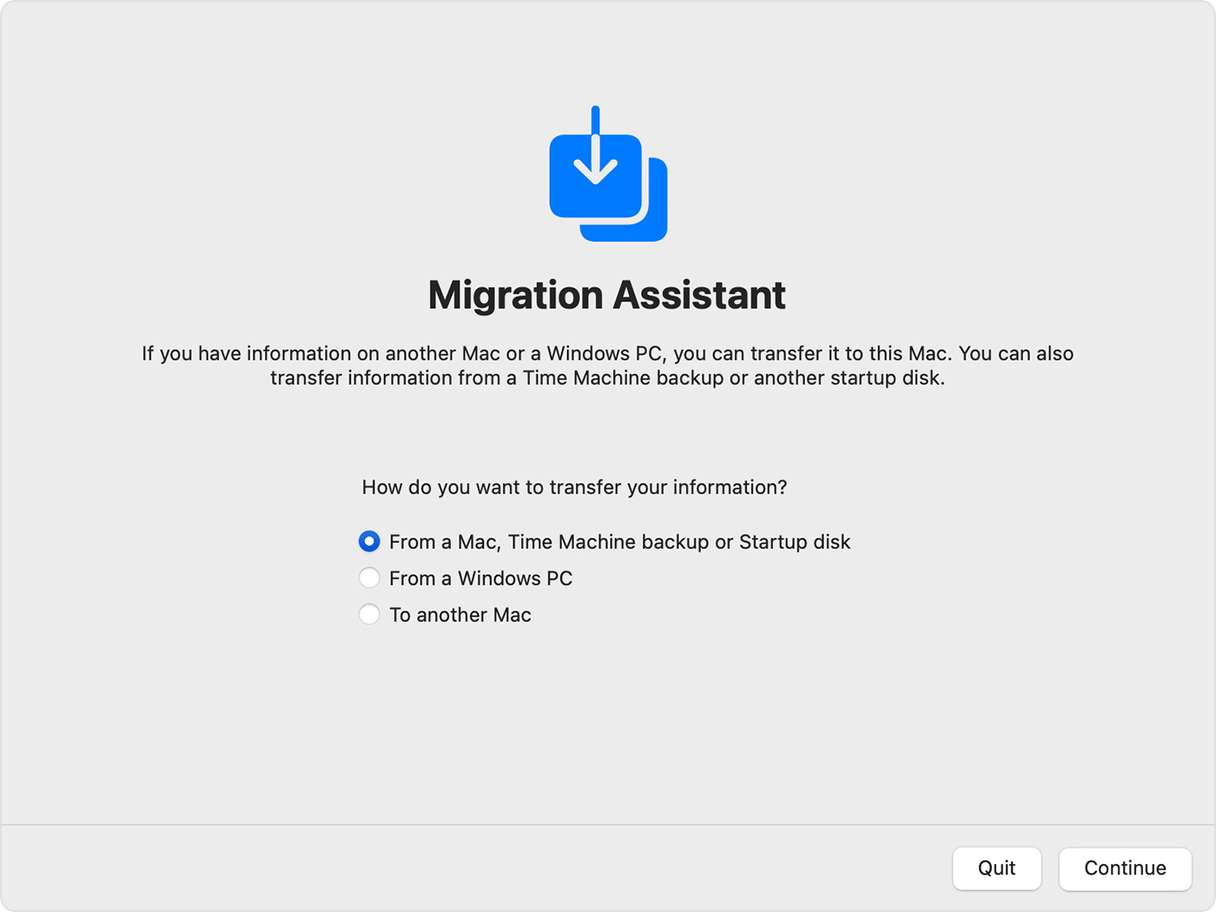
- Select ‘From a Mac, Time Machine Backup, or Startup disk’ and click Continue.
- Click your Time Machine and click Continue.
- Select the most recent backup.
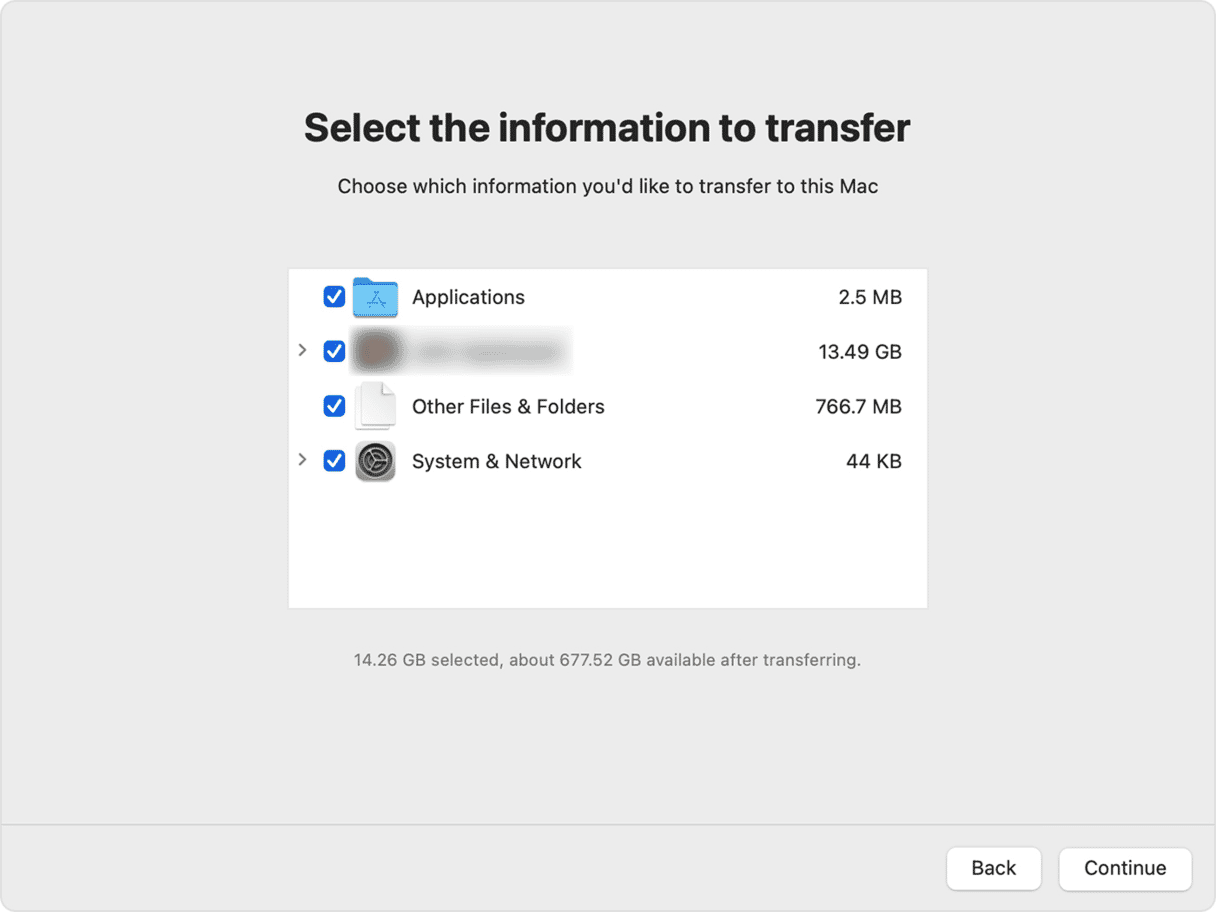
- Choose the data you want to transfer to the new Mac and click Continue.


How to inherit the backup history of an old Mac
When you transfer data to a new Mac from a Time Machine backup, you will be asked if you want to inherit the backup history of the old Mac that is stored on the Time Machine drive. If you choose to inherit the backup history, you will be able to use that Time Machine disk to restore files from the old Mac. However, you won’t then be able to restore files on the old Mac from the Time Machine drive.
If you want to preserve the Time Machine backup to use with the old Mac, choose Create New Backup.
More options for restoring your Mac from a backup
Time Machine isn’t the only option for backing up your Mac, although the fact that it comes free with macOS and is integrated into macOS Utilities makes it a great choice.
Backup tools like SuperDuper and Carbon Copy Cloner help you to create clones of your Mac’s boot drive. You can then update the clone on a regular basis, and the app will copy only those files that have been added or changed in the meantime, just as Time Machine does.
The clone can be made bootable, so if the worst happens, you can boot from it and restore your Mac from the backup (though for Intel-based Mac with a T2 security chip, you’ll need to turn off Secure Boot first. For Mac with Apple silicon, you’ll need to do that as well as use a Thunderbolt 3 external disk).
Other backup applications like Get Backup Pro and ChronoSync allow you to synchronize folders between disks, as well as create incremental backups to restore from whenever you need to.
There are lots of reasons you might need to restore your Mac from Time Machine, whether it’s to roll back to a version of the OS before an update, to fix a problem, or to recover files that you accidentally deleted. The great news is it can be easily done! Just follow the steps above, and your Mac will be restored in no time.