macOS Sonoma has some great new features and improvements. And for most people, upgrading from an earlier version of macOS is the right thing to do and won’t cause any problems. However, some people may upgrade and then regret it. That could be because some of their applications won’t run properly in Sonoma or that the upgrade has made their Mac slower. If you’ve upgraded and regret it, we’ll show you how to downgrade from Sonoma to Ventura.
Why downgrade macOS Sonoma
There are a few reasons you may want to know how to go back to previous macOS version:
| Mac is slow | If your Mac is slower or less stable on Sonoma than on Ventura, new features and improvements don’t make that worthwhile.
|
| App instability | One or more apps you use regularly don’t run in Sonoma or aren’t stable, so the only way to use them properly is to downgrade. |
| Personal preference | If you don’t like Sonoma when you use it, and it doesn’t work the way you want it to, then you may want to downgrade. |
Before you downgrade
If your reason for downgrading is that your Mac is slower or less stable than it was on Ventura, there is something you can try that may fix those problems without having to downgrade. You could reindex Spotlight, repair disk permissions, and control CPU load and memory pressure.
Doing all of those things manually would be time-consuming and difficult, though. Thankfully, there is an easier way — CleanMyMac. It comes with the Performance module that allows you to repair disk permissions, flush DNS cache, reindex Spotlight, and speed up Mail. It also has a handy Menu App that helps you gain more control over what’s going on in the background of your Mac by calculating memory pressure and CPU load and letting you quit resource hoggers.
Get a free trial of the app and try it out for yourself.
- To run maintenance tasks, open CleanMyMac, click Performance > Scan > View All Tasks > Maintenance Tasks, select what you want the app to do, and click Run.

- In the same Performance Manager, you can disable login items and launch agents. They may consume too many system resources, which may be more noticeable after an upgrade to a new version that itself puts more strain on your Mac.
- To monitor CPU and memory, open the Menu App and click Memory and CPU one by one, checking which unneeded applications you can quit.

How to downgrade macOS Sonoma to Ventura
There are three ways to downgrade from Sonoma to Ventura or any earlier macOS version your Mac ran before an upgrade. Keep on reading to learn about all of them.
Downgrade with Time Machine
If you upgraded from Ventura to Sonoma and made a Time Machine backup before you upgraded, it’s pretty easy to downgrade:
- Connect the disk with the Time Machine backup on it to your Mac.
- Restart your Mac in recovery mode by holding down Command-R on an Intel-based Mac until you see the Apple logo, or holding down the power button on a Mac with Apple silicon until you see the startup options screen. Click Options, then Continue.
- In macOS Utilities, select Restore from Time Machine Backup and click Continue.
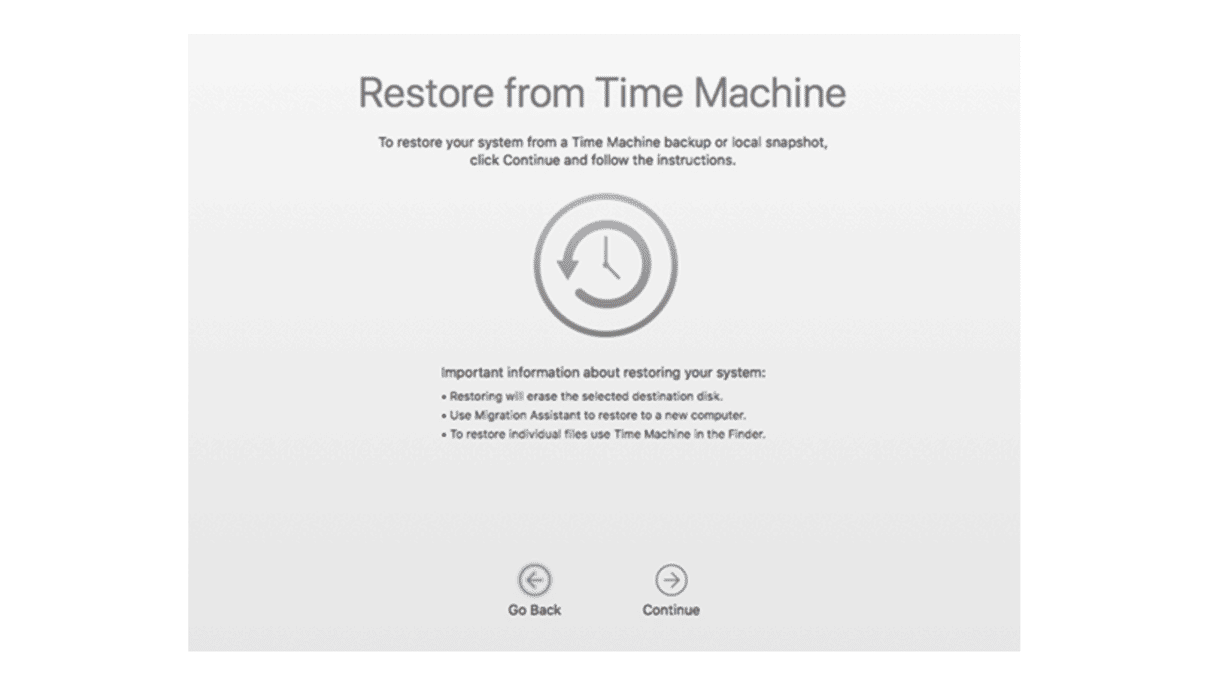
- Choose Continue again.
- Select the Time Machine disk as the Restore Source.
- Navigate the list of backups and select the one you made immediately before upgrading to Sonoma. It should say it was made with Ventura.
- Click Restore.

Downgrade in recovery mode
If you have an Intel-based Mac, you can boot into Internet Recovery and reinstall the version of macOS that was installed when your Mac shipped. You can then upgrade to Ventura if your Mac shipped with an earlier version:
- Shut down your Mac.
- Hold down Shift + Option + Command + R and press the power button.
- Release the keys when you see the Apple logo.
- Select Reinstall macOS.
- Wait for it to reinstall.

Downgrade with a bootable installer
You can create a bootable installer on a USB stick or disk and use that to boot your Mac and then reinstall macOS. Make sure you have a backup of all your data.
- Download Ventura from the App Store here.
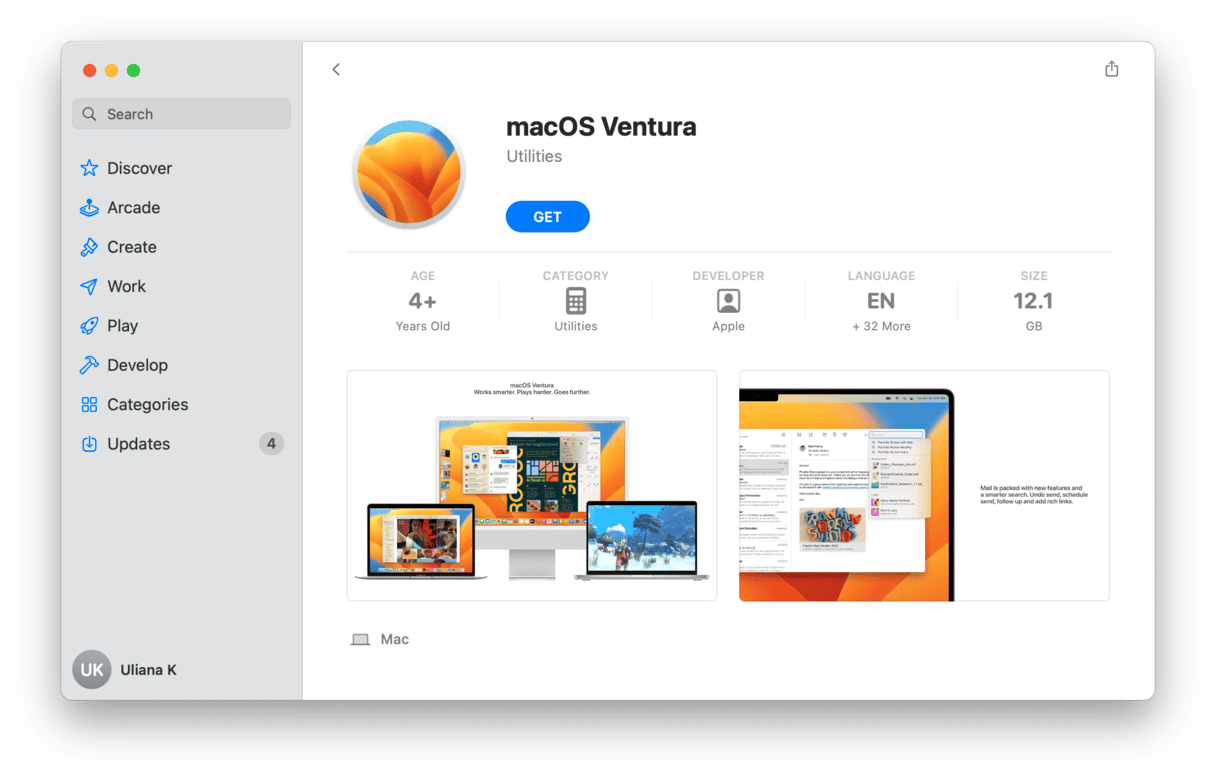
- When it finishes downloading, don’t click Open. If the installer starts running, click File, then Quit.
- You should now have a Ventura installer in your Applications folder.
- Plug in the USB stick and name it ‘Ventura installer.’
- Open Terminal from Applications > Utilities.
- Type this command: sudo /Applications/Install\ macOS\ Ventura.app/Contents/Resources/createinstallmedia --volume /Volumes/MyVolume [note that MyVolume in the command is to be replaced with the name of your USB drive].
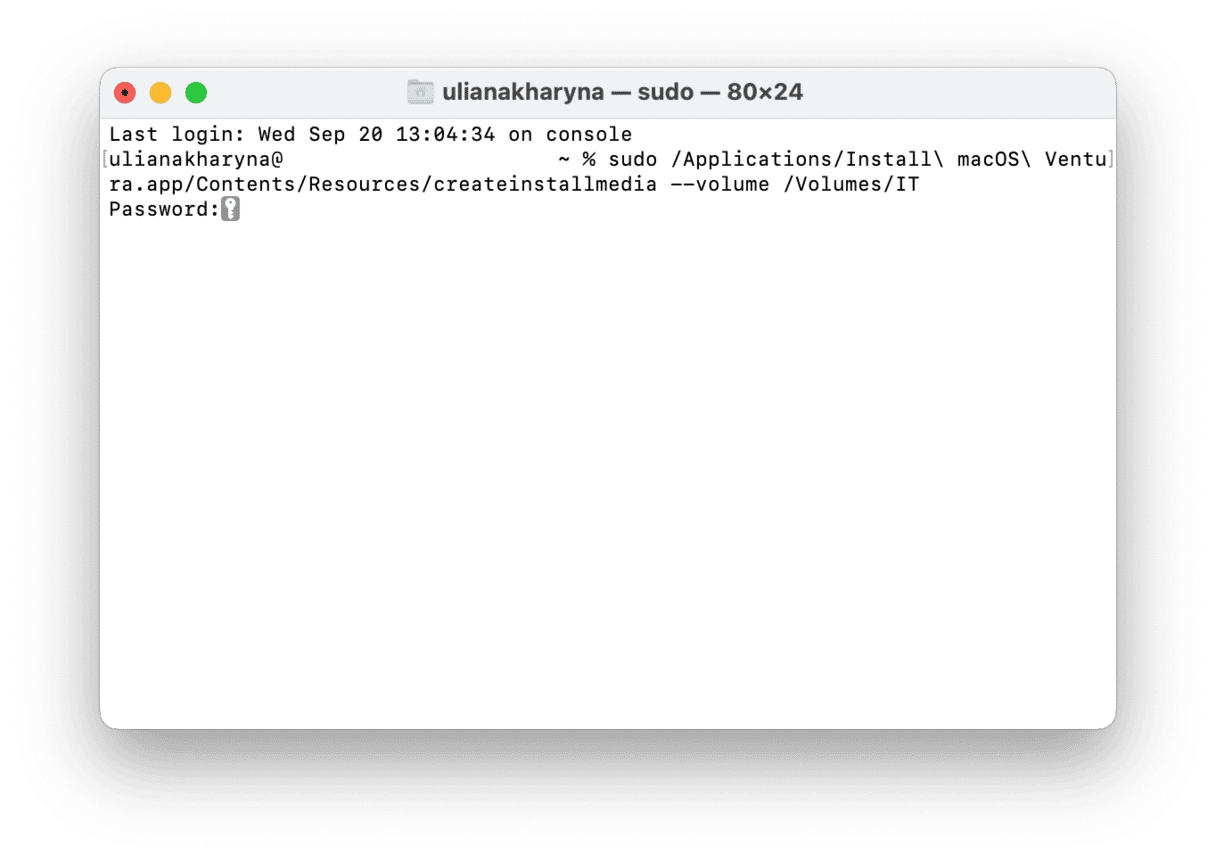
- Press Return.
- When Terminal reports that the installer has been created successfully, quit Terminal.
- Click the Apple menu and choose System Settings > General > Startup Disk.
- Select the Ventura Installer.
- Shut down your Mac and boot into recovery mode.
- Choose Disk Utility in macOS Utilities.
- Select your Mac’s startup disk and choose Erase. Follow the guidance on the screen to erase the disk.
- Quit Disk Utility.
- Choose Reinstall macOS Ventura from the menu.


Frequently Asked Questions
Is Sonoma slower than Ventura?
It’s not slower, but your Mac may run more slowly because of the extra demands it makes on your Mac’s resources.
Can I speed up my Mac on Sonoma?
Yes, CleanMyMac has several tools in its Performance module that can help speed up your Mac by running maintenance tasks and helping you control login items and launch agents.
Is it possible to downgrade from Sonoma to Ventura?
Yes, you can restore from a Time Machine backup or use a bootable installer. If you have an Intel-based Mac, you can also do it in Internet Recovery mode.


