If you’ve installed macOS Monterey on your Mac and have decided that you don’t like it or your Mac has difficulty running it, the good news is that you can downgrade to Big Sur. In this article, we’ll show you how to do that. It’s important that your Mac is connected to the internet at all times during this process.
1. Create a backup before you downgrade
To downgrade from Monterey, you need to wipe everything on your startup disk and perform a clean install of Big Sur. That’s the process we’ll be taking you through in this article. So the very first thing you should do when you decide to downgrade is back up your Mac. If you use Time Machine to back up regularly, you can just click Time Machine in the menu bar and choose Backup Now. If you use another backup application, run a backup in that. If you don’t currently back up regularly, make a clone of your start-up disk using a tool like Carbon Copy Cloner or SuperDuper.
By the way, if you used Time Machine to back up your Mac before you upgraded to Monterey, it will save time later on in the process because you will be able to restore your Mac from that backup instead of reinstalling Big Sur from scratch.
Additional step for Macs made from 2018
Most Intel Macs shipped from 2018 include Apple’s T2 security chip. You can see a full list of them here. Macs using Apple silicon don’t have the T2 but do have the same security features in the M1 chip. All these Macs require that you change the security settings to allow you to boot from an external disk or USB stick. Here’s how to do that.
- Restart your Mac and hold down Command when you see the Apple logo.
- When It starts up, click on Utilities in the menu bar and choose Startup Security Utility.
- Choose Enter macOS Password, then type in an admin name and password.
- Under External boot, select Allow booting from external media.
- Restart your Mac.
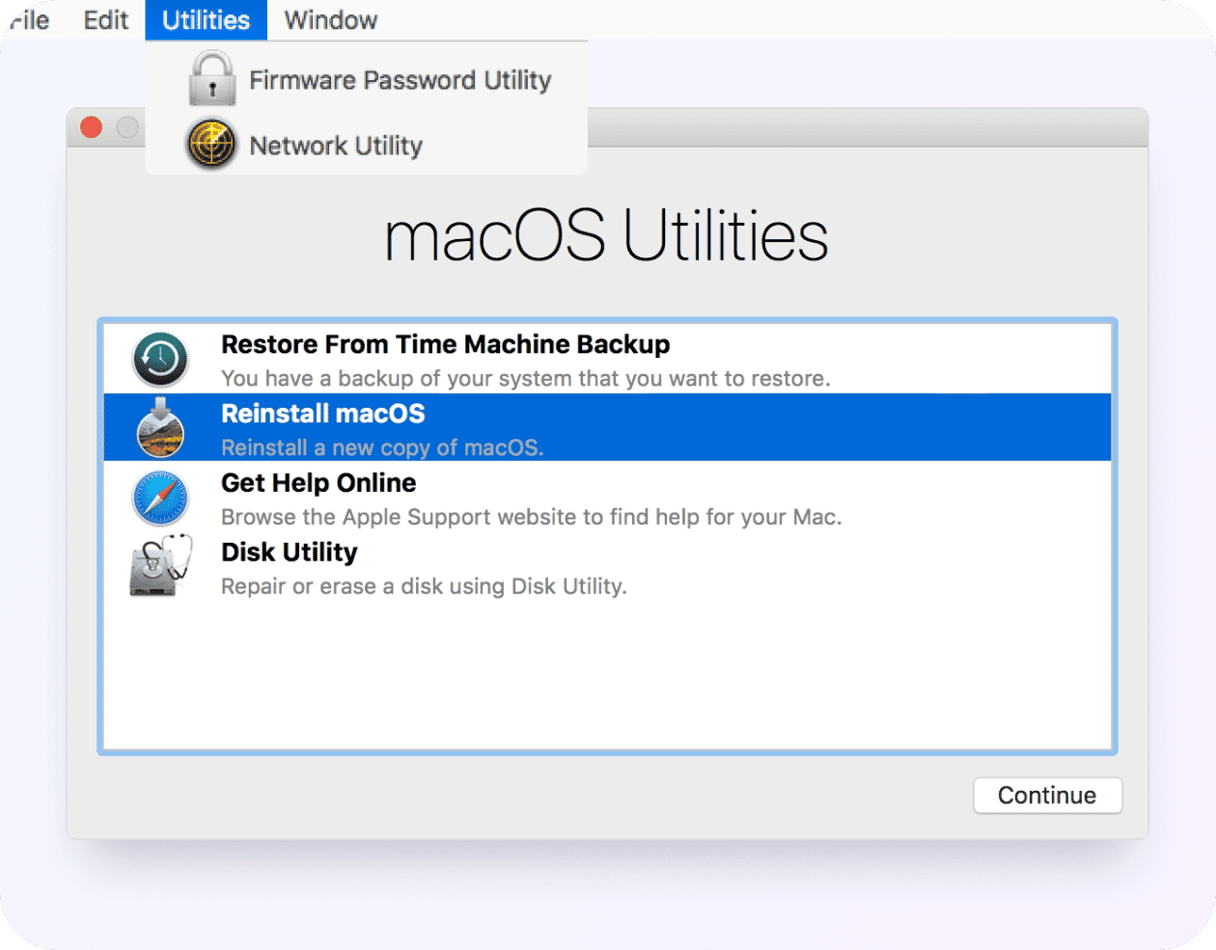
2. Create a bootable installer of macOS Big Sur
We’re going to completely erase your startup disk in order to downgrade from Monterey to Big Sur, so we first need to create a bootable installer of Big Sur. We’ll use the Terminal app.
Note: If your Mac shipped with Big Sur, you can skip this step. Once you’ve erased your hard drive, you can restart your Mac using Command-Shift-Option-R to enter Internet Recovery and choose the option to reinstall the version of macOS that came with your Mac.
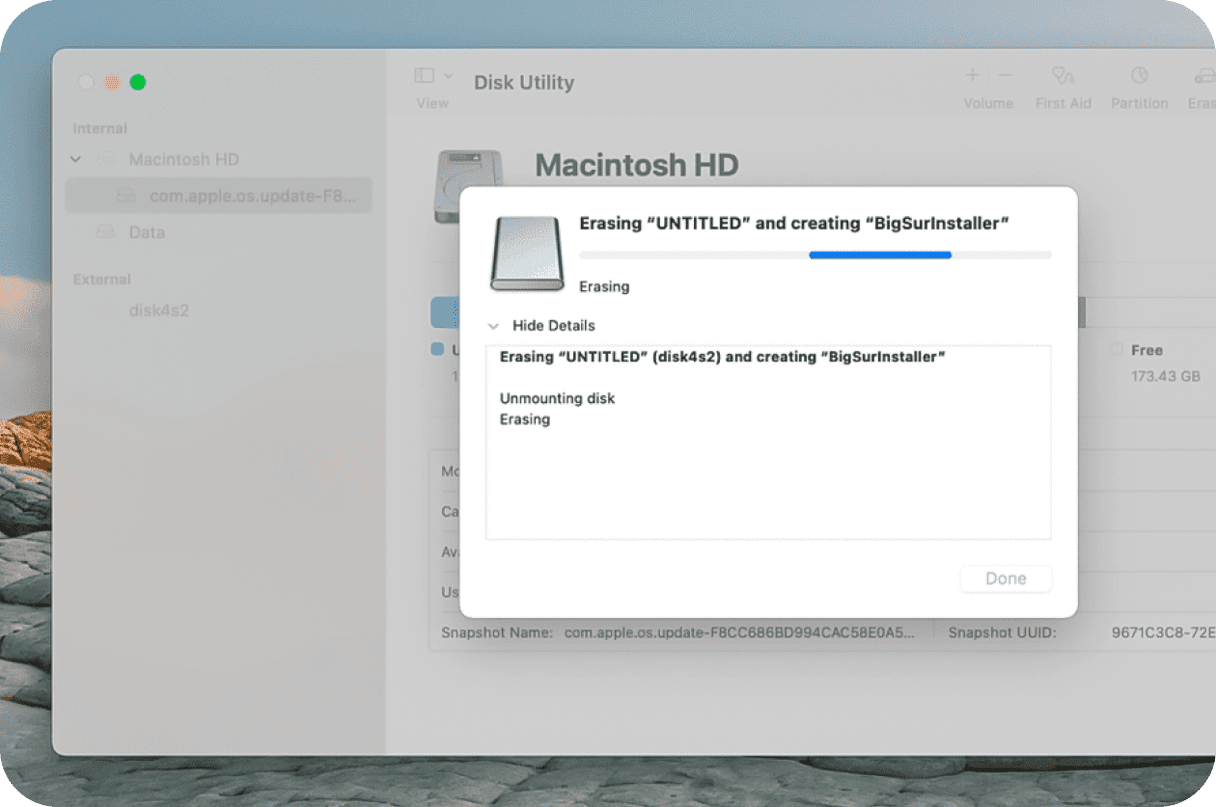
Creating a bootable installer via Terminal
- Use this link to find the link to Big Sur on the App Store.
- When the installer starts to run after the download, click on the Apple menu and choose Quit.
- Use Disk Utility to format an external hard drive or USB stick (minimum 16GB) as Mac OS Extended (Journaled). Call the newly formatted disk ‘BigSurInstaller’ (no spaces).
- Go to Applications > Utilities and launch Terminal.
- In the Terminal window, type:
sudo /Applications/Install\ macOS\ Big Sur.app/Contents/Resources/createinstallmedia --volume /Volumes/BigSurInstaller
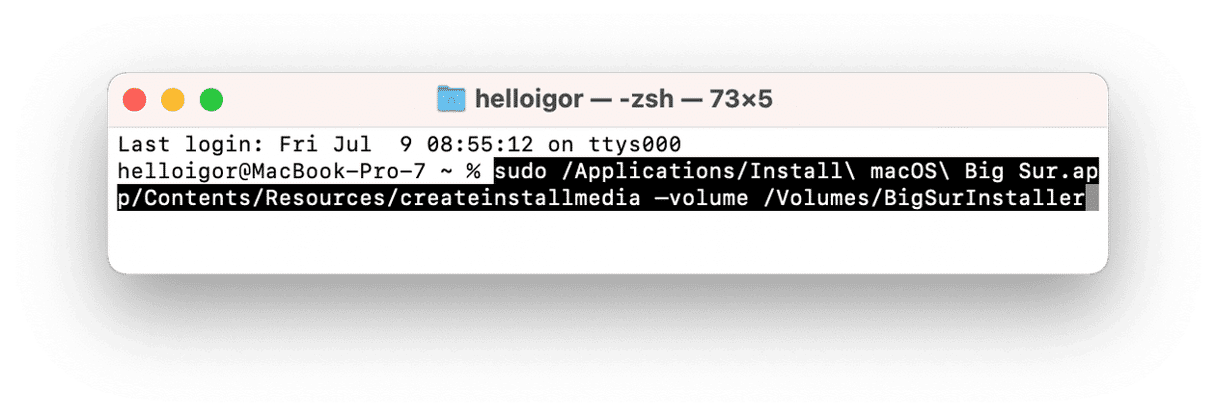
Type in your admin password. Type Y and press Return. Wait for the process to complete.
3. Erase your Mac’s startup disk
- Restart your Mac and hold down Command-R when you see the Apple logo.
- Choose Disk Utility and press Continue.
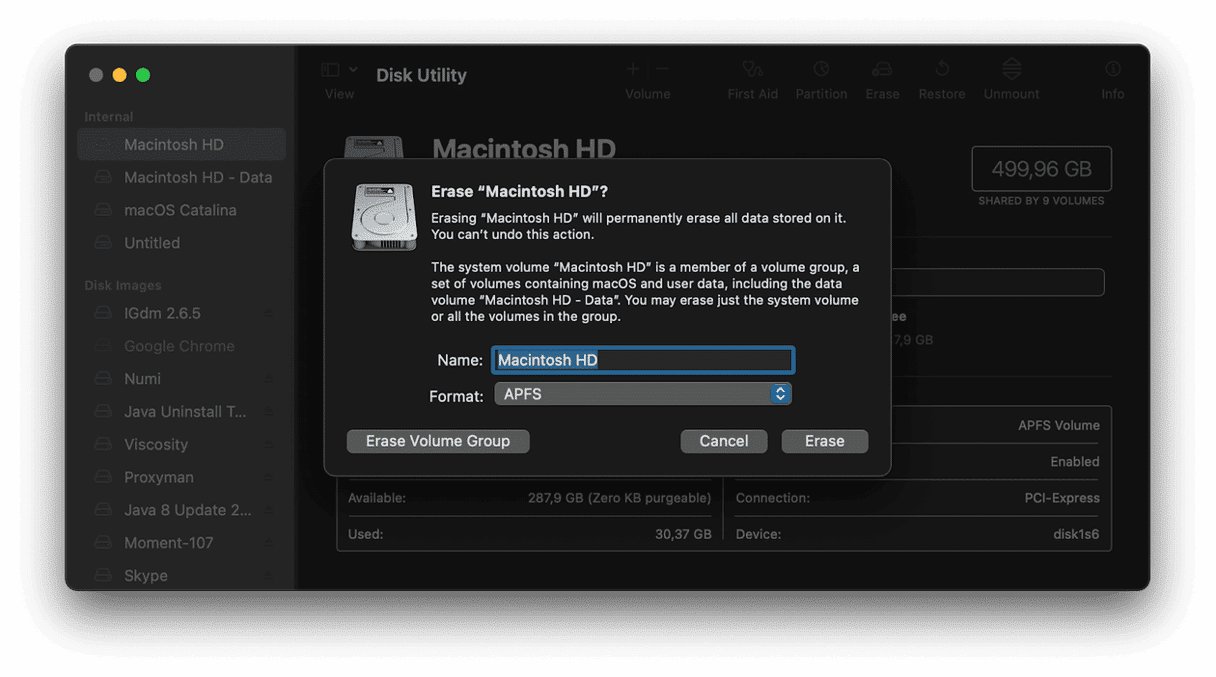
- Select your startup disk and press Erase.
- Give the volume a name and choose APFS or Mac OS Extended (Journaled) for the format.
- Click Erase.
- When it’s finished, quit Disk Utility.
4. Reinstall Big Sur from the installer you created
- Plug in the disk with the Big Sur installer.
- Restart your Mac while holding down the Option key.
- Choose the disk with the installer on it from the startup disk options.
- Click Continue. Big Sur will now install on your Mac.
5. Restore settings and data from Time Machine
Make sure the disk containing your Time Machine backups is connected to your Mac.
- Once Big Sur has completed installation, restart your Mac in Recovery mode by holding down Command-R when you see the Apple logo.
- Choose Restore from Time Machine backup.
- Press Continue.
- Choose the disk where your Time Machine backup is stored.
- Click Continue.
- Locate the most recent Big Sur back on the disk (that is, the last one you made before upgrading to Monterey).
- Press Continue and wait for it to restore.
If your macOS gets slow
If the reason you want to downgrade to Big Sur is that your Mac is running more slowly under Monterey, you may want first to consider optimizing its performance and running maintenance routines.
The Apple-notarized tool, CleanMyMac, allows you to do all of those things and more, including repairing disk permissions and running maintenance scripts. It can all be done with just a few clicks and can dramatically improve your Mac’s performance. If you don’t already have CleanMyMac, you can download its free edition here.
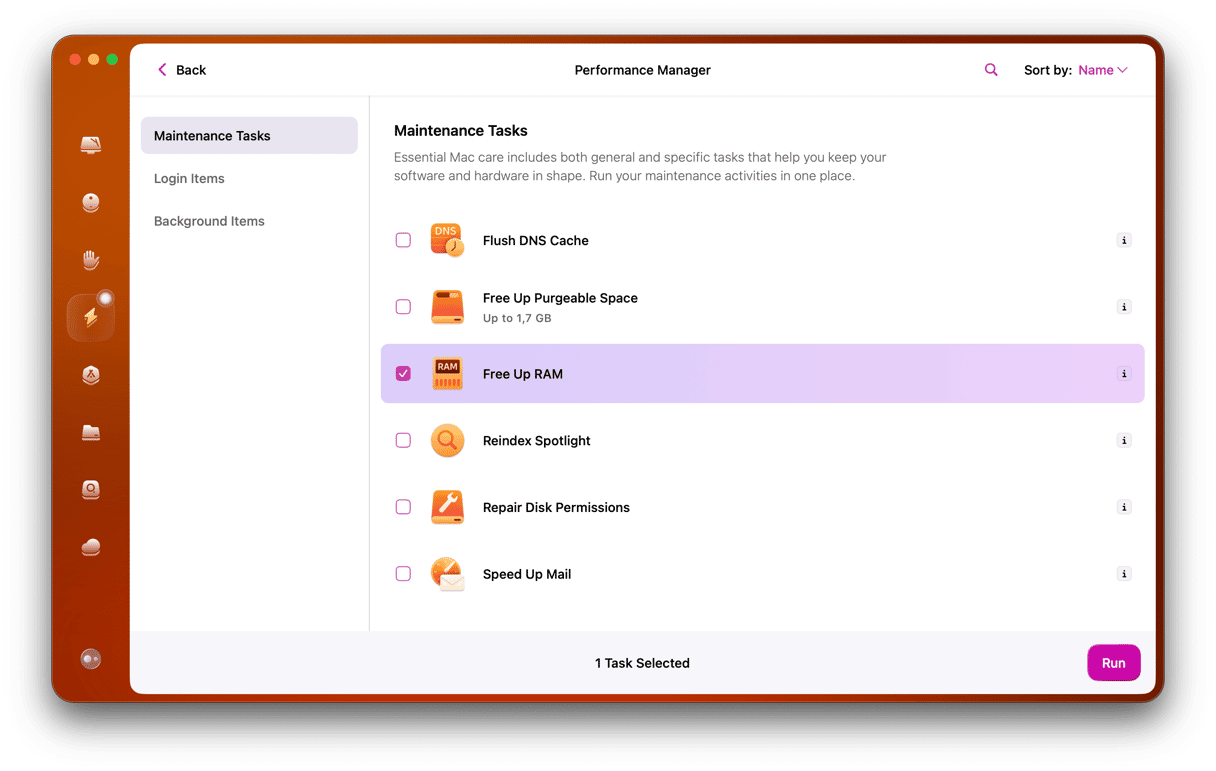
In the app, try these tools:
- Free up RAM
- Run Maintenance Scripts
- Find hidden background apps
To downgrade from Monterey to Big Sur is not a simple process and means wiping your startup disk. Before you start, you should make sure you have backed up all the data on your Mac. Using Time Machine makes it easier to restore files afterwards. If you want to keep using Monterey, but it’s making your Mac slow, consider using CleanMyMac to optimize it and improve its performance.


