Despite the popularity of Apple’s Keynote and the fact that it’s free for every Mac user, not to mention that it’s a very capable tool, Microsoft PowerPoint remains the default tool for business presentations for both Mac and PC. And that doesn't look likely to change anytime soon. However, not everyone who you may want to watch your presentation will have a copy of PowerPoint and so you need to think of other ways for them to view it. One solution is to save your PowerPoint as a video on your Mac, meaning anyone on any platform can watch it. It also means you can upload it to YouTube or another video sharing platform. In this article, we’ll show you how to do just that. Let’s go!
Why you might need to save PowerPoint as video
The most common reason for saving a PowerPoint presentation as video is so that you can distribute it to as many people as possible. Every device has some way of watching video, while far fewer people have PowerPoint installed.
Installing PowerPoint on Mac: Before you start
Viewing a presentation as a video is very different from having it delivered by a presenter in person. So there is quite a bit to think about before you start:
- Make sure you’re using a recent version of PowerPoint. The more recent the version, the more options it will have for exporting video. However, as long as it’s no older than PowerPoint 2010, you should be OK.
- Check your slides, including transitions and animations. It’s important that you check your slides for typos and other mistakes, as well as make sure that transitions and animations work. And, of course, you should make sure your presentation is complete. Once you have exported the video, you won’t be able to change anything on the slides.
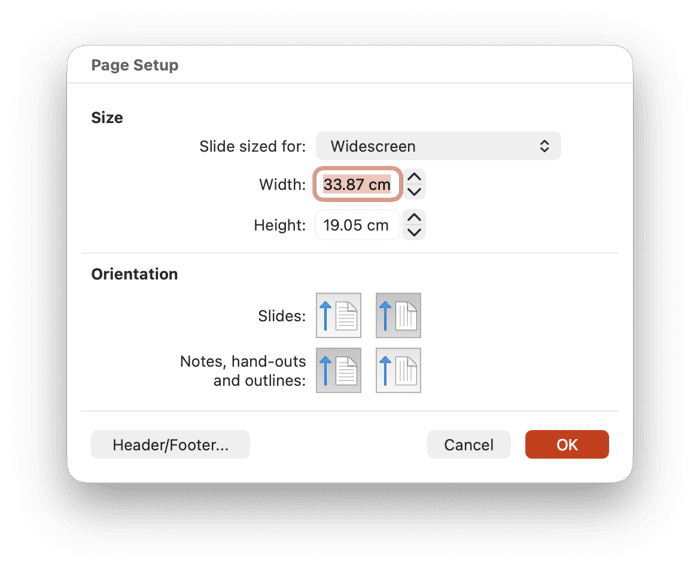
- Think about aspect ratio. The most common aspect ratio for presentations is 4:3 but widescreen video, the most common format, is 16:9. PowerPoint supports 16:9 aspect ratio slides. Can you change yours to fit that aspect ratio without ruining the design? If so, they will look better in a video than 4:3 with black bars down the side.
- Consider the text on your slides, remembering that people often watch videos on small screens. If the text is too small or too cramped, they won’t be able to read it.


How to prepare a PowerPoint presentation for export to video
If your presentation is set up so that slides advance when you click a button on your Mac or a remote control and you export it as a video, the duration of each slide and transition will be set automatically. If you want to specify how long each slide or transition is on screen, you will need to change that before you export the presentation to video.
- Open PowerPoint and the presentation you want to export to video.
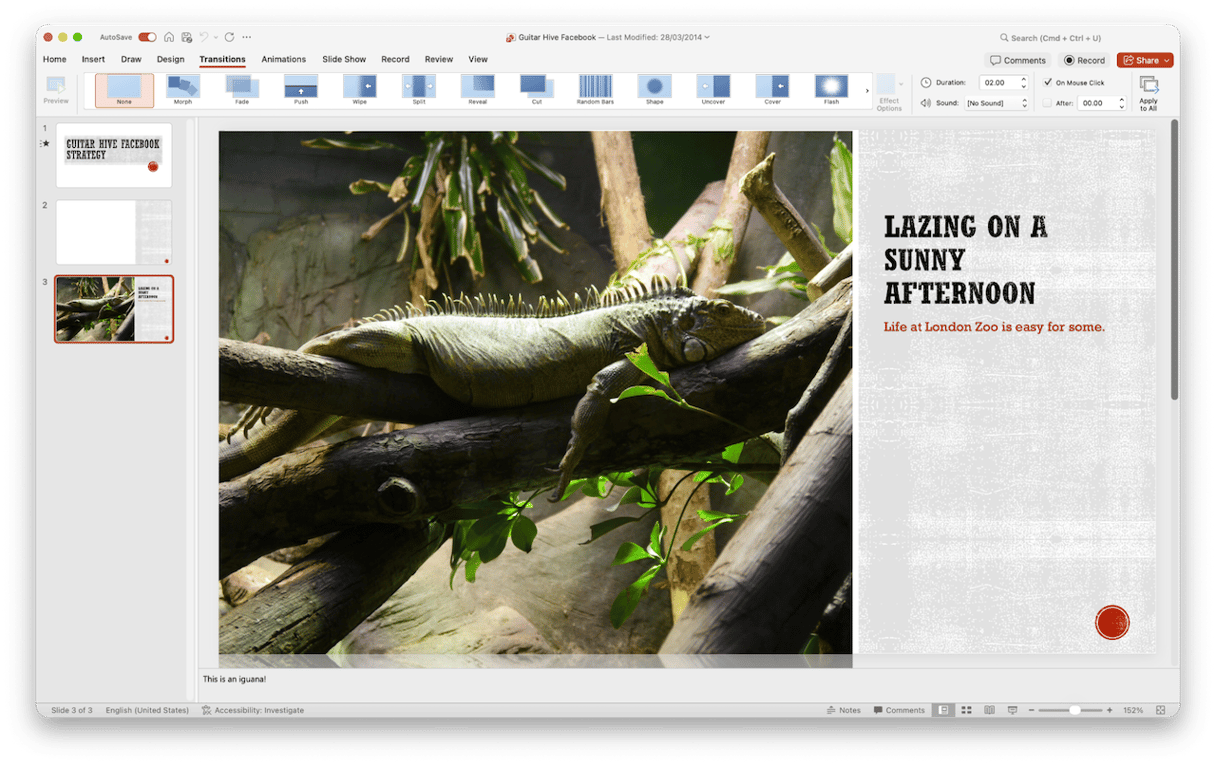
- Select the first slide and choose Transitions in the toolbar.
- Check the ‘After’ option and input a time after which the transition will begin. Note that the time is specified in minutes and seconds, so if you want a slide to last 30 seconds, input 0:30. You can also uncheck the On Mouse Click Box. If you also want to specify the duration of transitions, enter a value in that box.
- Once you’ve done that, click Apply to All to apply the settings to all slides. Alternatively, you can go through the slides in your presentation one by one and set times for each.
- Once you’re finished, save your presentation.

How to save a PowerPoint presentation as video
Once you’ve checked everything in your presentation is as it should be and you’ve specified timings for slides and transitions, you can export the presentation:
- Click the File menu and choose Export.
- From the File Format menu, choose MP4 or MOV (MP4 is more widely compatible).
- In the Quality menu, choose the video quality you want. Presentation is the highest quality and Low is the lowest.
- If you specified timings for slides or transitions, select the checkbox next to Use Recorded Timings and Narrations.
- When you’re done, click Export.

When the video has been exported, watch it through to check it. If the file size is much larger than you expected, go back to PowerPoint and export it again using a lower quality setting. If the quality is lower than you wanted, go back to PowerPoint and choose a higher quality setting.
If you recorded narrated audio with your presentation, it should play alongside the video when you export it. However, other embedded media won’t play in the video.
How to clear space on your Mac easily
If you save lots of presentations to your Mac as video, or create lots of video files on your Mac in other applications, you will soon use up lots of space on your startup disk. If you need to free up space, the logical thing to do is to track down the oldest files and those that haven’t been opened for the longest period, and those that are, individually, taking up the most space.
However, that’s not always easy to do. And that’s where CleanMyMac’s My Clutter feature comes in. It has a tool for analyzing the files on your Mac and identifying the largest and oldest ones. You can then filter the results and quickly get a view of the files that you haven’t opened in a while, or the files that are taking up the most space. You can then decide whether to archive them on an external disk and then delete them with a click in My Clutter.
Here’s how it works:
- Get your free CleanMyMac trial — you can test it for 7 days for free.
- Open it, choose My Clutter, and run a scan.
- Choose Review in the Large & Old Files pane.
- At the top right of the window, click the Sort By menu and choose how you want to view the files.
- Select the files you want to delete and click Remove.

If you want to save a PowerPoint presentation so that it can be viewed easily by as many people as possible, saving it as a video is a good idea. Follow the steps above to save PowerPoint as a video on your Mac.
Frequently asked questions
1. Which video format should I choose?
While you can export from PowerPoint in MOV format, MP4 is much more widely compatible, so you should choose that.
2. How much space do presentations take up when I save them as video?
That depends on how many slides there are and what kinds of images, animations, and transitions you have. It could be anything from a few MB to a few hundred MB.
3. How can I share the video?
That depends on how big the file is. If it’s only a few MB, then you can send it as a message or email. If it’s larger, it’s better to upload to a cloud storage site and share it from there.