Microsoft Office was one of the most popular suites of applications for Mac until Apple made Pages, Numbers, and Keynote preinstalled with macOS. If you switched from MS Office to iWork, it is a good idea to remove it. However, uninstalling Office isn’t as easy as it should be, so here’s a step-by-step guide to show you how to uninstall every part of Microsoft apps.
What is Microsoft Office?
Office is a suite of tools that comprises Word, Excel, Powerpoint, Outlook, and OneDrive. To use such apps, you can either subscribe to Office 365 on Microsoft’s website and download the apps from there or download the individual apps from the App Store and buy a subscription as an in-app purchase.
Subscriptions are annual, and there are several different tiers, each of which provides a different level of service concerning the number of devices you can install Office apps on.
How to uninstall Office 365 from Mac
To uninstall Office 365, you need to uninstall each app, and there are two ways to do it— manual and automatic. We’ll show you both.
Automatic removal
Before you go ahead and attempt the manual uninstallation described below, there is another, much easier way. CleanMyMac allows you to uninstall Office apps — or any other app — with just a couple of clicks using its uninstaller tool.
Here’s how to uninstall Microsoft Office on Mac with just a few clicks easily:
- Get your free CleanMyMac trial.
- Choose Applications in the sidebar and run a quick scan.
- Click Manage My Applications > Uninstaller.
- Select the checkboxes next to the Office apps (Word, Excel, etc.) you want to uninstall.
- Click Uninstall.

CleanMyMac now removes not just the apps themselves but also all the associated junk files, saving you a huge amount of time and effort.
You can now check whether there are any leftover files:
- Go to the Leftovers tab of the Applications feature.
- If there are any files listed, select the checkboxes next to them and click Remove.
Manual removal
Uninstalling Office manually is more complicated than using an app uninstaller because you need to locate files in several different folders and move them to the Trash. If you are in the mood for some detective work, follow these steps one by one:
- Go to your Applications folder and select Microsoft Excel.
- Press and hold the Command key and click the following apps: OneNote, Outlook, PowerPoint, Word, and One Drive.
- With all those apps selected, drag them to the Trash or Control-click one of the apps and choose Move to Trash from the menu.

- In the Finder, click the Go menu and choose Go to Folder, or press Command+Shift+G.
- In the box that opens, type
~/Library/Containersand press Return. - Locate each of the folders listed below and drag them to the Trash (some of them may not be present):
com.microsoft.errorreporting
com.microsoft.Excel
com.microsoft.netlib.shipassertprocess
com.microsoft.Office365ServiceV2
com.microsoft.Outlook
com.microsoft.Powerpoint
com.microsoft.RMS-XPCService
com.microsoft.Word
com.microsoft.onenote.mac
- Click the back arrow in the Finder window to go back to
~/Libraryand open the Group Containers folder. - Locate the folders below and move them to the Trash (again, some may not be present):
UBF8T346G9.ms
UBF8T346G9.Office
UBF8T346G9.OfficeOsfWebHost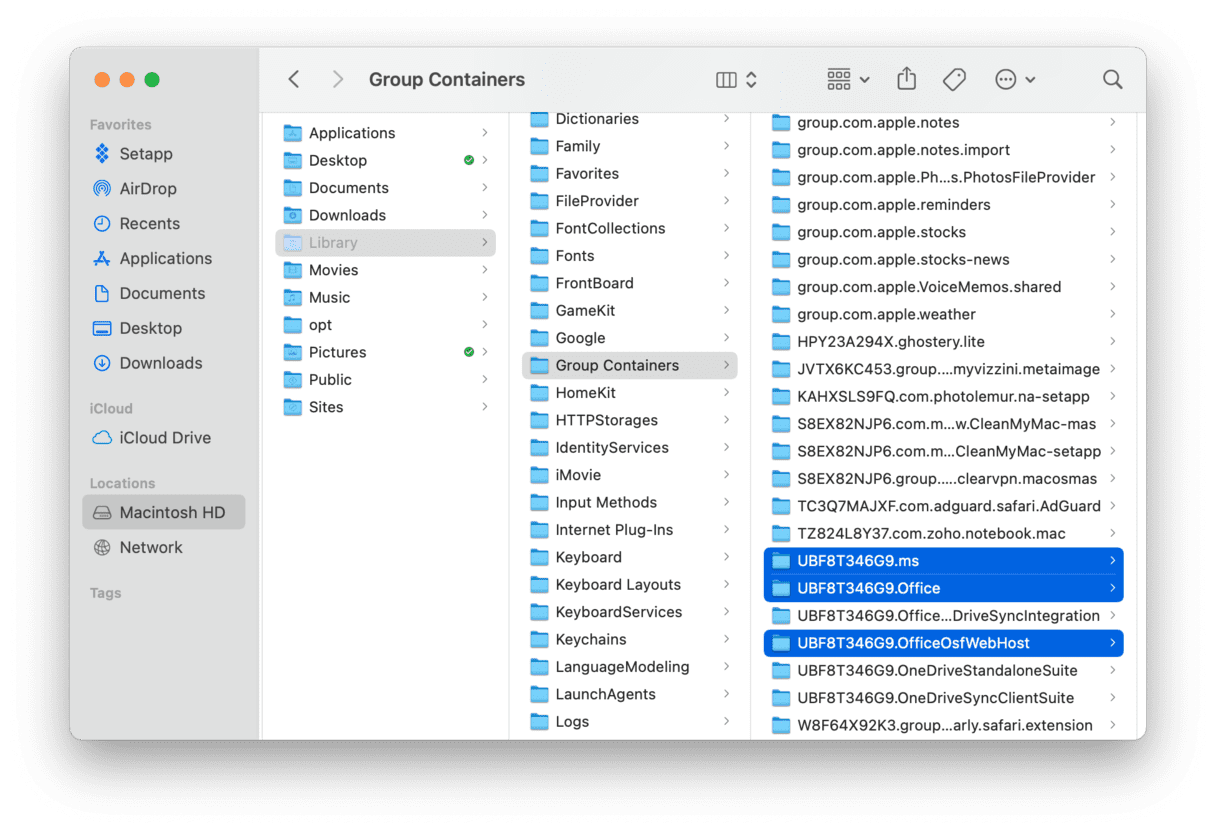
- Empty the Trash.
- If any Office icons are in the Dock, right-click them and choose Options > Remove from Dock.
- Restart your Mac.

You have now uninstalled Office from your Mac.
Why is it so difficult to uninstall Office?
Good question! Microsoft offers an uninstall utility on Windows PCs that allows you to remove Office or any Office app with a few clicks. However, on a Mac, you have to do it the manual way. That means not just removing the app binaries themselves but hunting down all the other ‘junk’ files that Microsoft Office installs on your Mac.
How to troubleshoot common uninstallation issues
Sometimes, when uninstalling MS Office, you may encounter one of the following errors:
- An item is in use
- An application is open
- Permission denied (usually while trying to send files to the Trash)
- Office reappearing after the uninstallation
- Being unable to remove some files
They may either pop up as an error message or simply prevent your from completing an intended action.
If you face any of the above, follow the steps below one by one:
- Close all files in MS Office format and quit all MS Office apps. Also, consider quitting all other apps running in the background to avoid conflicts with Microsoft applications.
- Restart your Mac from the main Apple menu.
- Run First Aid for your startup disk using Disk Utility — you can open it from Applications > Utilities.

- Repair disk permissions — follow the steps outlined in this guide.
- Boot your Mac into safe mode and follow the uninstallation steps above. Check if you have not missed any because Office apps might reappear if you have.
Uninstalling Microsoft Office is complicated since there is no official uninstaller. It is why you have to manually track down files and folders and drag them to the Trash. A much easier solution is to use the CleanMyMac’s Uninstaller tool, which can uninstall applications with just a couple of clicks, removing all their associated files.


