If you’re sent a PDF of a form or document by email, and you need to sign and return it, it’s much easier to sign it on your Mac and send it straight back than it is to print it out, sign the printout, and then scan it back to your Mac. Keep on reading, and we’ll show you how you can do that.
How to sign PDFs on your Mac
If you have Adobe Acrobat Pro, you could use that to sign a PDF on your Mac. But most of us don’t, so we’re going to show you how to do it using Preview.
Start by filling in the form
- Launch Preview and open the form you want to sign.
- Click the Pencil icon and then the form button in the toolbar (a rectangle with dots across it).
- Click in the boxes on the form and type in your details.
Sign the PDF
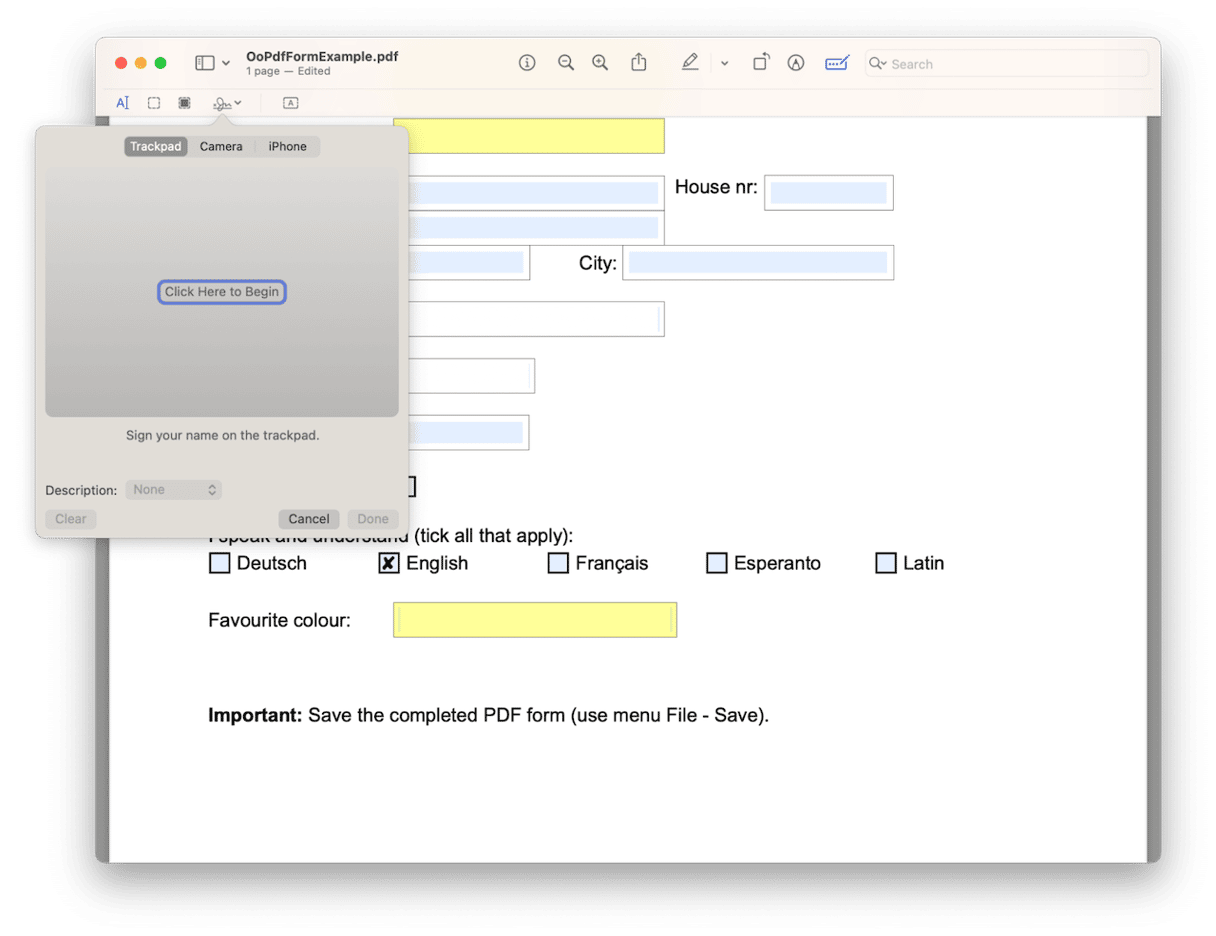
- Click the signature button in the form filling toolbar (a squiggly line).
- Choose Create signature.
- You now have a choice of how to create the signature
Sign a PDF using the trackpad
- Choose Trackpad.
- Click on the signature box.
- Use your finger to write your signature on your Mac’s trackpad. If your trackpad has force touch, you can press down harder to make the ink darker.
- Click Done when you’re finished or, if you don’t like your signature, click Clear and start again.

Sign a PDF using your Mac’s camera
- Click the camera icon.
- Write your signature on a piece of white paper and hold it up to the camera.
- Make sure your signature is level with the blue line.
- When your signature appears in the window, click Done. Or, if you don’t like it, click Clear and start again.
Sign a PDF using your iPhone or iPad
- Click Select Device.
- Choose the device you want to use.
- Sign your name with your finger on your iPhone or iPad.
- If you’re happy with the result, click Done. If not, click Clear and start again.
Every time you click Done, the signature you created is saved so that you can use it again. And you can save multiple signatures, and each time you need to sign a PDF, choose the one you want.
- Click the signature button.
- Choose the signature you want to use.
- Drag it to the place you want it on the page.
- Use the handles to resize it so that it fits the space.
There are lots of ways of signing a PDF in Preview. You can use your Mac’s trackpad, camera, or even the screen of your iPhone or iPad. Follow the instructions above for whichever method you want to use.


