Adobe Lightroom running slow is common since managing, editing, and processing tens or hundreds of images is never going to be a lightning-fast process. Although a quick restart can sometimes be enough to get things back to normal, it’s likely that whatever was responsible for making Lightroom slow will manifest again soon enough. Fortunately, there are a number of things you can do to speed up Lightroom. Let’s dive in!
How to speed up Lightroom on your MacBook
Before you can speed up Lightroom, you need to get to the root of why Lightroom is running slow on your Mac. In most cases, the reason behind poor performance falls under one of three categories:
- Insufficient cache size
- Software issues, including the way you use Lightroom
- Hardware problems — not enough memory, space, or CPU
The good news is all of these could be solved, albeit with various degrees of difficulty.
1. Increase the default cache size
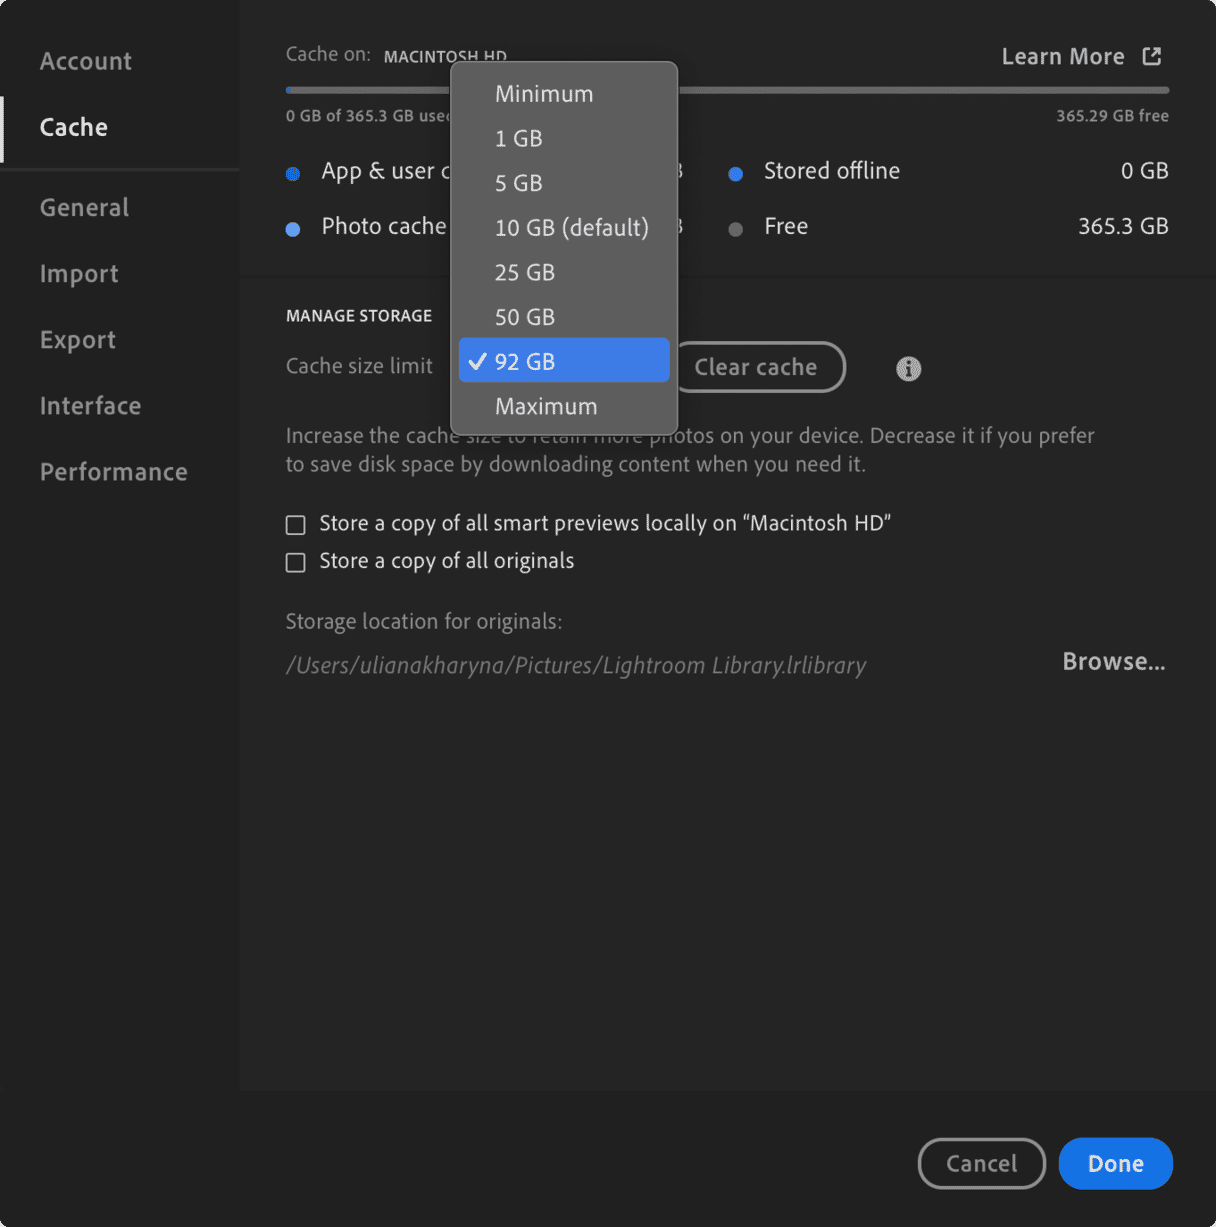
The easiest and one of the most productive fixes you can do is upping the cache size: while the default cache size set by Lightroom ranges from 4 to 10 GB, many users see improvements by increasing this to somewhere between 50 and 70 GB. It goes without saying that the more photos you’re working with, the larger cache size you’ll need.
It might seem surprising that Adobe sets such a (comparatively) low cache size, given that the average Lightroom user is likely to be working with thousands, tens of thousands, or even more images, but luckily, this problem is very easy to fix.
Here’s how to do it:
- Open Lightroom and navigate to Preferences > Cache.
- Change Cache size limit.
2. Accelerate Lightroom with proper settings
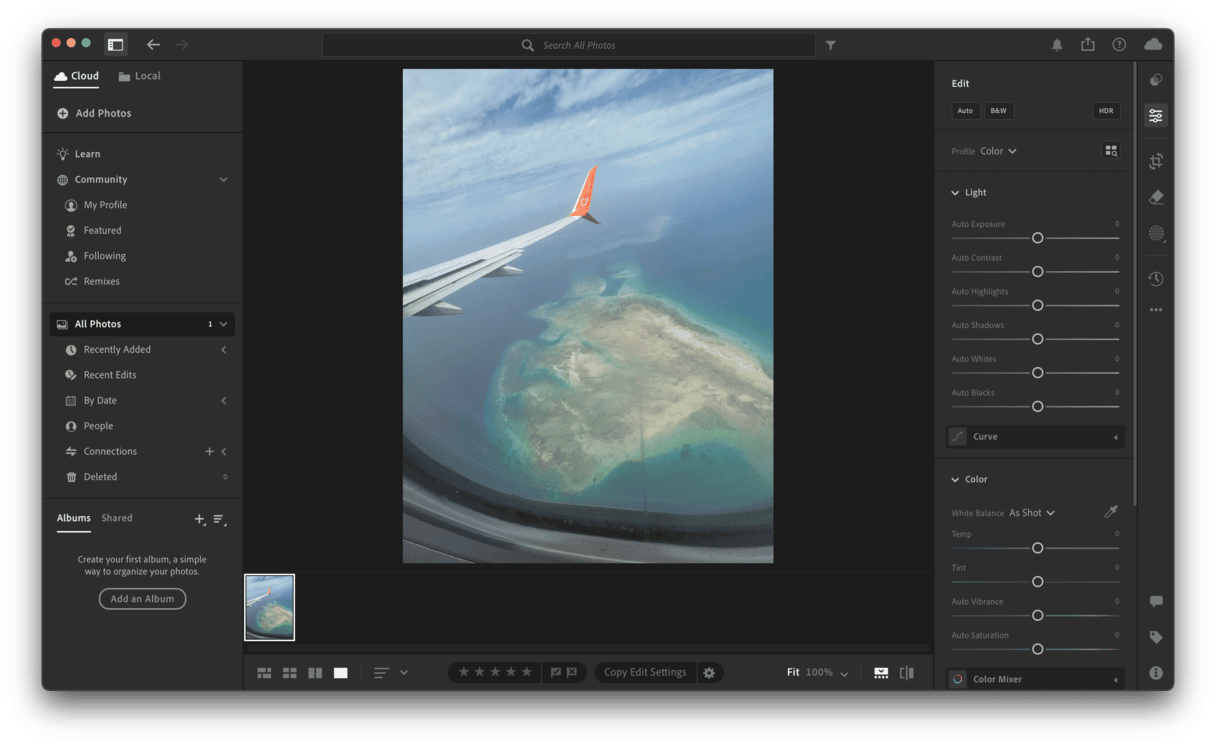
If changing your cache size doesn’t help speed up Lightroom, there are a few other things you can do with the app itself to reduce slowdown. A large number of presets, for example, can cause sluggish performance. While you’d need a very large number to see any negative impact, clearing them out can help improve how the app runs.
Thinking critically about the way you apply adjustments might also help speed up Lightroom. Local corrections and Spot Removal, for example, aren’t designed for use on a large number of corrections per image. Adobe even recommends that you use Photoshop for this level of correction. If you’re dead set on using Lightroom to make such changes, clearing out your History panel can have a significant impact as it doesn’t delete its content automatically unless instructed to do so.
3. Upgrade to the latest software and macOS
Basic as it may be, it’s always worth following tried-and-tested advice about making sure you’re using the most recent version of Lightroom. If you’re running Lightroom CC, then that won’t be an issue, but for those still making edits with an older version of Lightroom CS, it may be time to upgrade. So, consider switching from Lightroom Classic to Lightroom via Creative Cloud.
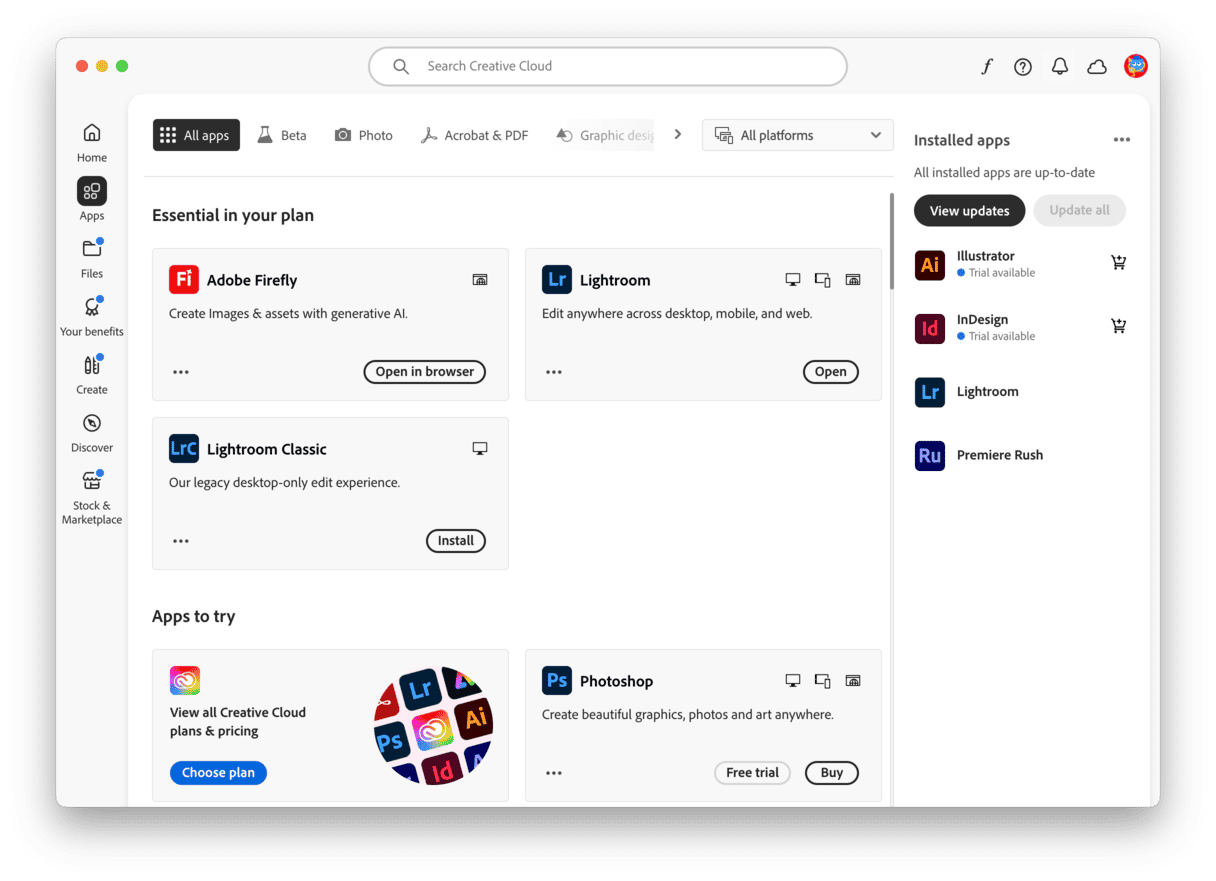
If you’ve already switched, here’s how to update Lightroom via Creative Cloud:
- Open Creative Cloud and click Apps in the sidebar.
- Click Update All under Installed apps.
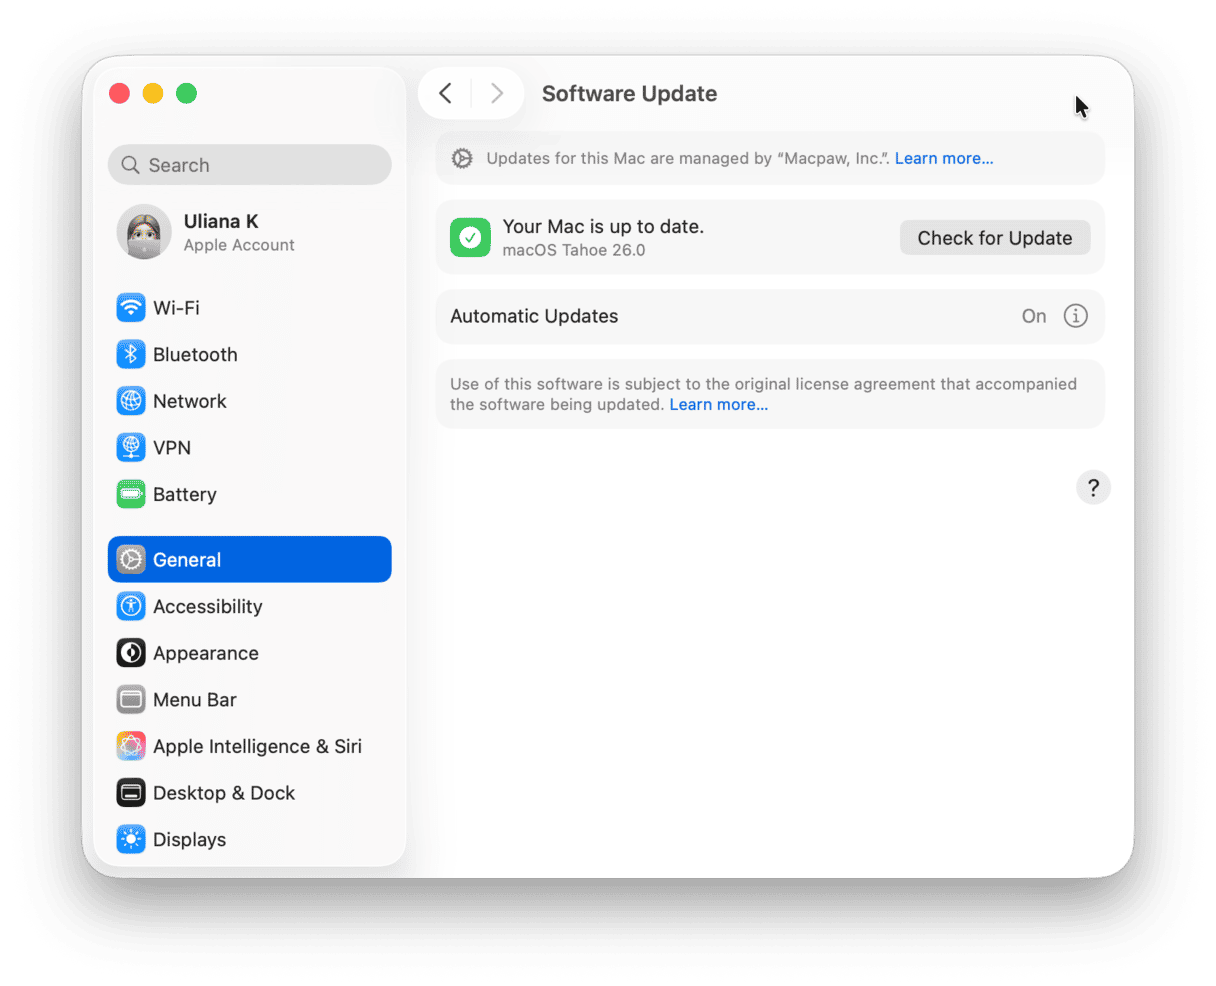
Similarly, upgrading to the latest version of macOS is advised when you’re trying to get the most out of Lightroom. While it’s unlikely that changes like these will result in any huge improvements to Lightroom’s performance, it’s true that newer versioning typically addresses incompatibility issues and bugs, even if it may introduce a few new ones of its own.
So, go to System Settings > General > Software Update and install any updates waiting there.
4. Switch to automatic Mac maintenance
You probably knew it was coming, but it’s time to look at one of the most significant ways to speed up Lightroom: slow performance is often down to insufficient RAM and hard disk space. Upgrading your setup is an option if your machine is totally outdated, and it can be worth it if it significantly improves your efficiency by reducing the amount of time you spend waiting around.
However, and this should come as good news for the cash-strapped, it’s not the only option! An app like CleanMyMac, as the name suggests, is a great way of clearing some hard disk space and removing other unnecessary and outdated files clogging up your Mac and resulting in Lightroom running slow.
Using CleanMyMac is simple:
- Get your free CleanMyMac trial.
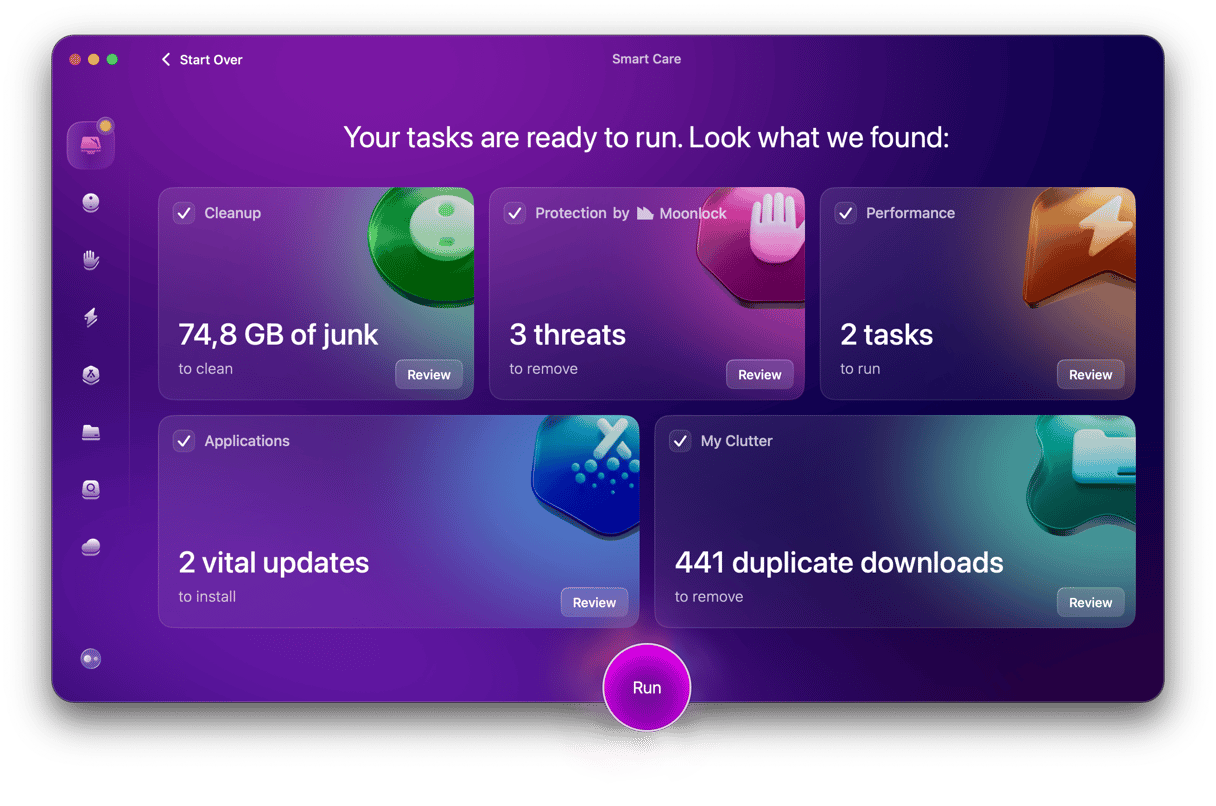
- Click Smart Care > Scan.
- Click Run to streamline your system overall: remove junk files, duplicate downloads, and any malware that may have found its way onto your Mac, install critical app updates, and run maintenance tasks.
Extra tips to speed up Lightroom Classic
If you still use Lightroom Classic, there are a few more things you can do to speed it up.
1. Change Standard Preview Size
Actions like rendering 1:1 previews often take a long time to create because they involve the processing of so much data. Standard previews will usually do the job just as well unless the work you’re doing is only minuscule in scale. When you really need 1:1 previews, setting aside time to leave your computer alone and render them manually is often the most effective solution.
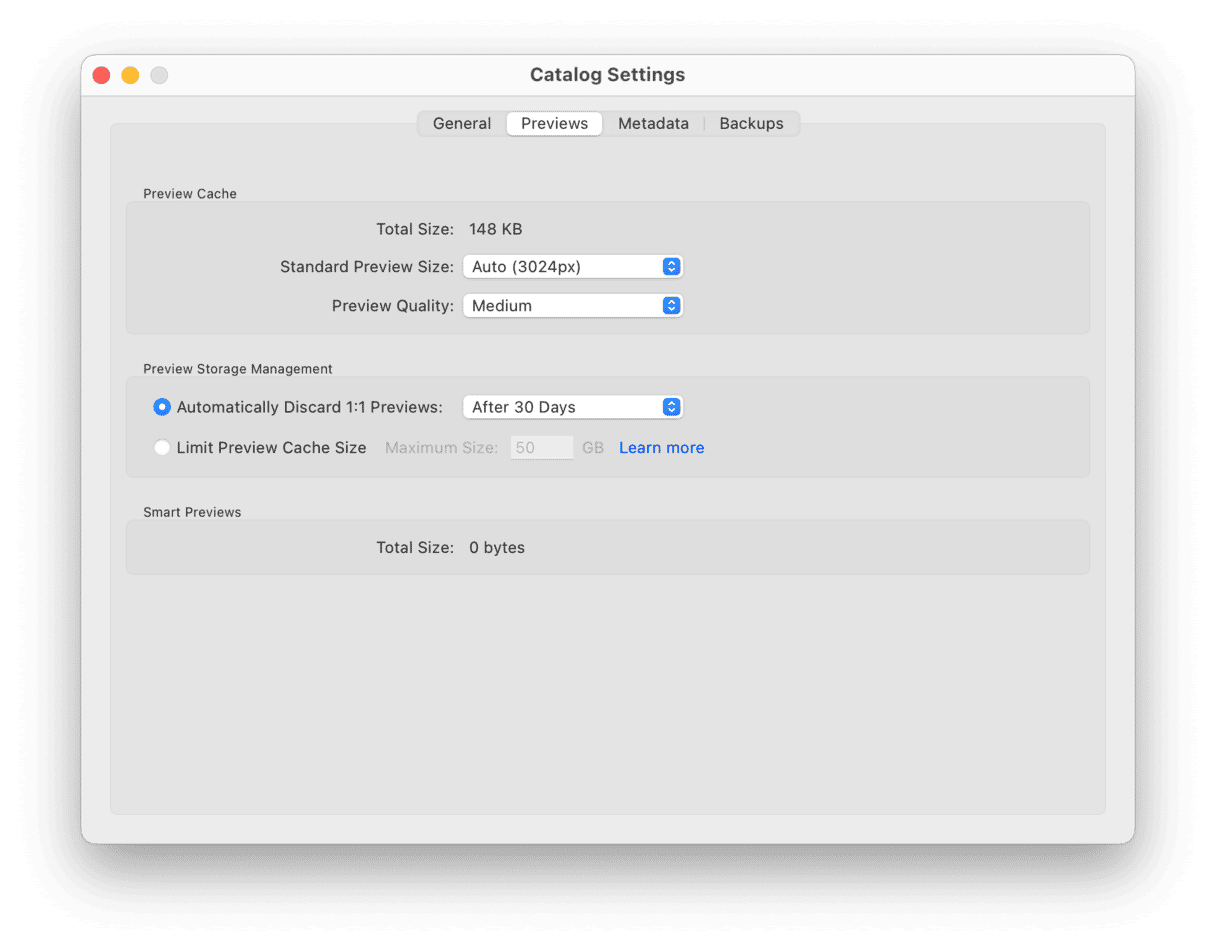
Counterintuitively, hanging on to 1:1 previews rather than discarding them can actually improve performance in the long run: when you discard 1:1 previews, Lightroom has to recreate new ones if you need them again, even if only for very minor revisions. You can check it in Catalog Settings > Previews.
For a standard preview size value, in most cases, 1024 or 1440 pixels should be enough.
2. Disable Address Lookup and Face Detection
These features may be valuable when importing new images or in similar circumstances, but most of the time, they just cause a slowdown due to eating up memory and CPU. So, try disabling them to see if it improves the performance of Lightroom.
Here’s what to do:
- Click Lightroom Classic in the menu bar and go to Catalog Settings.
- Deselect the checkboxes under Address Lookup and Face Detection.
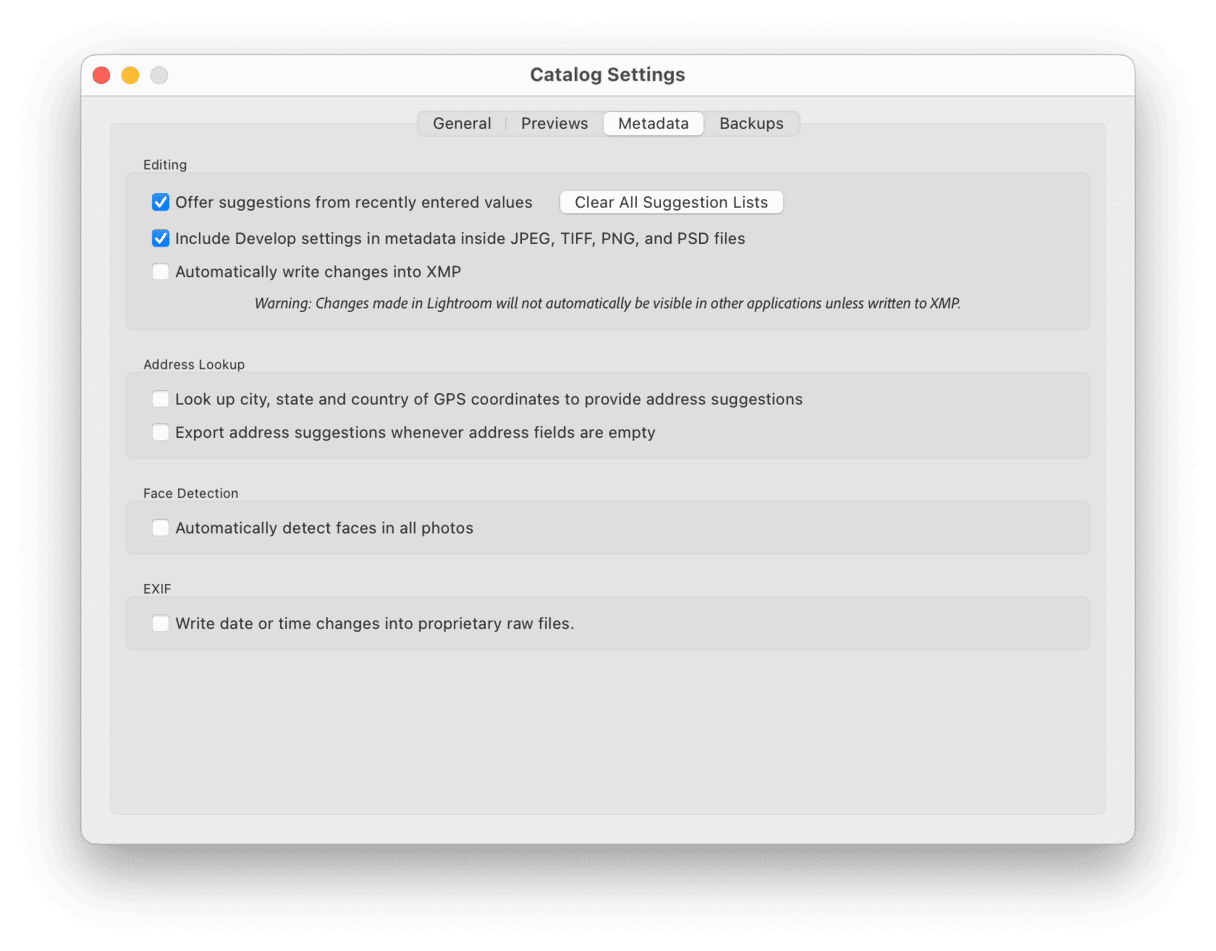
You can select them to enable both features should you need these features in the future.
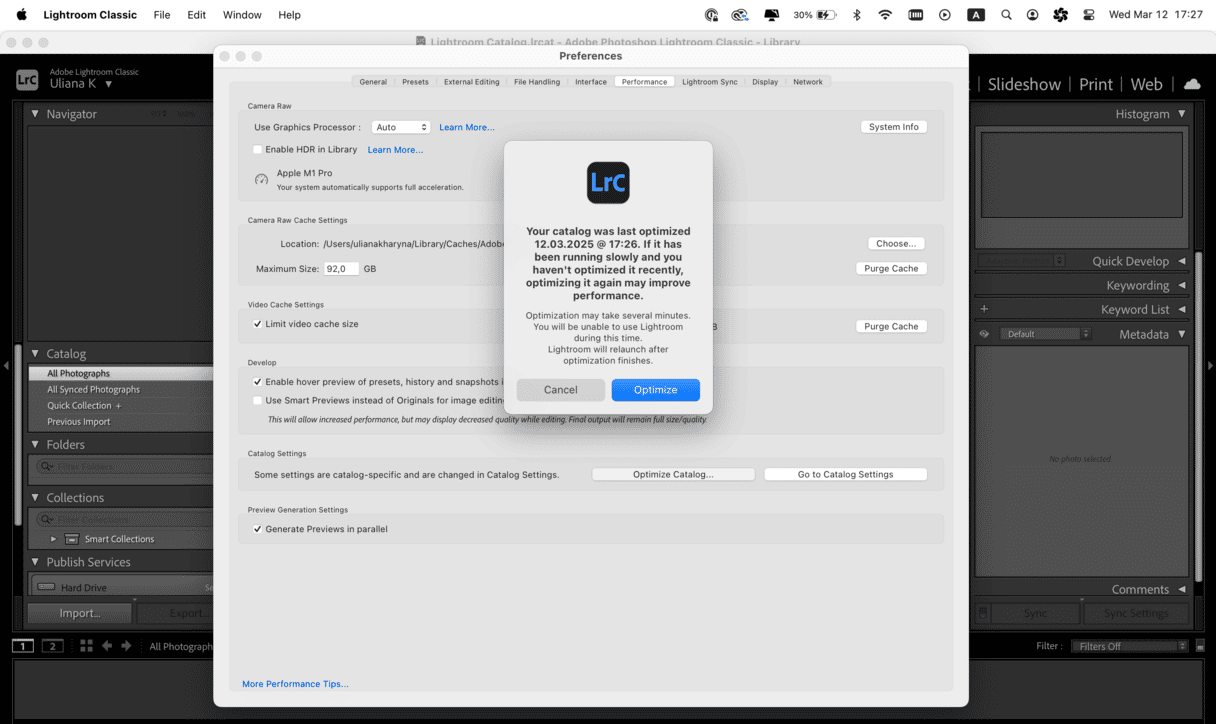
3. Optimize catalog upon shutdown
Optimizing catalog upon shutdown helps make files smaller by collapsing them, and it also rebuilds the database indexes. As a result, it may speed up Lightroom. Do it every time you quit Lightroom or before starting to work with it.
Here’s how:
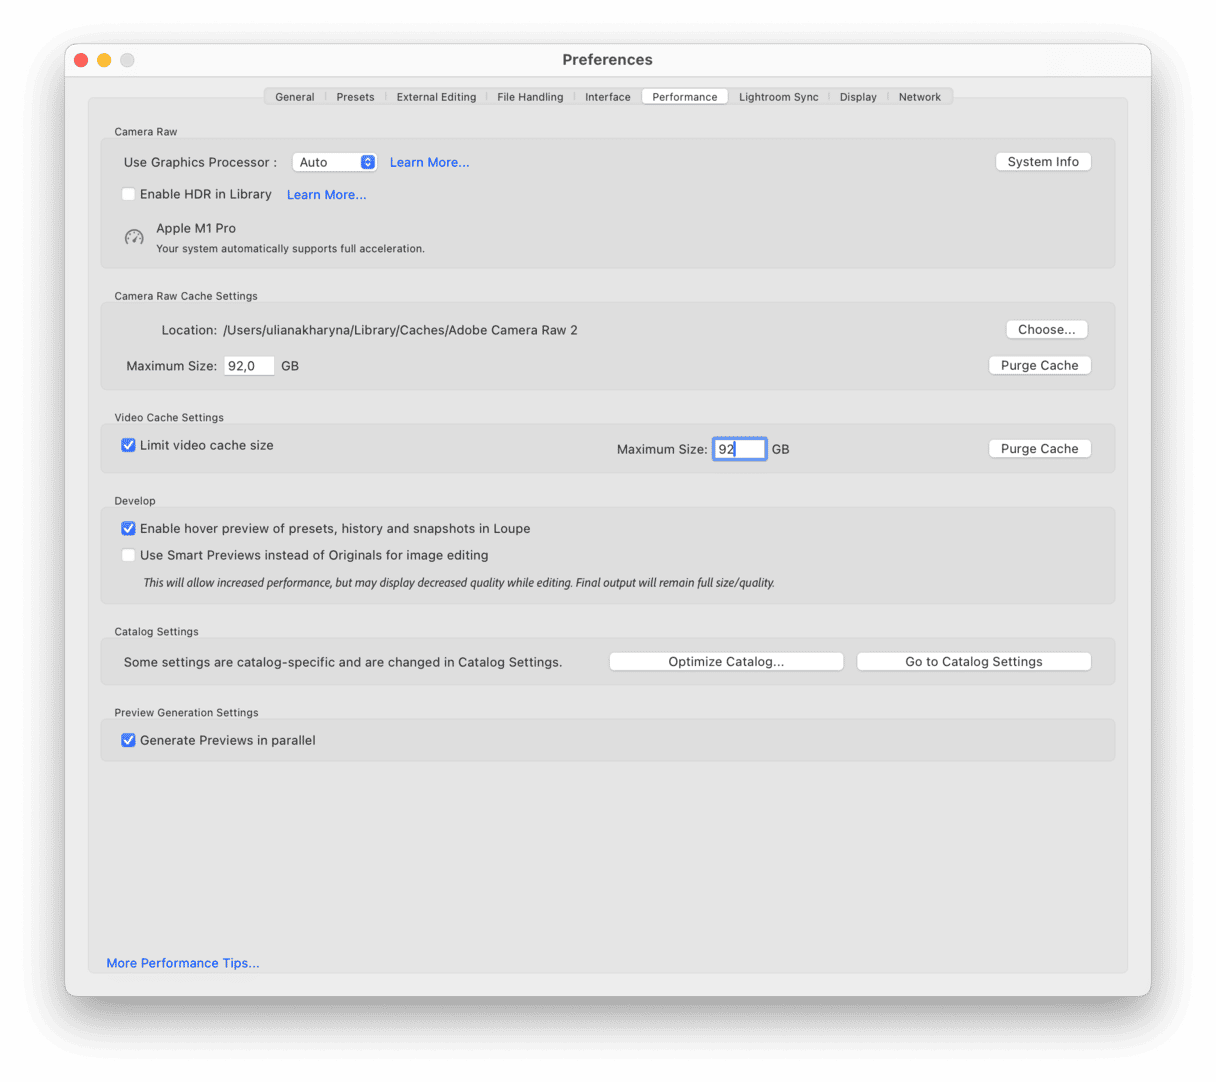
- Go to Preferences > Performance.
- Under Catalog Settings, click Optimize Catalog.
- Confirm by clicking OK.
If you still find yourself asking, “why is Lightroom so slow?” on a regular basis, then you’ll want to keep an eye on the amount of disk space and memory available. Upgrading your computer should really be at the very end of your to-do list since most of the tips above will have a noticeable impact immediately.


