Is macOS Tahoe slow after updating? I noticed my Mac felt heavier than usual, too, with apps taking longer to open, the Finder lagging when previewing files, and scrolling through Safari unusually glitchy.
I've spent the last couple of weeks testing different fixes, trying both standard maintenance techniques and a few lesser-known tweaks that worked for me personally.
Some changes gave instant results, while others required a little patience. Below, I'll share exactly what worked, along with why it helps, so you can get your Mac feeling snappy again.
Why is macOS Tahoe slow?
After digging into Activity Monitor and reading Apple's developer notes, I found three main reasons why Tahoe feels slow and heavy after upgrading:
- Background reindexing: Tahoe introduced deeper system indexing for Spotlight and Photos, which runs aggressively after installation. On my Mac, this lasted nearly 48 hours.
- New system caching: The updated file system uses heavier caching for faster long-term performance, but it temporarily clogs SSD space right after the update. I saw almost 10GB of new cache files appear within a day.
- App compatibility lags: Some apps still aren't optimized for Tahoe.
The good news? It's all to be expected, and there are plenty of manual steps you can take to improve macOS Tahoe performance.
Fixes: Mac slow after Tahoe update
1. Check what's eating your Mac's resources
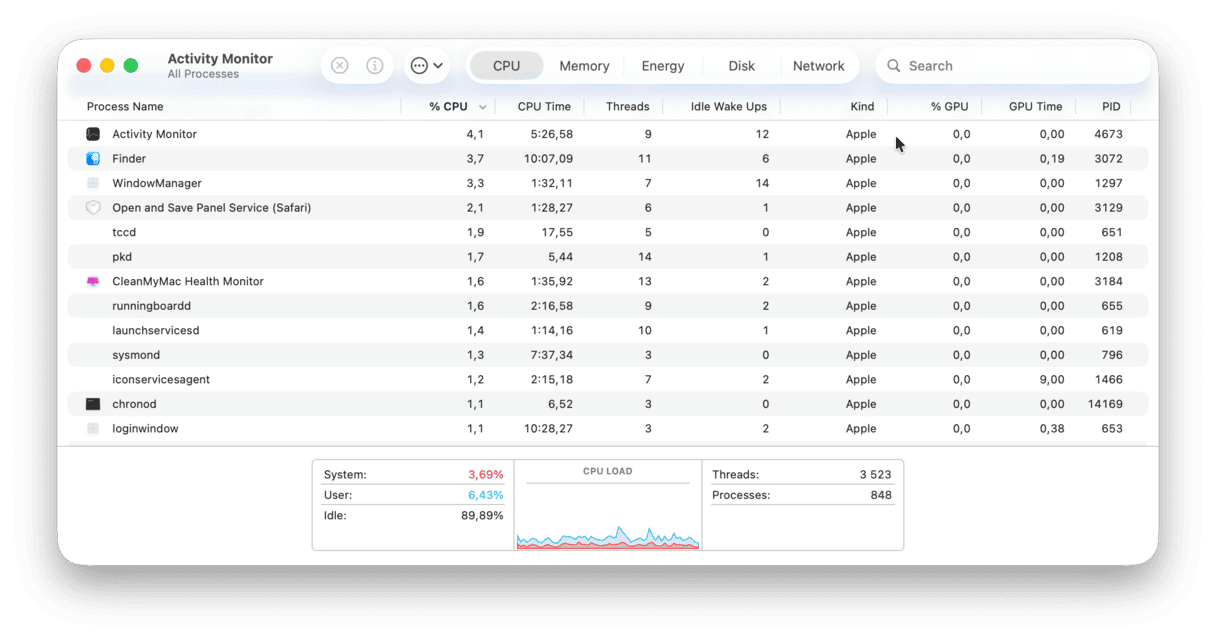
The first thing I did was open Activity Monitor (Applications > Utilities). It might sound glaringly obvious, but many people skip this step. In my case, a stubborn background process along with Spotlight indexing was spiking CPU usage. macOS Tahoe has updated indexing protocols, and after a big update, it can run for hours or even days if you have a large drive. If you see processes like mds or mdworker hogging resources, give it time to finish. But if an app you barely use is chewing through memory, consider uninstalling or force-quitting it to free up resources.
- Select any unwanted processes or apps in the CPU tab.
- Click the X button (top) to close them down.
2. Run some maintenance tasks
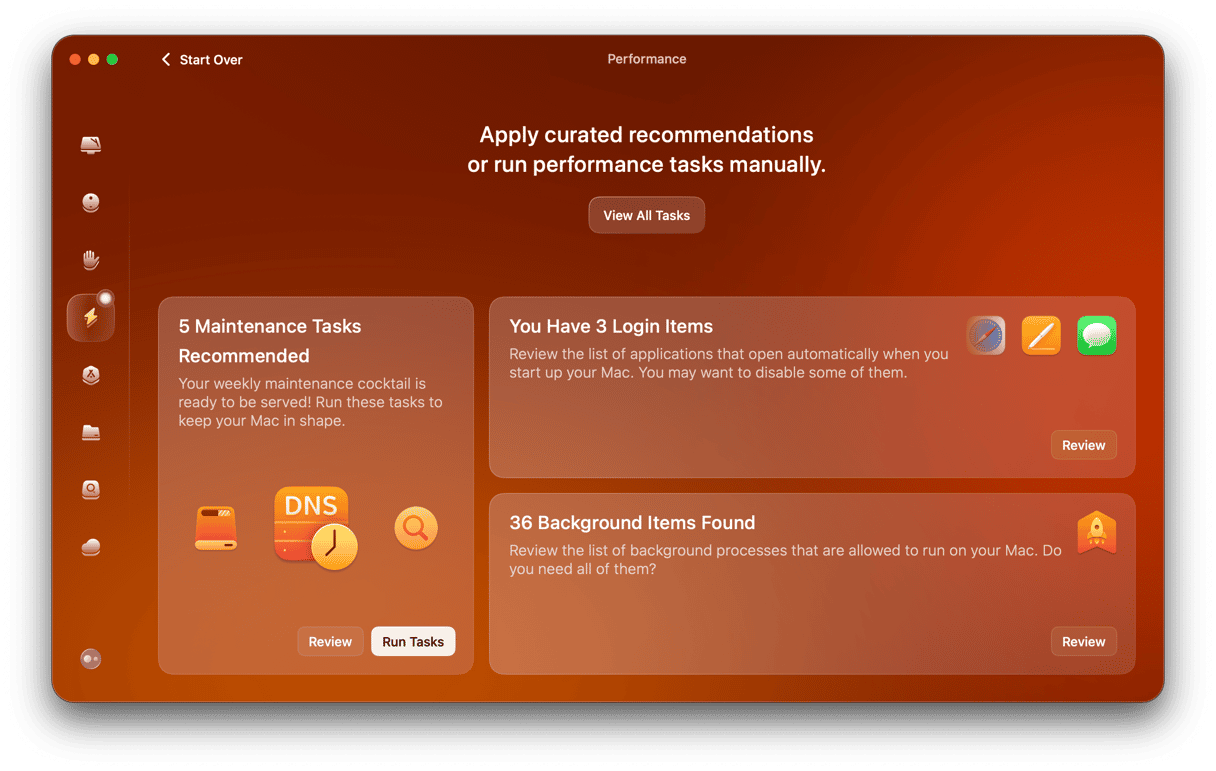
After waiting a day for indexing to settle, I still felt lag when switching between apps. Here's where I used CleanMyMac's Performance feature, which I've relied on for years. It gives you recommended maintenance tasks, which can make a surprising difference; here's how it works:
- Open CleanMyMac — get your free trial here (you can test it for 7 days at zero cost).
- Click Performance > Scan.
- Now, click View All Tasks.
- Select what you need and click Run.
3. Reduce your startup items
Tahoe loves to reload certain login items you might have turned off before. I found three apps: Zoom, Dropbox, and an old printer utility, added back to startup after the update.
To check and adjust, here's what to do:
- Go to System Settings > General > Login Items & Extensions.
- Disable anything you don't need running right after boot.
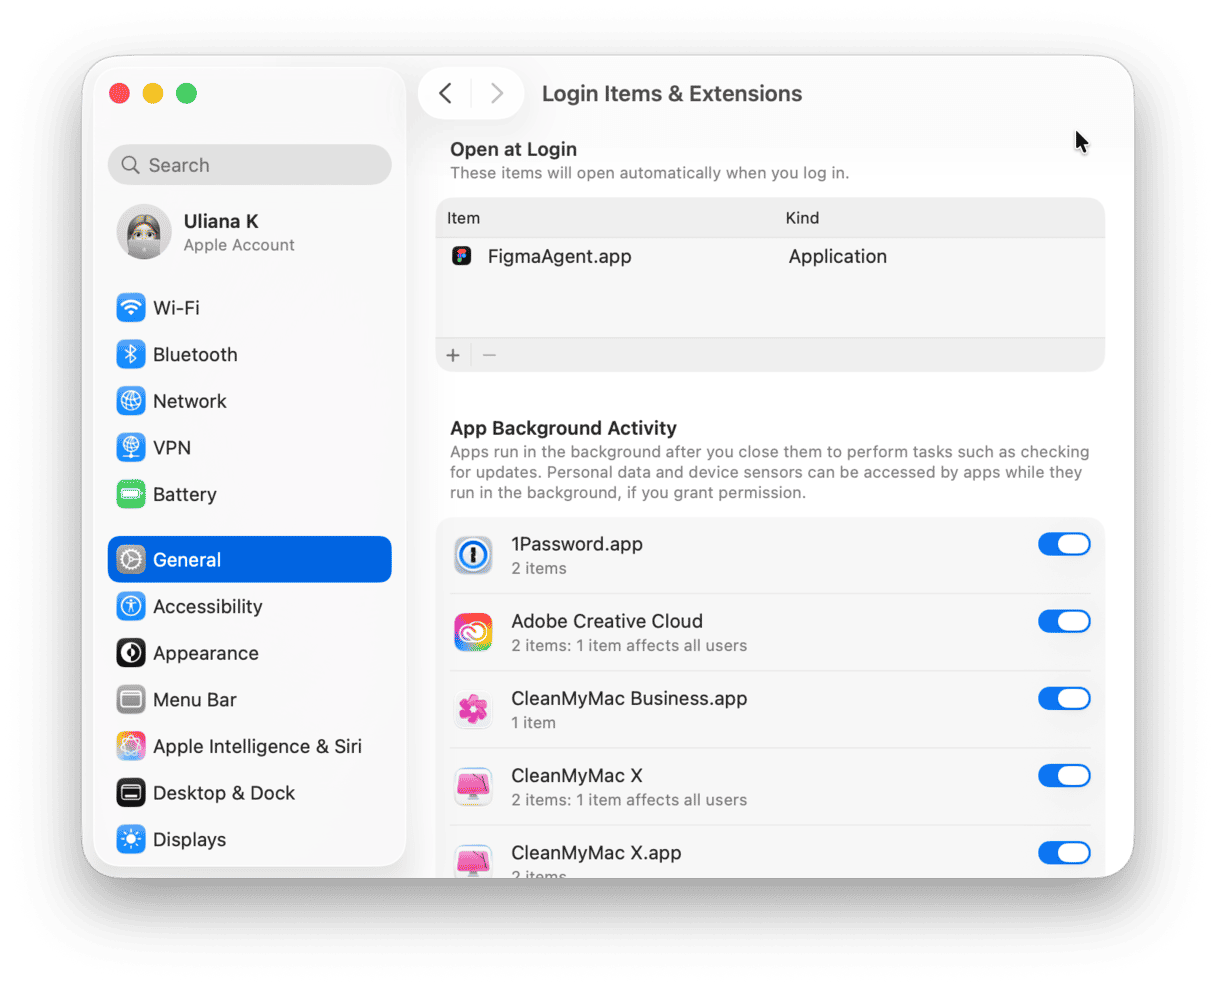
You can shave off some serious seconds by getting smart on what opens when you boot up your device. Not to mention give macOS Tahoe a little extra space to breathe.
4. Check and update your apps
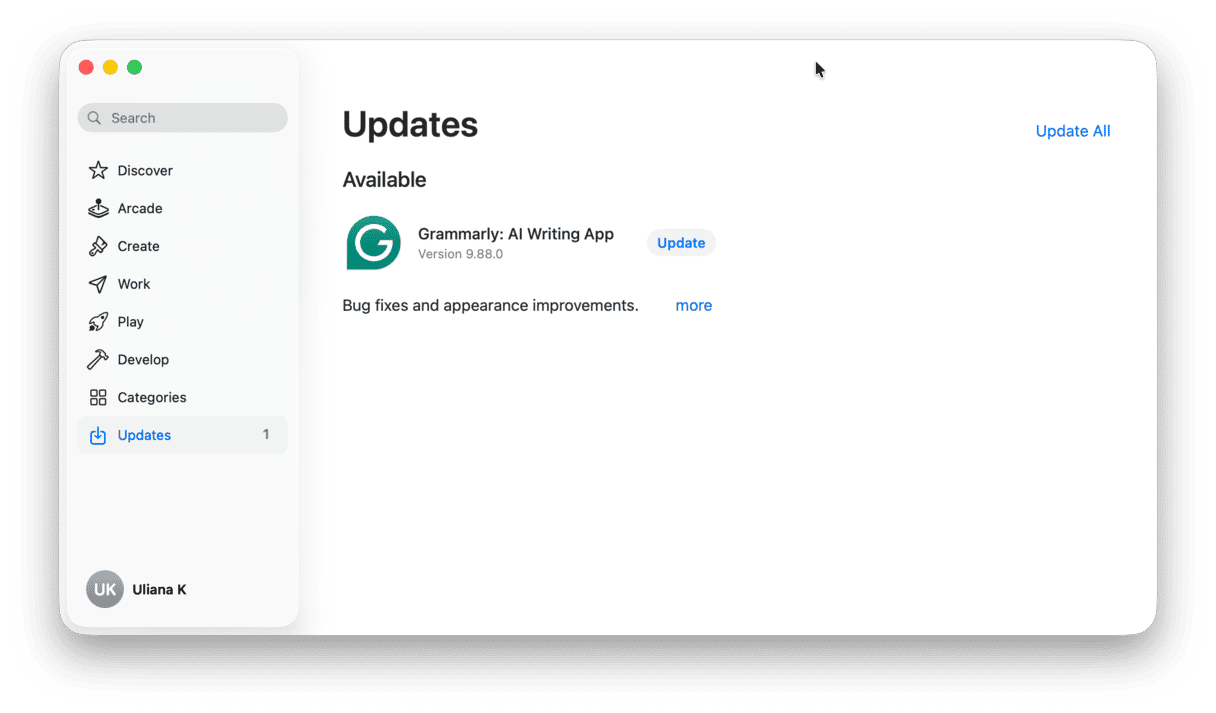
This was a surprise. Several of my third-party apps weren't optimized for Tahoe yet, including an older photo editing tool that was crashing constantly. After updating everything through the App Store and developer websites, system-wide lag reduced dramatically. If you use creative or resource-heavy software, this step is crucial. Developers often push performance patches after macOS updates.
Here's how to update apps on Mac:
- Check via the App Store which apps have updates available.
- If you installed the app directly from a developer's website, you'll need to manually check for updates there.
5. Clear out old system junk
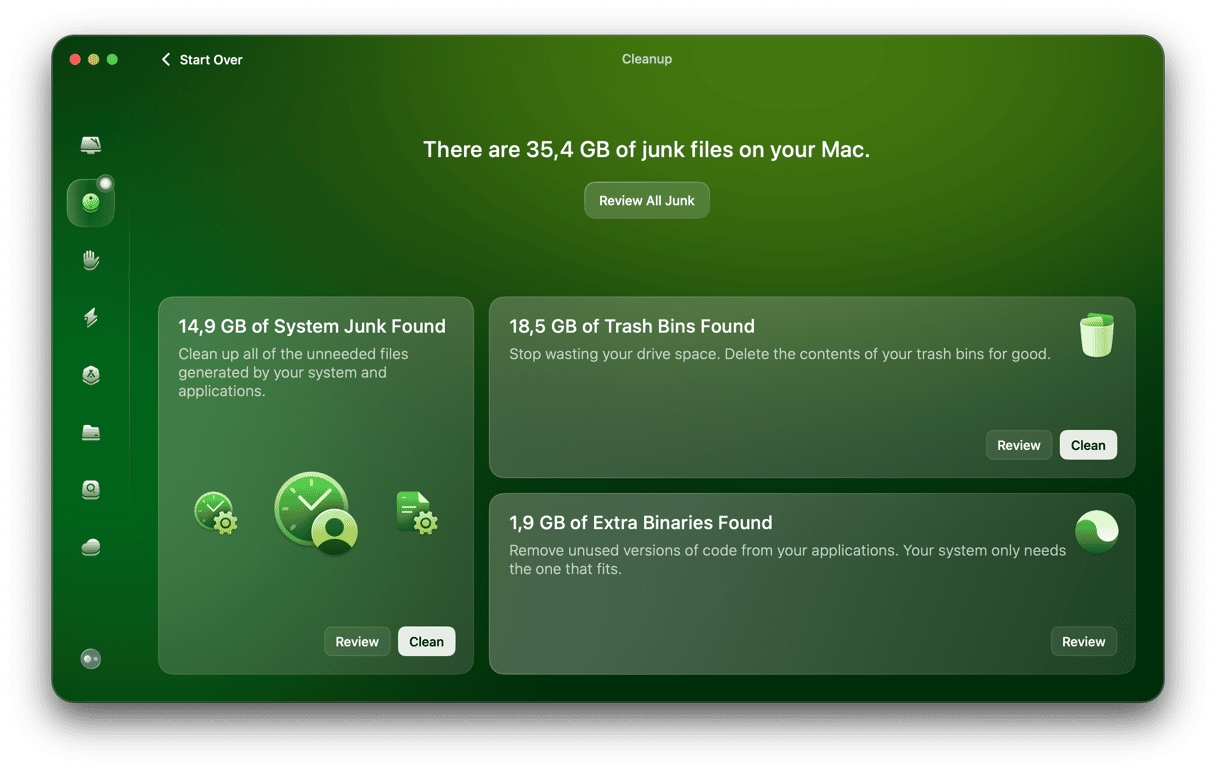
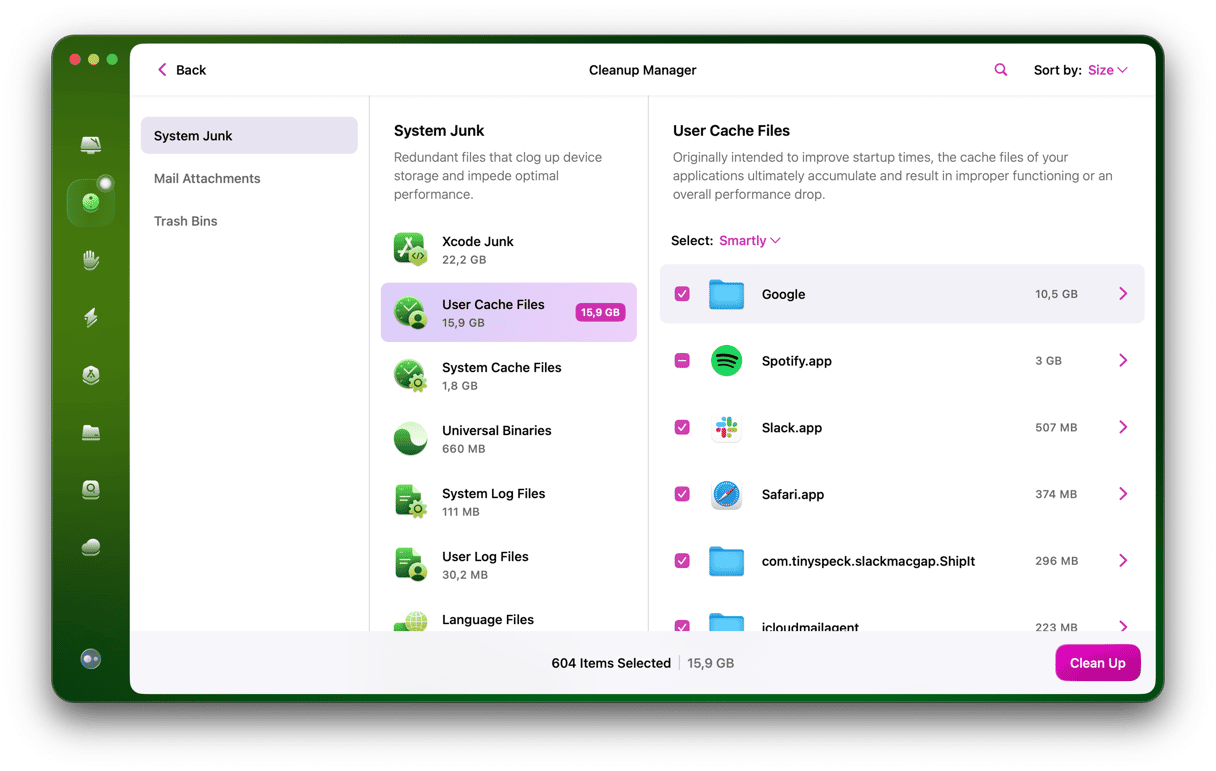
If your Mac is playing host to tons of old system cache, temporary files, and other outdated and unnecessary junk, then this will also hinder performance. Keeping on top of this regularly can really help keep your device running at its best, especially after a major system upgrade. I used CleanMyMac again, but this time, I used the Cleanup feature. It found an alarming 60+ GB of leftover cache, outdated Time Machine snapshots, and system junk on my Mac. Here's how to check:
- Open the app again, but this time click Cleanup > Scan.
- Click Review All Junk.
- Select stuff you want to delete and click Clean Up.
6. Check your iCloud syncing
If you're still finding that macOS Tahoe is laggy, it's time to check your iCloud syncing. macOS Tahoe's updated iCloud sync service caused background network spikes on my MacBook Pro.
I paused syncing for large folders temporarily; here's how:
- Go to System Settings > Apple Account > iCloud > Drive.
- Toggle off Desktop & Documents Folder.
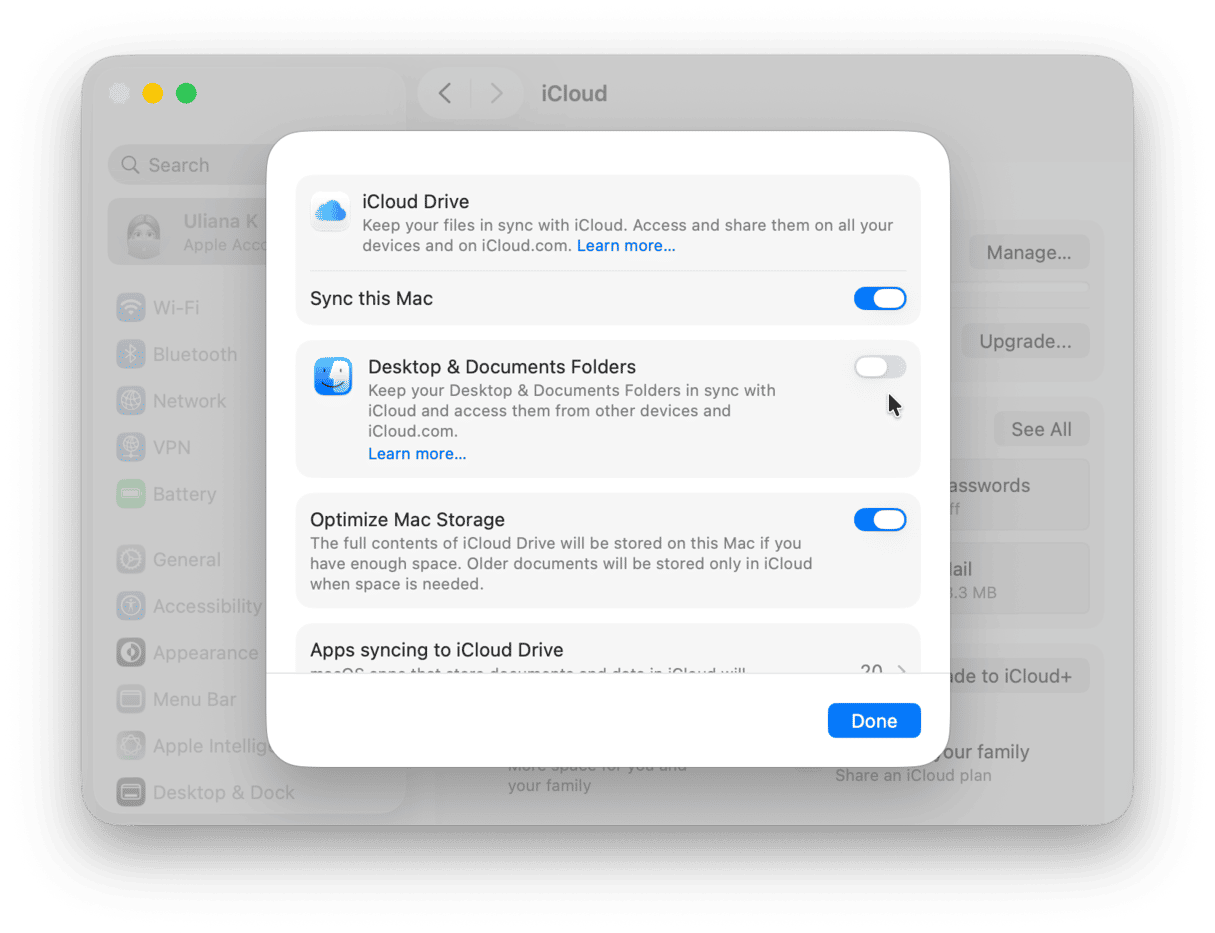
This will stop constant background uploads. Just see if this improves lag, and if it does, give it a couple of days before you toggle it back on, which should give your Mac enough time to finish up any other indexing jobs still running.
7. Keep 15-20% storage free
macOS Tahoe seems to need more breathing room than Sequoia if your storage dips below 10% free, swap files and temporary system data pile up fast.
You'll need to keep an eye on your available storage by checking in System Settings > General > Storage.
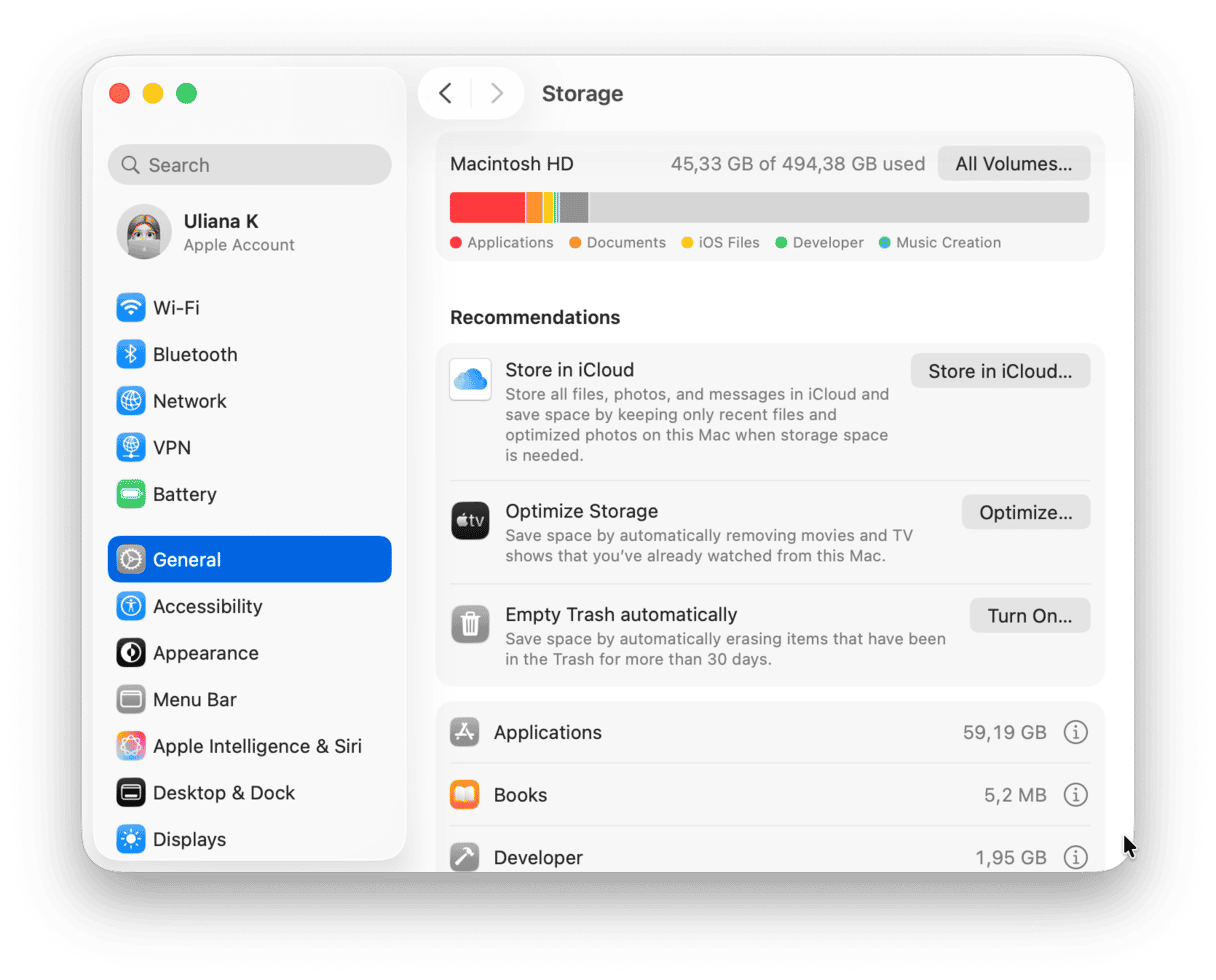
If your system is filling up, here are some tips on how to quickly free up space.
- Transfer old files and large media files to external or cloud storage.
- Remove apps you no longer need.
- Clean out your Downloads folder.
- Clear up your Desktop files and folders.
- Empty your Trash.
8. Give macOS Tahoe time to settle
Finally, a reality check. Every major macOS update runs background optimization for a few days, Spotlight indexing, Photos library updates, and Mail database reindexing. I noticed real performance improvements after about 72 hours, so don't panic immediately after updating.
All of these tips should help improve macOS Tahoe's performance. After running these tasks, my Mac was quickly back to its old self.


