So you’ve just installed macOS Tahoe, hoping to enjoy new features and better Mac performance — but instead, you’ve run into bugs or Wi-Fi that just won’t connect. We’ve created a handy guide to help you deal with the most common issues, from installation problems to apps crashing on the new macOS.
How to fix macOS Tahoe problems
Let’s go through the macOS Tahoe known issues one by one and discover quick solutions.
1. macOS Tahoe won’t install
If you see random error messages that stop everything and don’t allow you to install the latest macOS, try these fixes:
- Reclaim space on your Mac (at least 20GB is recommended).
- Restart your Mac and try installing Tahoe one more time.
- If it’s still stuck, boot into Tahoe Safe Mode to clear out temporary files. To do that, restart your Mac and hold down the Shift key until you see the login screen. Then log in, try installing macOS Tahoe again.
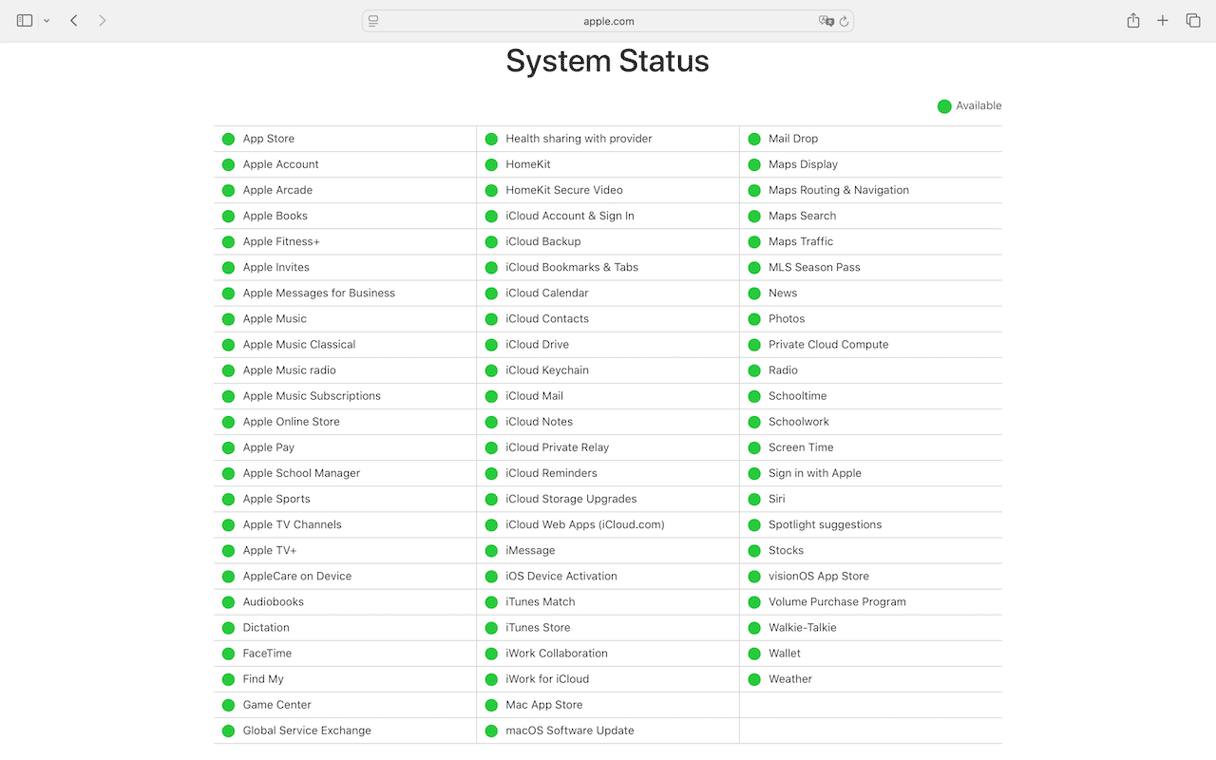
- Check if Apple’s servers are working. Visit Apple's status page and look for a green dot next to macOS Software Update.
2. Mac is slow after updating to Tahoe
You might see longer startup times, apps taking forever to load, or the spinning beachball showing up more than usual. This can be frustrating as you expect better performance from the new macOS. Remember that a slowdown right after an upgrade is normal — your macOS downloads the newest assets and needs some time to complete the setup.
If you’d like to speed things up without digging through settings, try using the dedicated Mac cleaner and speed booster like CleanMyMac. Its Performance tool will help you run a list of maintenance tasks, like reindexing Spotlight, repairing disk permissions, speeding up Mail, and more — all in just a few clicks. Here’s how to get started:
- Get your free CleanMyMac trial here.
- Open the app.
- Select Performance from the sidebar and run a scan.
- Click View All Tasks and choose those you want to run.
- Click Run.

Once you’ve tackled a few maintenance tasks, make the most of CleanMyMac’s other tools too. Safely clear out system junk, monitor Memory pressure and CPU load, update apps, and more.
For instance, here’s how running the Smart Care tool looks like:

3. Wi-Fi not working
If your Wi-Fi won’t connect after installing macOS Tahoe, try this: first, turn your Wi-Fi off and then back on — you can do this by clicking the Wi-Fi icon in the menu bar. If restarting didn’t solve the problem, unplug the router and plug it back in.
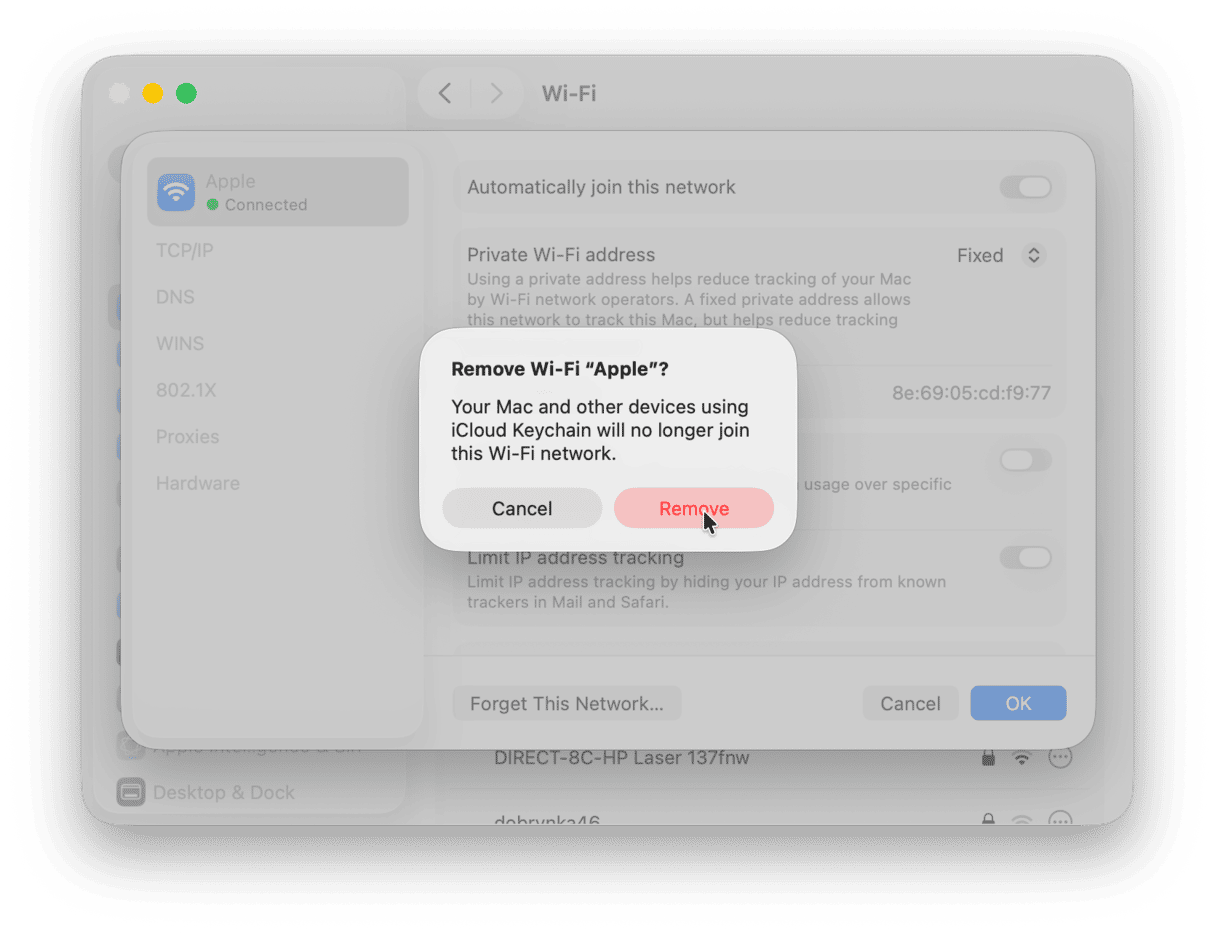
Another way is to forget your Wi-Fi network and reconnect from scratch. Here’s how to do that:
- Go to System Settings > Wi-Fi.
- Look for your Wi-Fi network.
- Click Forget This Network.
- Then, try to connect to your network again by entering your Wi-Fi password.
If it did not help, go to Network > Firewall and enable it.
We hope these steps will help you solve most Wi-Fi issues and get you back online.
4. Bluetooth not working
If your Bluetooth devices keep disconnecting, won’t pair, or if both Wi-Fi and Bluetooth stop working together, here’s what to do:
- Open System Settings > Bluetooth.
- Turn Bluetooth off, then turn it back on.
- Connect your device again.
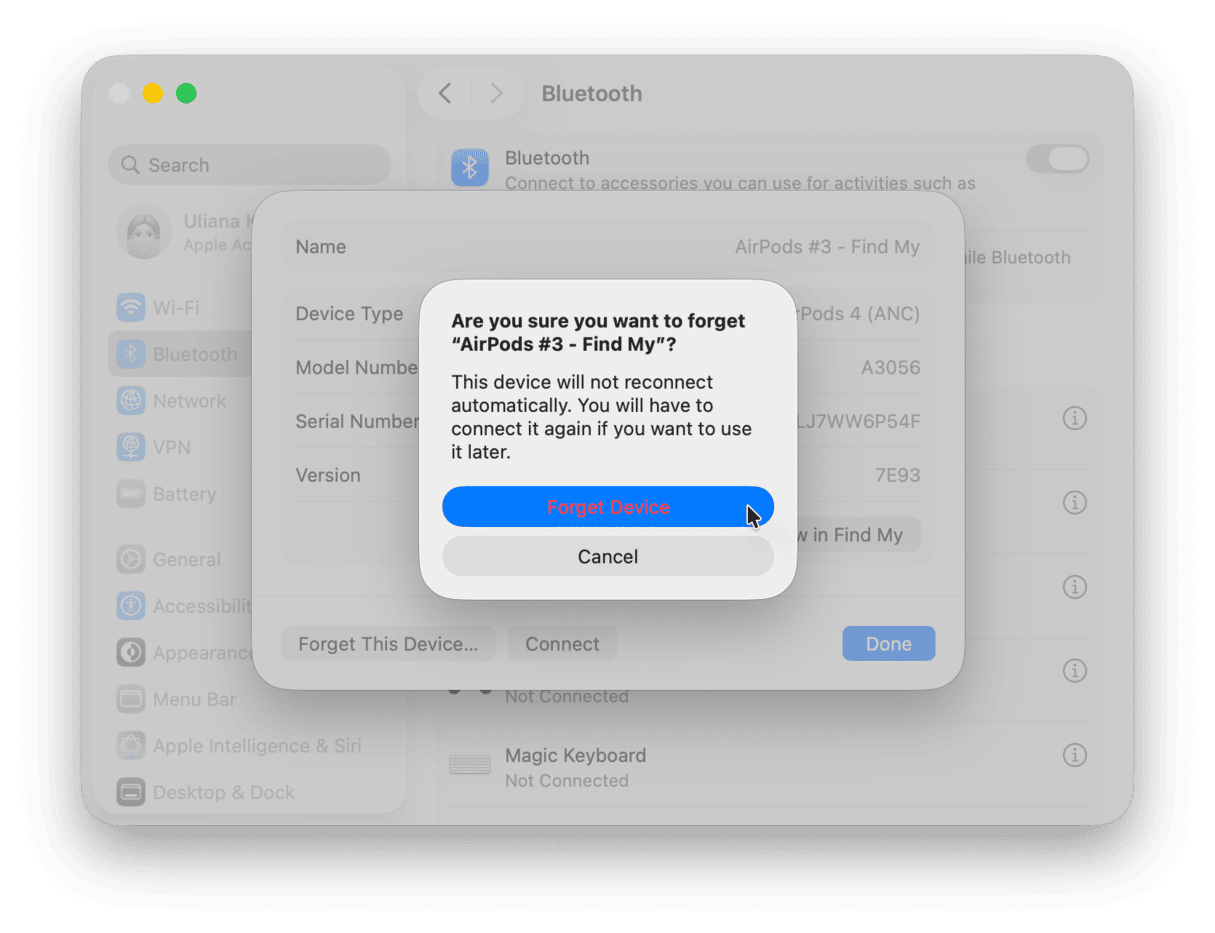
The next step to try — remove the device and pair it again:
- Go to System Settings > Bluetooth
- Find your device in the list.
- Click the “i” or right-click the device name.
- Choose Forget This Device.
- Reconnect your device to your Mac.
If your Bluetooth is still acting up, restart your Mac — a quick reboot can fix a lot of random connection problems.
5. Apps keep crashing on macOS Tahoe
If your apps keep closing or freezing, don’t worry — this can happen after an upgrade. First, check if there’s an update for the app in the App Store or on the developer’s website. Many apps get small updates to work better with the new macOS. You can also restart your Mac — sometimes that’s all it takes to stop random crashes.
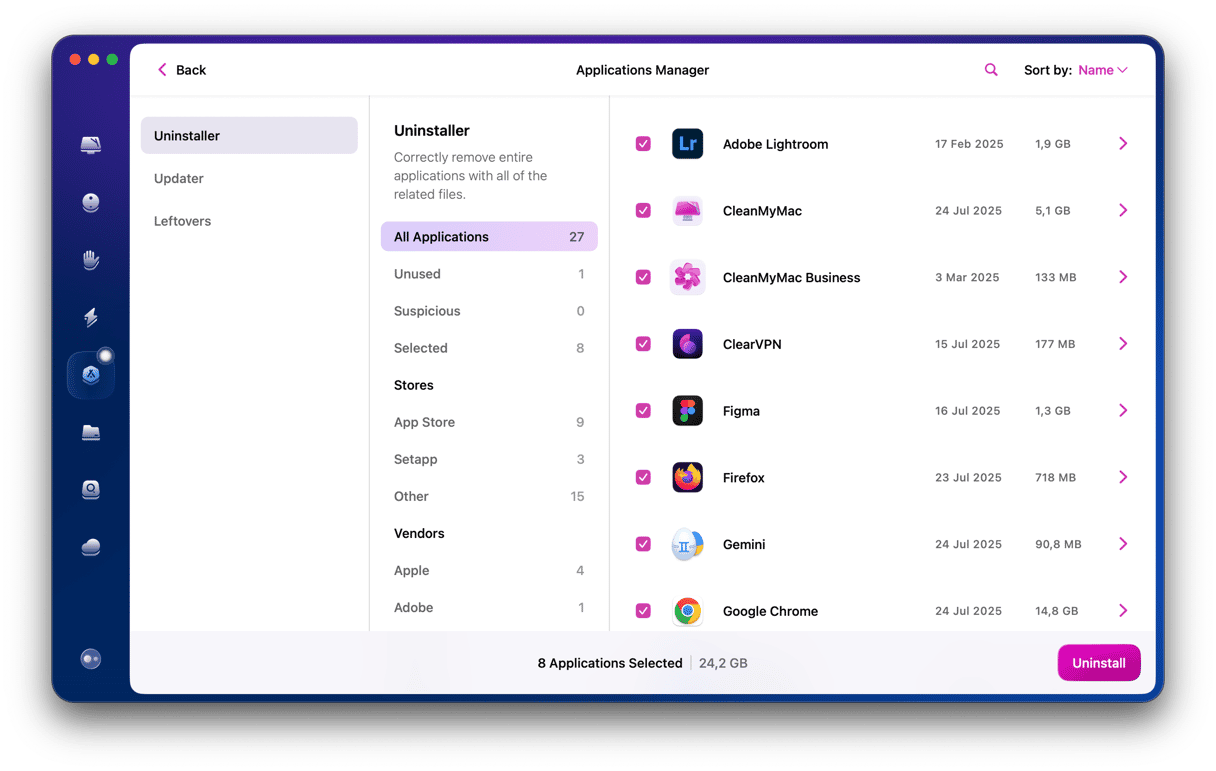
If that doesn’t help, you can try resetting the app. This means deleting its settings and preferences files so the app creates new ones the next time you open it. The fastest way to do that is to use the Applications tool in CleanMyMac. Here’s how it works:
- Open CleanMyMac and choose Applications from the sidebar.
- Click Scan, then choose Manage My Applications.
- In the Uninstaller tab, find the app in the list of all apps.
- Click an arrow next to its name and choose everything except Binaries.
- Click Remove.
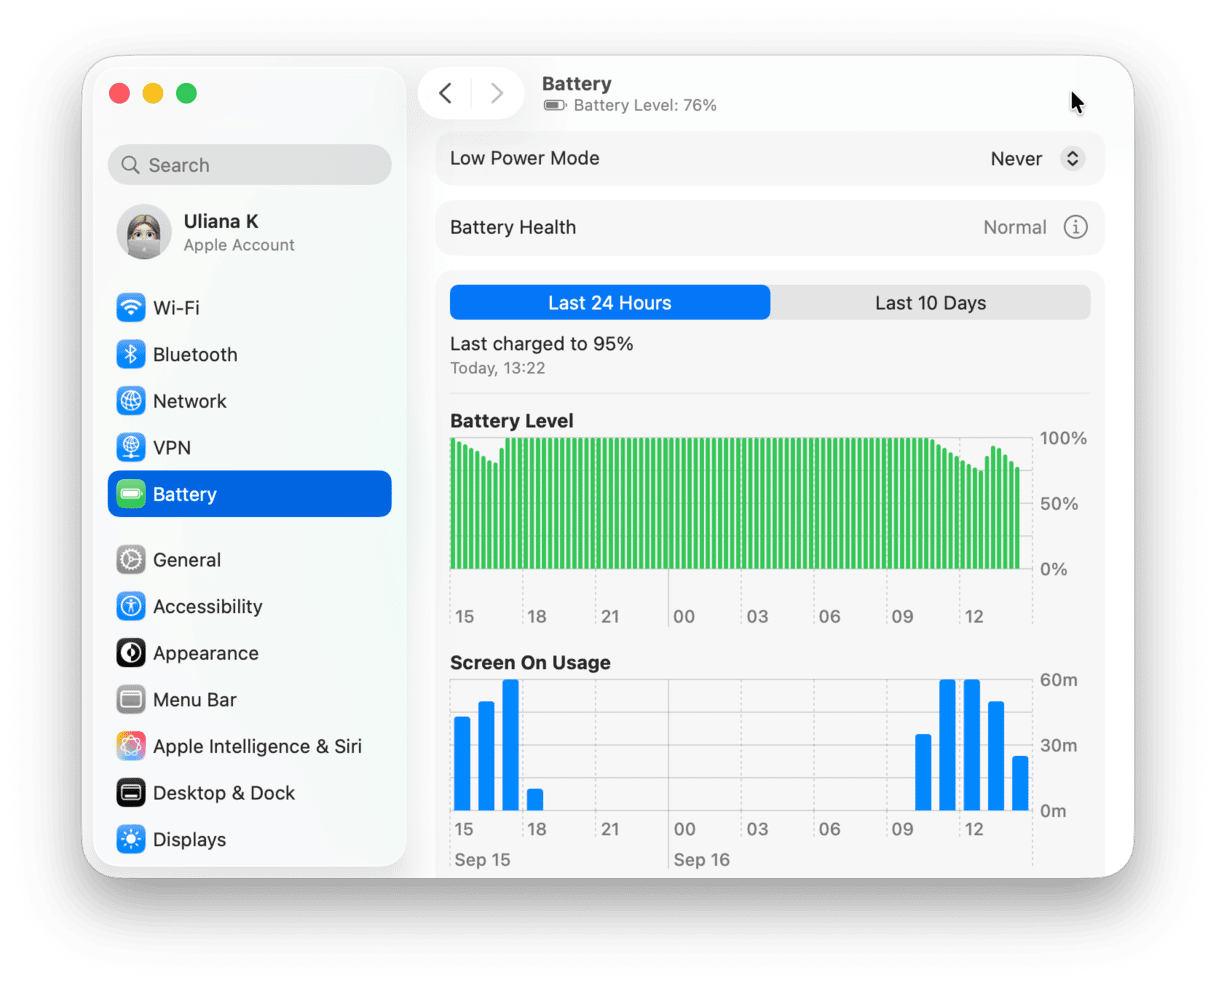
6. Battery draining faster
A fresh macOS install can drain your battery faster at first while your Mac reindexes files and finishes background tasks. Just wait a day or two. If the issue remains, go to System Settings > Battery to explore what’s using the most power on your Mac.
7. Sluggish animations in Tahoe
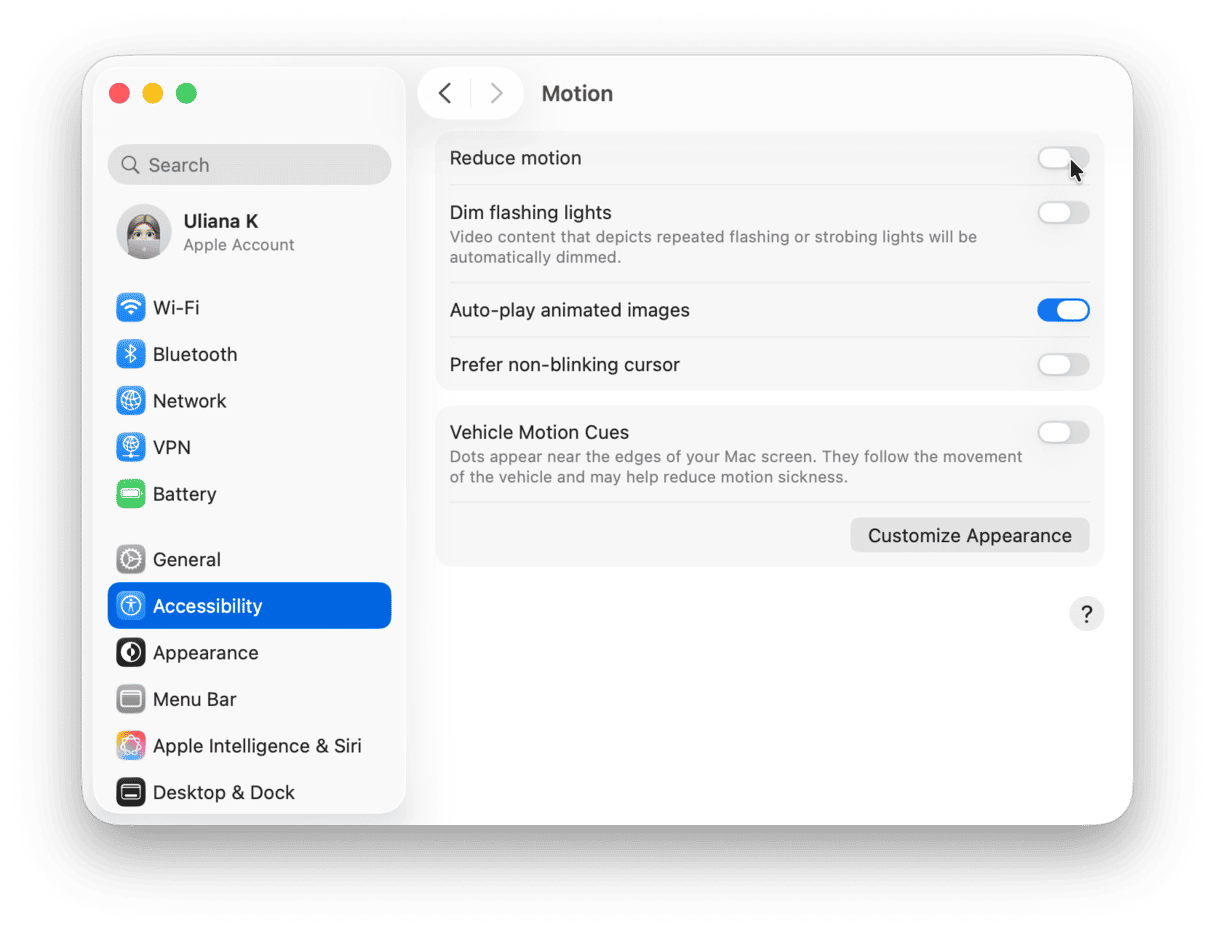
macOS Tahoe uses more power for visual effects, so animations may not be smooth on your Mac. Here’s how you can switch these effects off:
- Open System Settings and go to Accessibility > Display.
- Switch on Reduce transparency.
- Then, return to the main Accessibility menu, choose Motion, and enable Reduce motion.
Final tips
After an upgrade, some settings may reset, so consider checking them if anything is missing. Here are a few things to begin with:
- Finder > Settings > General if your startup drive is no longer on the Desktop
- System Settings > Menu Bar if any elements went missing (usually happens to a VPN icon)
- System Settings > Apple Account > iCloud if any syncing settings have been misconfigured
Hopefully, these quick fixes help you get the most out of the latest macOS update. Stay tuned — we’ll keep this article updated as new issues and solutions come up.


