Many of us have at least one USB device connected to our Mac. It could be a keyboard, mouse, hard drive, USB stick, or even a microphone or webcam. Most of the time, they, well, just work so that we never need to think about it. That makes it more difficult when they don’t work because we’re not sure what to do to fix the problem. What do you do when you encounter macOS Sonoma USB issues? We’ll show you that.
macOS Sonoma USB not working: Why do USB devices keep disconnecting?
There are a number of possible reasons why USB devices may keep disconnecting in macOS Sonoma:
- The device itself could be faulty.
- The cable connecting the device to your Mac could be faulty.
- Your Mac may not be supplying enough power to the USB device.
- There may be a software conflict.
How to fix it when a USB device keeps disconnecting
As with solving any problem on your Mac, the best strategy is to eliminate the most obvious and easiest-to-fix causes first.
1. Try a different cable
If the cable connecting your USB device to your Mac can be swapped, try a different cable. If the cable is causing the issue, that will fix it immediately.
2. Try a different USB port
USB ports, like cables, can get damaged, particularly if they are used a lot. So, if trying a different cable didn’t work, try plugging the device into a different USB port. If it’s plugged into a hub or dock, try plugging it directly into your Mac. If it’s plugged in via an adapter, try a different adapter.
3. Plug it into a power supply
If the USB device can be powered independently rather than relying on your Mac to supply power, try plugging it into its power cable or power supply. If it can’t, and you have connected it to a MacBook that is running on battery power, connect the MacBook to mains power and try again.
4. Update macOS Sonoma
It’s possible that the issue could be a bug in Sonoma that has been fixed in a recent update. Update Sonoma to check:
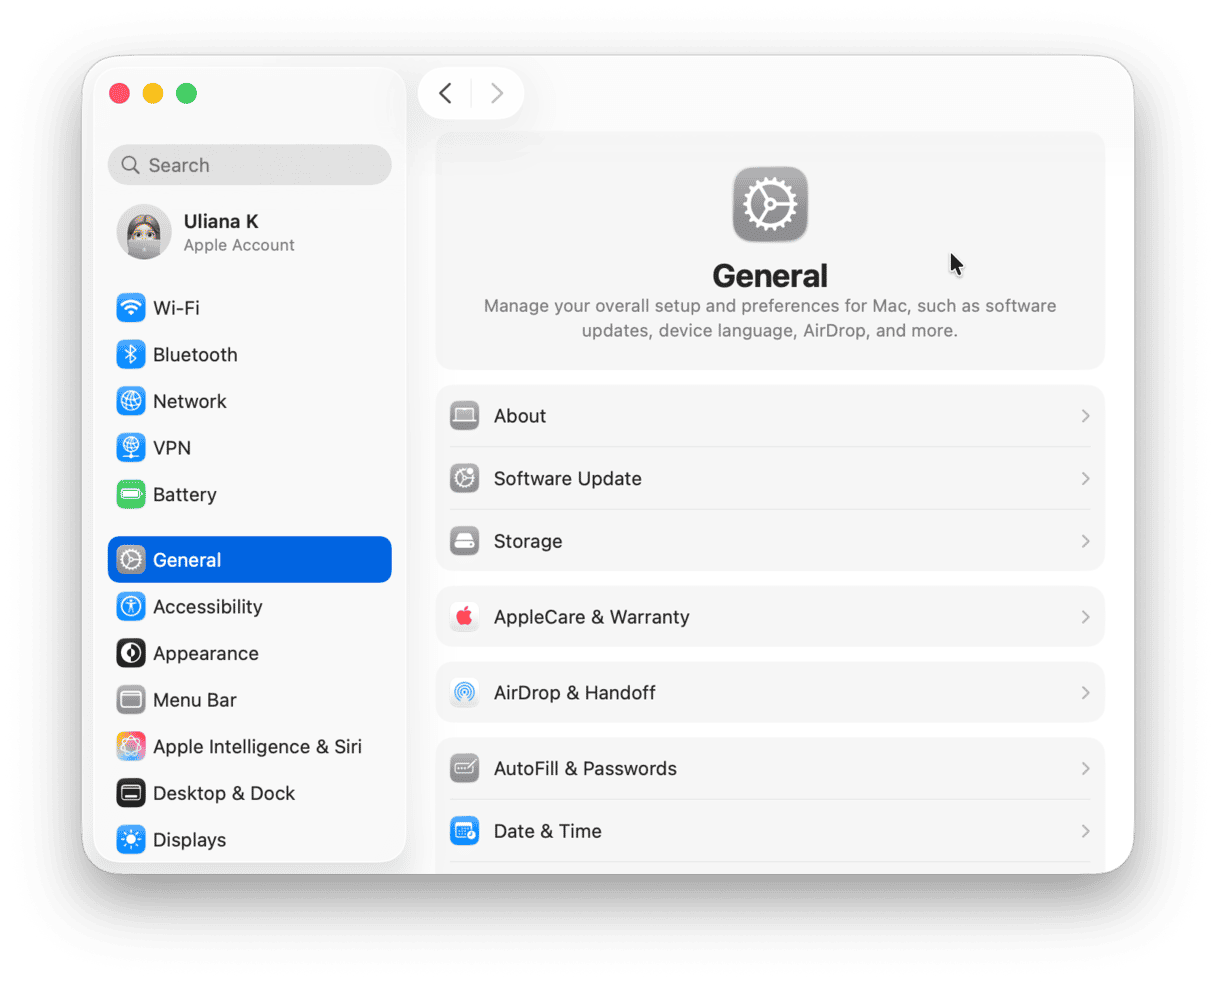
- Click the Apple menu and choose System Settings.
- Click General > Software Update.
- Wait for it to check for updates.
- If there is an update available, follow the instructions on the screen to install it.
5. Run maintenance on your Mac
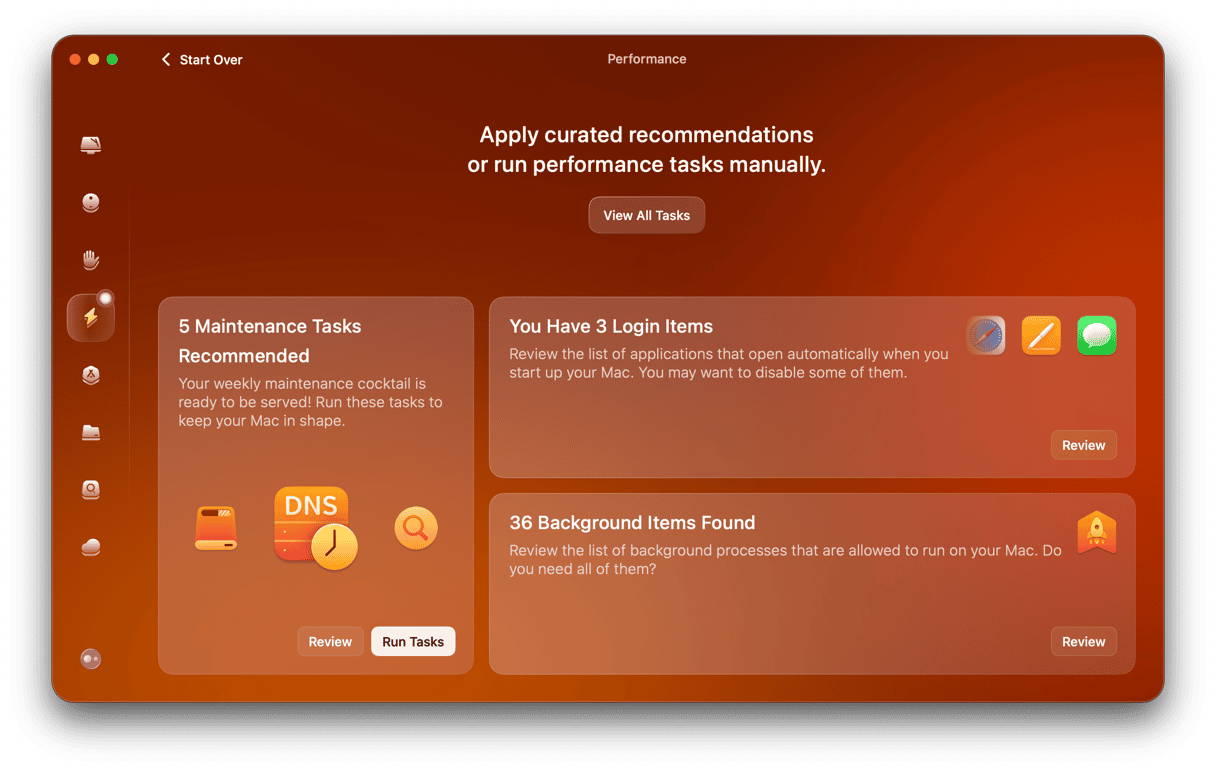
Carrying out regular maintenance on your Mac is something you should do, even when you don’t have problems. Carrying out maintenance will help prevent them from occurring in the future. Maintenance tasks include repairing disk permissions, flushing the DNS cache, and reindexing Spotlight. You could do all that manually, although you’d need to use Terminal. However, it’s much easier to use a tool designed for the job, and CleanMyMac is the one. As well as carrying out all these tasks, it can help you declutter your Mac, reclaiming valuable storage.
Here’s how to use this smart Mac optimization app:
- Start your free CleanMyMac trial.
- Go to Performance.
- Run a quick scan.
- Click Run Tasks on the Maintenance Tasks tile.
6. Reset the SMC
The system management controller (SMC) manages the distribution of power to different parts of your Mac, including USB ports. Resetting it can sometimes fix problems. If you have a Mac with Apple silicon, like an M1 or M2, you can ignore this step because the SMC resets every time you reboot. So, just reboot your Mac.
If you have an Intel-based Mac, the process for resetting the SMC differs depending on whether you have a desktop or laptop and whether your Mac has a T2 security chip. You can find the steps for resetting the SMC on an Intel Mac on Apple’s website.
7. Boot into safe mode
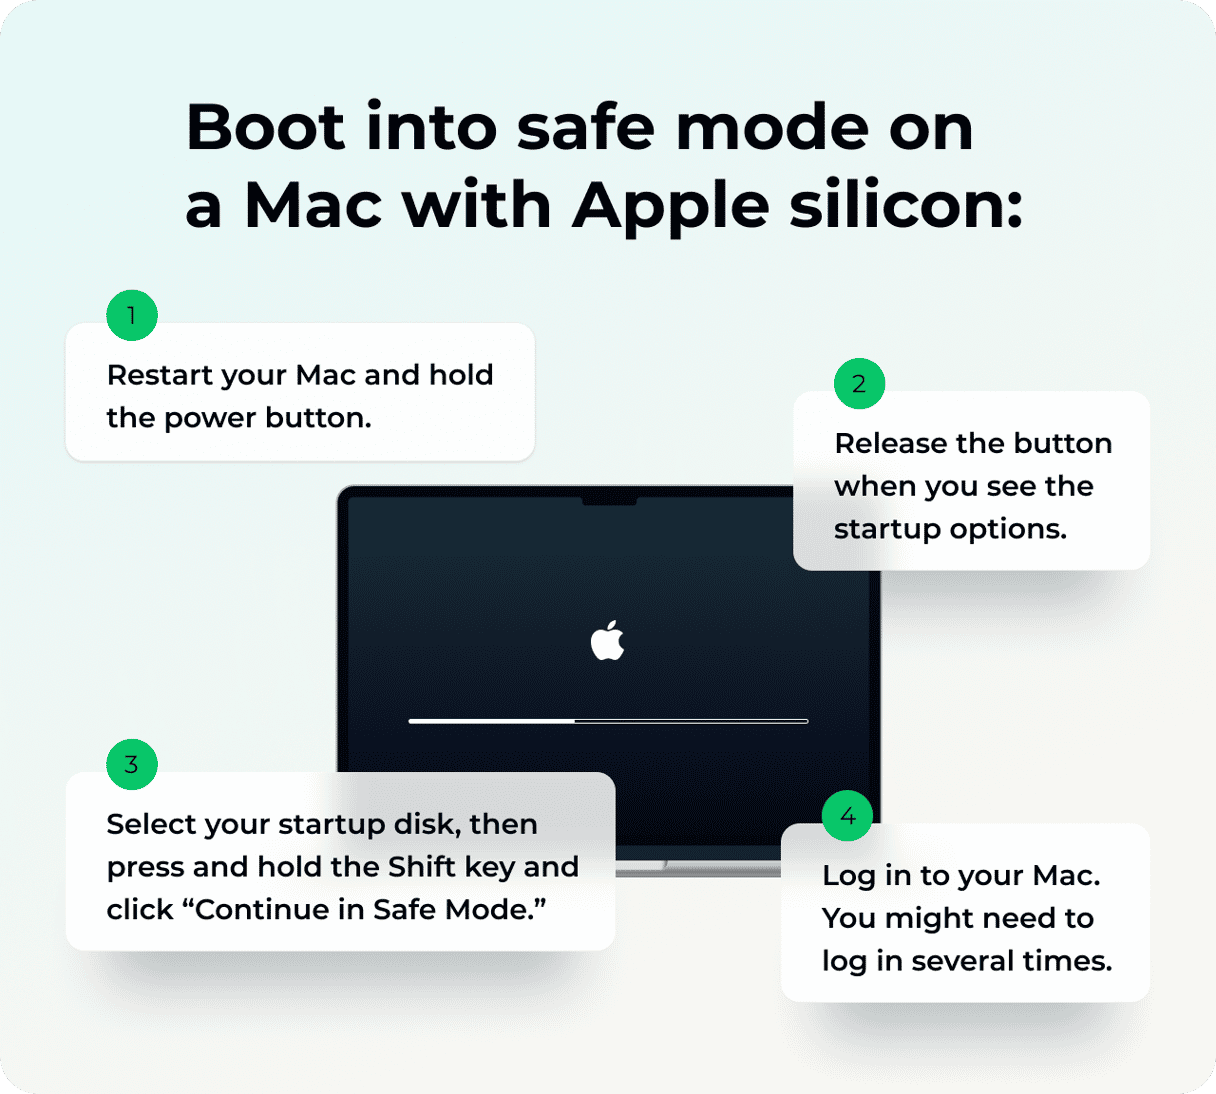
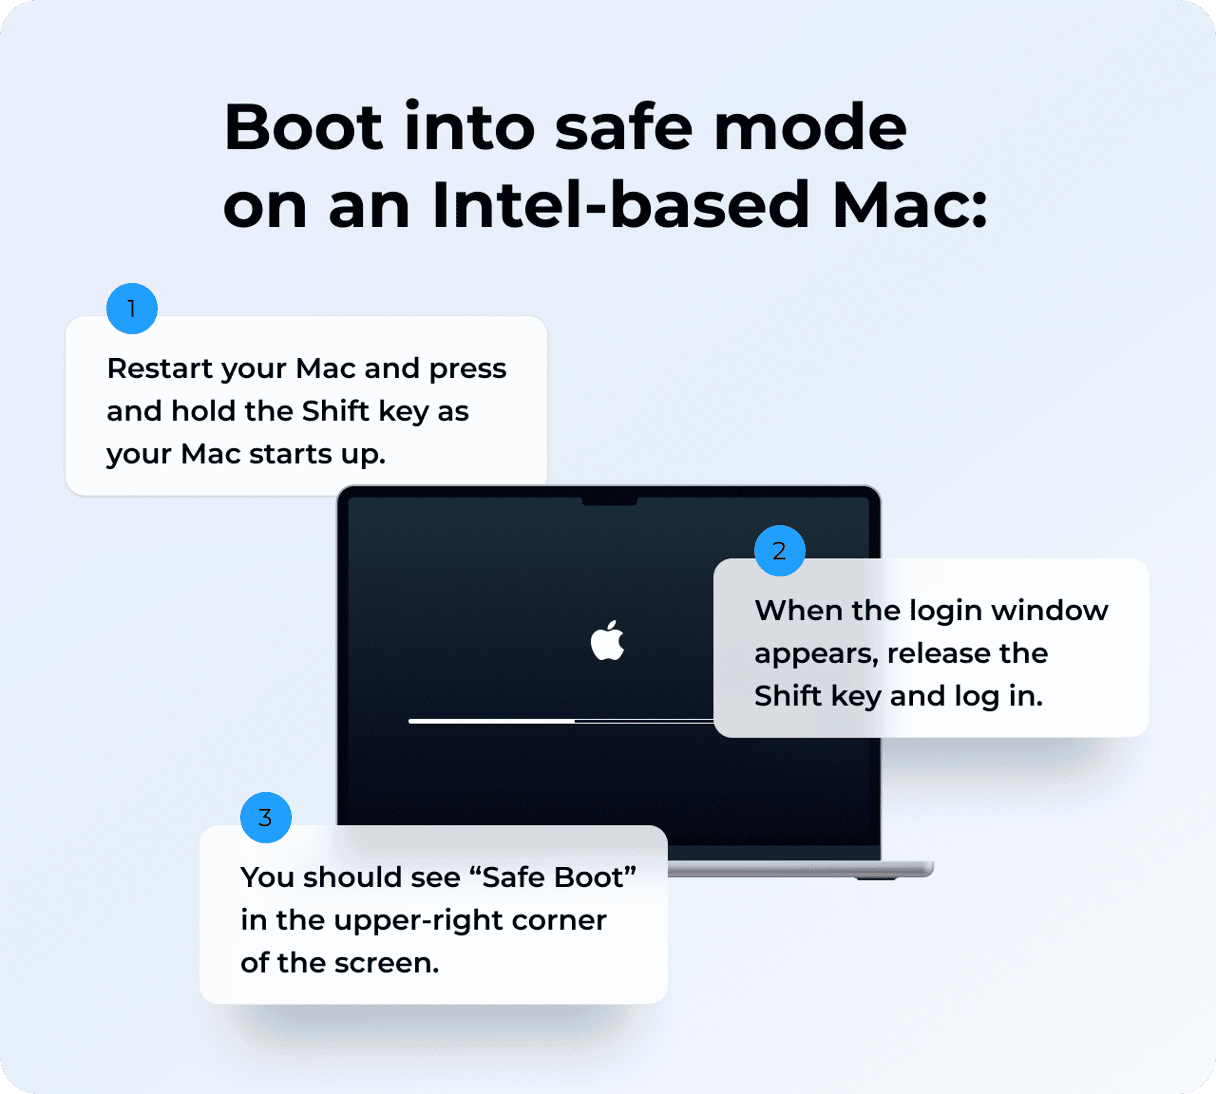
When you boot your Mac in Safe mode, it loads only those extensions that are necessary for it to complete the startup process. Any extensions not needed for that are disabled. It also performs a check on your startup disk and fixes any problems it finds. The process for booting into safe mode differs depending on whether you have an Intel-based or an Apple silicon Mac.
Apple silicon
- When your Mac is powered off, press and hold the power button until you see ‘Loading startup options’ on the screen.
- When prompted, choose your startup disk and press and hold the Shift key.
- Click Continue in Safe Mode.
- Your Mac will restart, and you will see ‘Safe Boot’ in the menu bar.
Intel
- Shut down your Mac.
- Press and hold the Shift key, then press the power button.
- Release the Shift key when you see the login window.
- Log in with your admin username and password.
- If you’re asked to, log in again.
- Your Mac will restart, and when it boots, you will see Safe Boot in the menu bar.
8. Reset NVRAM
Non-volatile RAM, or NVRAM, is the memory that retains data about settings on your Mac even after you’ve shut it down. It’s powered by its own battery and keeps your Mac’s clock ticking at the right time. Sometimes, resetting it can fix problems.
If you have a Mac with Apple silicon, all you have to do is restart your Mac, and NVRAM will reset.
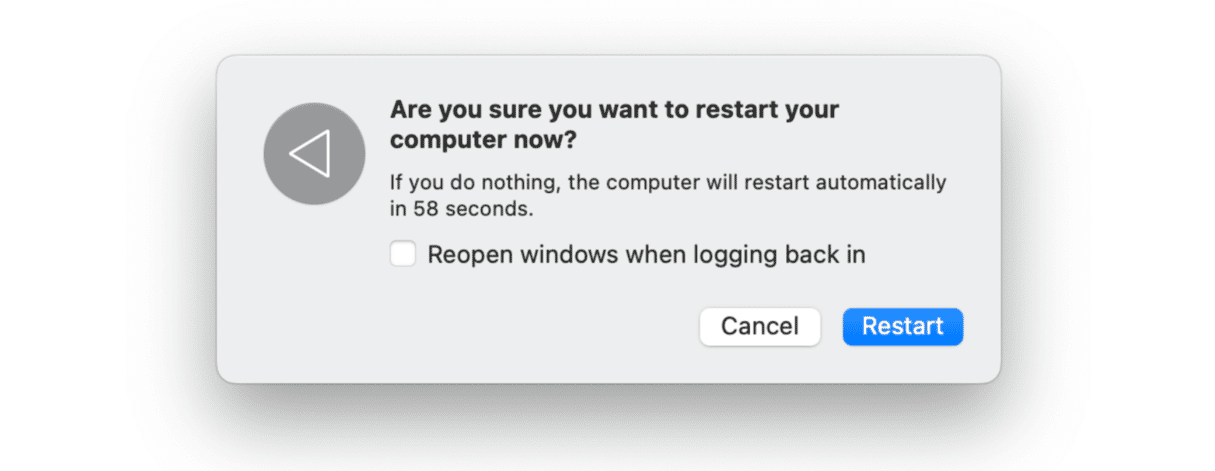
If you have an Intel-based Mac, restart while holding down Command-Option-P-R and release the keys when you hear the second startup chime.

If you have a USB device that you rely on connected to your Mac, the last thing you need is for it to keep disconnecting. If Sonoma USB is not working after you update, follow the steps in the article above, and you should be able to discover what the problem is as well as fix it and stop your USB device from disconnecting.


