The growing problem of e-waste is one that can’t be ignored. We produce more than 50 million tonnes of e-waste per year and only recycle 10% of it. Another 90% of outdated, unwanted, or broken electronics end up in a landfill. With these huge numbers, it seems obvious that we shouldn’t simply throw away our devices the moment a newer model comes out.
But what if your Mac truly is old and not running as well as it should? Are you supposed to keep using it until it can’t even boot up anymore? And if you do want that new model, how can you go about discarding your old Mac responsibly?
Here, we’ll lay out a number of options for getting rid of your old Mac without just sending it directly to the landfill. Plus, we’ll even give you some tips for ways to repurpose your Mac if it’s old but still usable.

When is your Mac “too old”?
For some people, a Mac is old enough to be replaced when it’s running slowly all the time. For others, having a noticeably outdated Mac is enough to warrant an update.
But if you’re looking for some general guidelines, your Mac is probably on its last legs if:
- It’s no longer able to run the latest version of macOS.
- You’re constantly running out of storage.
- You’re experiencing frequent software issues (although some of these, such as a Mac that keeps restarting, can be solved).
If you have one or more of these issues, chances are that you’ll want to recycle your Mac. While some minor problems, such as software issues, can be remedied, others are less easily fixed. If your Mac has severe hardware damage, you’ll likely want to recycle it (rather than sell or reuse it).
Recycle your old Mac with the Apple Trade In program
The easiest way to recycle old Apple devices is through the Apple Trade In program. This program gives you the option to recycle your Mac for free or to trade it in for credit toward a new purchase. While you get a little extra cash to spend on a newer device, you also know you’ve helped the planet by recycling your old Mac.

Clean your Mac and get it up to speed
Sometimes, your Mac is just old and slow. In many cases, users would rather simply get a new computer than go through the hassle of clearing out unneeded files and applications. But rather than shelling out big bucks for a new Mac, why not do a deep clean?
If you’d rather have an app do the work for you, you’ve got plenty of options. If you’re looking for an all-in-one solution to clean, protect, and maintain your Mac (no matter how old it is), we’d recommend CleanMyMac as the best place to start. It’s got plenty of tools to help you uninstall and remove unnecessary files and applications, helping your Mac run healthier and faster. Plus, it comes with an unlimited, free 7-day trial, which means more cash saved up for a new Mac.

Get started with a free CleanMyMac trial
How to reuse your old Mac at home
Sometimes, you’ve got to get creative when it comes to a worn-out Mac. There are a variety of ways you can repurpose and reuse your old Mac.
Turn your Mac into a network-attached storage system
If your old Mac has a large hard drive with lots of storage space left, turning it into a network-attached storage (NAS) device is a great way to make use of it. You can think of this as using your old computer as cloud storage.
By connecting your Mac to your home Wi-Fi network, you can access any files you’ve stored on it from all of your other devices. Keep in mind, this is a better option if you have a MacBook rather than an iMac.
Create an emergency Wi-Fi hotspot
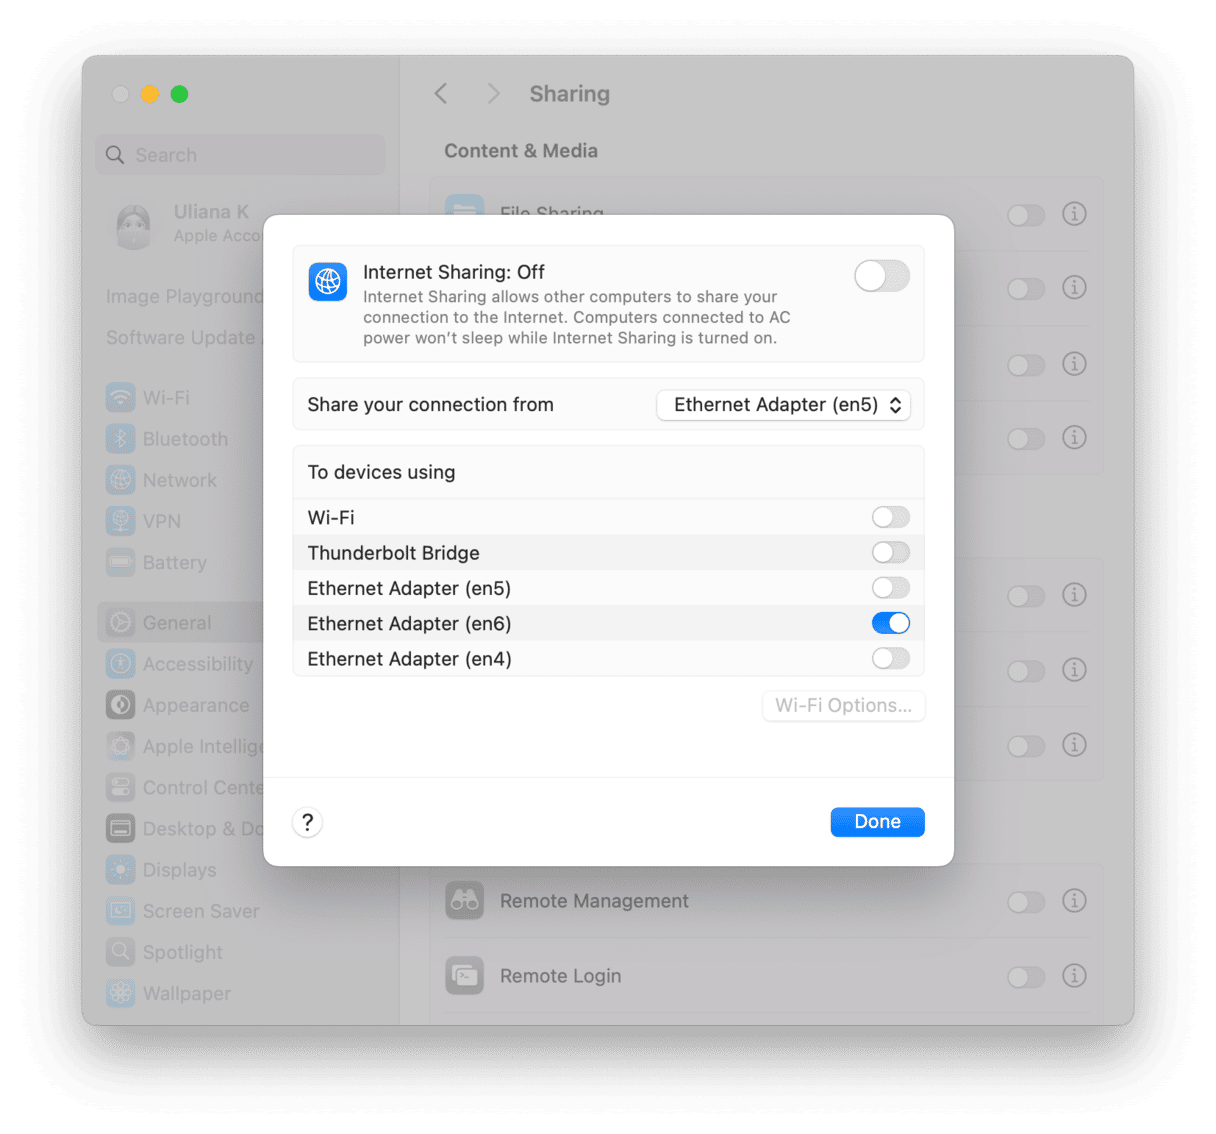
You may not know that you can use an old Mac as an additional signal extender or router! This is a great option if you have areas in your home with a weak or nonexistent Wi-Fi signal. Simply connect your old computer to an Ethernet cable and keep it wherever you’d like the new signal to reach.
You’ll also need to adjust your internet sharing settings. Here’s how:
- Go to Apple menu > System Settings > General > Sharing.
- Click the i icon next to Internet Sharing.
- Choose Ethernet from the menu next to Share your connection from.
- Select Wi-Fi from the list under To devices using if that’s how you would like to share your connection.
- If you select Wi-Fi, click Wi-Fi Options, and name your new network. From the Security pop-up menu, choose WPA2 Personal.
- Give your new network a password and click OK.
- Click Done and enable Internet Sharing.
Install Linux on your Mac
Linux is a highly customizable open-source operating system that will run on even very old computers, including Mac computers. If your Mac is too old to run even past versions of macOS or is constantly plagued by the dreaded “rainbow wheel of death,” downloading Linux will allow it to run again.
Even if you’ve never used Linux before, it offers a number of different options that even lifelong macOS users will appreciate. If you’re looking for a familiar interface, Ubuntu offers a UI that’s similar to macOS. Additionally, Linux boots up more quickly than macOS, making it a great option for Mac that has become nearly (or completely) too slow to use.
One option for installing Linux is turning your old MacBook into a Chromebook using Chromium, Google’s Linux-based OS. It has very limited system requirements, making it a perfect option for old, slow Mac.

How to prepare your Mac for sale (if you decide to sell it)
If your Mac’s hardware is in even decent condition (but you don’t want to bother with repurposing or cleaning it), you have the option to sell it for some extra cash. There are many ways to go about selling your Mac, such as sending it to a refurbishing site. Some of these sites even allow you to sell damaged or broken Mac, too!
If your Mac isn’t completely damaged, you’ll want to take a few steps to prepare it for sale before shipping it off.
Back up your Mac
First and foremost, you’ll need to back up your Mac. It’s important to keep in mind that this process will differ depending on whether you have your new Mac already or not.
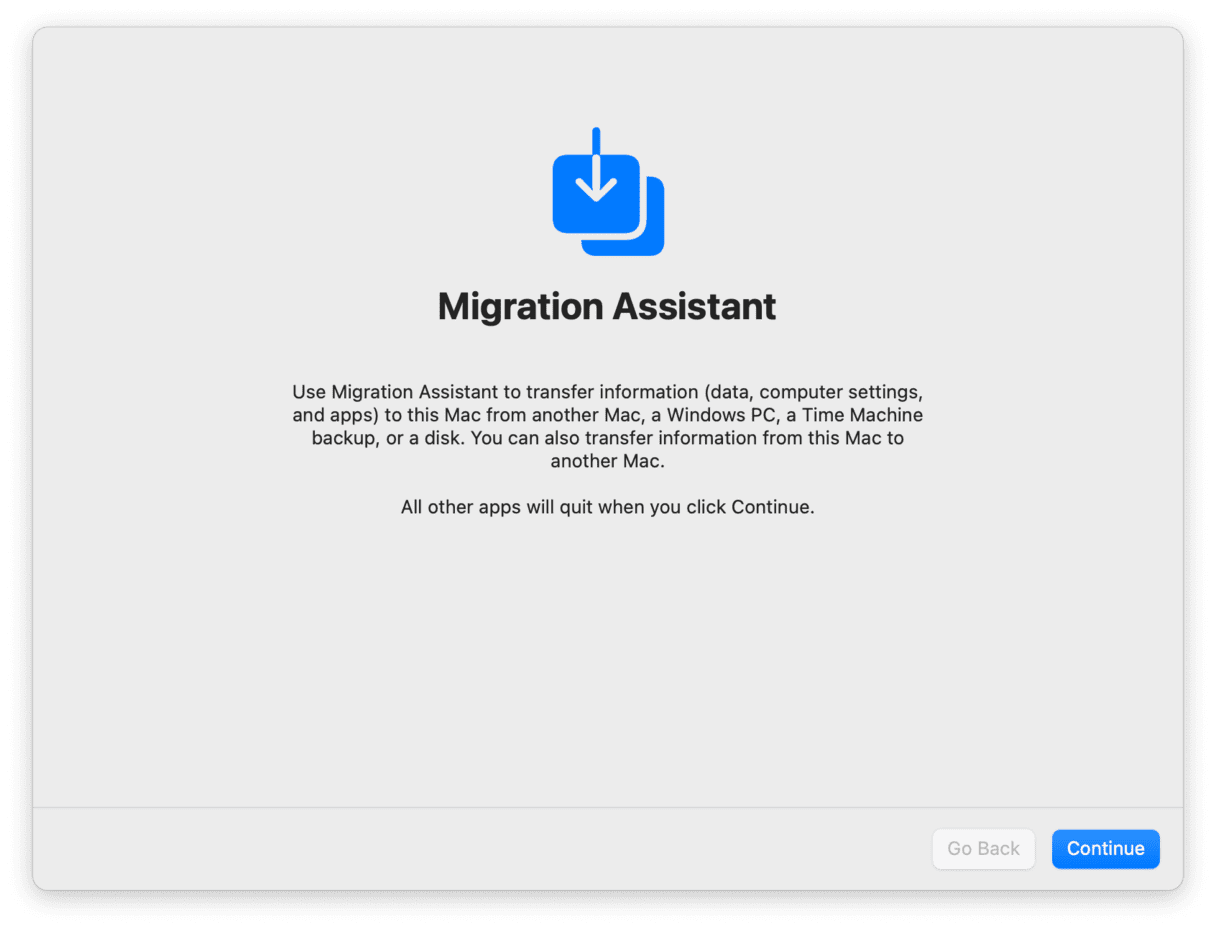
If you have a new Mac waiting, the setup process on your new computer will walk you through the process of getting all your files from your old Mac onto your new one. You can also use Apple’s Migration Assistant in Finder > Applications > Migration Assistant.
If you’re getting your Mac ready to sell without having bought a new one yet, you’ll want to use Time Machine (Apple’s built-in backup service) to save all your important files either to iCloud or to an external hard drive.
Deauthorize and sign out of your accounts
In order to protect your privacy, you’ll want to sign out of any linked Apple accounts before sending your Mac off. Two of the most important of these are iMessage and iCloud.
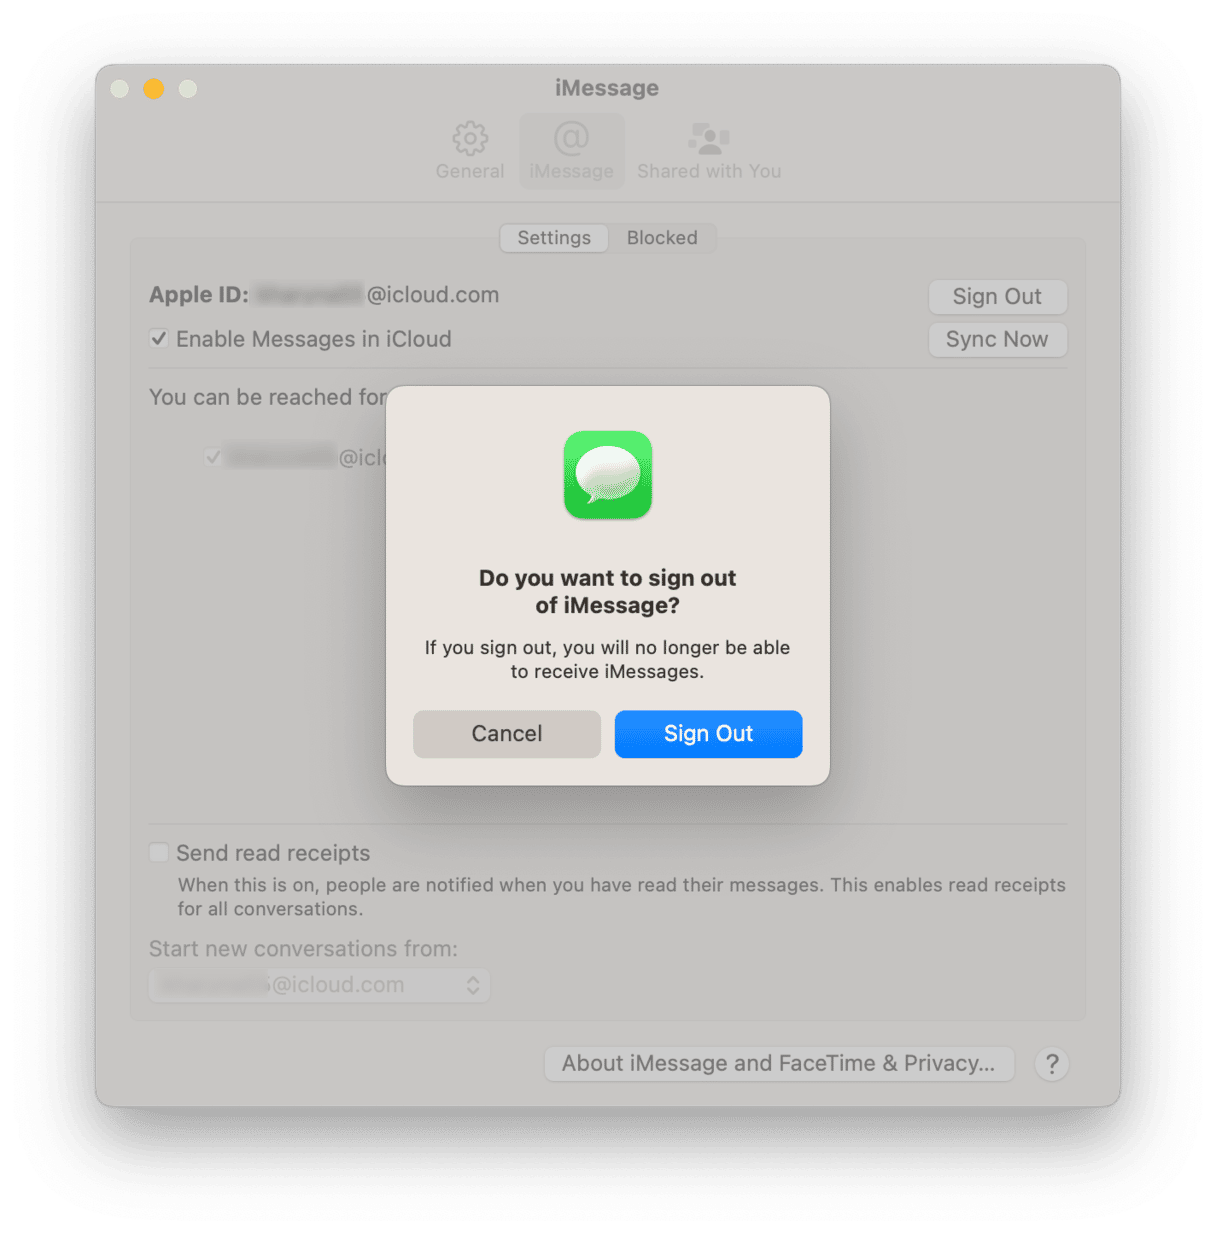
To sign out of iMessage:
- Launch iMessage and go to Settings > iMessage.
- Select your logged-in account(s) and click Sign Out.
You’ll also want to sign out of iCloud. To do this:
- Go to System Settings > Apple Account.
- Click Sign Out on the bottom left of the window. Note: If you use Find My Mac, you’ll need to turn this off first. Just uncheck the box next to Find My Mac on the list in the iCloud tab.
While signing out of iCloud disconnects your Mac from Apple’s cloud servers, you’ll need to do the same thing with iTunes on older macOS versions. Here’s how:
- Open iTunes and go to Account > Authorizations.
- Select Deauthorize This Computer and follow the instructions that appear.
Erase your Mac’s drive
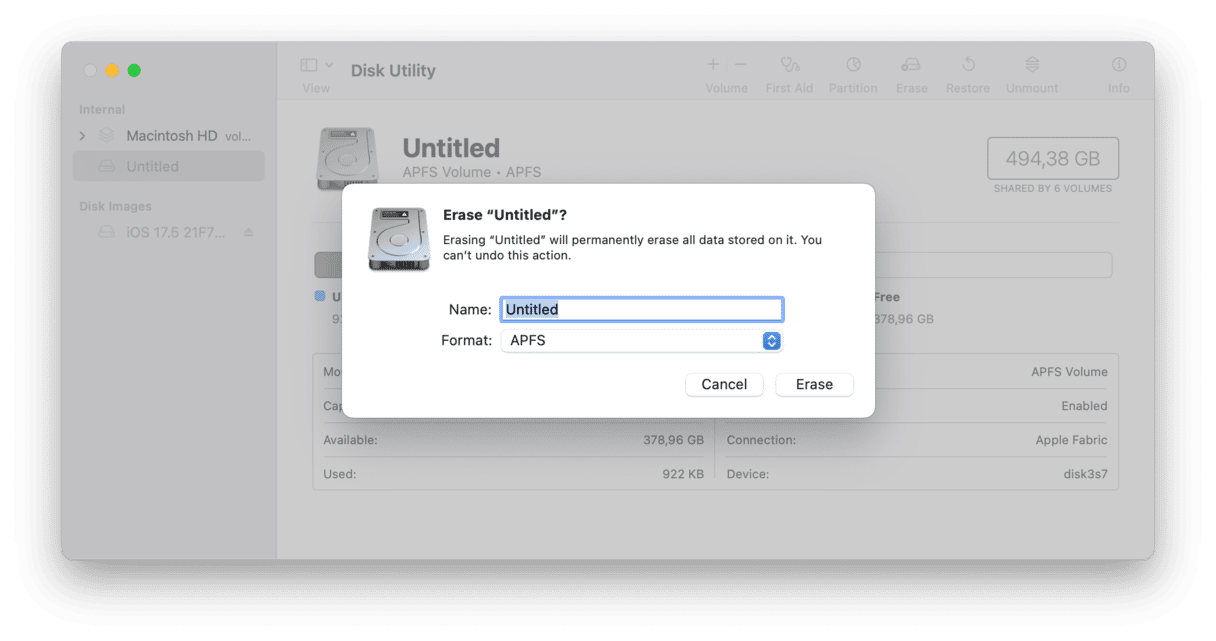
After you’ve backed up your Mac’s drive and signed out of your Apple accounts, you’re all set to erase your Mac’s drive. One way to do this easily and effectively is with the Disk Utility Program. To access this:
- Open the Finder and go to Applications > Disk Utility.
- Click the drive you’d like to erase from the sidebar
- Choose Erase in the toolbar.
- Follow the on-screen instructions to complete the deletion.
Install macOS
You’ll want to install macOS on your newly-erased hard drive if you’re looking to sell your Mac or give it to a friend or family member. Luckily, this is easy with macOS Recovery. Here’s how to start up your Mac in recovery mode:
Intel-based Mac
Just turn on your Mac and press and hold Command-R immediately when your Mac boots up. Let go of the keys when the Apple logo, spinning wheel, or another type of startup screen.
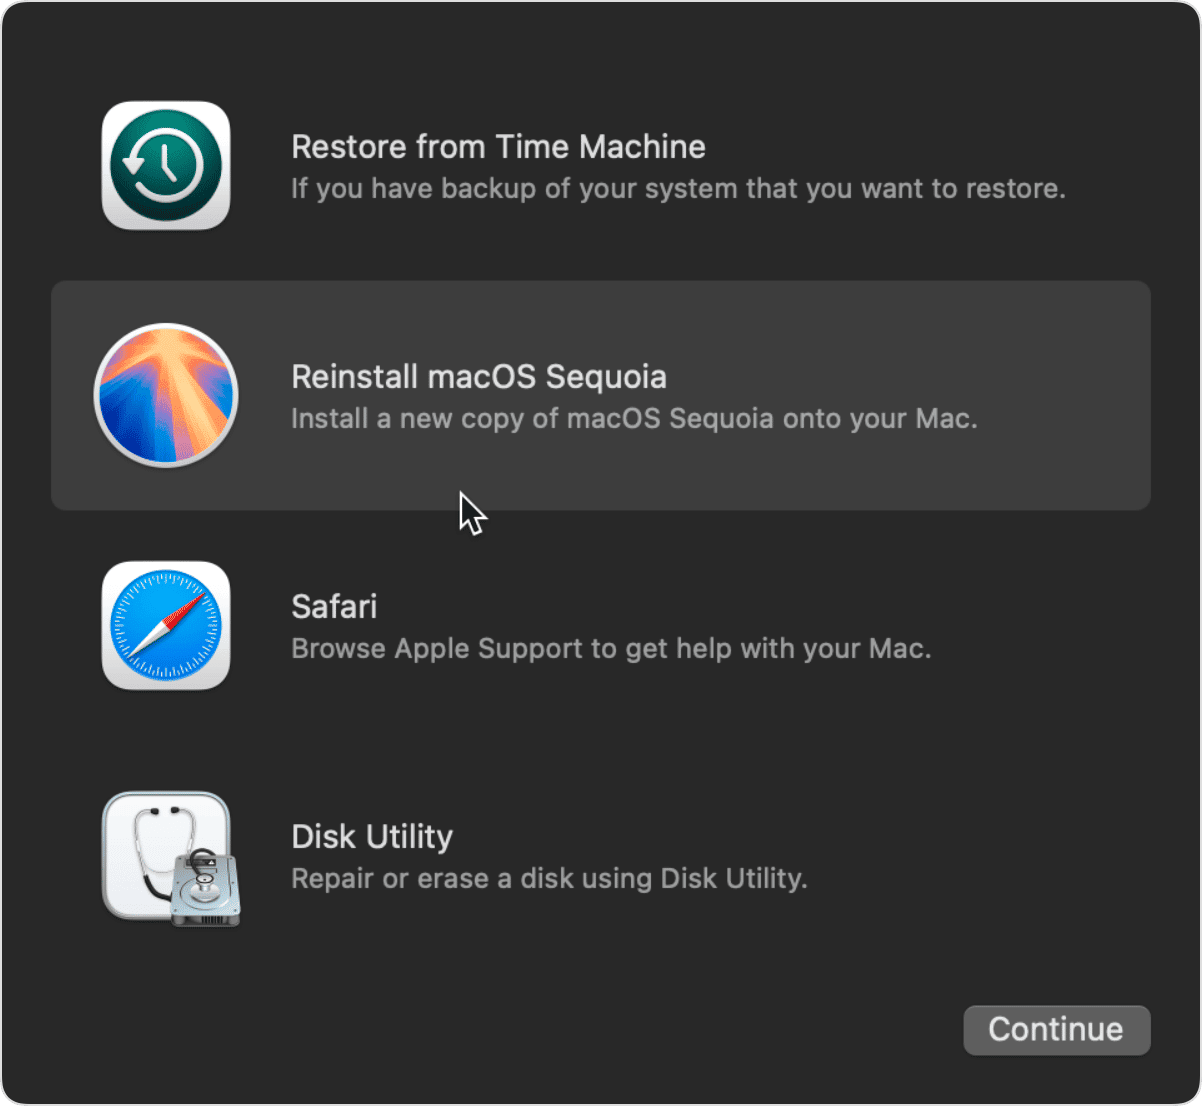
Mac with Apple silicon
Turn on your Mac and keep pressing the power button until the startup options appear. Click the Options icon > Continue.
Upcycle your Mac
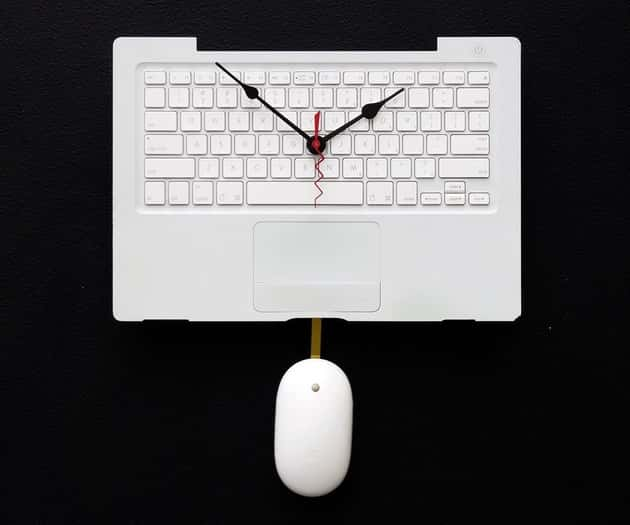
There are lots of ways to creatively upcycle your Mac and give it a new life. Fancy this clock to decorate your kitchen?
Thanks for reading! Subscribe for more Mac tips.


