The CleanMyMac X Menu displays devices connected to your Mac via a cable, Bluetooth, or Wi-Fi. Displayed devices may include iPhones, iPads, external drives, as well as other accessories, such as headphones, mice, and keyboards.
In this article:
View connected devices
For a simple menu of devices connected to your Mac, click CleanMyMac X Menu in the menu bar and see the Connected Devices monitor in the lower-right corner.
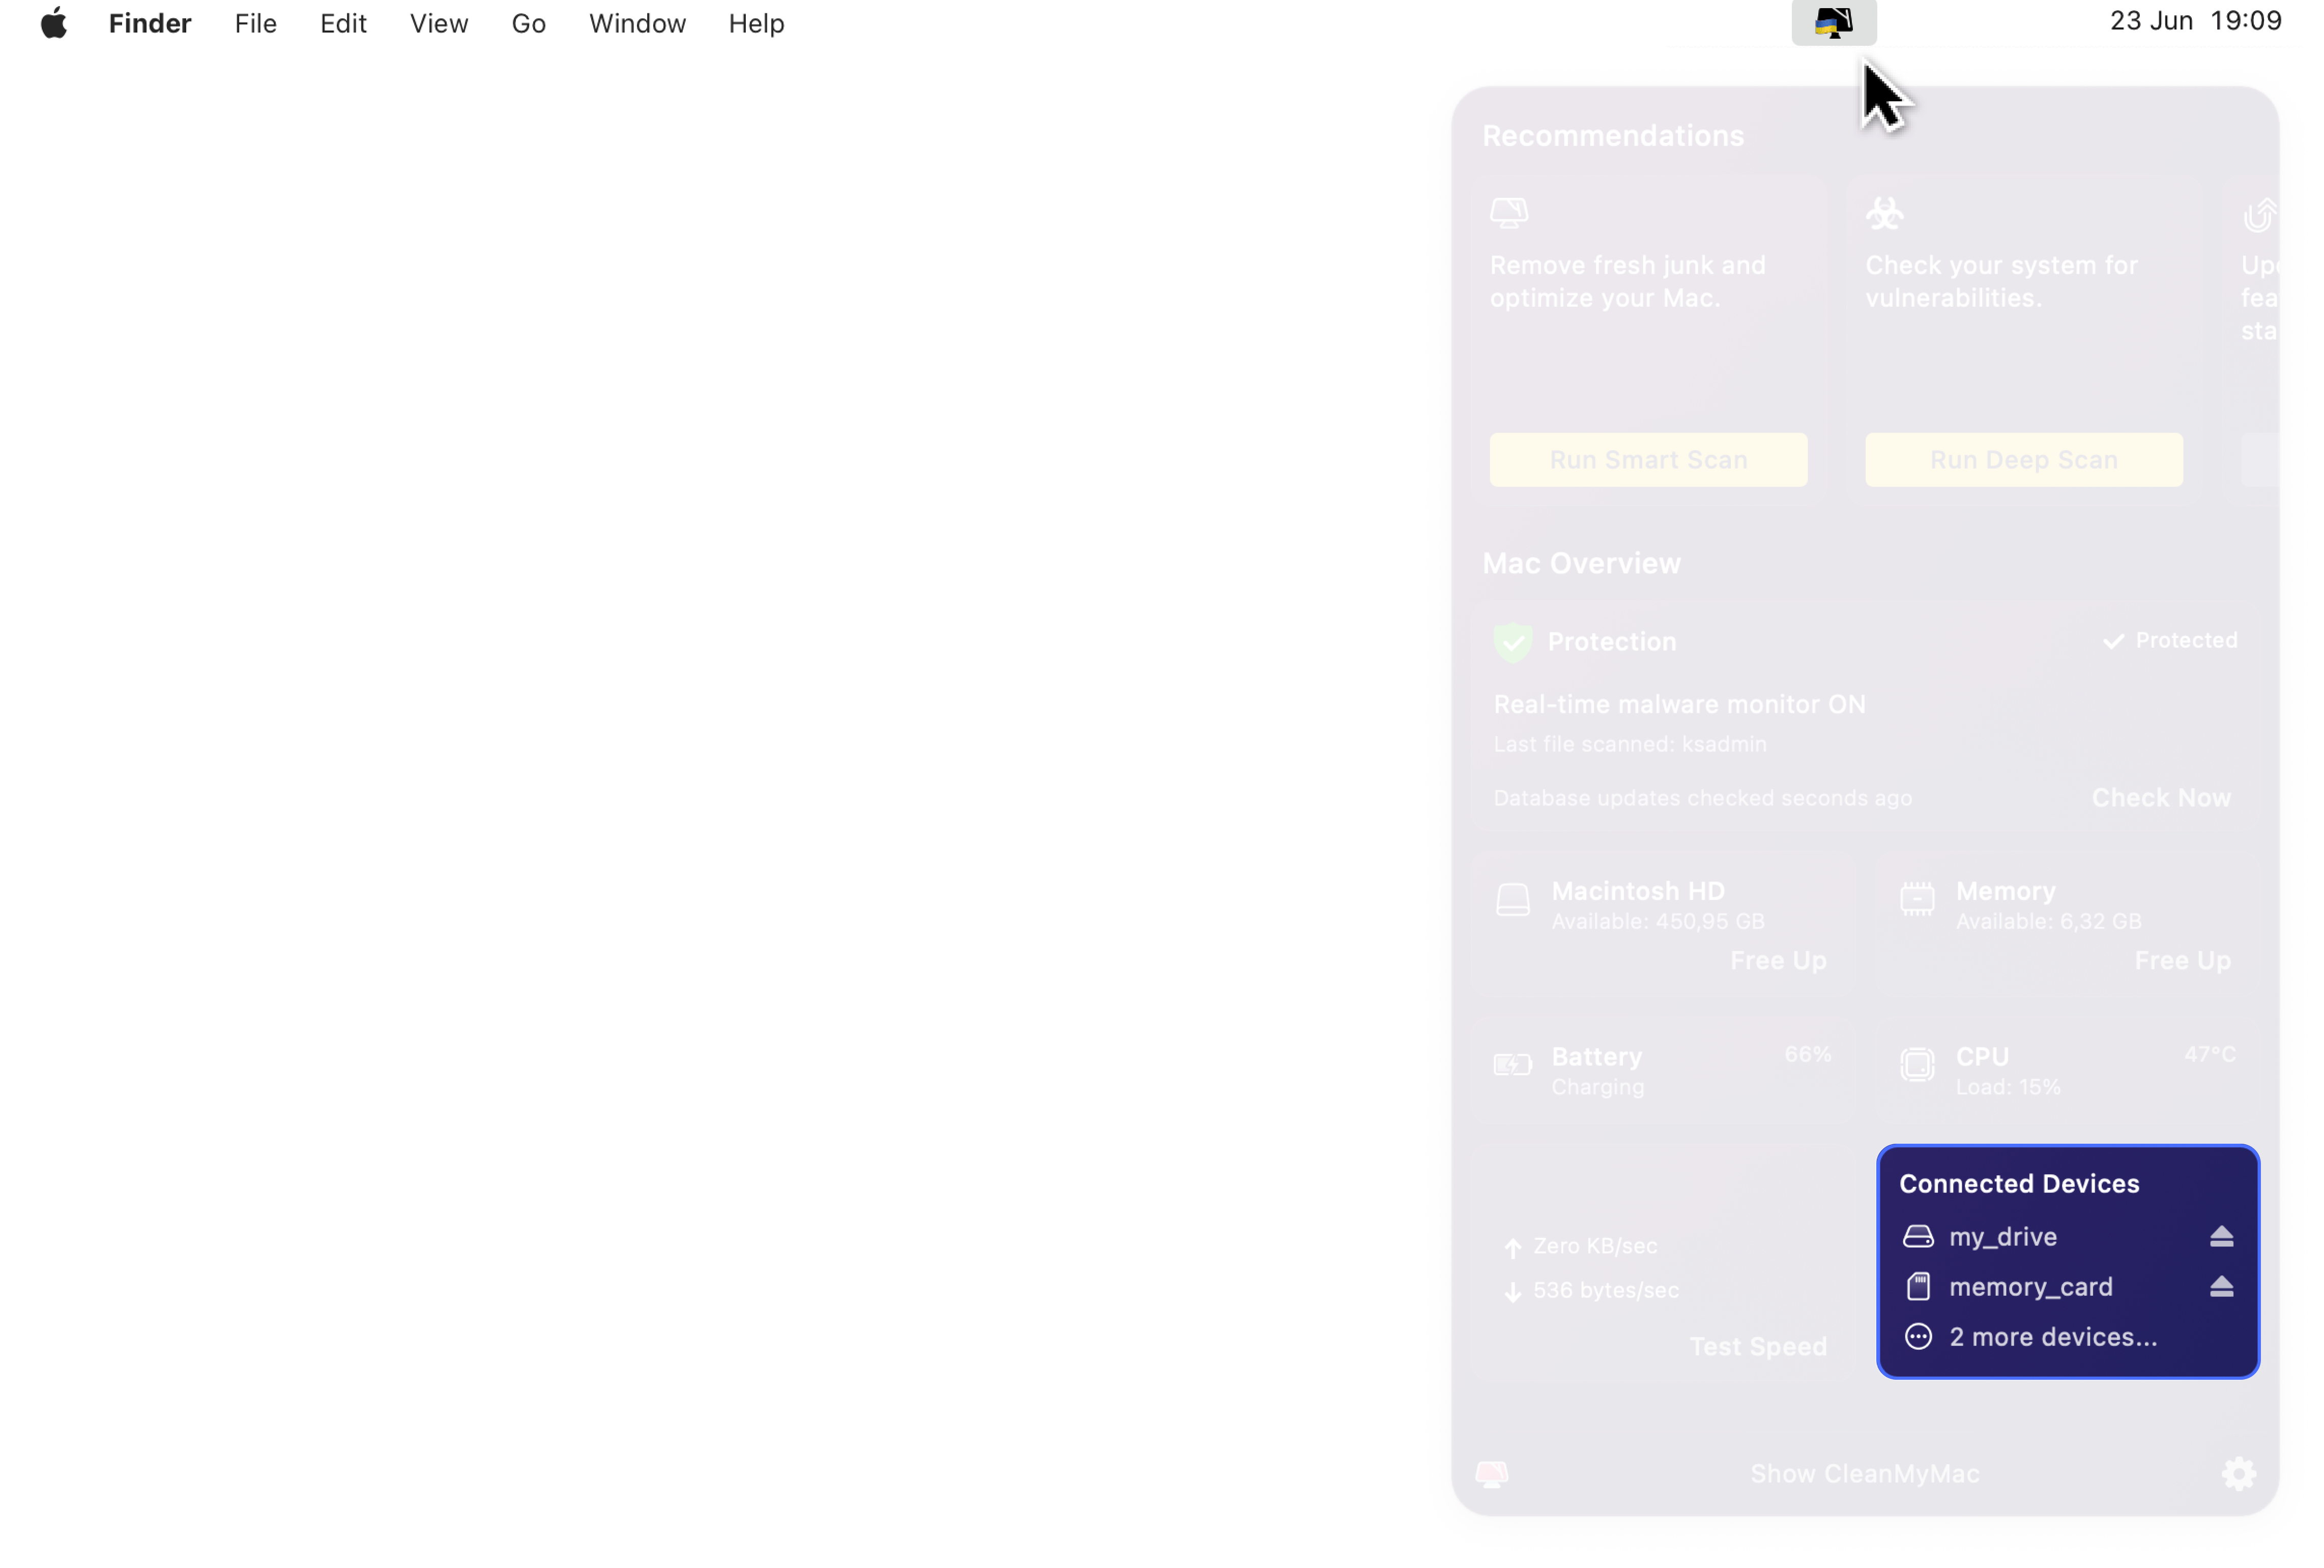
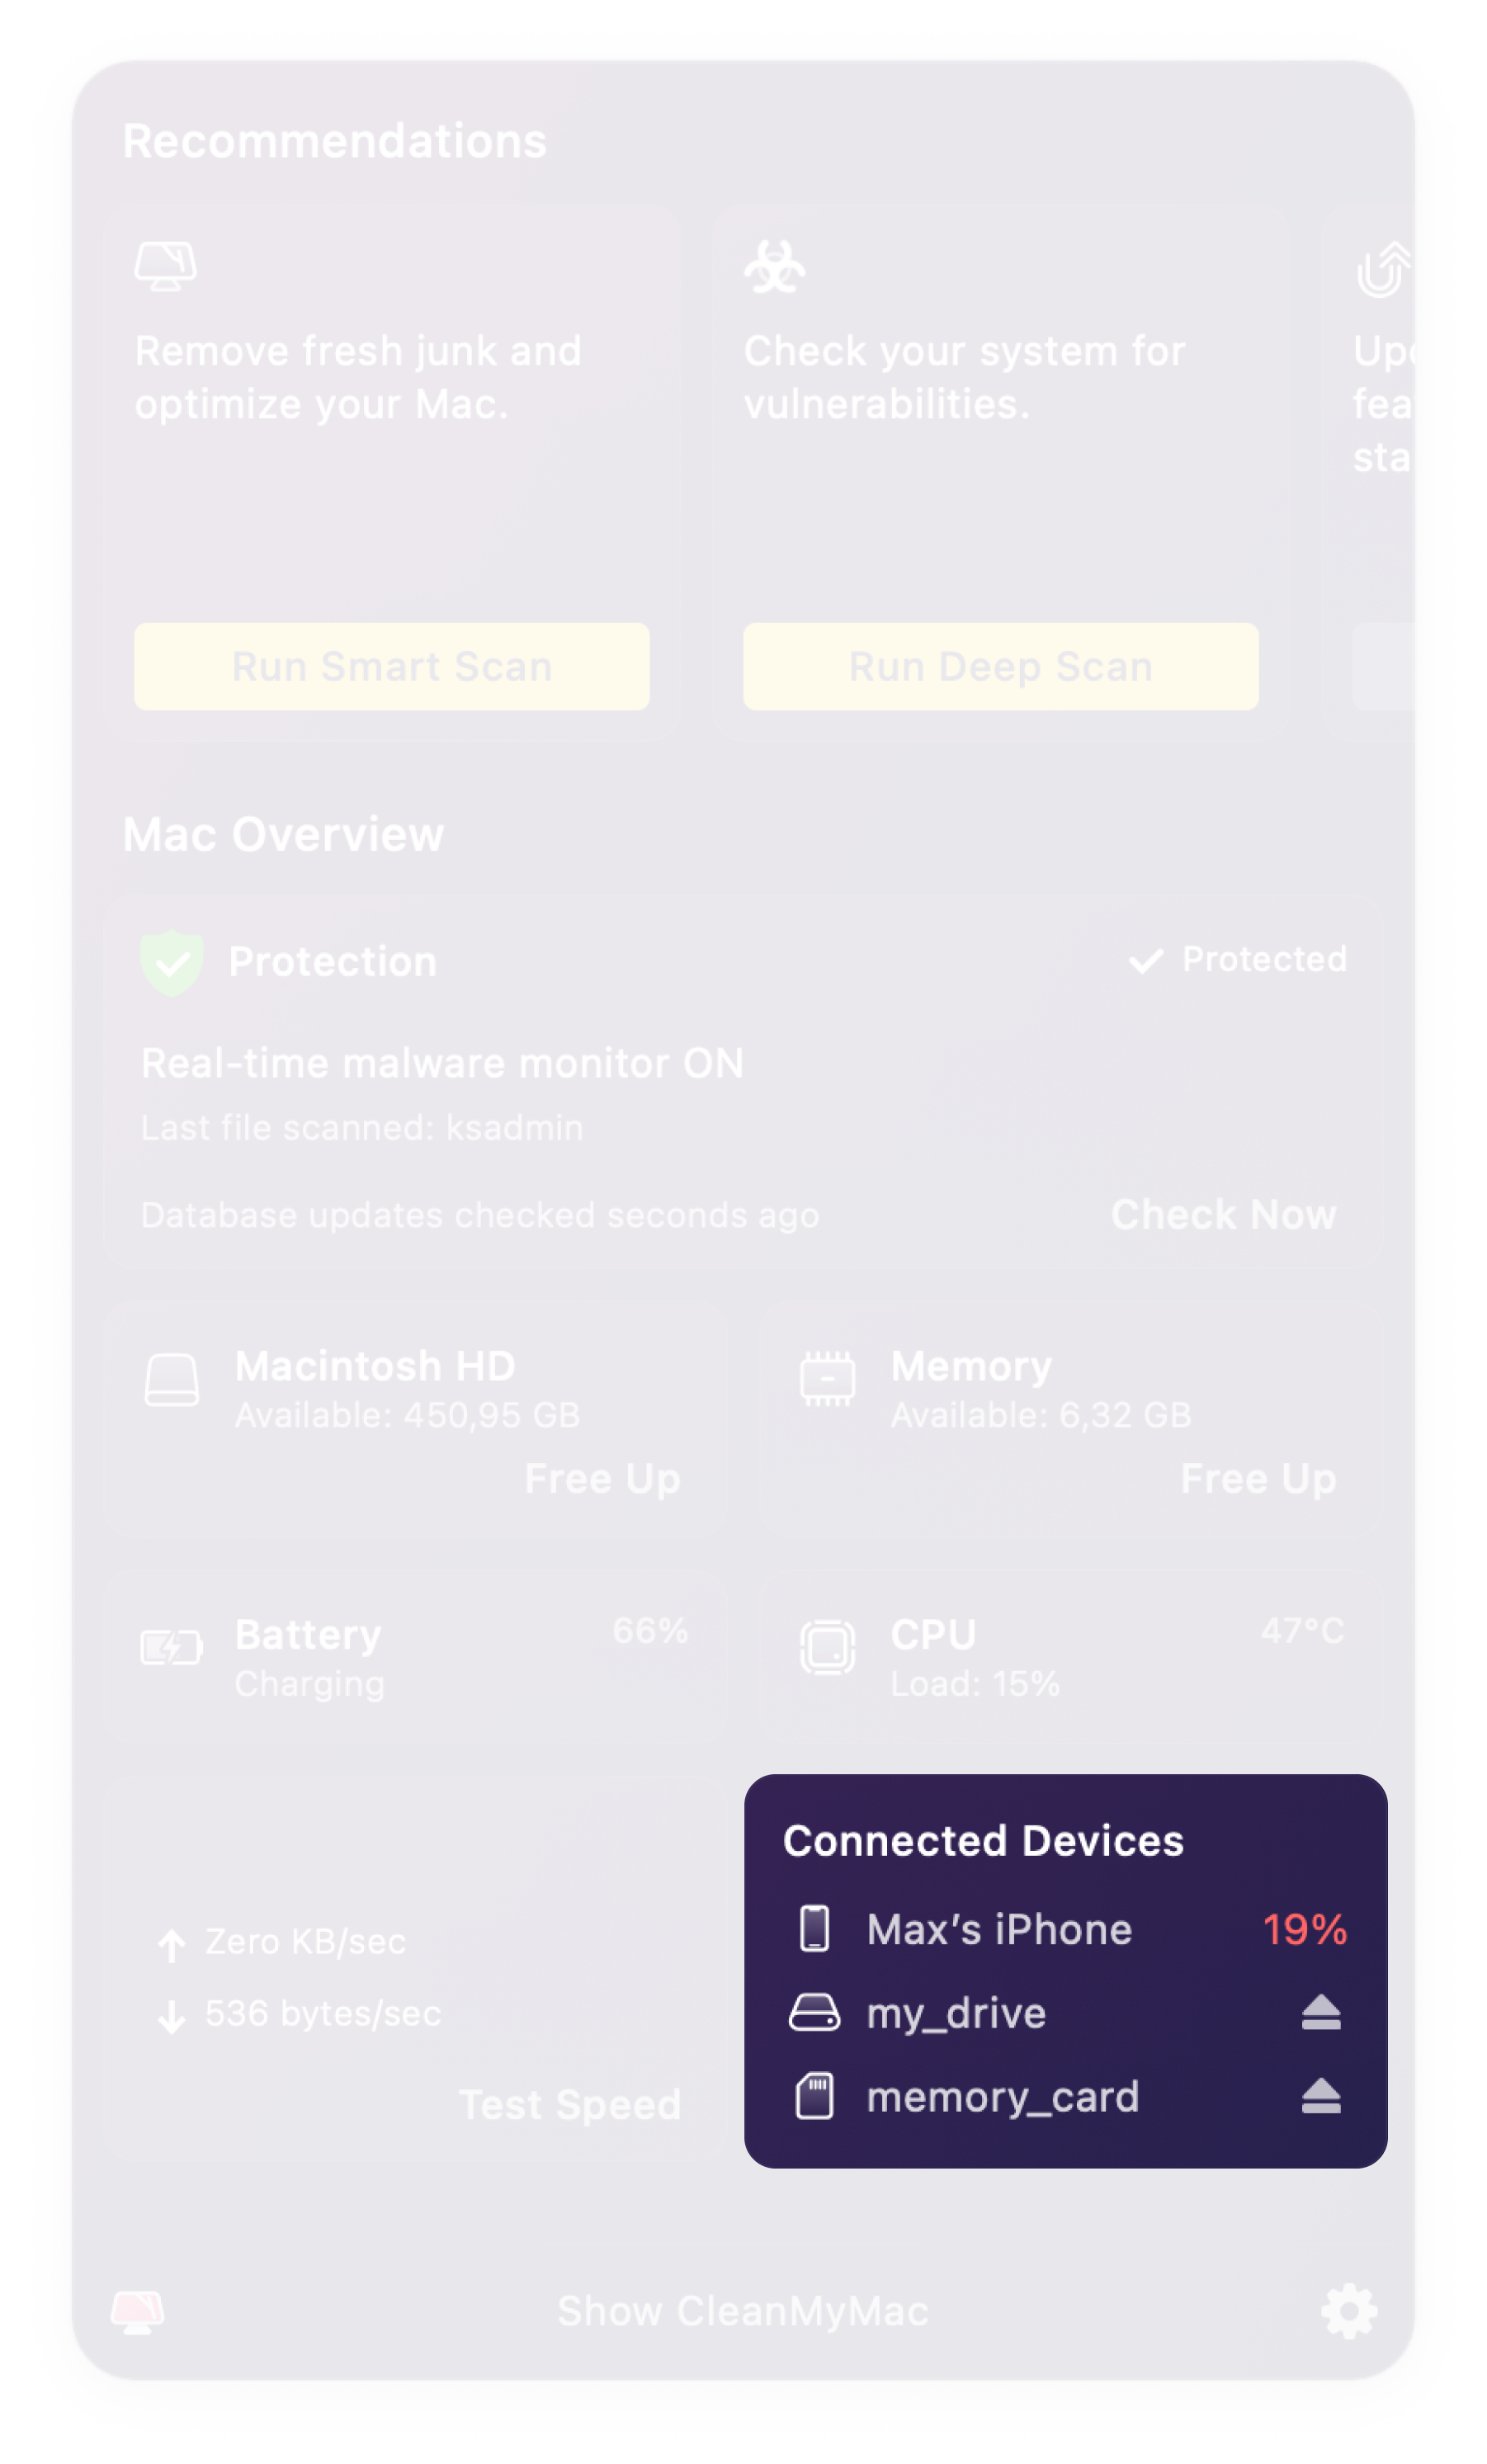
Here you can see up to 3 devices. Devices that were connected earlier are displayed at the top. Devices with a low battery percentage (less than 20%) are highlighted in red and appear at the top of the list, giving you an alert to charge them soon.
To see more details for all devices connected to your Mac, click the Connected Devices monitor in the Menu. Click it again to hide these details. To close both menus, click anywhere beyond them (for example, your desktop or another app).
Detailed view
For a detailed menu of all devices connected to your Mac, open the CleanMyMac X Menu and click the Connected Devices monitor.
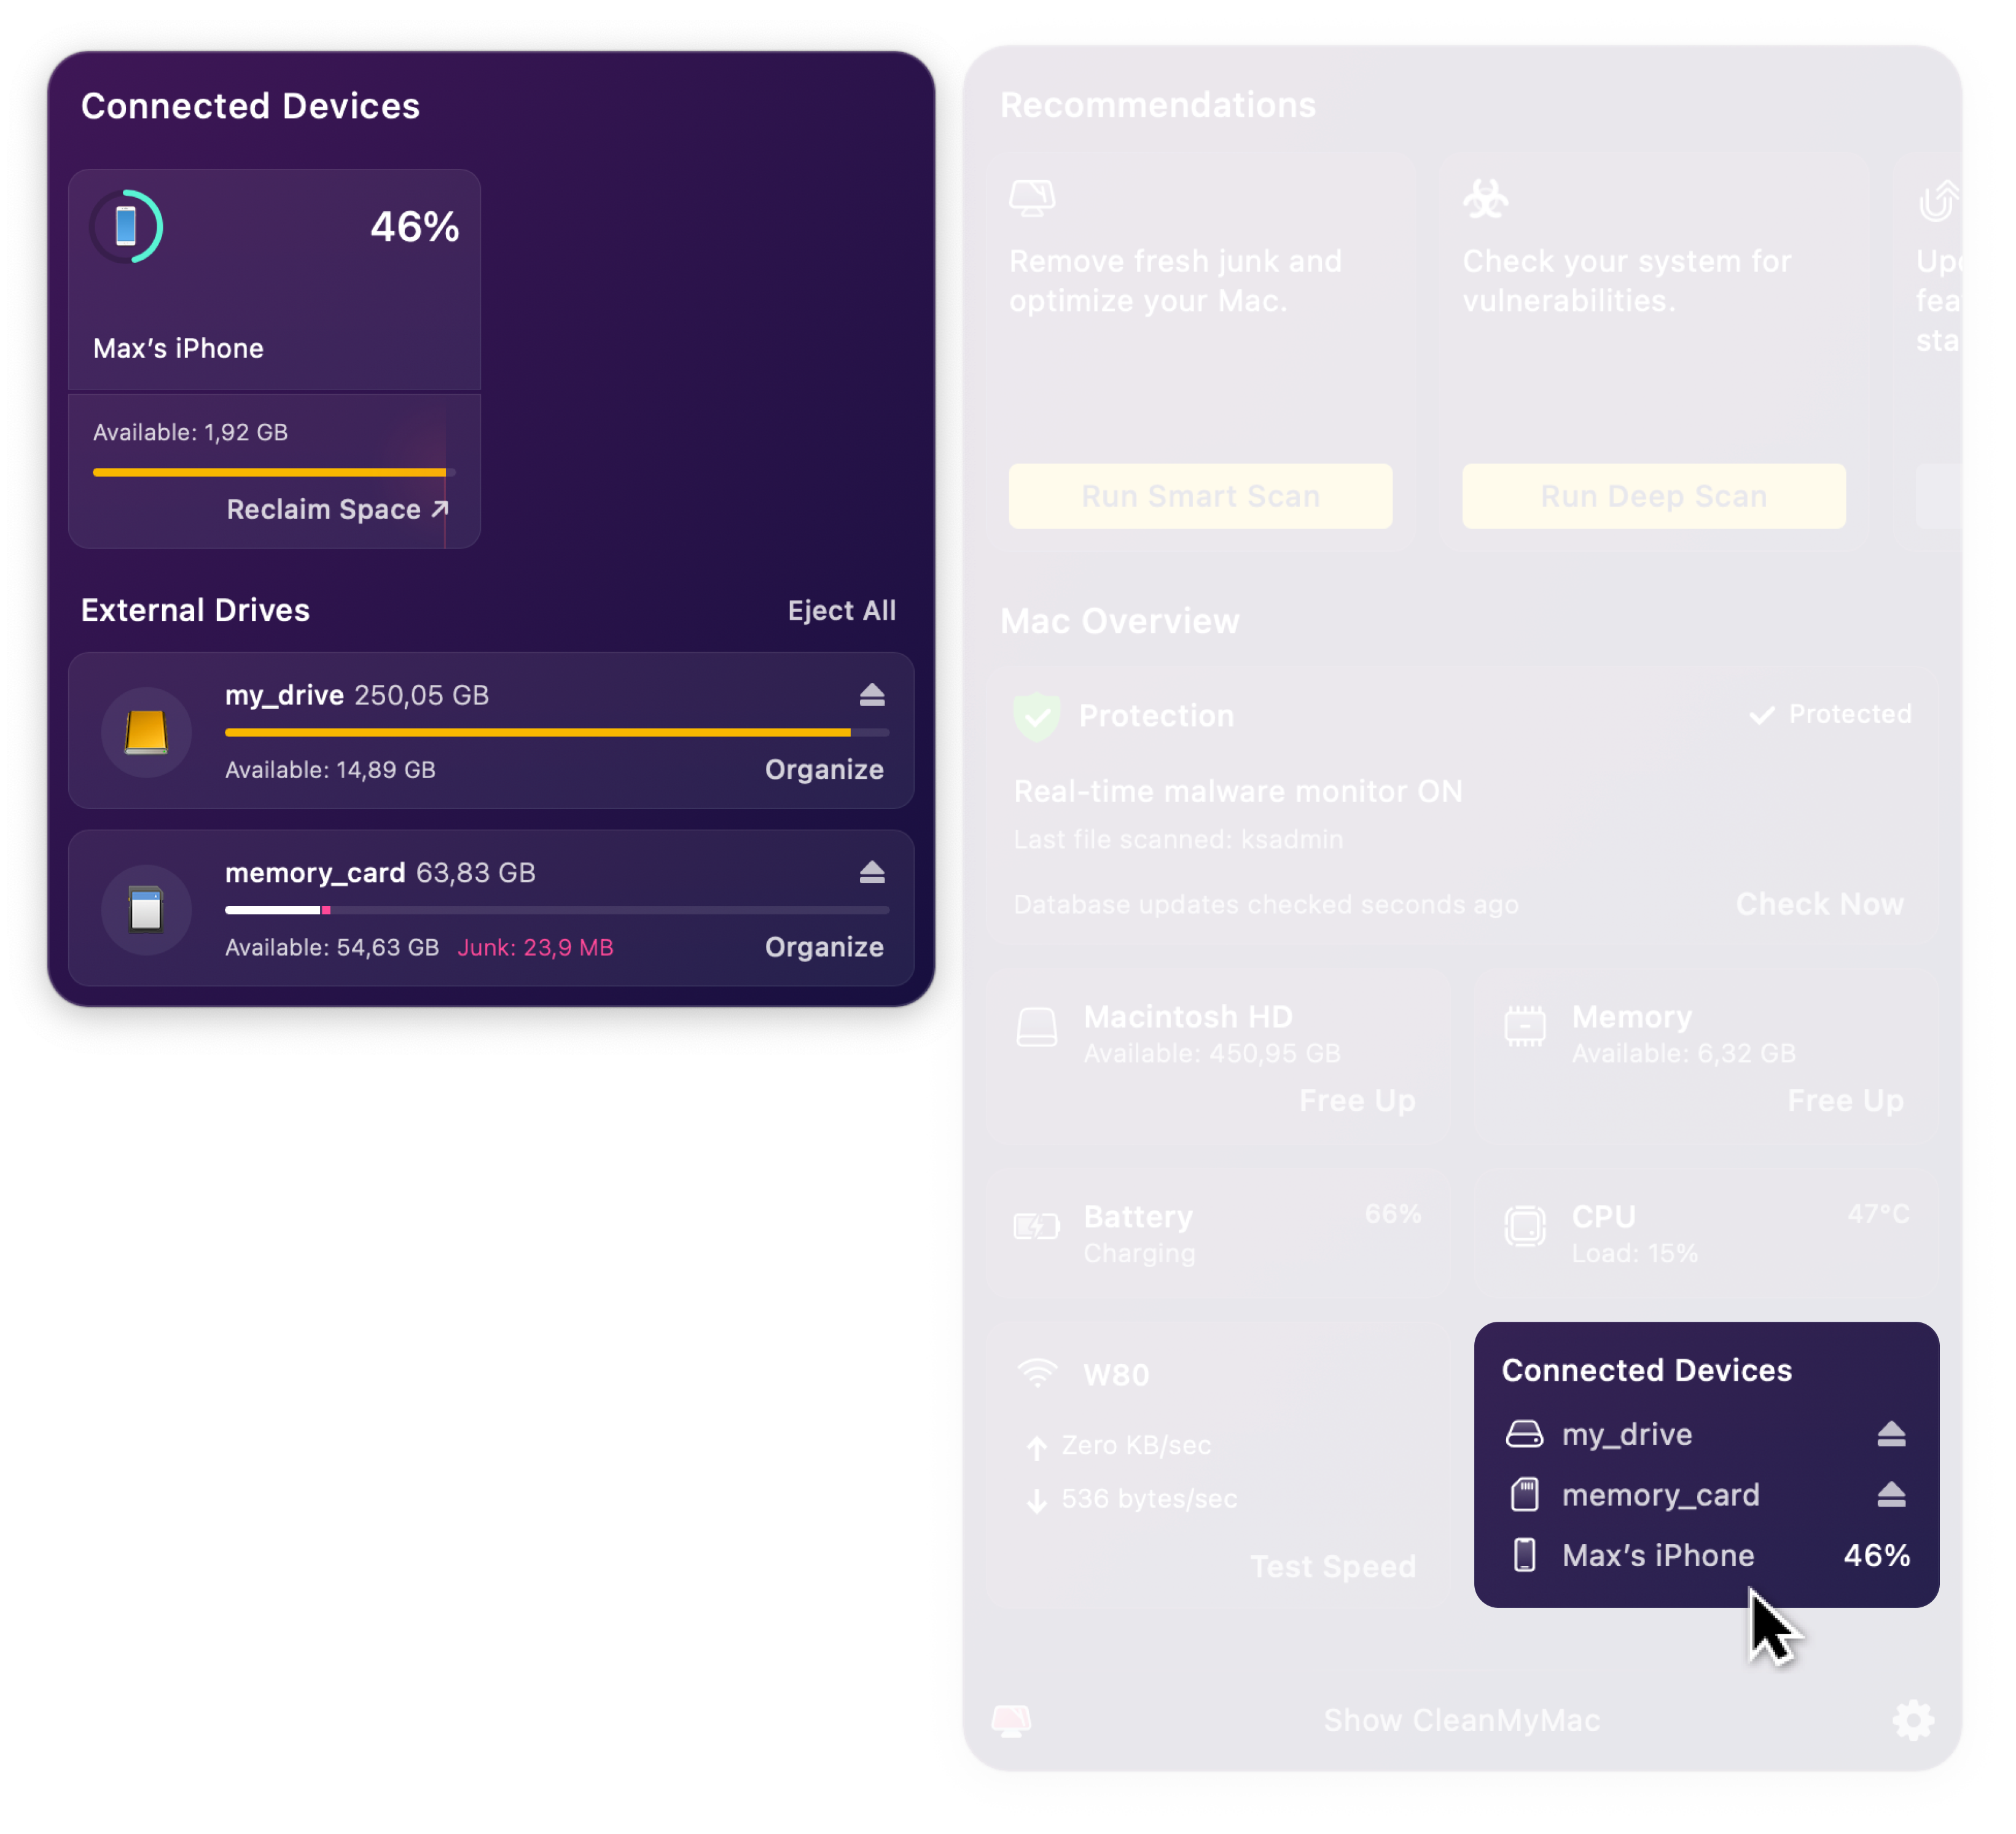
What you can see and do in the detailed menu depends on the device type. The three types of devices displayed in the menu are:
iPhones and iPads
For iPhone or iPad, you can see the battery percentage and available storage. Press Reclaim Space to read our blog article about freeing up storage on your device.
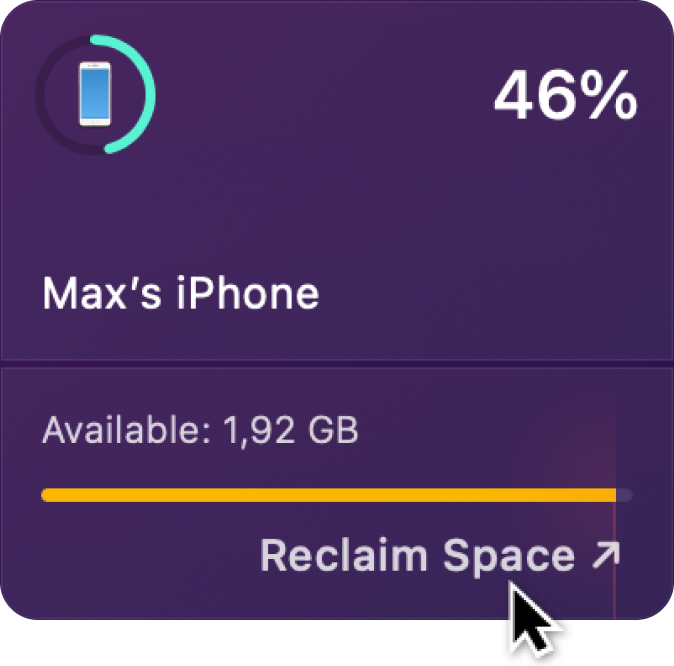
How to connect an iPhone or an iPad so that it's displayed in the CleanMyMac X Menu? The Menu instantly displays an iPhone or an iPad connected to your Mac via a cable. For a wireless connection, your device must:
-
Use the same Wi-Fi network and Apple ID as your Mac
To check if your iPhone or iPad is a trusted device on your Mac, do the following:
-
Click the Apple menu in the upper-left corner of your screen and choose System Settings.
-
Click your Apple ID name at the top of the sidebar.
-
On the right, scroll down to the Devices list and make sure your iPhone or iPad is there.
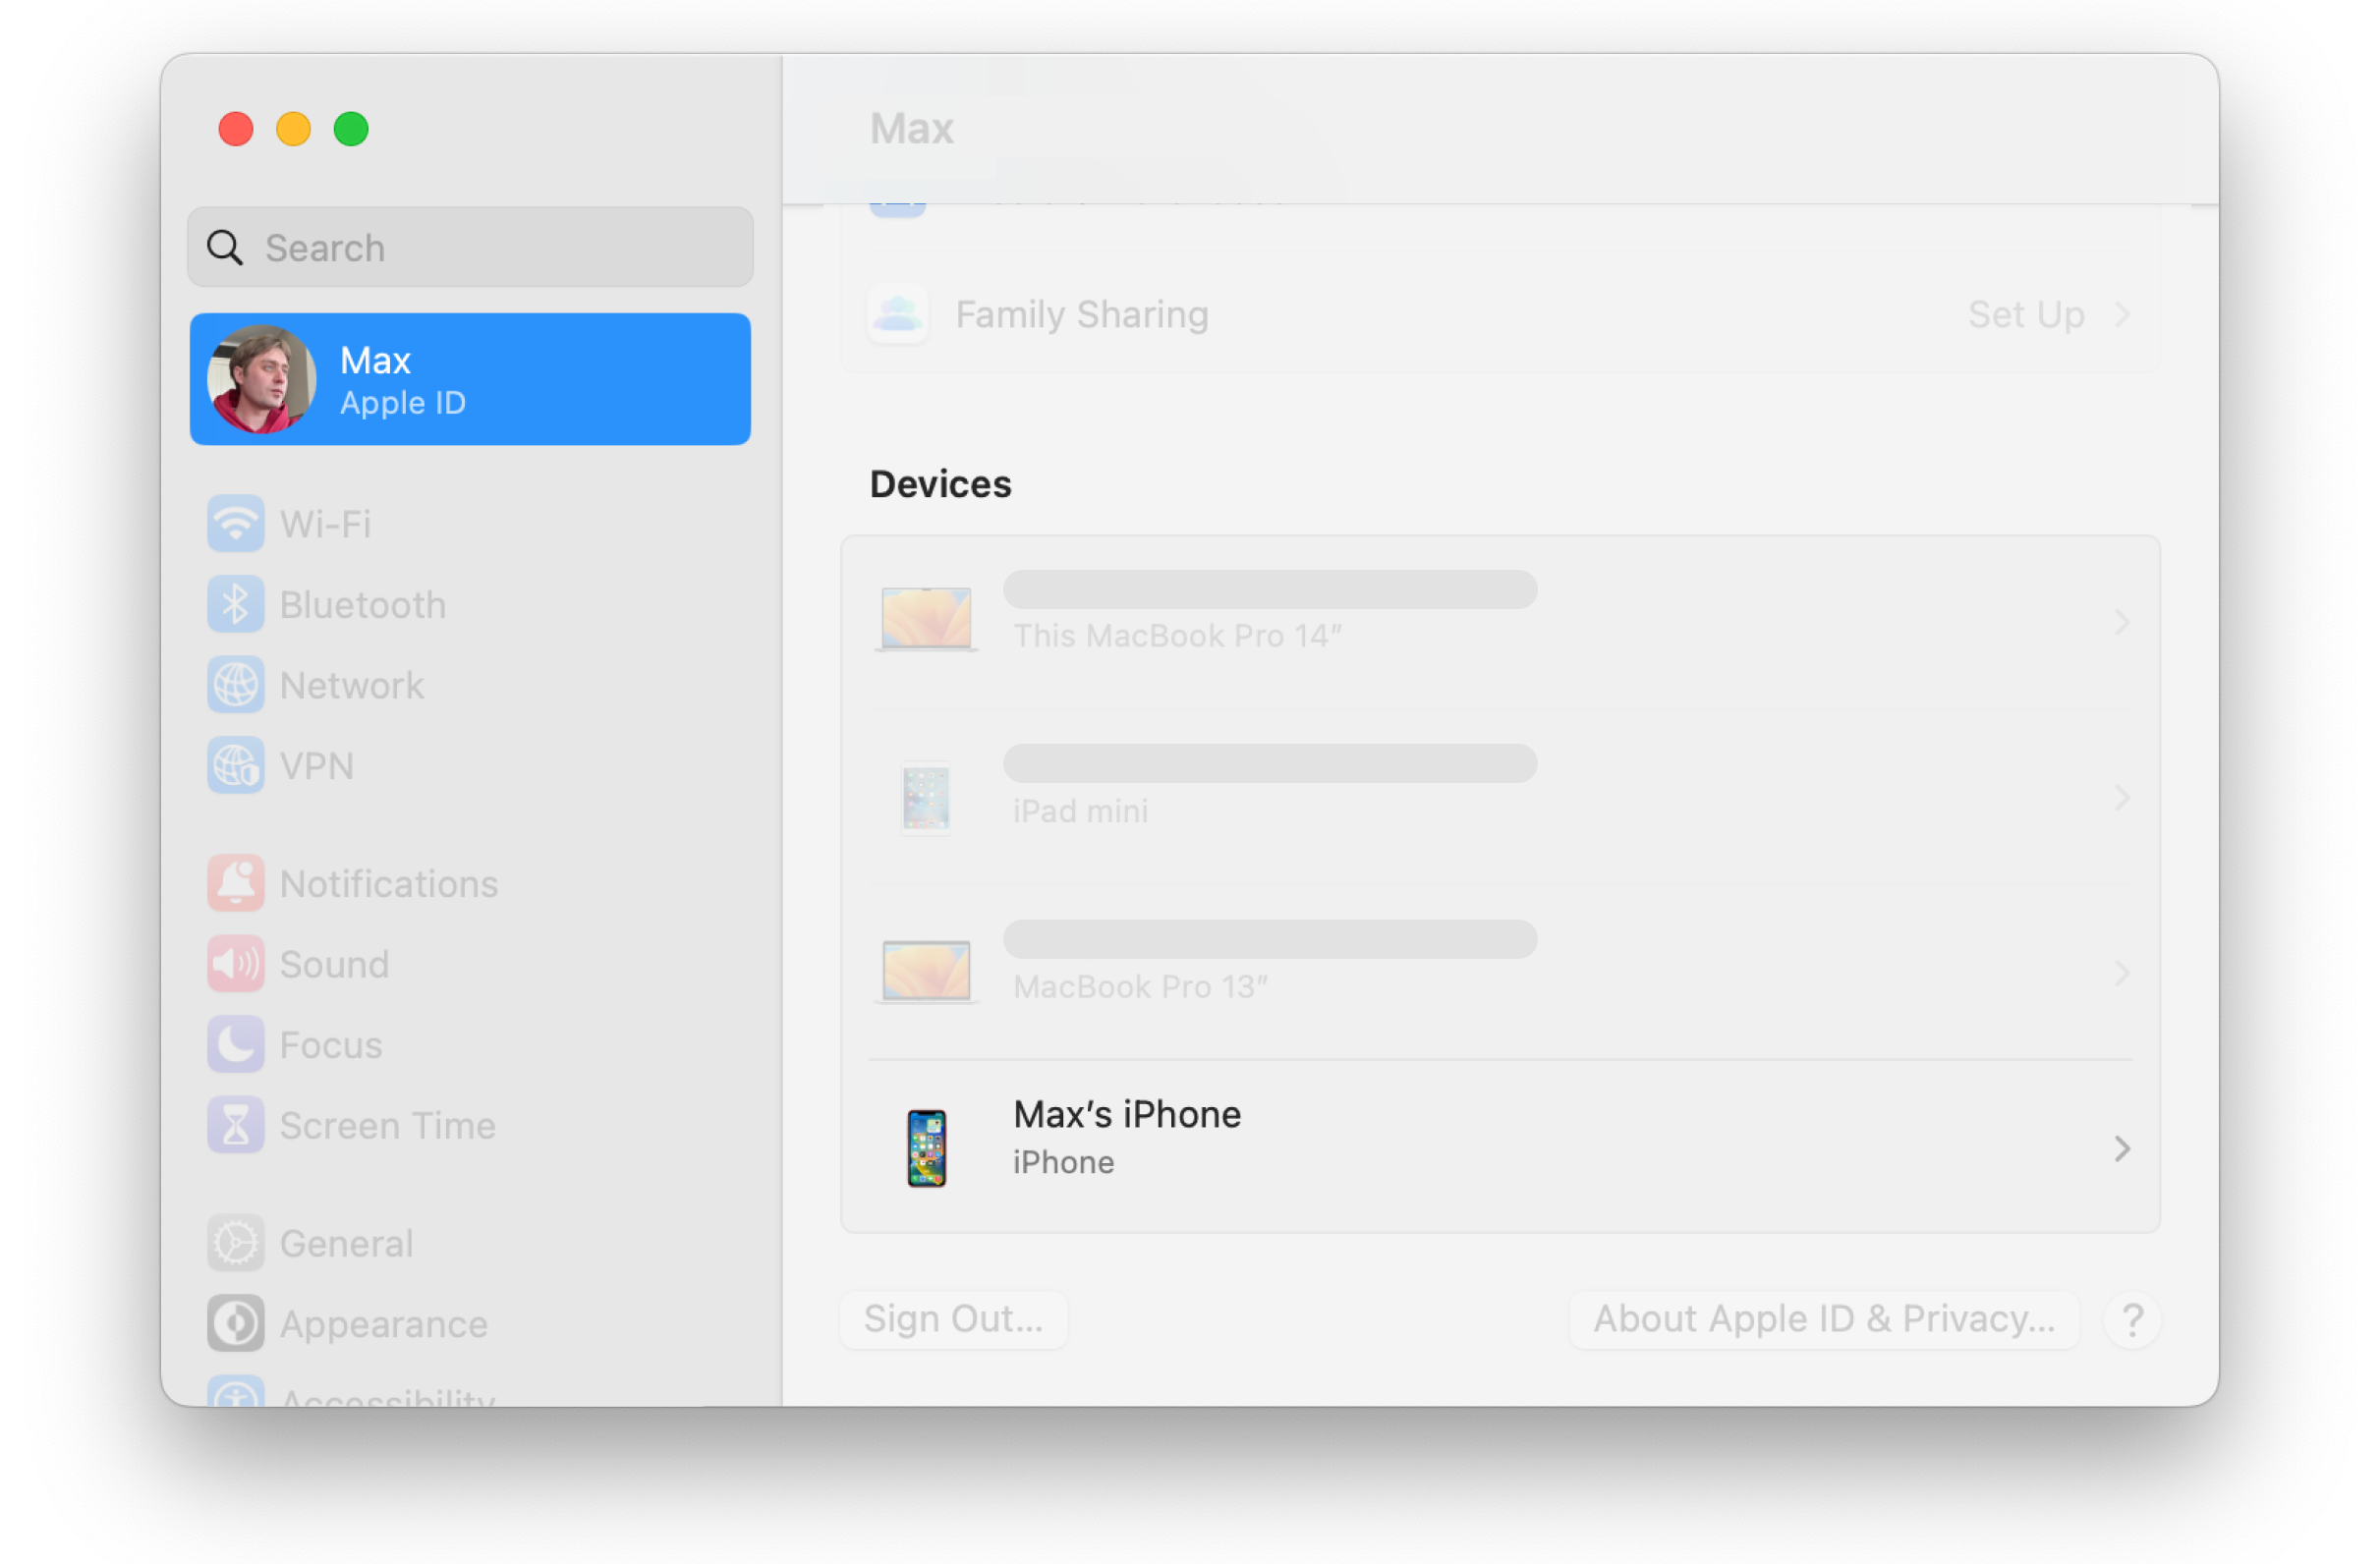
For more information, also see how to add or remove trusted devices in the macOS user guide.
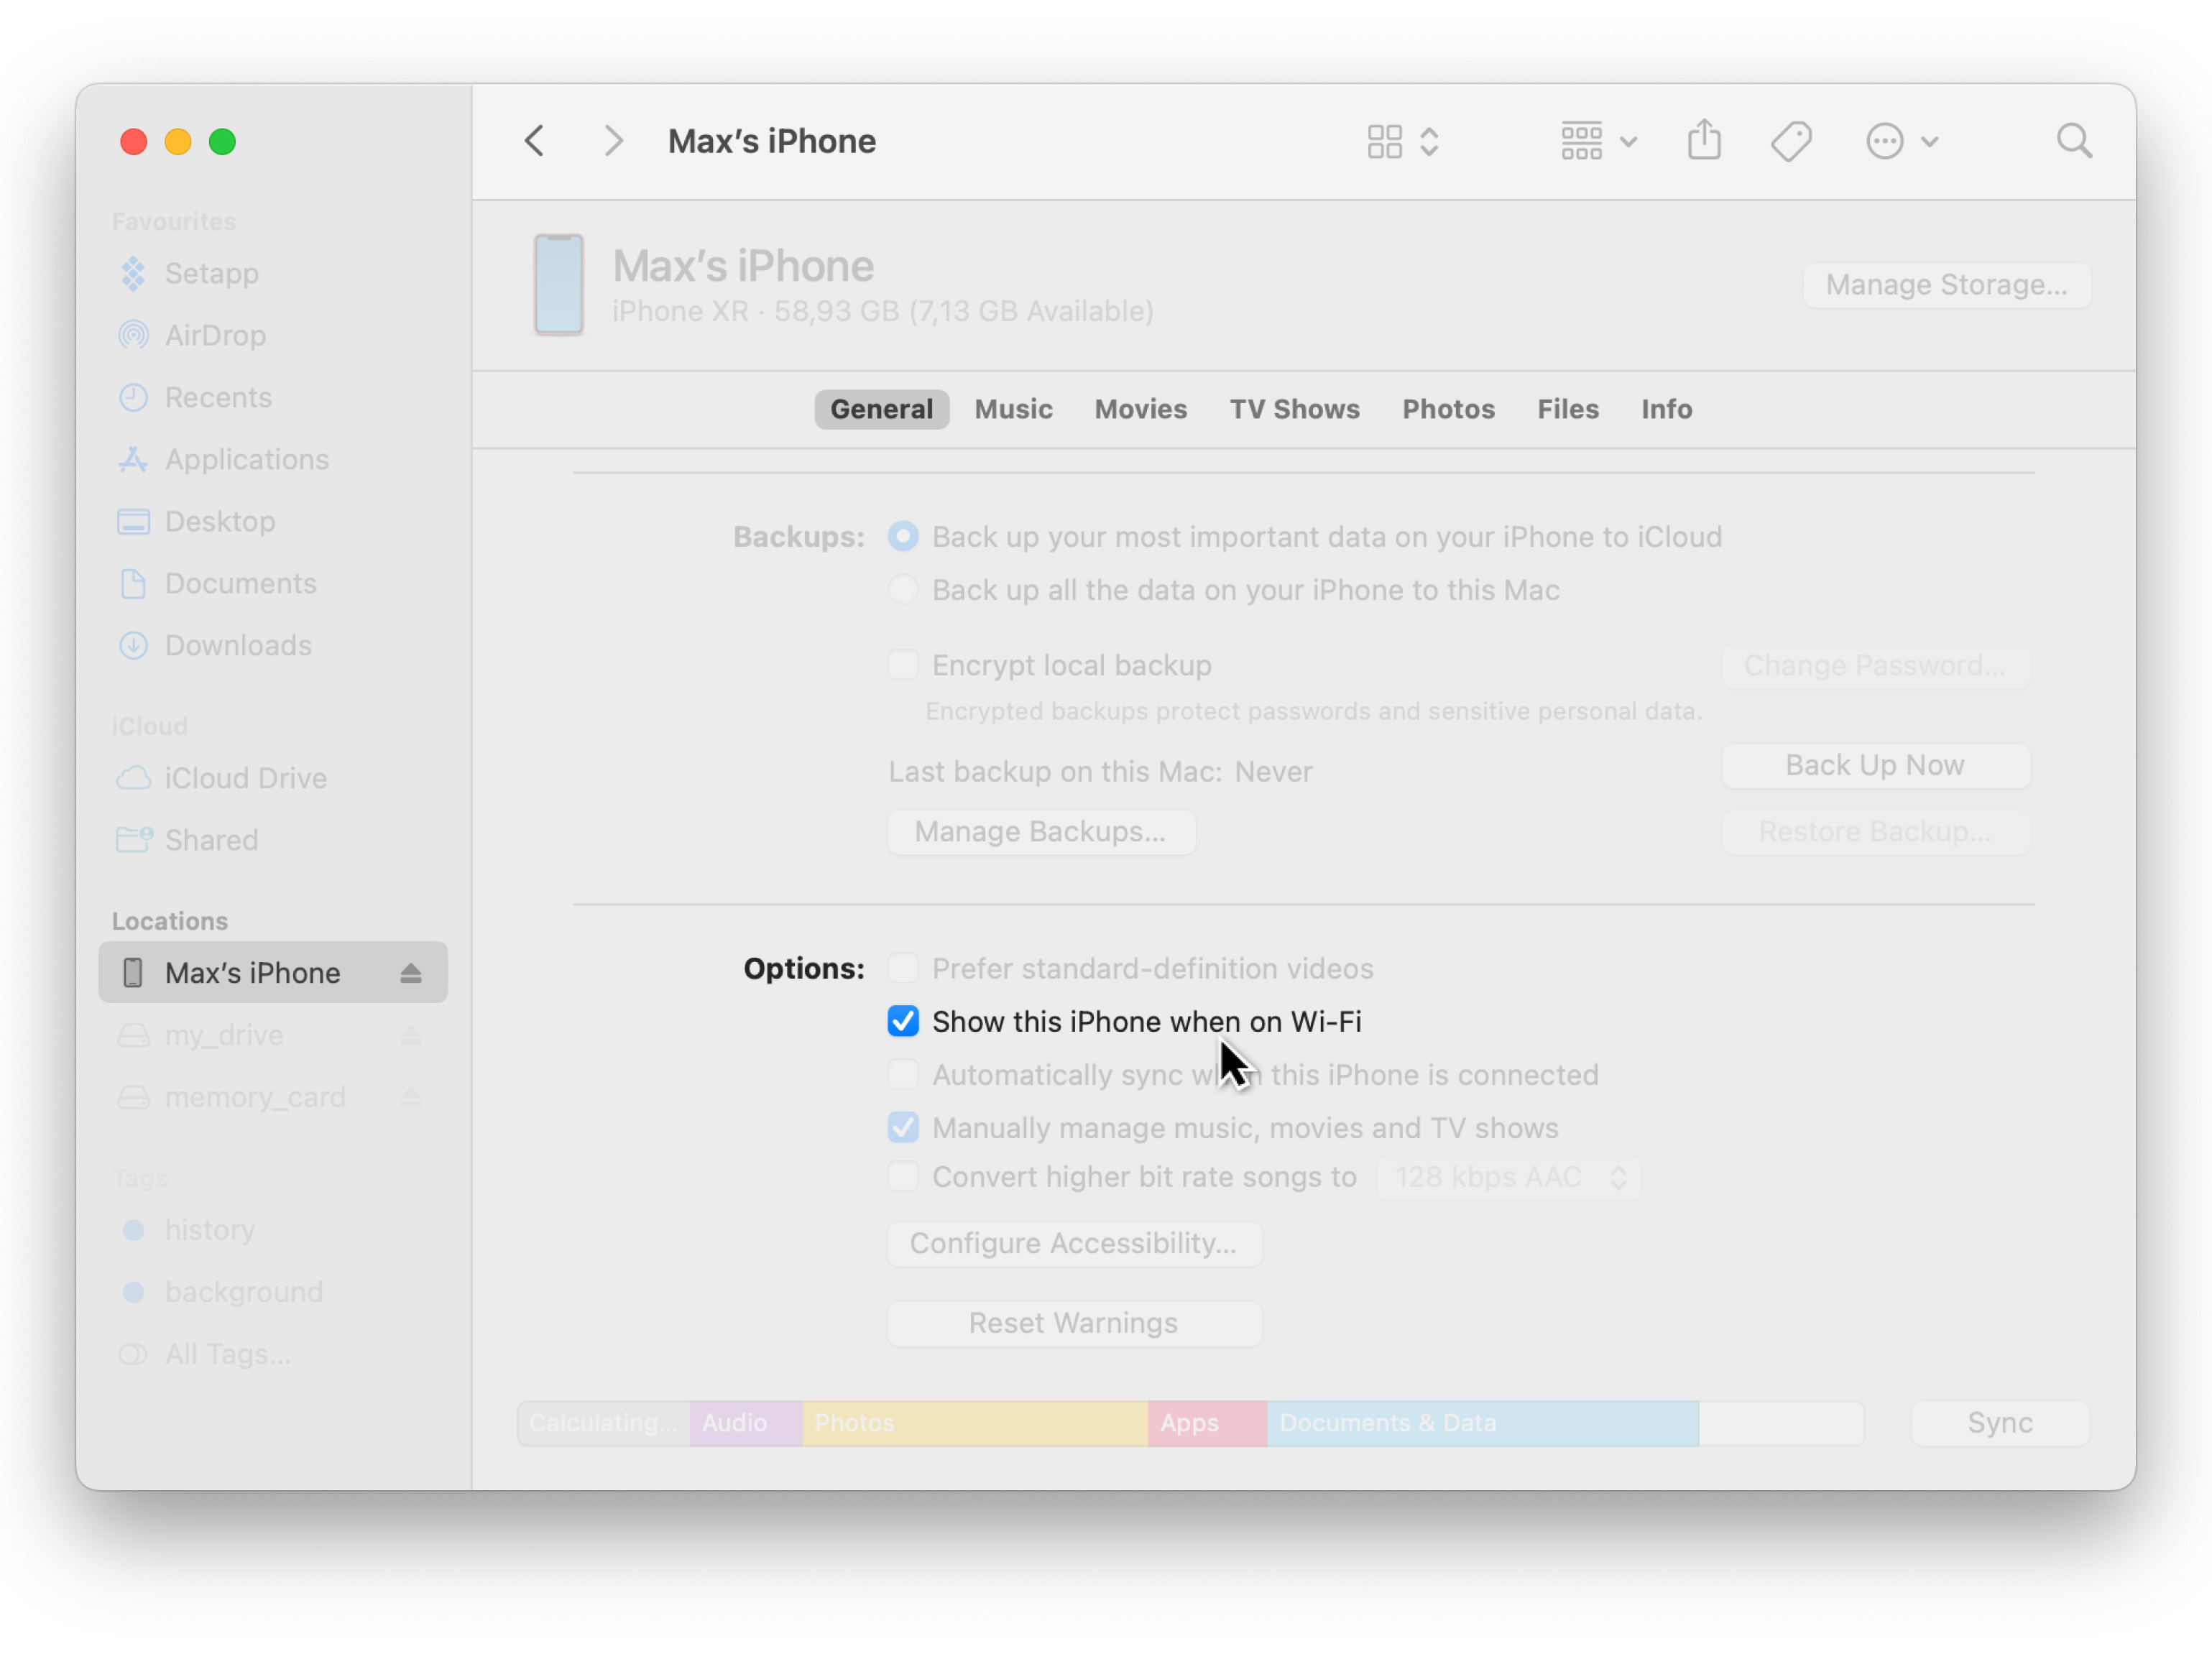
To turn on Wi-Fi syncing for your iPhone or iPad, do the following:
-
Connect your device to your Mac with a cable.
-
Go to Finder and select your device in the sidebar.
-
In the General tab, go to the Options section (you may need to scroll down to it) and select "Show this [device] when on Wi-Fi".
Bluetooth devices
For devices connected with your Mac via Bluetooth, you can check the battery percentage. Devices with a low battery percentage (less than 20%) are highlighted in red and displayed at the top.
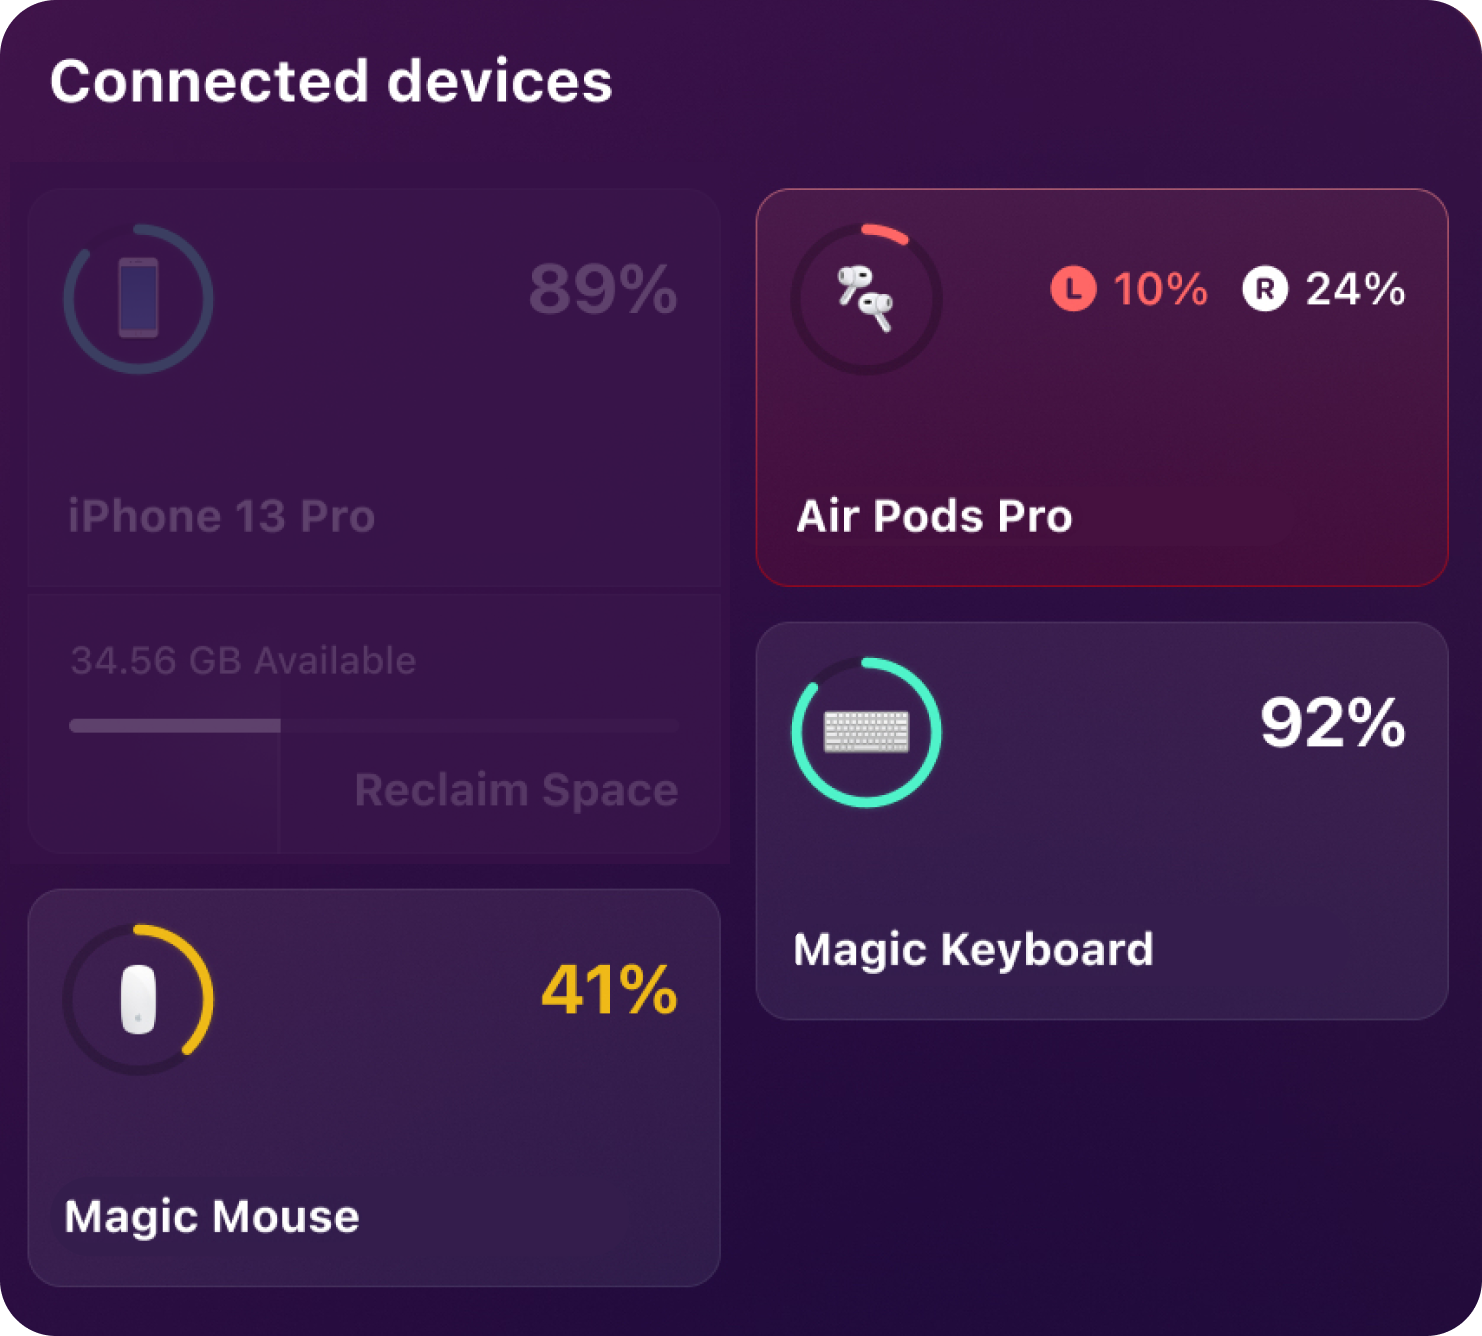
How to connect a Bluetooth device so that it's displayed in the CleanMyMac X Menu? The Menu displays all supported devices connected to your Mac via Bluetooth. If you have trouble pairing a Bluetooth device with your Mac, check the macOS user guide for the steps to set up Bluetooth connections.
Supported devices. CleanMyMac X Menu supports most Bluetooth devices commonly used with Mac:
- AirPods
- Magic Mouse
- Magic Trackpad
- Magic Keyboard
- Headphones and earbuds manufactured under Apple MFi (Made for iPhone/iPod/iPad) Program (for example, Beats)
- Other third-party headphones
- Third-party pointing devices
Note: Third-party devices of some brands may work with limitations, such as no battery percentage being displayed in the Menu.
Other Bluetooth devices (smartwatches, speakers, and gamepads, among others) are many and differ much in terms of software and hardware. So, we can't guarantee that they are or aren't displayed in the CleanMyMac X Menu at all times.
Work with external drives
The CleanMyMac X Menu supports various types of external drives, including portable HDDs and SSDs, flash drives, and memory cards. To view detailed information about the external drives connected to your Mac, open the CleanMyMac X Menu and click Connected Devices. For each drive, you can instantly see the available disk space and the amount of junk, if any.
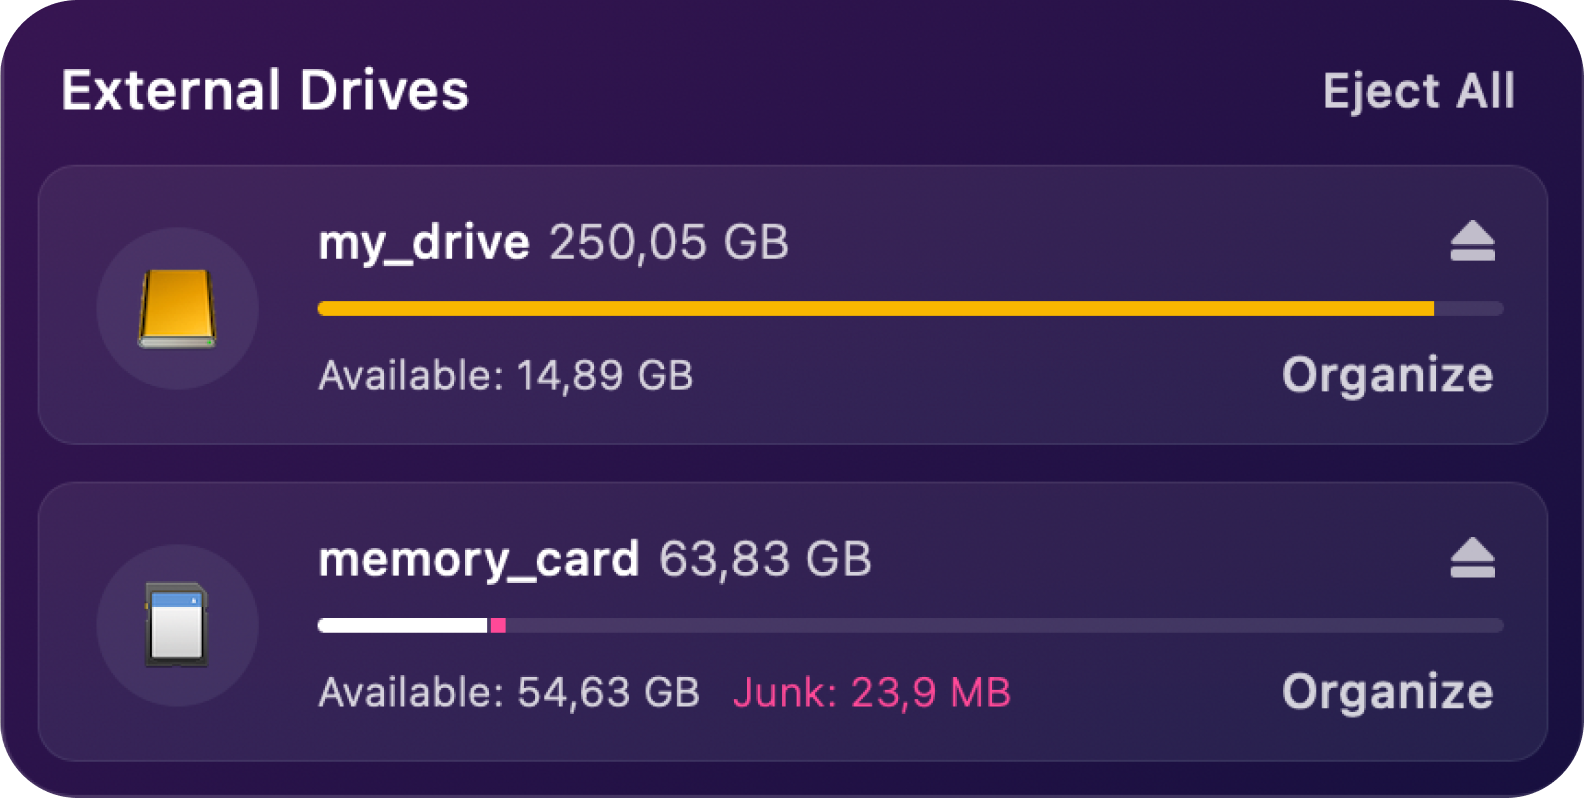
But besides that, you can scan your external drives for junk, clean up junk, manage files, and safely eject your drives, as described in the sections below.
Technical aspects to know before you start
Disk access. Depending on where you got CleanMyMac X from, do the following:
-
If you have the MacPaw Store version of CleanMyMac X, make sure full disk access is turned on for all components of the app.
-
If you have the MacPaw Store version of CleanMyMac X, make sure full disk access is turned on for all components of the app.
-
Connect your drive to your Mac.
-
Go to the CleanMyMac X Menu and click Connected Devices.
-
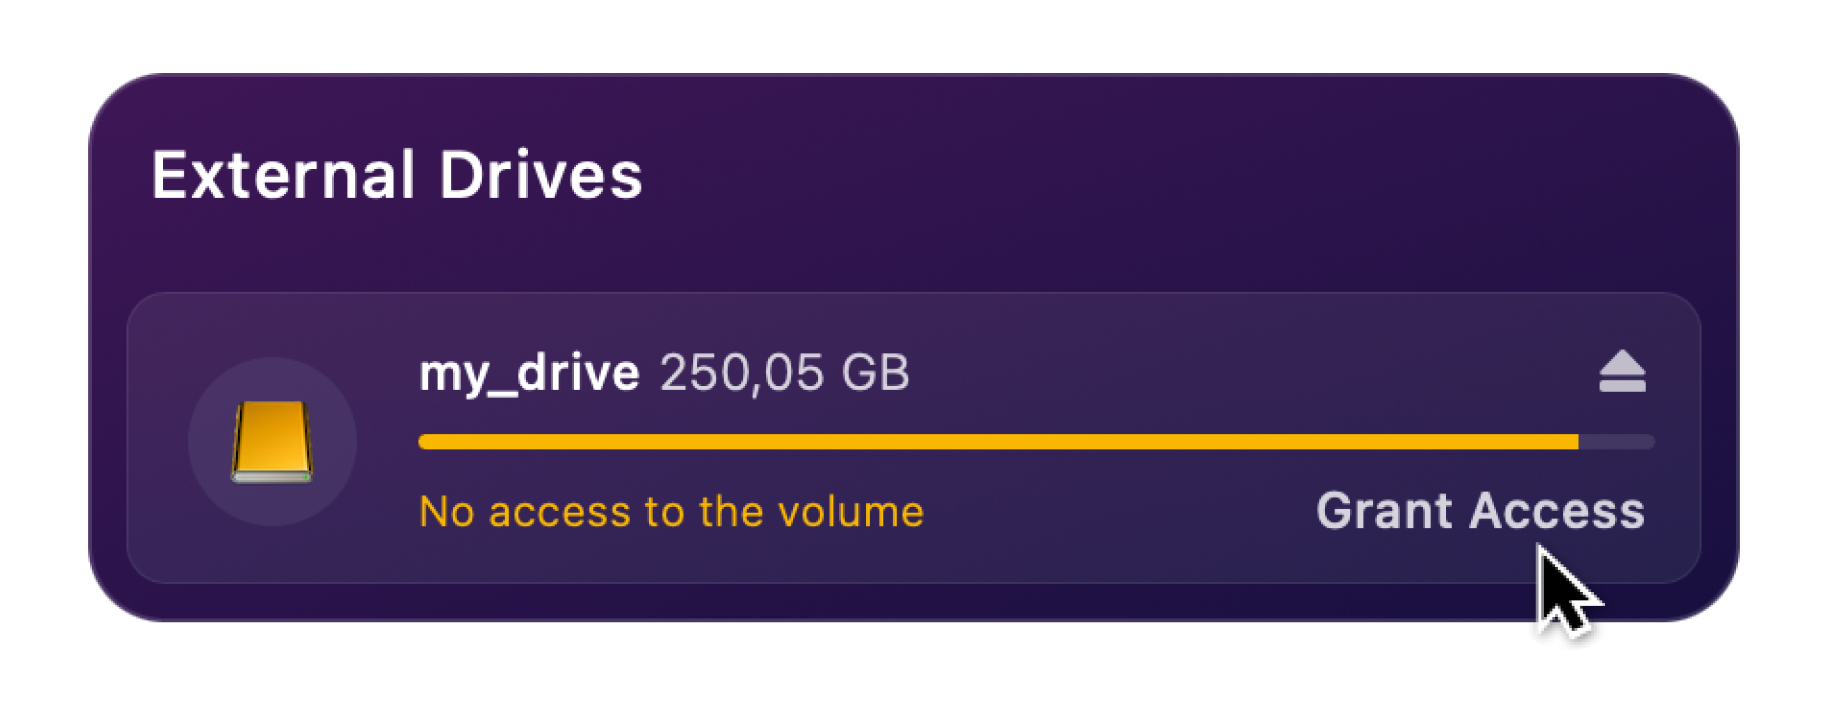
Click Grant Access next to your drive.
-
In the window that opens, click Grant Access.
You need to grant access only once for each drive you use. The next time you connect your drive, the Menu won't ask for access again.
-
Supported types of connection and devices. Your drive must be connected to your Mac directly via a cable, USB, or card slot.
The Menu doesn't display devices and wirelessly connected storages like these:
- Cloud storages (like Google Drive)
- Network-attached storage (NAS) devices
- Disk images (DMG files)
- RAID drives
- Internal drives connected externally via enclosures and adapters
- Wireless hubs, such as AirPort and Time Capsule
Supported file system formats. Make sure the file system format of your external drive is compatible with macOS. The compatible formats are:
- Apple File System (APFS)
- Mac OS Extended
- MS-DOS (FAT)
- ExFAT
An external drive with any other file system format is read-only on your Mac. For such a device, you can only see its available storage in the CleanMyMac X Menu.
Scan an external drive for junk
The CleanMyMac X Menu automatically scans your drive for junk when you connect it to your Mac and repeats the scanning at certain intervals when you open Connected Devices. So, to initiate another scanning later while the drive is connected, just open the CleanMyMac X Menu and click Connected Devices.

Once the scanning is complete, the Menu displays updated information about the available space and the amount of junk on your drive.

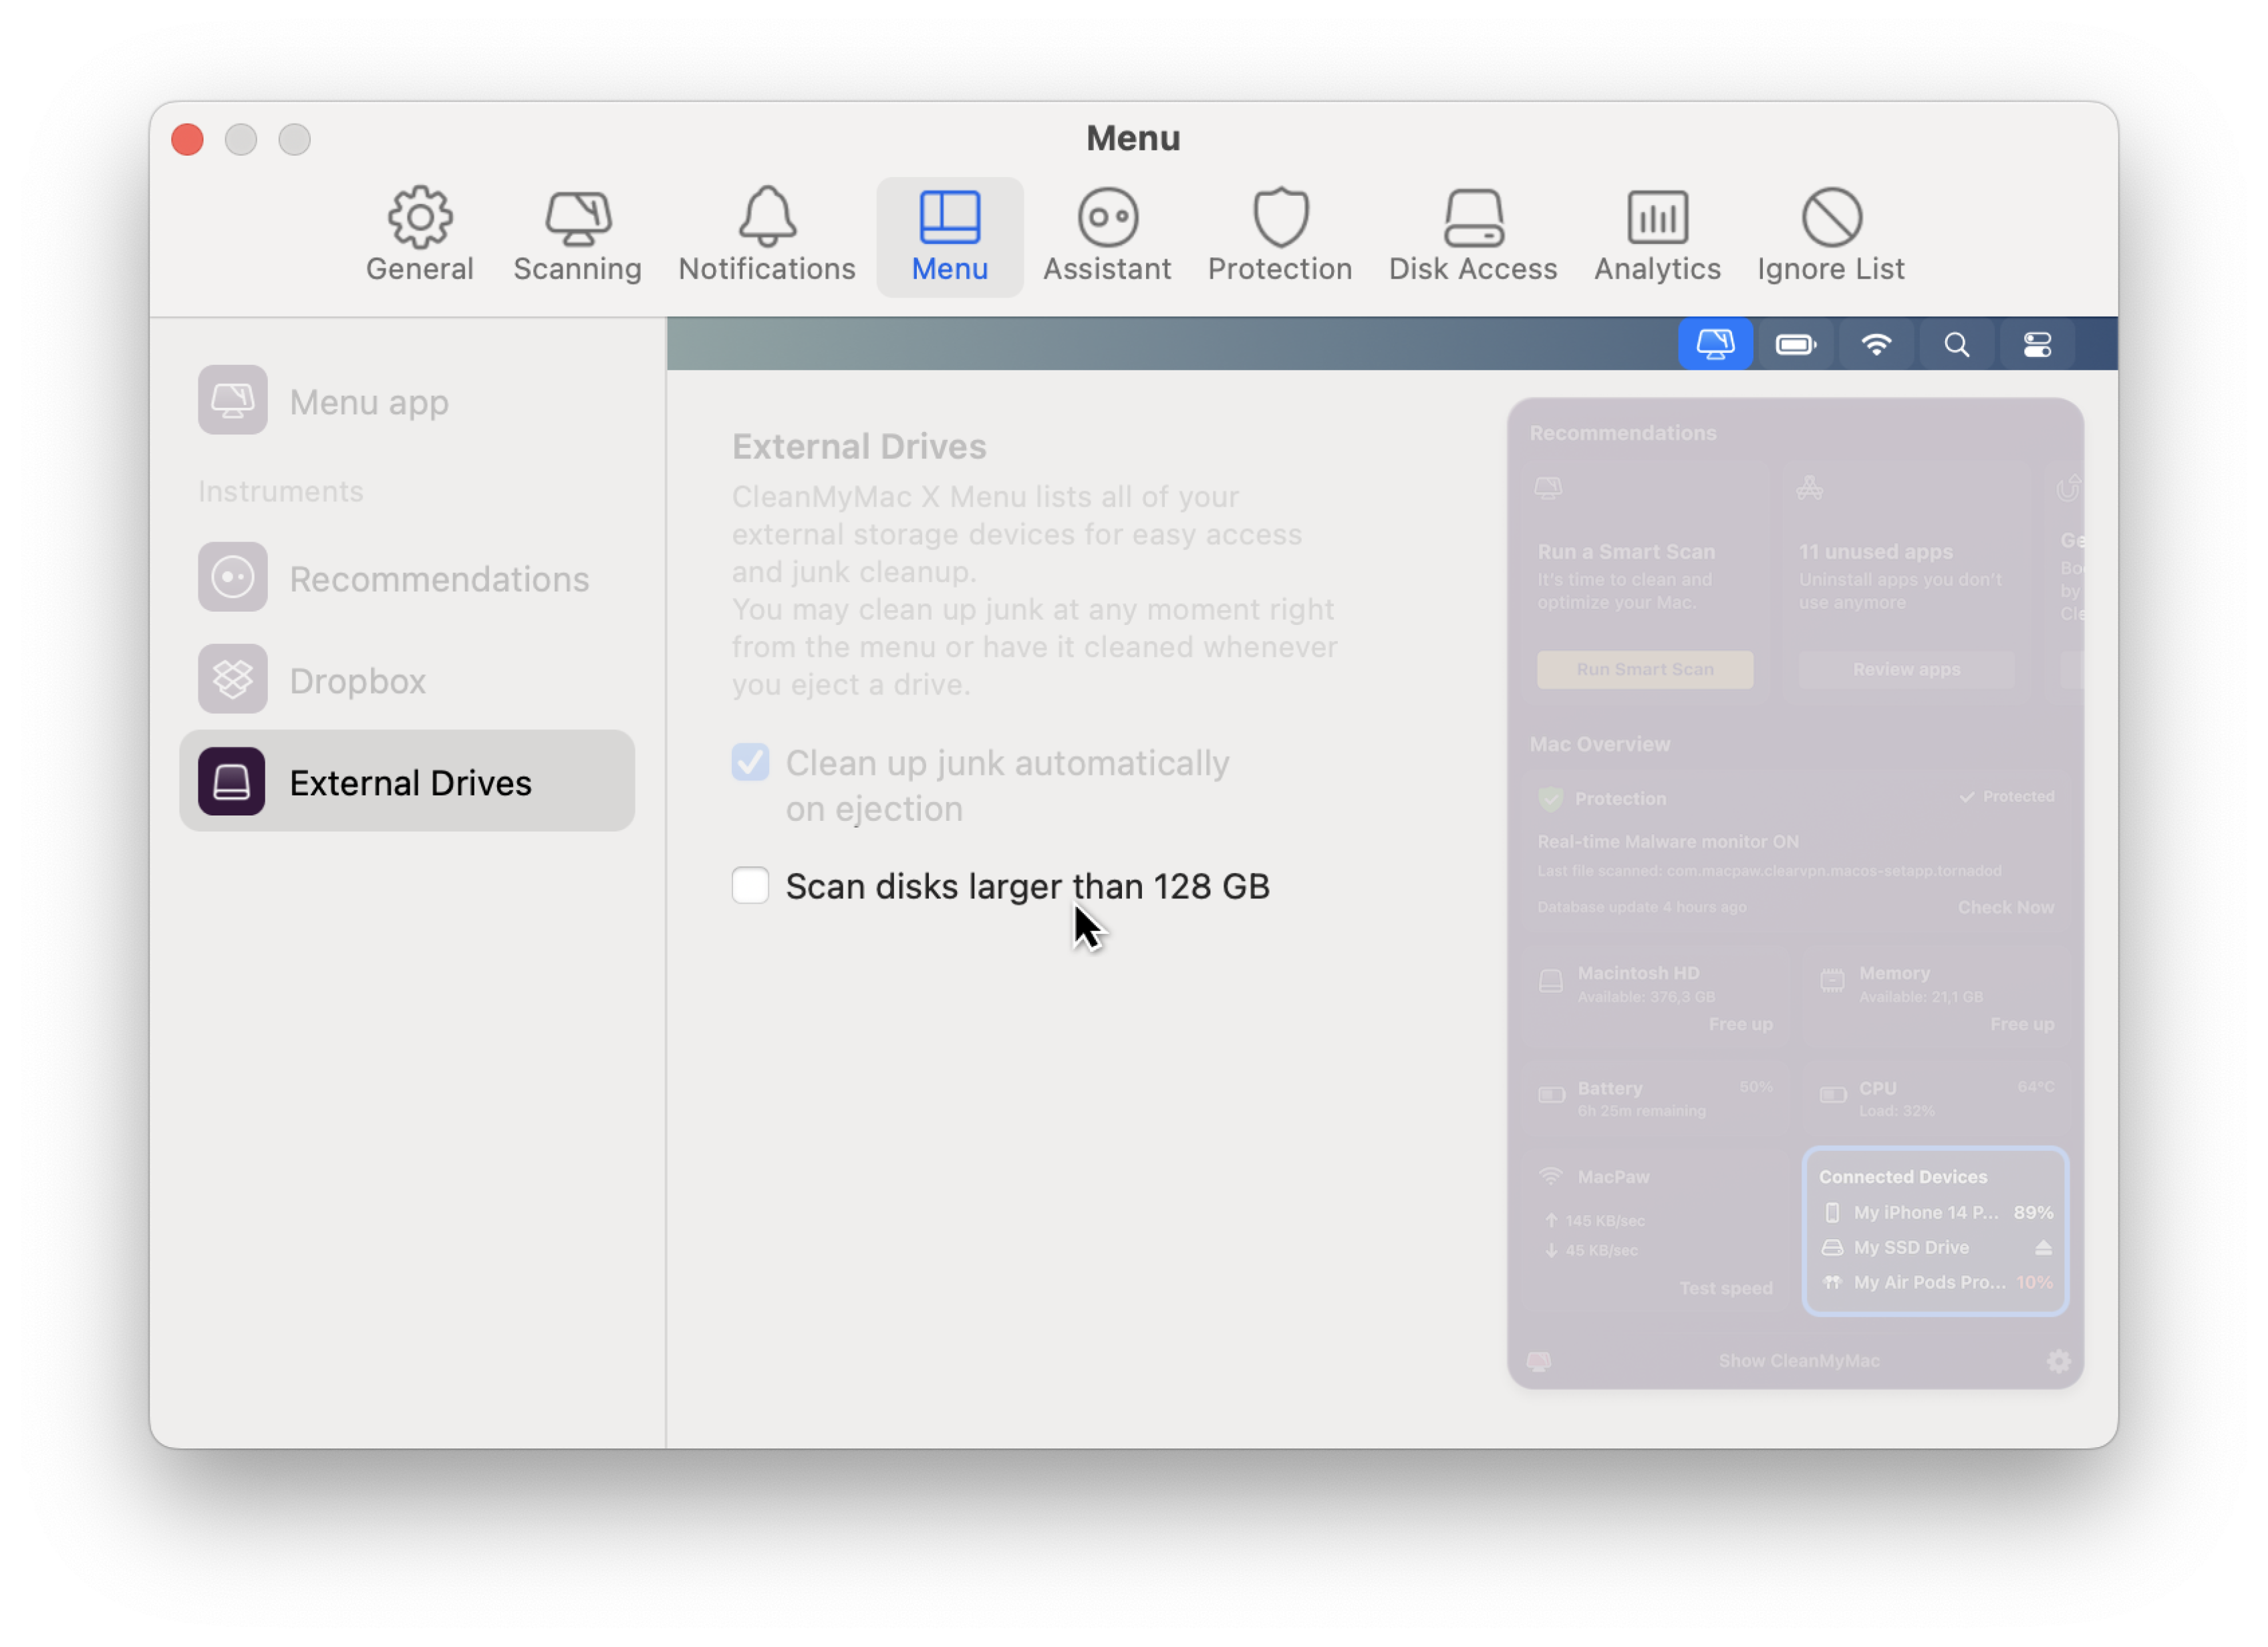
Note: Scanning large drives with thousands of files may take a while. If you don't want such drives to be scanned for junk each time you connect them to your Mac, go to the app settings and turn off scanning for disks larger than 128 GB.
Clean up an external drive
Junk includes system-generated service files (such as .DS_Store, .Spotlight, and Thumbs.db) and deleted files that remain in the drive's local Trash. Normally, you don't see these files and never clean them up, so they keep accumulating. As a result, an external drive you've been using for quite some time may contain gigabytes of junk.
To reclaim this space, open the CleanMyMac X Menu, then click Connected Devices. Hold the pointer over the Junk indicator on the selected drive and click Clean Up.
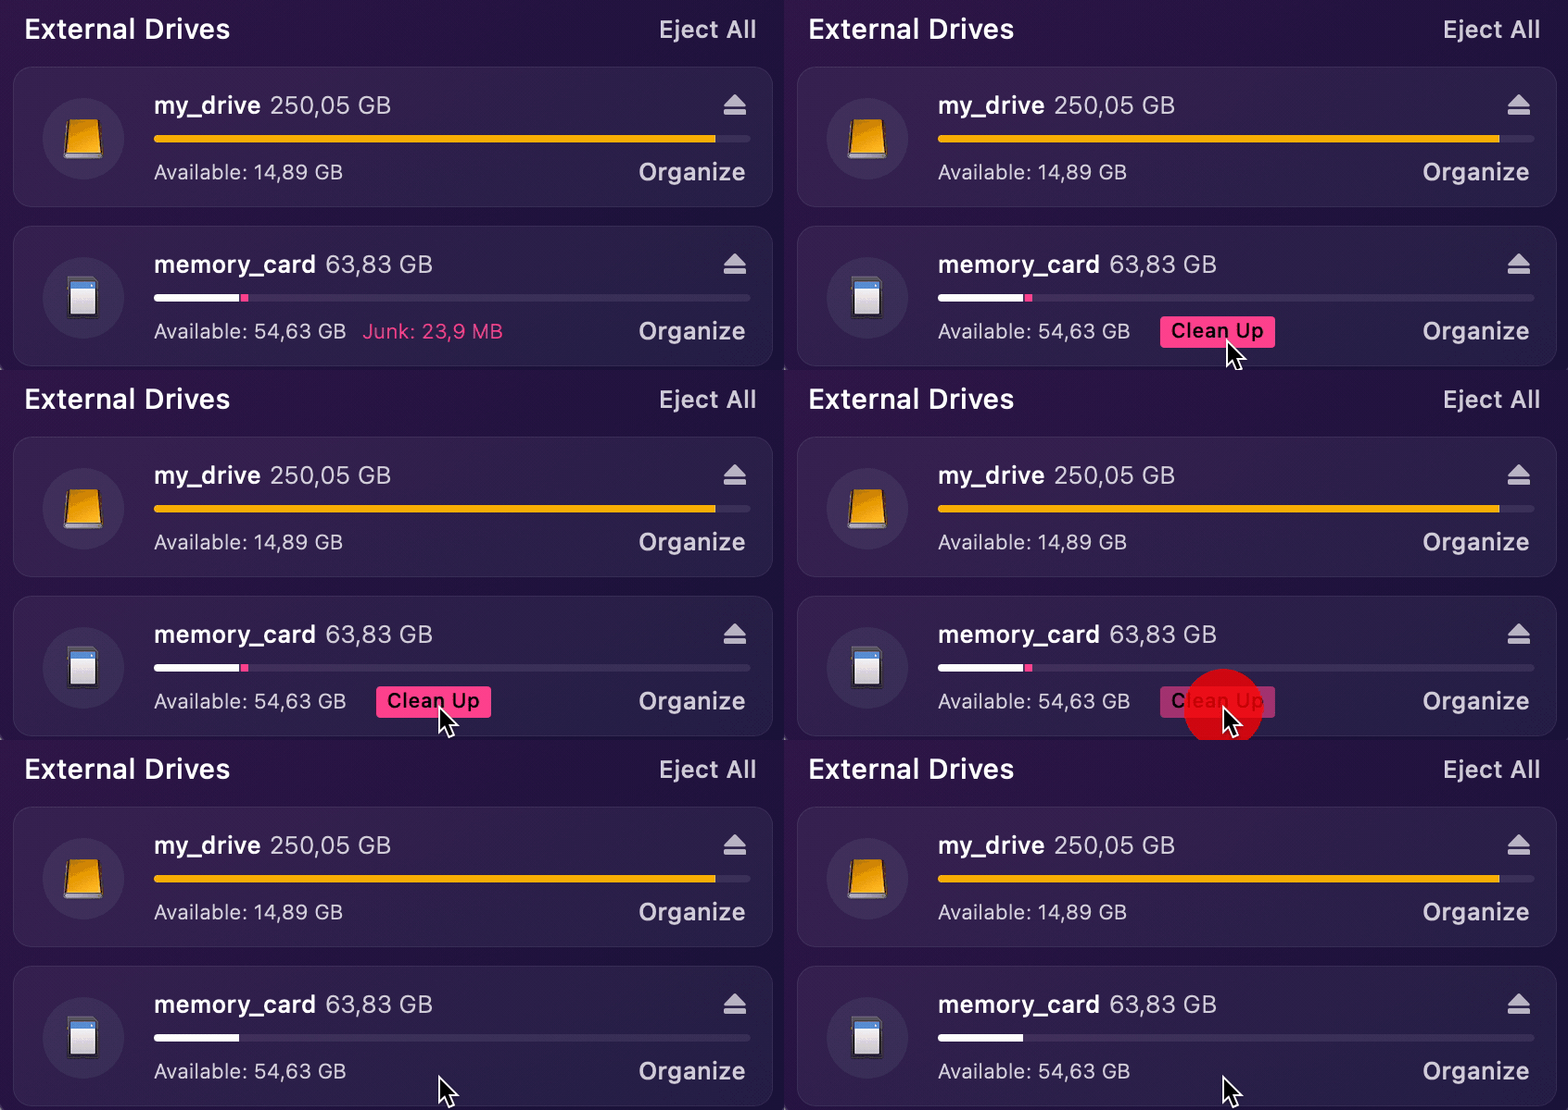
That's it, the junk is gone.
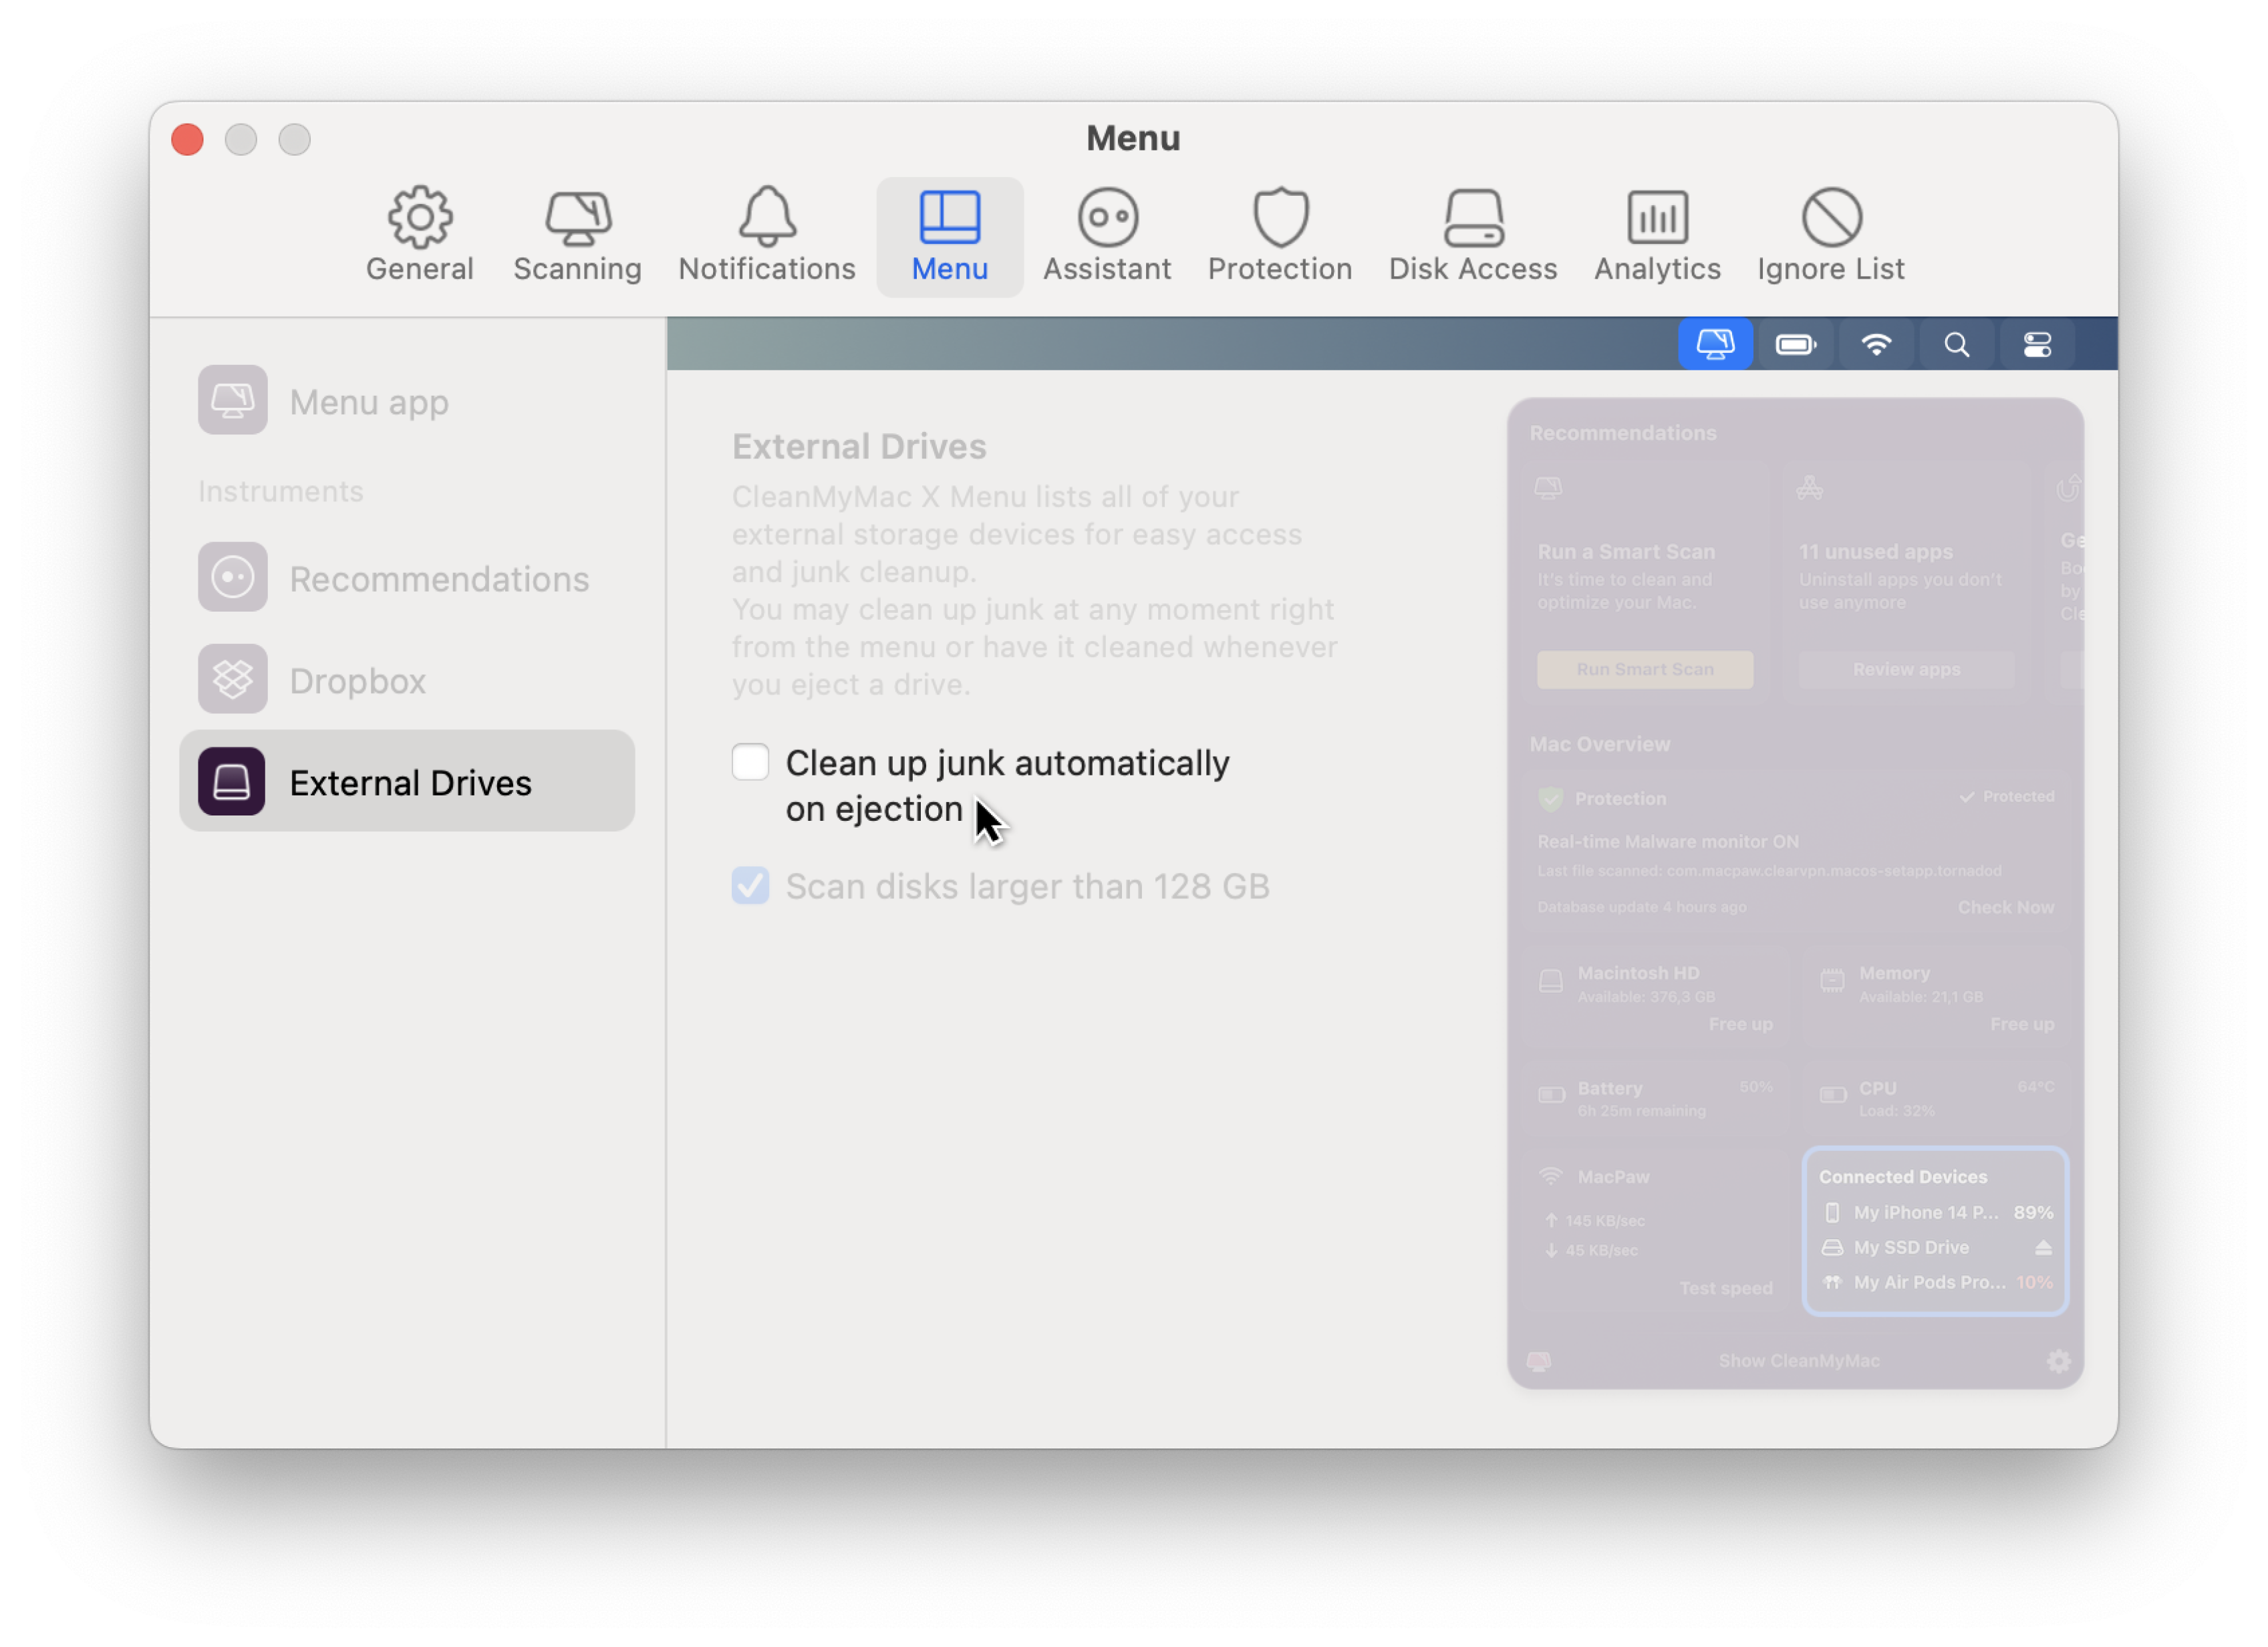
Junk is also removed automatically when you eject an external drive. But, if you wish, you can turn off the auto-cleanup.
Review and manage files on an external drive
You can start reviewing files on your external drive using Space Lens or Finder directly from the CleanMyMac X Menu.
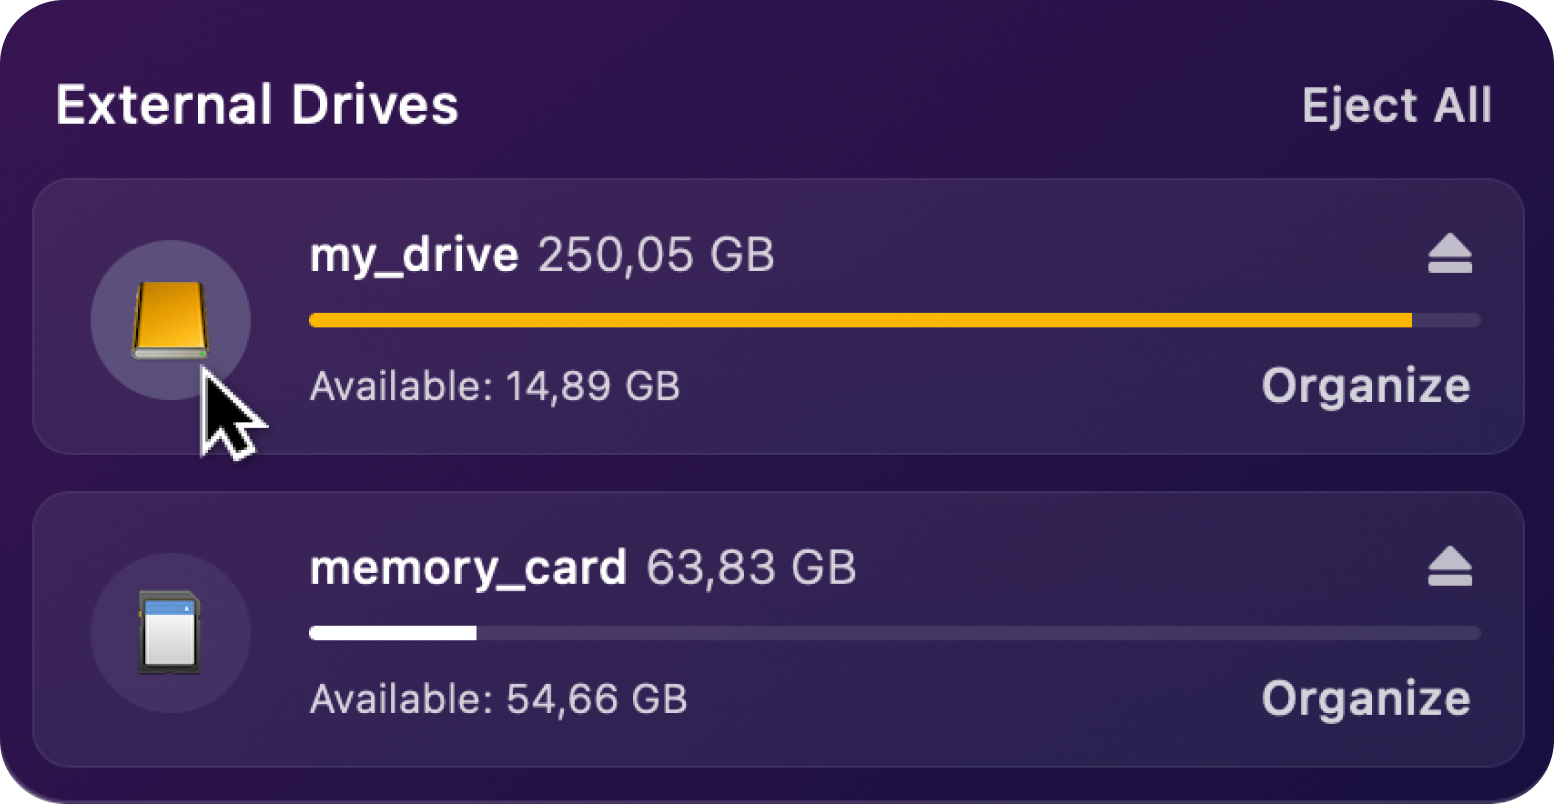
Scan an external drive using Space Lens. To run a quick scan of an external drive with the Space Lens module, open the CleanMyMac X Menu and click Connected Devices. Then, select a drive and click Organize.
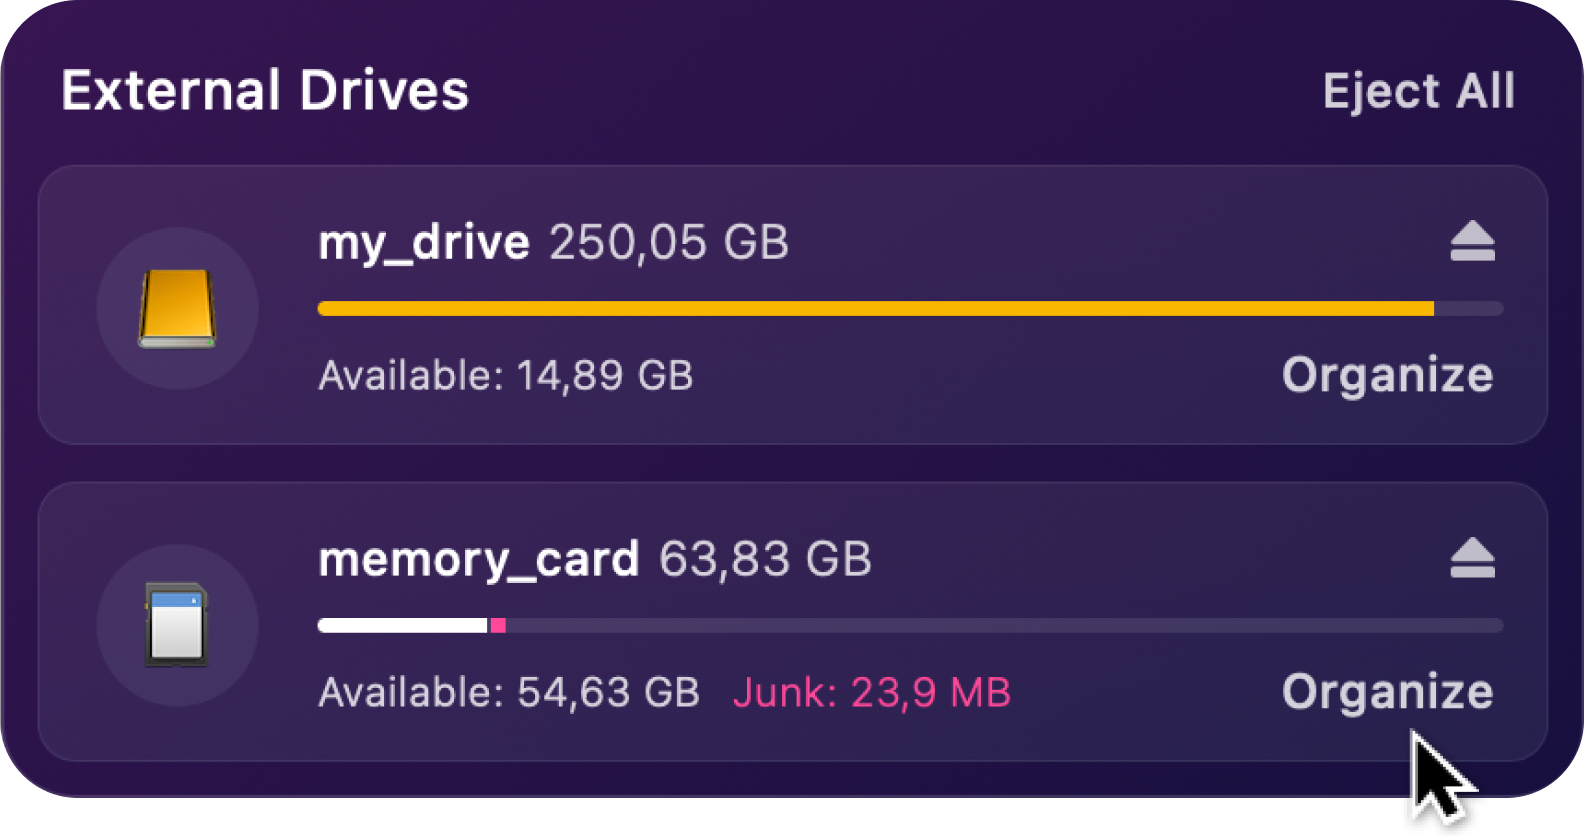
Space Lens builds a detailed map of your external drive storage, helping you spot the largest space wasters and, if needed, remove them. To learn more about this CleanMyMac X module, see Space Lens.
Open an external drive in Finder. To open an external drive in Finder, open the CleanMyMac X Menu and click Connected Devices. Then, select a drive and click the drive icon.
Turn off scanning for large drives
-
Open CleanMyMac X, then choose CleanMyMac X > Settings in the menu bar (upper-left corner of your screen).
Or, open the CleanMyMac X Menu, click the cog icon in the lower-right corner, and choose Preferences.
-
Go to the Menu tab and choose External Drives.
-
Deselect the "Scan disks larger than 128 GB" checkbox.
Safely eject an external drive
You can safely eject your external drives using the CleanMyMac X Menu.
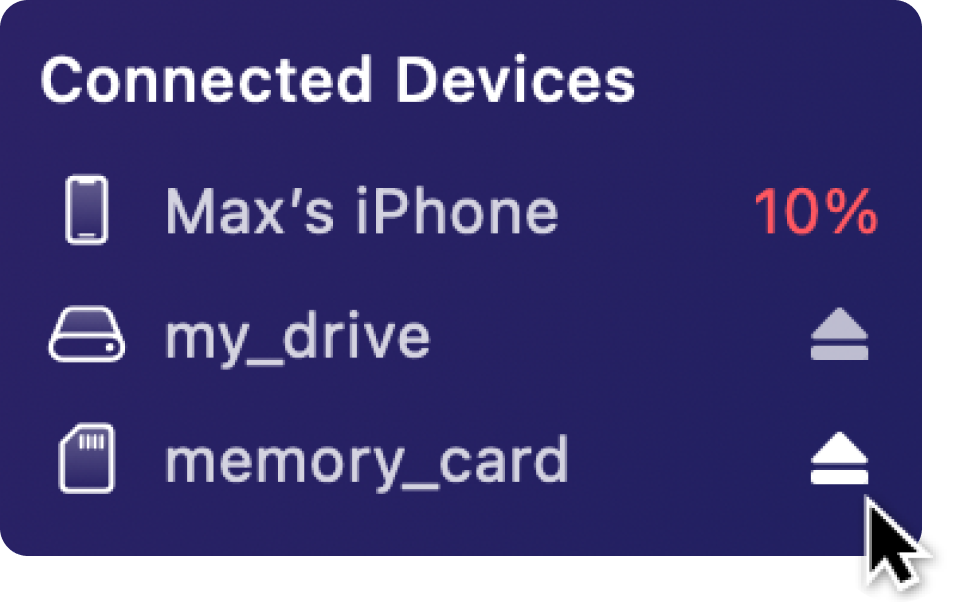
To eject a specific drive, open the CleanMyMac X Menu and click the Eject button ⏏ next to the drive in Connected Devices.
Alternatively, open the CleanMyMac X Menu and click Connected Devices. Then, click the Eject button ⏏ next to the drive you need to eject.
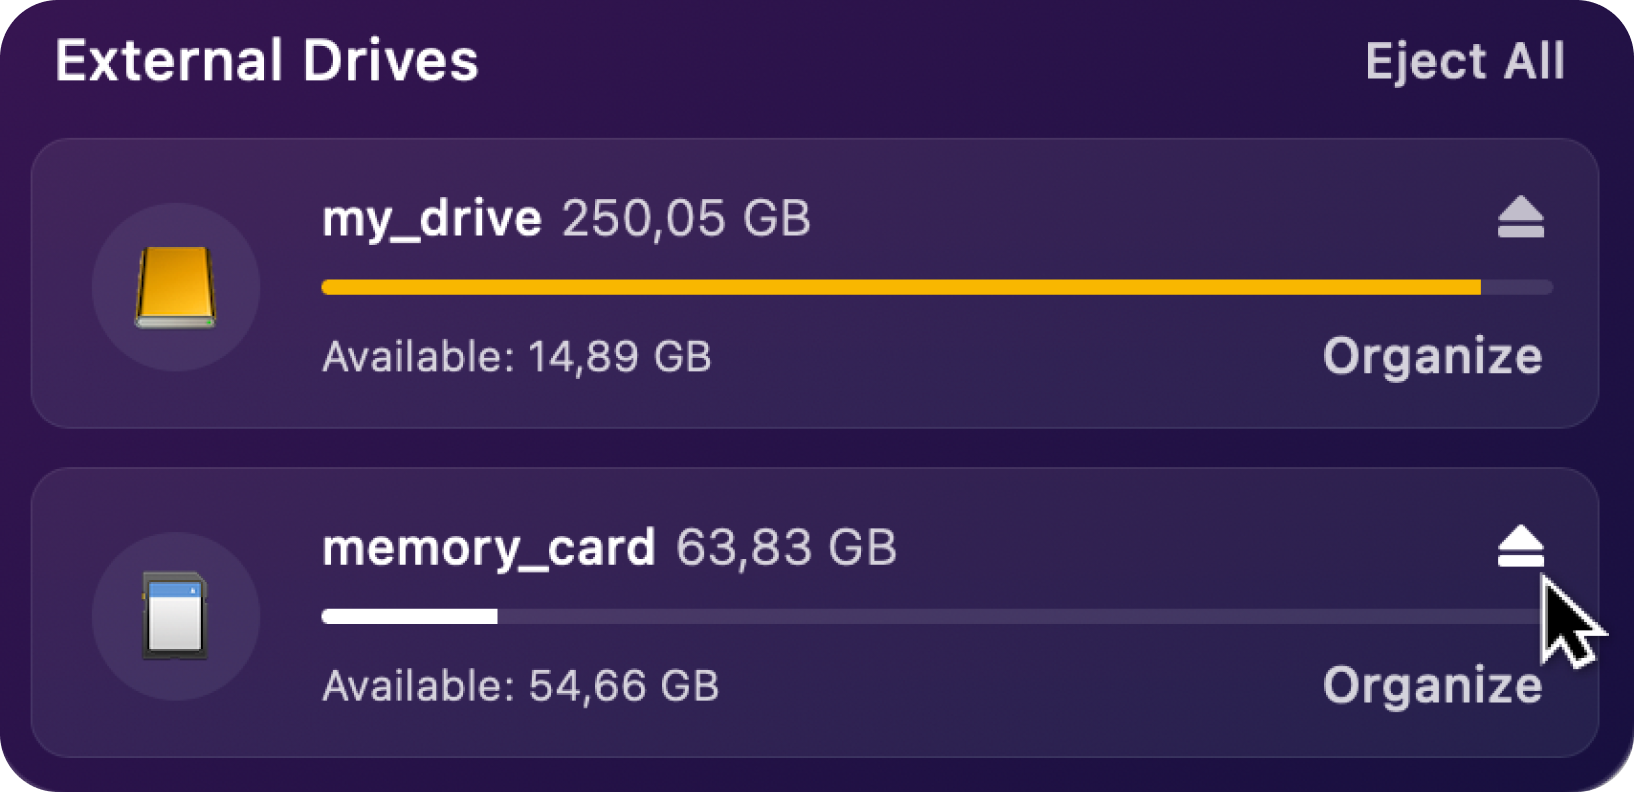
To eject all drives at once, open the CleanMyMac X Menu and click Connected Devices. Then, click Eject All.
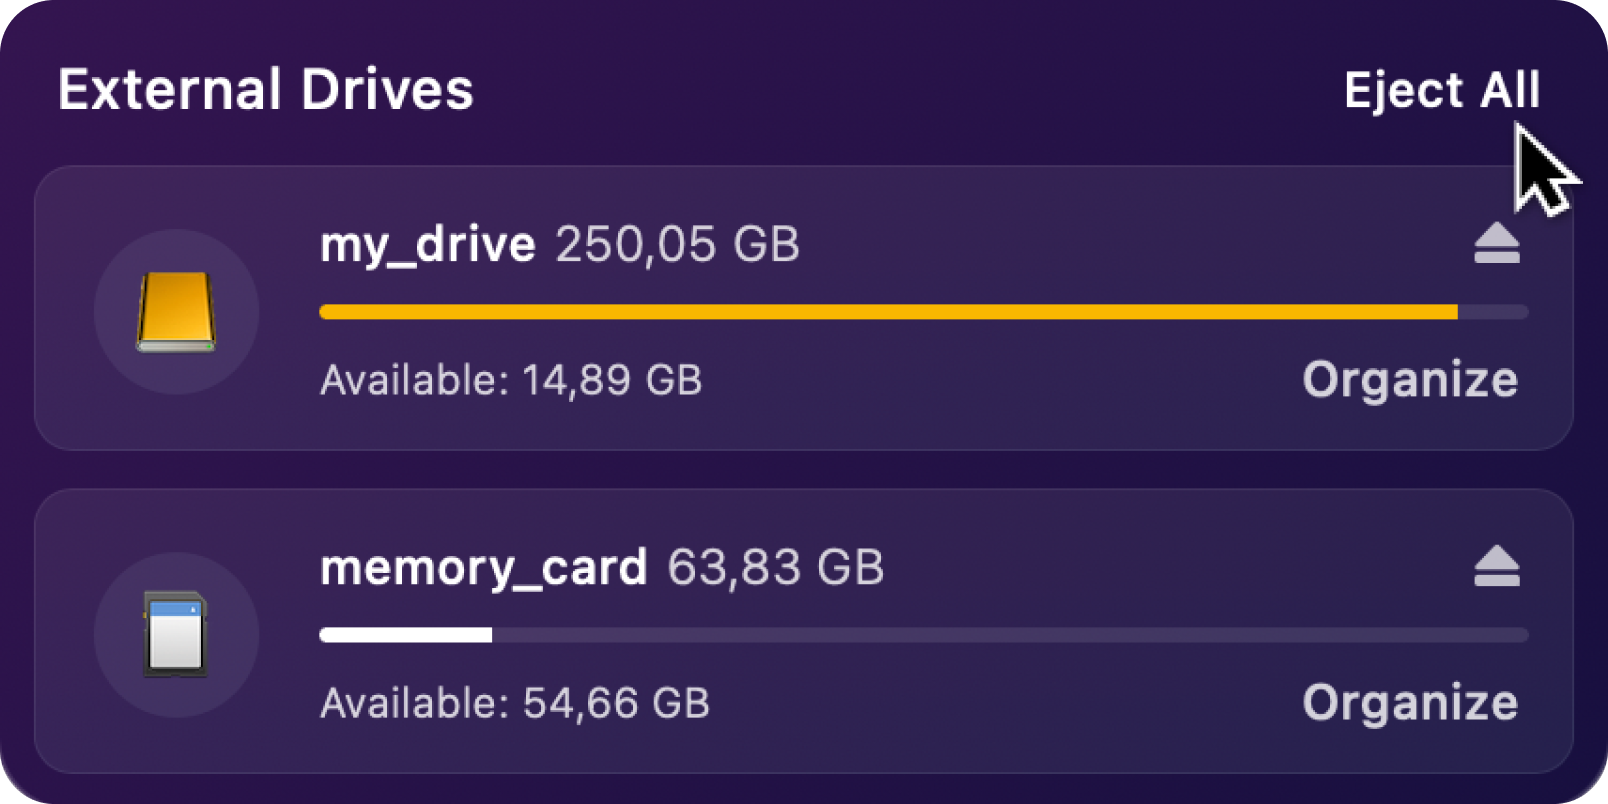
Note: By default, junk is removed from your drive when you eject it using the CleanMyMac X Menu. But you can turn off the auto-cleanup feature in the app settings.
Turn off auto-cleanup on drive ejection
-
Open CleanMyMac X, then choose CleanMyMac X > Settings in the menu bar (upper-left corner of your screen).
Alternatively, open the CleanMyMac X Menu, click the cog icon in the lower-right corner, and choose Preferences.
-
Go to the Menu tab and choose External Drives.
-
Deselect the "Clean up junk automatically on ejection" checkbox.
