The App Store version of CleanMyMac X slightly differs from the versions you'll find on other marketplaces. This means some features described below may not be available from the App Store due to its guidelines. Read more about different versions of CleanMyMac X.
Your Mac stores most of the data on its disks. Data is precisely why we use computers—to keep and process the information we need, be it office documents, movies, or books. Keeping your disks safe means safeguarding your data; that's why monitoring storage devices and space on your Mac matters so much.
What information about my disks and storage space does CleanMyMac X provide?
-
Space available on your startup disk
-
Types of data stored on your disk
-
"Vital signs" of your disk: health and temperature
-
Free space in your Dropbox account
-
Size of Trash (which you can clean immediately)
Check the available disk space
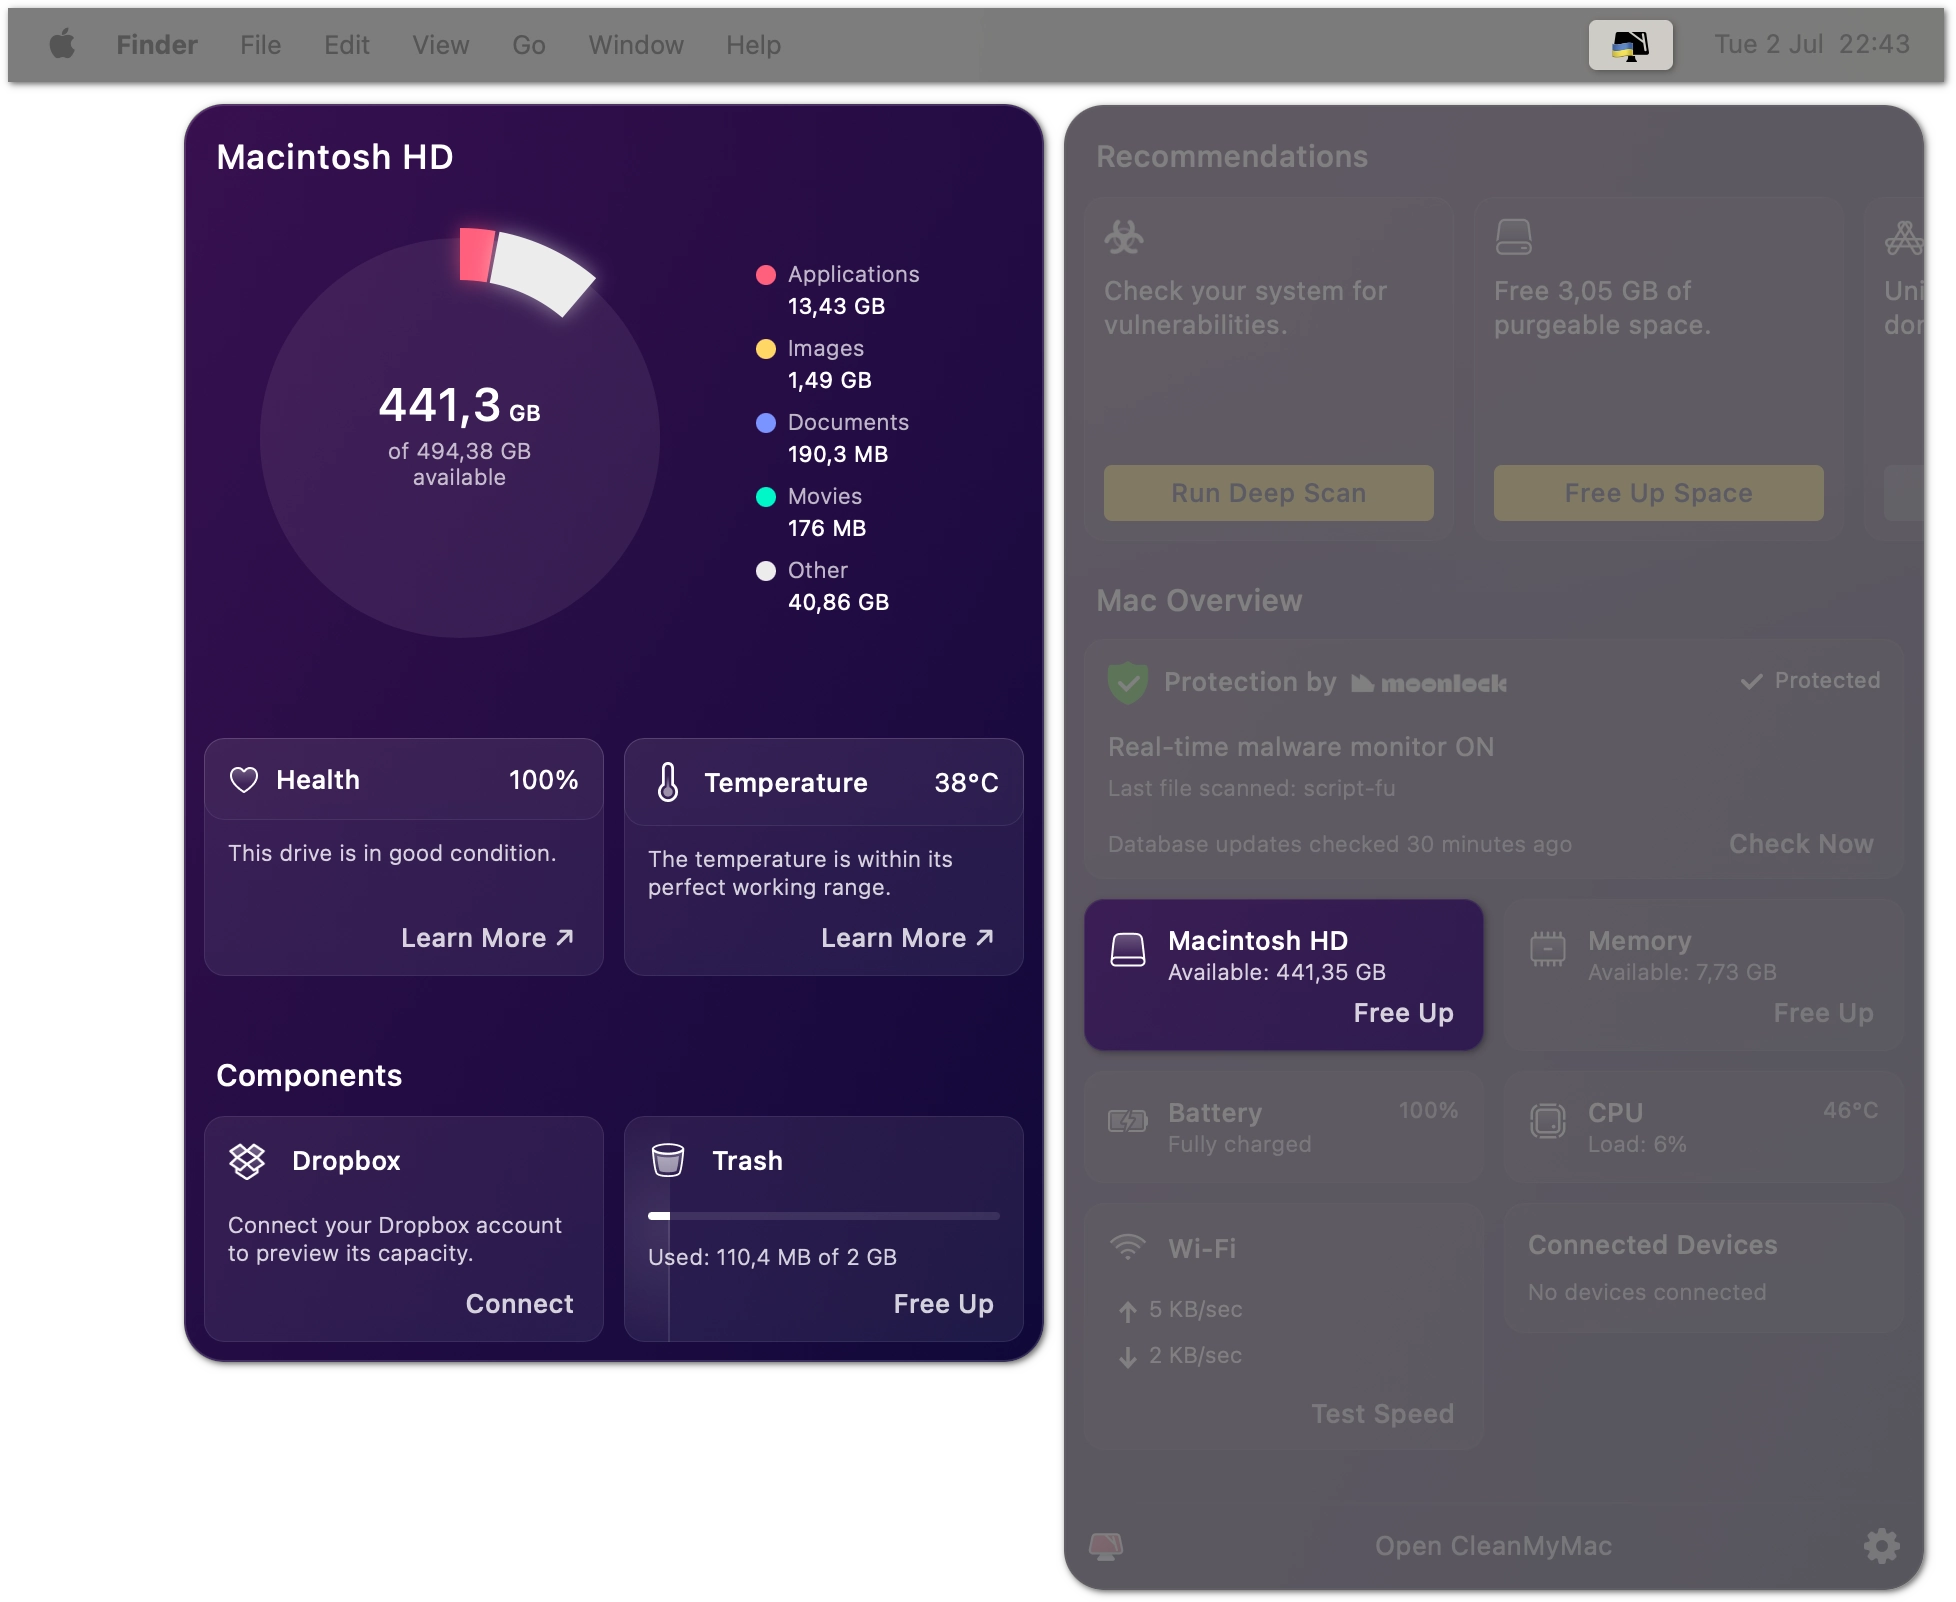
Open the CleanMyMac X Menu and see the monitor with the name of your disk on it (for example, Macintosh HD). On the monitor, you'll find how much disk space is still free.
For more parameters and details, click the disk monitor in the CleanMyMac X Menu; click the monitor again to hide the detailed menu. To close both menus, click anywhere beyond them (for example, your desktop or another app).
How much free disk space is enough?
10–15% available disk space is a must for macOS to start and function correctly. With less free space, all operations on your Mac may slow down, and even system errors are possible.
The disk monitor in the CleanMyMac X Menu shows free space in yellow once you go below 10%. Should this happen, click Free Up on the disk monitor to start removing system junk using Smart Scan. Or, you may delete some data manually; these CleanMyMac X features may come in useful:
-
detailed storage map
CleanMyMac X also shows an alert when you run out of disk space. You may configure or turn off this alert on the Notifications tab of CleanMyMac X Preferences.
Find out which types of data occupy your disk
After seeing the remaining disk space, people often ask themselves: Where did all the used space go? For a quick answer, open the CleanMyMac X Menu and click the disk monitor. On top of the detailed menu, you'll see which file types are taking up your disk space and how much is still available.
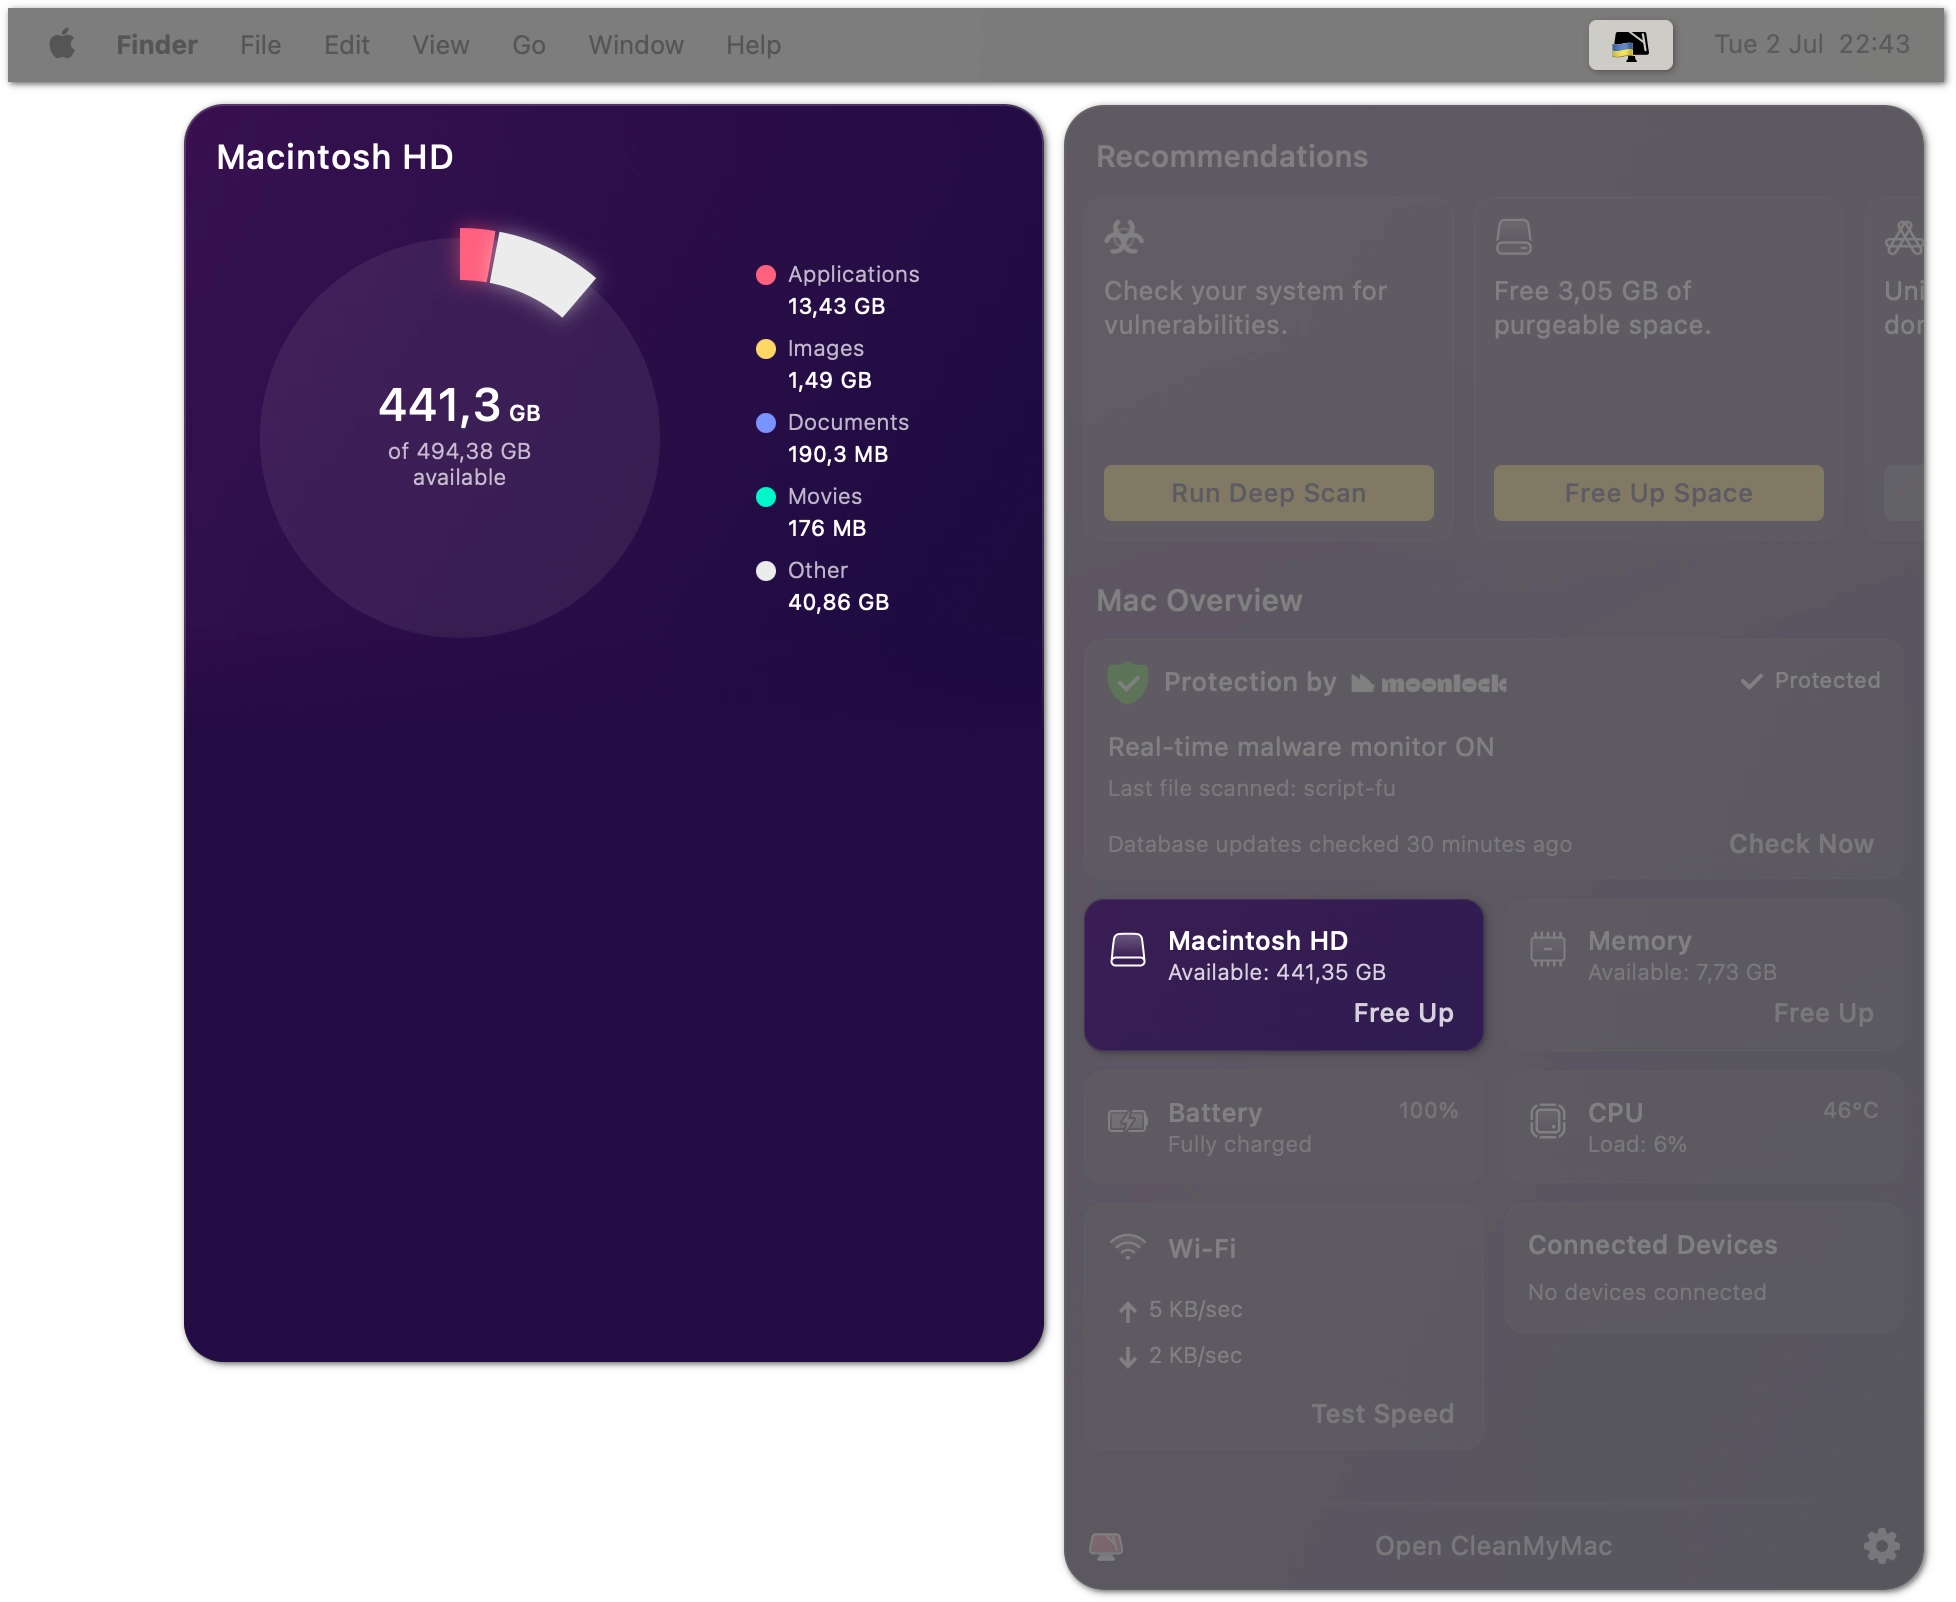
Hover over a category on the right (like Documents or Movies) to highlight the corresponding segment on the chart. To start a quick cleanup, move the cursor to the center of the chart and click Run Smart Scan.
If you're curious about which files exactly are in these categories, see this section.
Monitor the health of your disk
This feature isn't available in the App Store version of CleanMyMac X.
The Health monitor shows whether your disk works correctly and how much of its operating resources are left. To know how "healthy" your disk is, open the CleanMyMac X Menu, click the disk monitor, and check Health.
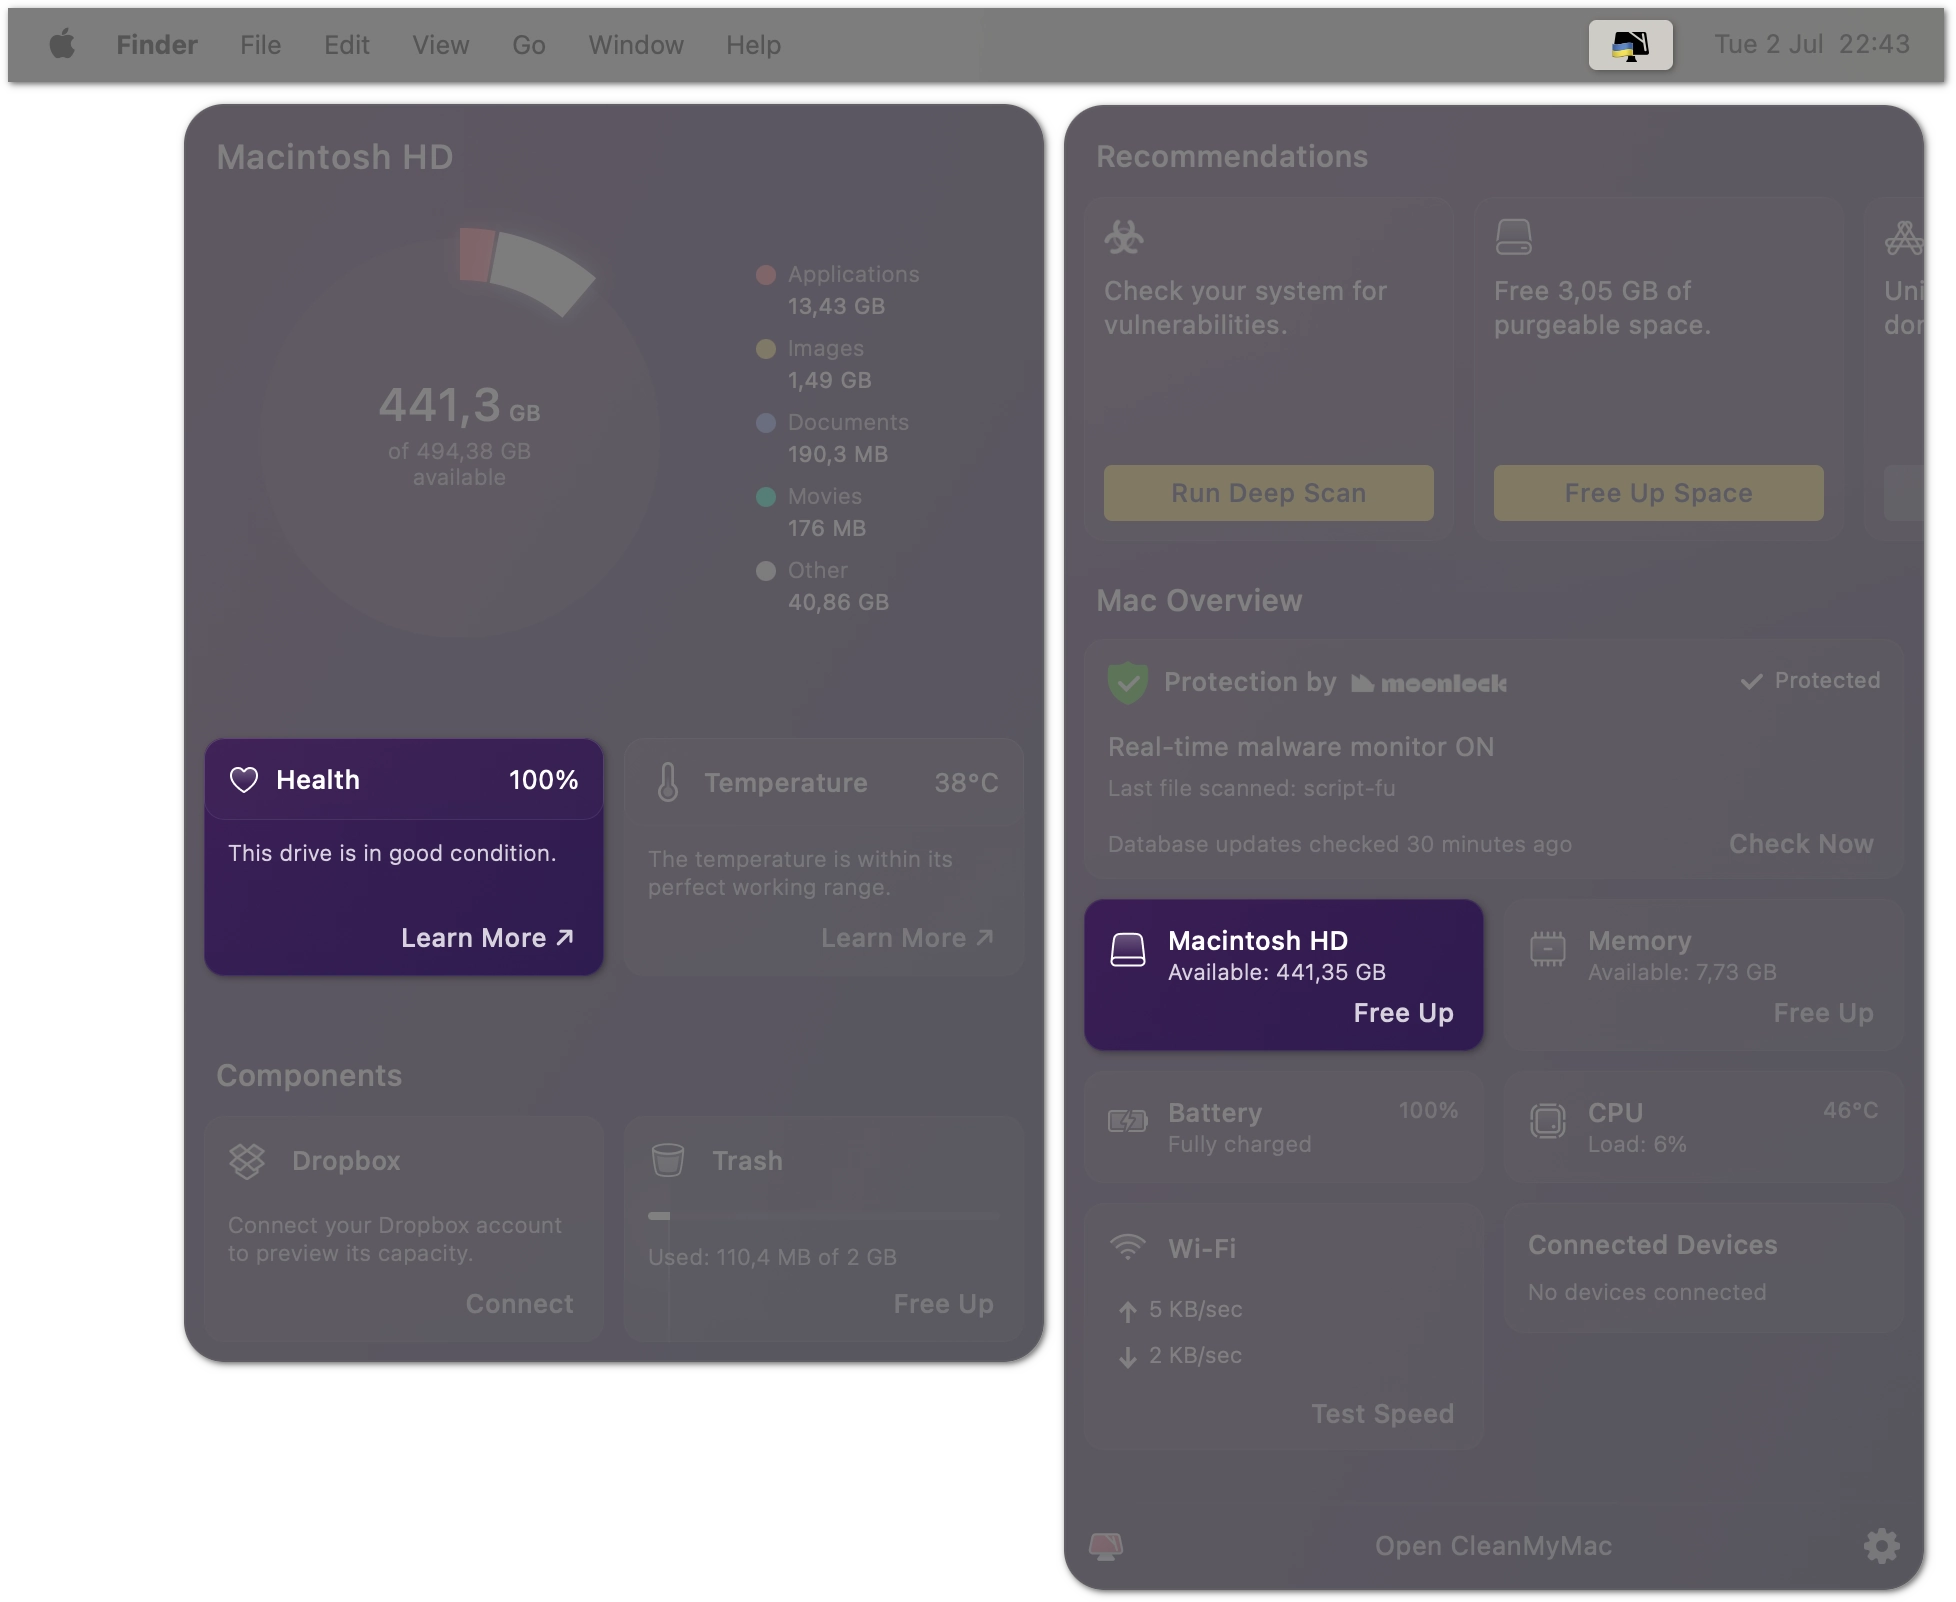
Most importantly, the Health monitor reports critical failures immediately once they occur. With such early warnings, you always have enough time to back up or transfer your data to safe storage.
Health rates
The percent value in the Health monitor (let's call it the health rate) is the remaining operating resource of your disk. This resource, or disk lifespan, is based on critical working parameters like data retention, state of memory blocks, and others.
Sadly, the health rate cannot tell how many months or days the disk will function. The rule of thumb is this: the lesser the health rate, the sooner you'll need to repair or replace the disk. The clues below will help you understand the health rates better:
| Normal 100%–70% |
Warning Less than 70% |
Critical 0% |
Your disk has used only a minor part of its resources and doesn't report serious errors. Most memory blocks are OK, so there are no evident threats to your data. |
The disk starts aging and may occasionally report non-critical issues, like failing memory blocks. The disk fixes such problems automatically by moving data from faulty segments to the specially reserved healthy ones. Failing blocks are a common issue for both HDDs and SSDs. You don't need to repair or replace the disk when the number of failing blocks isn't critical. Still, at this point we recommend making regular backups to keep your data safe. |
The disk either reports critical errors or has used its resources almost to an end. For example, there mightn't be enough healthy memory blocks. See recommendations below for next steps. |
If the health rate isn't displayed for your disk, see troubleshooting. Interested in technologies behind the Health monitor? Read more here.
What do I do when disk health is 0?
Will my disk fail right now? That might be the first question when you see a critical warning or a disk health rate that amounts to zero. The answer is this: most likely, no. But the disk may break anytime soon.
At 0% health, the diagnostic reports suggest that the disk has either served its projected lifetime or has fewer healthy memory blocks than it requires for safe work. The disk may still function for some time, but the risk of critical failure is high.
So, what to do?
-
Make a backup copy of your data immediately.
You may follow the detailed instructions on backing up using Time Machine in our blog.
-
Repair or replace your disk at an authorized Apple service.
You can also use Disk Utility to repair some programmatic errors. Disk Utility is an Apple tool that's installed with the operating system on any Mac.
However, when the disk health has ended, fixing critical errors on the software level is not a reliable solution. Only a service center or a repair shop can guarantee that your disk is in good condition and that the data on it is safe.
Find out your disk temperature
This feature isn't available in the App Store version of CleanMyMac X.
Every hour, the Temperature monitor measures the heat level of your disk and gives a warning when it overheats. To know the disk temperature, open the CleanMyMac X Menu, click the disk monitor, and check Temperature.
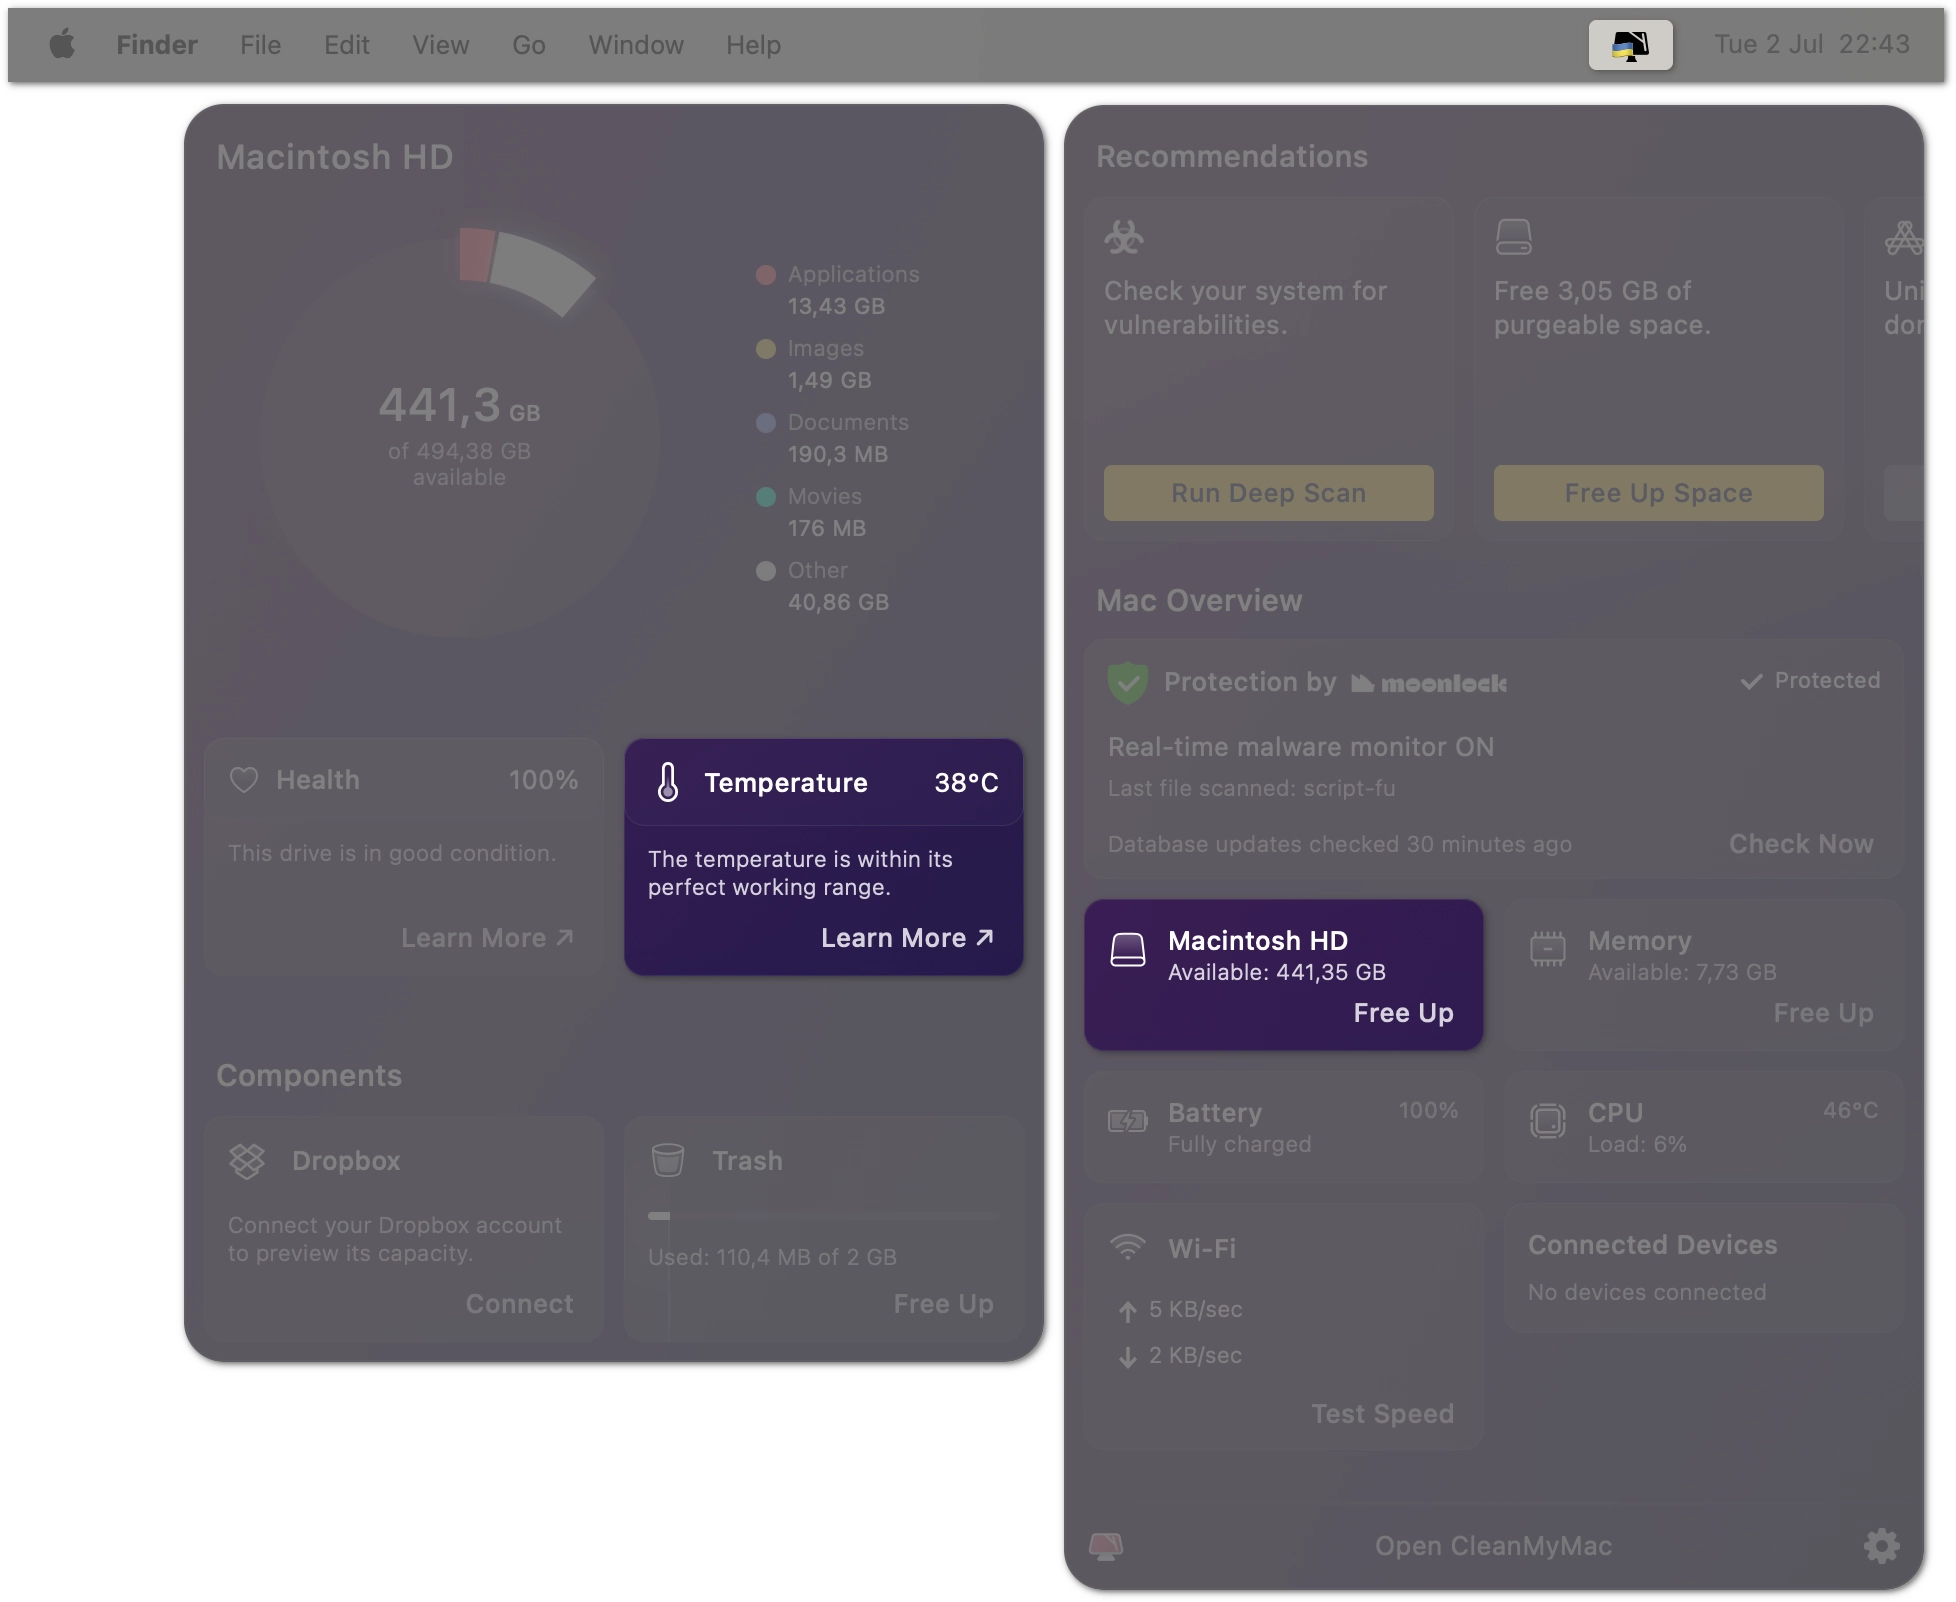
Temperature monitoring is important because HDDs and SSDs aren't designed to withstand heat. Graphic cards and processors have the built-in means to handle higher temperatures, while disks don't. When overheating, parts inside a disk wear out much faster, so the entire disk may fail sooner than manufacturers predict.
What temperature is good for my disk?
The temperature is displayed in Celsius or Fahrenheit, according to your system settings (you can change them in System Preferences > Language & Region > Temperature).
| Under 50°C (122°F) | 51–70°C (124°–158°F) | Above 70°C (159°F) |
| Perfect operational temperature. | Drive starts overheating. The read/write operations are still good, but the disk is under stress and wears out faster than usual. Consider cooling the disk down when you finish the current tasks. If the disk is in the "yellow heat zone" often, consider diagnosing it at a repair store. | Disk temperature is far beyond safe. Cool it down immediately. |
Cool down the disk when it overheats
Disks overheat not on their own but because of the high temperature inside a computer. It's CPU and RAM that emit extra heat, and bad ventilation inside your Mac might take the temperature even higher.
There's no way to cool down the disk directly, but here's what you can do:
-
Allow for airflow inside your Mac: put it on a table or any even surface so that the air inlets aren't covered.
If your disk overheats often, it may be a sign of a serious problem. To secure your data, we recommend backing up your data using Time Machine and checking your disk at an authorized Apple service center.
Keep track of the free space in your Dropbox
Open the CleanMyMac X Menu, click the disk monitor, then check Dropbox. The Dropbox monitor lets you know how much space you have available in your account. Click Connect to sign in to Dropbox and allow the monitor to check the free space for you.
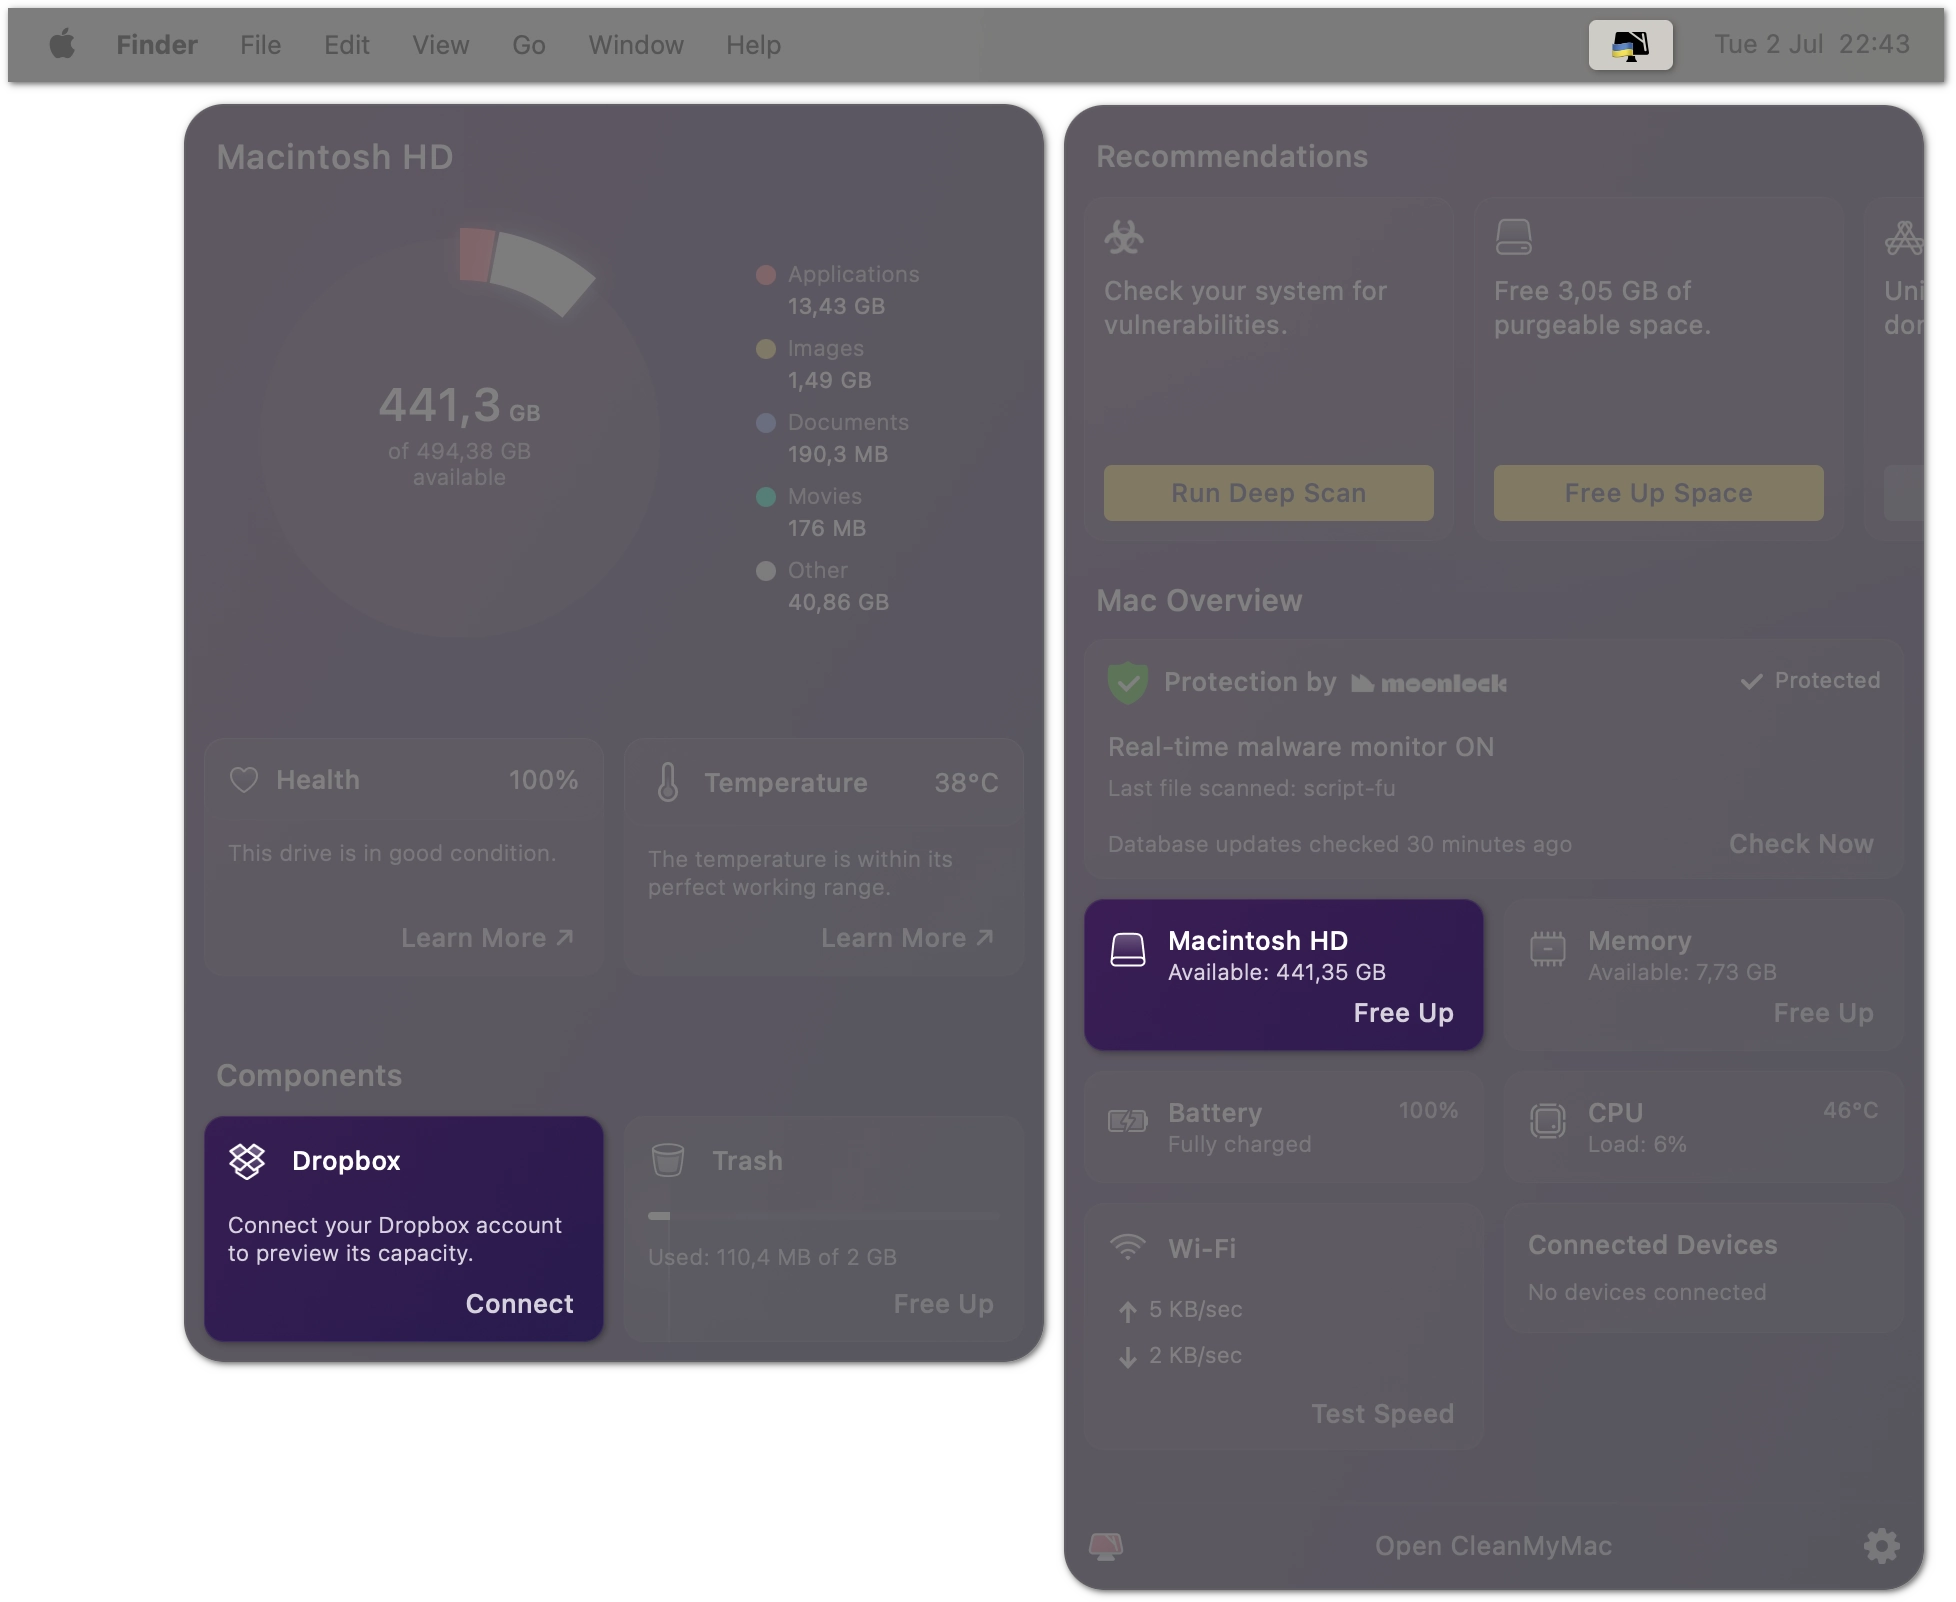
Connecting Dropbox and CleanMyMac X is absolutely safe, and here's why:
-
Dropbox users may get information about the state of their accounts using the third-party apps. For sharing such information, Dropbox uses its own official API, which is secure and reliable.
-
CleanMyMac X doesn't have access to the files in your Dropbox, and never stores any of your account info.
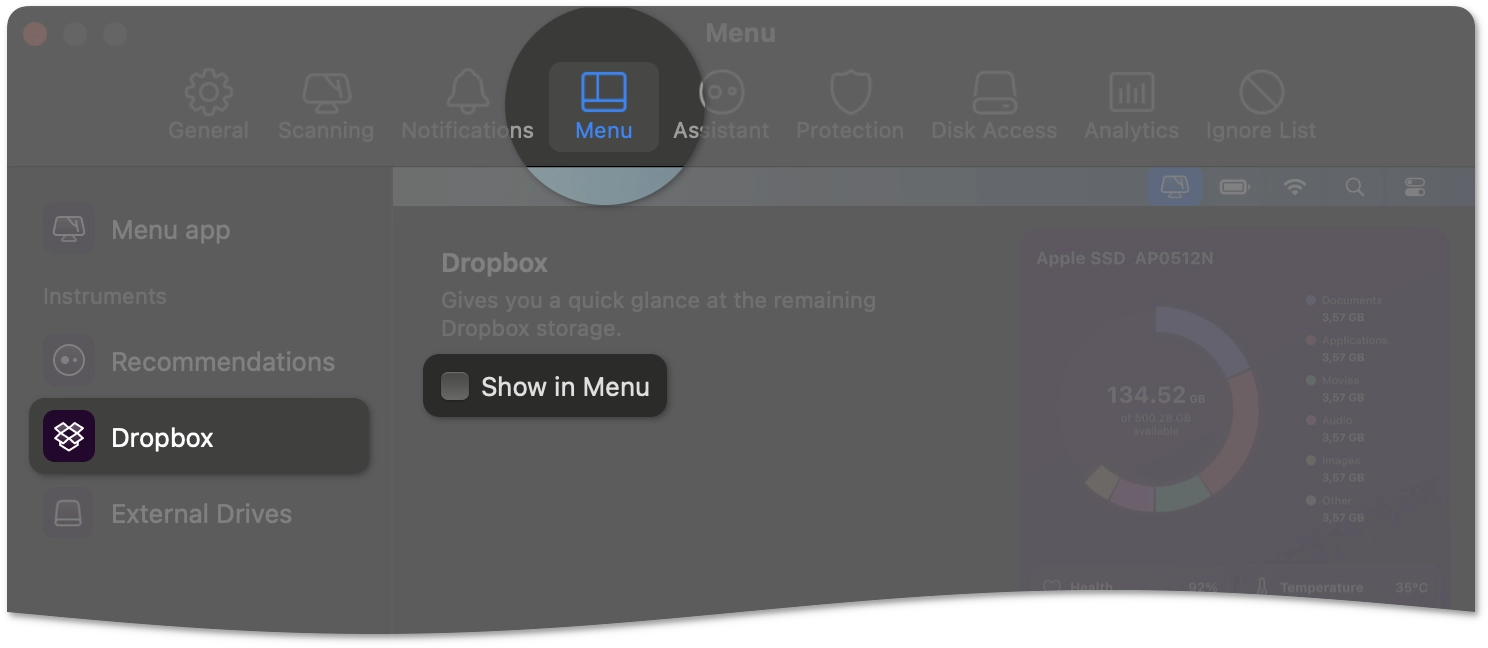
Finally, if you don't want the CleanMyMac X Menu to show the Dropbox monitor, follow these steps:
-
Open CleanMyMac X, then choose CleanMyMac X > Preferences in the menu bar.
Alternatively, open the CleanMyMac X Menu, click the cog icon in the lower-right corner, and choose Preferences.
-
Go to the Menu tab, then click Dropbox in the sidebar on the left.
-
Deselect the Show in Menu checkbox.
Clean up Trash
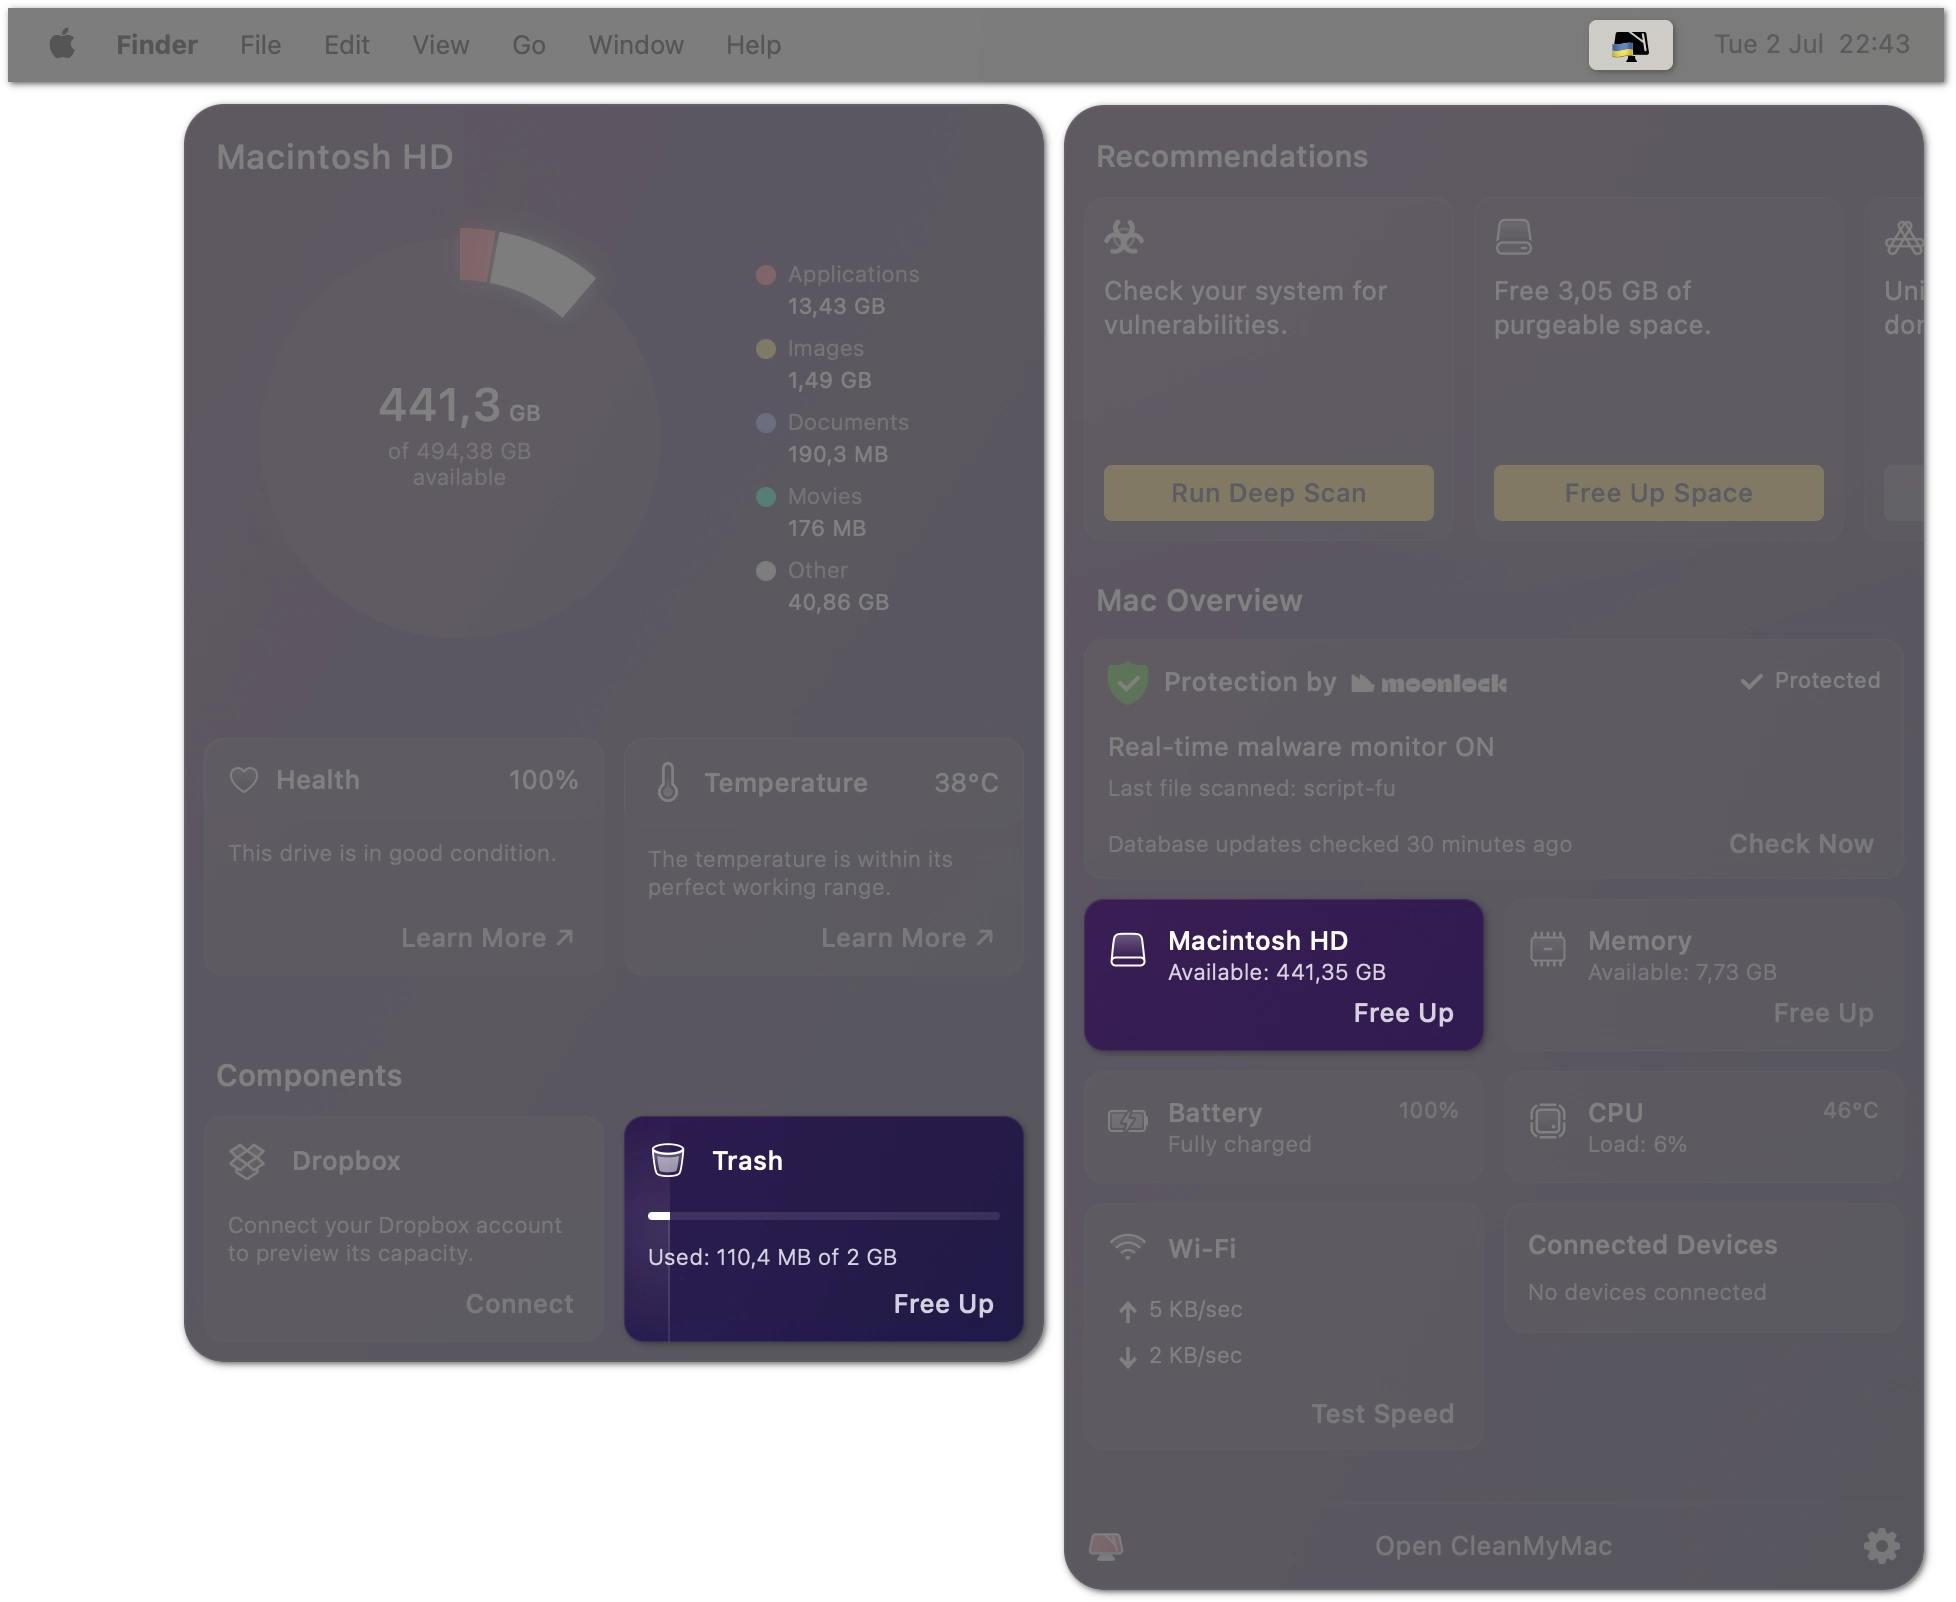
To quickly get rid of the junk in the main Trash folder on your Mac, follow these steps:
-
Open the CleanMyMac X Menu and click the disk monitor.
-
In the Trash monitor, click Free up.
Your Mac has lots of folders with deleted items. The Trash Bins module can help you clean all of them without much effort.
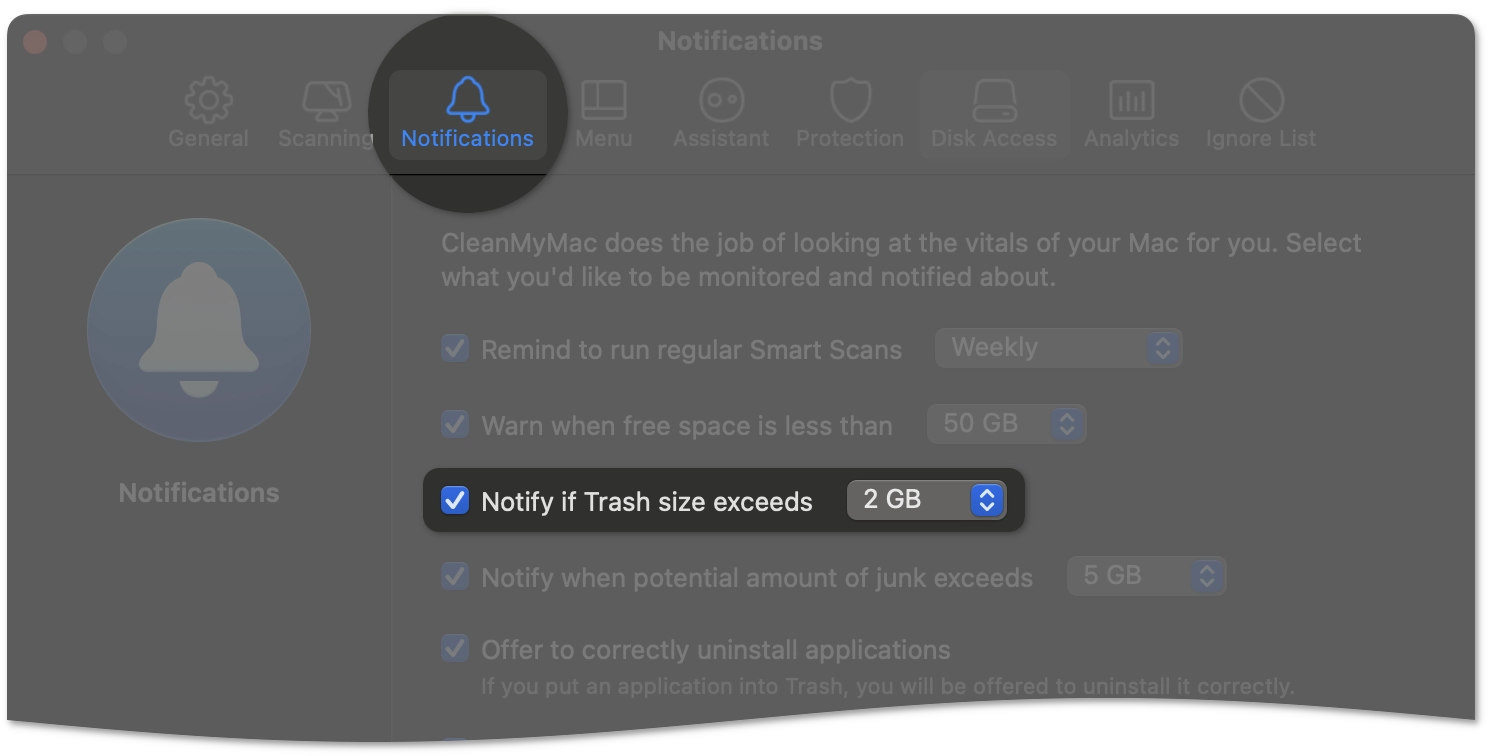
Trash cleanup notifications. Deleted files may gradually take really a lot of space on your disk. The good news is that CleanMyMac X has a way to deal with this problem before it even occurs. Just specify how much space you're ready to keep in your system Trash, and get a cleanup reminder once the limit is reached. Follow these steps:
-
Open CleanMyMac X, then choose CleanMyMac X > Preferences in the menu bar.
Alternatively, open the CleanMyMac X Menu, click the cog icon in the lower-right corner, and choose Preferences.
-
Go to the Notifications tab.
-
Find the setting named 'Notify if Trash size exceeds', and change the threshold as you prefer.
Troubleshooting. Why health and temperature of my disk aren't shown?
Disk monitoring is a delicate technical matter, so there might be many reasons why the CleanMyMac X Menu may not display the health and temperature rates. Let's consider the most frequent cases and find solutions for them.
Case 1: You're using the App Store version of CleanMyMac X.
In this version, Health and Temperature monitors aren't available due to a technical limitation of the App Store. The limitation is called "sandboxing"; it doesn't allow apps to access any data beyond their working directories.
If you want the Health and Temperature monitors to work on your Mac, you might consider shifting to the MacPaw Store version of CleanMyMac X. Find out more here.
Case 2: You haven't provided the Full Disk Access privilege for CleanMyMac X.
Without Full Disk Access, the Health monitor can't receive the diagnostic data from a hard drive. In this article, we explain how to grant Full Disk Access for CleanMyMac X and why it's totally safe for your Mac.
Case 3: Another app or service has occupied the diagnostic channel.
It usually takes a second for any app to receive a package of SMART diagnostic data from the disk. But some apps don't follow the best engineering conventions and don't free up the SMART channel after connection.
To regain access to the SMART info, close all apps or restart your Mac.
If health and temperature aren't available even after a reboot, the problematic app might open automatically in the background, when macOS starts. Try to turn off some login items and launch agents using the Optimization module of CleanMyMac X.
Case 4: Your disk doesn't support the SMART diagnostic protocol, fully or partially.
For some drives, you'll see only the OK status instead of a health rate or a particular temperature. Disks like these don't support the advanced features of the SMART diagnostic protocol required for detailed calculations. But even such disks can send enough information for the Health monitor to report a critical drive malfunction.
To verify if your drive works with SMART diagnostics, you can use Disk Utility. This article from Apple shows the steps to get detailed info about a disk.
Disk Utility may show the SMART status as Verified (meaning your drive does support SMART). If so, make sure another process or app isn't blocking access to your SMART channel (see Case 3). But if health and temperature are still not displayed, please contact our Support Team.
The SMART status in Disk Utility may also be Not Supported. This means CleanMyMac X can't receive the SMART diagnostic info, so health and temperature won't show up. Should you decide to replace your disk with a new one, most probably, these monitors will work fine.
In-depth guide to the disk monitor
Which files are in categories on the storage chart?
The storage chart shows which file types are taking up your disk space; we've mentioned the chart in this section.
| Category | Overview | ✅ In this category | ❌ Not in this category |
| Applications | All apps installed on your Mac | App packages in the ~/Applications folder |
- Apps installed on your Mac be default (like Finder, Mail, or Calendar) - macOS system files |
| Audio | Sound files with no video | MP3, AIFF, FLAC, WAV, MIDI, and others | - Apple Music Library - Libraries or playlists created by music player apps |
| Documents | - Office files - Plain-text files with a simple structure |
- PDFs and files, related to office suites: MS Office (DOC, XLS, PPT) and iLife (PAGES, NUMBERS, KEYNOTE) - Simple text files (TXT, RTF) - Markup files (HTML, CSV, JSON) - Source files for programming (PHP, JS, C++) - Configuration and service files for apps and the operating system (PLIST, YAML, VCF, VCARD) |
- Temporary and support files created by office suites |
| Movies | Multimedia files containing video | MP4, MPEG, AVI, and others | - Media libraries by Apple (like Apple TV) - Libraries or playlists created by multimedia players |
| Images | Photos and other graphic files | JPEG, PNG, SVG, GIF, and others | - Apple Photo library and related files - Project files or libraries created in graphic editors like Photoshop and others |
Other is for files that aren't included in other categories. Here are some examples of such files:
-
Files and data used by the system, such as log files, caches, virtual machine files, and other system resources
-
Temporary system and application files
-
Fonts, app support files, and plug-ins
How do the Health and Temperature monitors work?
These instruments based on a diagnostic protocol that manufacturers embed into HDDs and SSDs. The protocol is called SMART (Self-Monitoring, Analysis and Reporting Technology), and it does exactly what the name suggests – monitors and reports the disk state. The SMART data includes lots of attributes, these are just some of them:
-
Projected disk lifetime (and how much of if has already been used)
-
Data retention (how long the disk can store information in an unpowered state)
-
Retired and healthy memory blocks
-
Disk temperature