Apple has built a brilliant backup tool right into macOS. It’s called Time Machine — because it allows you to ‘go back in time’ to when your data was safe. With its help, you can forget about the fear of data loss. In this article, we’ll explain everything there is to know about Time Machine: how it works, how to set it up, how to back up and restore files, and how to fix it if anything goes wrong.
What is Time Machine?
Apple Time Machine is an application built into macOS that backs up your Mac hourly, daily, and weekly so that you always have a recent backup of every file on your Mac. That means if your Mac crashes and your startup disk dies, you can restore all your data.
However, that’s not the only benefit. Time Machine also allows you to restore individual files. So, for example, if you accidentally delete a file you need, you can launch Time Machine, roll back to the point right before you deleted it, and restore it just by clicking on it.
| What Time Machine backs up | What Time Machine does not back up |
| User data | macOS core system files |
| Applications | Temporary files and caches |
| System Settings | Trash bins |
| Emails and messages | Spotlight index |
| External drives (if manually selected) | Excluded items/folders |

How does Time Machine work?
Once you’ve set it up, Time Machine backs up your data to an external drive or compatible network-attached storage device (like Apple’s own Time Capsule). If you use an external drive, it will need to be connected in order for Time Machine to run. If you use a network drive, your Mac will need to be on the same Wi-Fi network.
Note: Time Machine cannot back up to iCloud/iCloud Drive, Google Drive, Dropbox, or other cloud drives. If you want to back up your Mac to a cloud drive, you will need to use a third-party backup tool like Backblaze, but you will have to check the developer's website of such apps to make sure they work the way you expect them to. For some options, jump to this article on the best Mac backup software.
As with any backup tool, the first backup will take quite a while because Time Machine has to copy every file on your Mac (except for those you’ve chosen to exclude). But subsequent backups are much quicker.
It also makes what it calls Local Snapshots. These are backups that are stored on your startup disk and other external drives connected to your Mac. That way, if you need to restore a file and your Time Machine drive isn’t available, you can restore from the local snapshot.
How to use Time Machine
How to set up Time Machine
You’ll need to connect an external drive to your Mac either by USB or Thunderbolt (or FireWire if your Mac has it), or use a Time Capsule or Time Machine-compatible NAS.
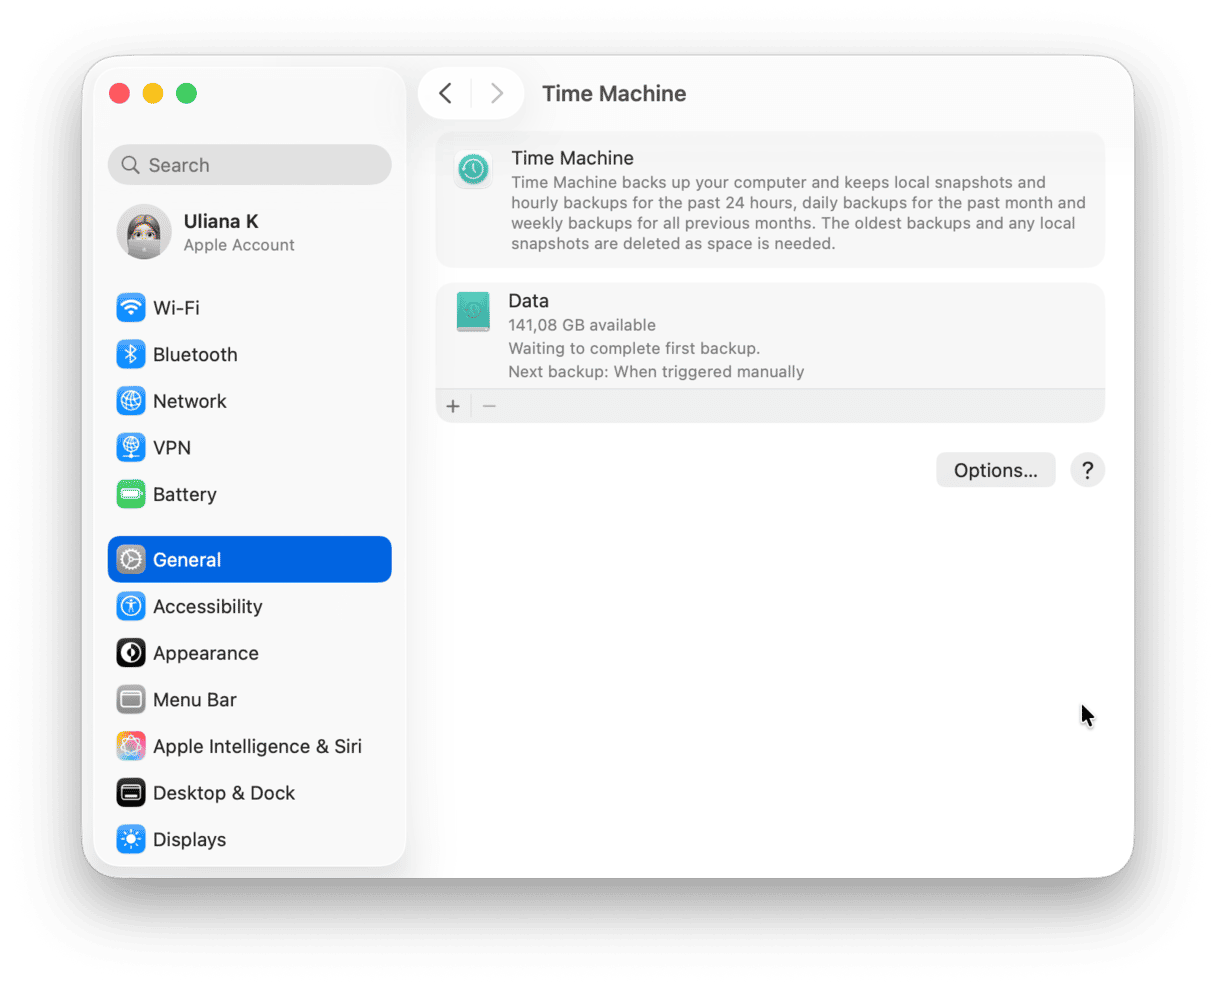
- Open System Settings from the Apple menu and navigate to General > Time Machine.
- Click Add Backup Disk, select your chosen backup device, and click Set Up.
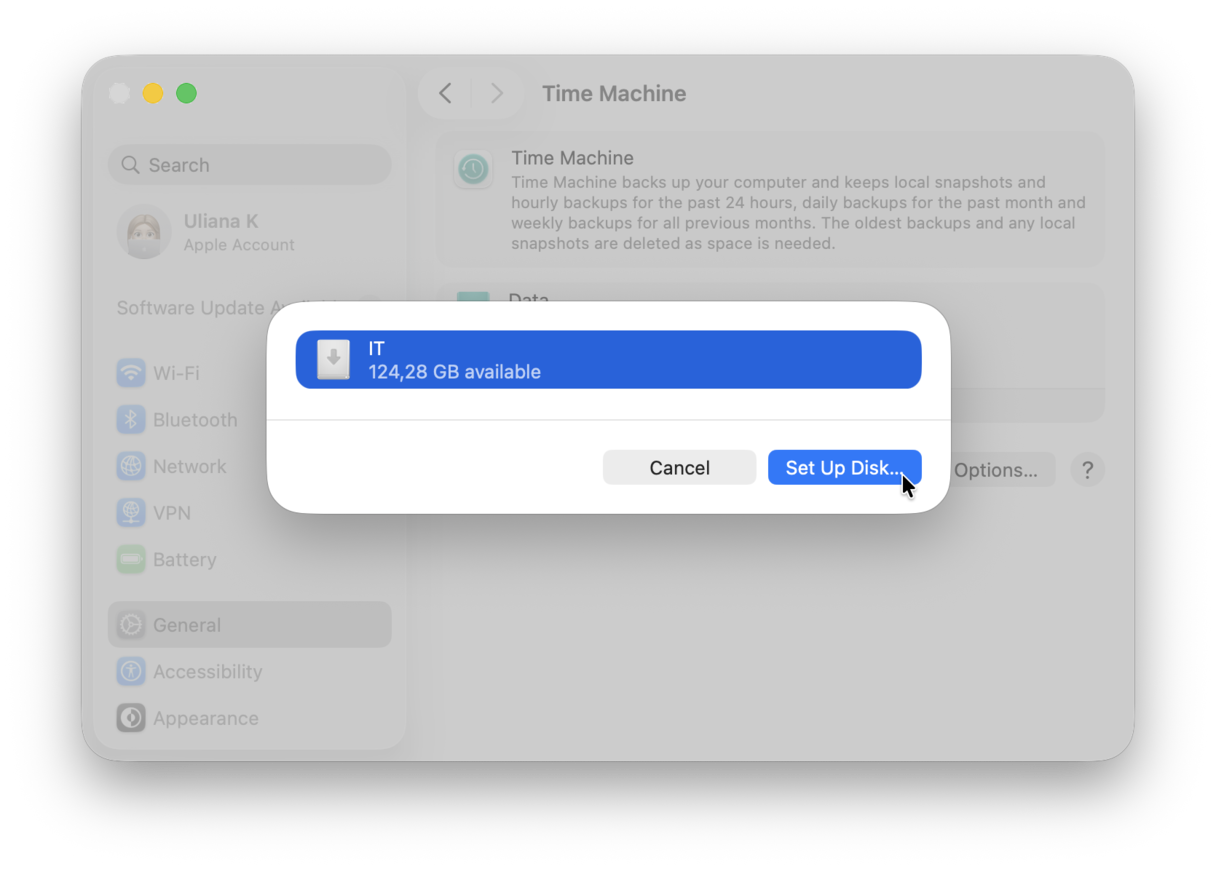
- You may need to take additional steps, such as erasing the disc. Just follow the onscreen instructions.


In System Settings, go to Menu Bar and select the checkbox next to Time Machine. This way, you will be able to quickly access it to initiate a backup or restore files.

What you need to know before setting up Time Machine
There are a few important steps you need to take before setting up Time Machine:
- Drive capacity matters: Make sure that the storage device is of at least twice your Mac's storage capacity. Say, if you have a 512 GB MacBook, invest in a 1 TB storage device.
- The drive will be erased: If you have any files on the storage device, move them to your Mac or another drive. Ideally, buy a separate drive for backups.
- Security: Encryption is highly recommended. If you do decide to encrypt the backup, you will need to create a password. You will be asked to enter it to recover files.
- Customization: You can exclude files or even entire folders from a Time Machine backup.
- Decluttering matters: Before your first backup, get rid of unnecessary files so that they do not waste space on your storage device.
How to declutter your Mac before you start your Time Machine backup
Before you start your Time Machine backup, you should clean macOS to remove old baggage like outdated files, broken or junky files, which could amount to several dozen gigabytes. Not only will this safeguard your Mac from potential software conflicts, but also your backup will be much smaller and so much faster, too.
The best way to do that is to use CleanMyMac (get your free trial here). This handy tool can scan your Mac looking for files it thinks you don’t need and identify them for you, so you can decide whether to delete them or not. It identifies system junk, mail attachments, duplicates, similar images, and large and old files. CleanMyMac also makes it easy to uninstall applications.
- To use CleanMyMac, open it — Smart Scan is automatically selected — and click Scan. This will scan your Mac, looking for files that can be safely deleted.
- When CleanMyMac has finished scanning, click each section — Cleanup, Protection, etc. — one by one and review the results by clicking Review Details. You might be surprised by just how much space you can reclaim.
- You can deselect any items you don’t want to delete.
- Repeat that for every heading in this section of CleanMyMac. You’ll save several gigabytes of data and make your first Time Machine backup much quicker. Upon checking details, click Run.

If there are any applications on your Mac that you no longer need, click Applications in the sidebar and run a scan. Then, click Manage My Applications > Uninstaller, scroll through the list, and select the checkboxes next to the ones you want to get rid of. Once you’re done, click Uninstall. CleanMyMac doesn’t just remove the application files themselves; it hunts down and deletes all the associated files scattered around your Mac, removing every trace of the app you uninstall.
You can also check out the My Clutter feature to remove large and old files, duplicate files and photos, and similar images. And it also has the Performance feature that will help you remove Time Machine snapshots that should have been deleted automatically but never were.
Why use CleanMyMac
- You can test all 25+ tools for 7 days at no charge
- With the help of the Cleanup feature, on average, users find and remove 9 GB of junk files (based on internal data)
- Using the My Clutter feature, on average, users find and remove 4 duplicates and 5 similar images after the first scan (according to internal reports)
Try CleanMyMac for free — see how easy it is to make your backups smaller and faster.
How to exclude files from the backup
If you want to minimize the amount of space your backup occupies, click the Options button. Then click ‘+’ and navigate to files or folders you don’t want to be backed up, for example, your Downloads folder.

In this window, you can also choose backup frequency.

How to back up your MacBook
Now that you've set up Time Machine, all you have to do is click a Time Machine icon in the menu bar and choose Back Up Now.

Alternatively, you can right-click your storage device in System Settings > General > Time Machine and click Back up to [device name] Now.

If it is the first backup, be ready that it will take up a few hours — if a lot of space is occupied, it may be even up to 24 hours.
How to restore from Time Machine
There are two different methods for restoring files from Time Machine, depending on whether you want to recover specific files and folders or restore your entire Mac from a backup.
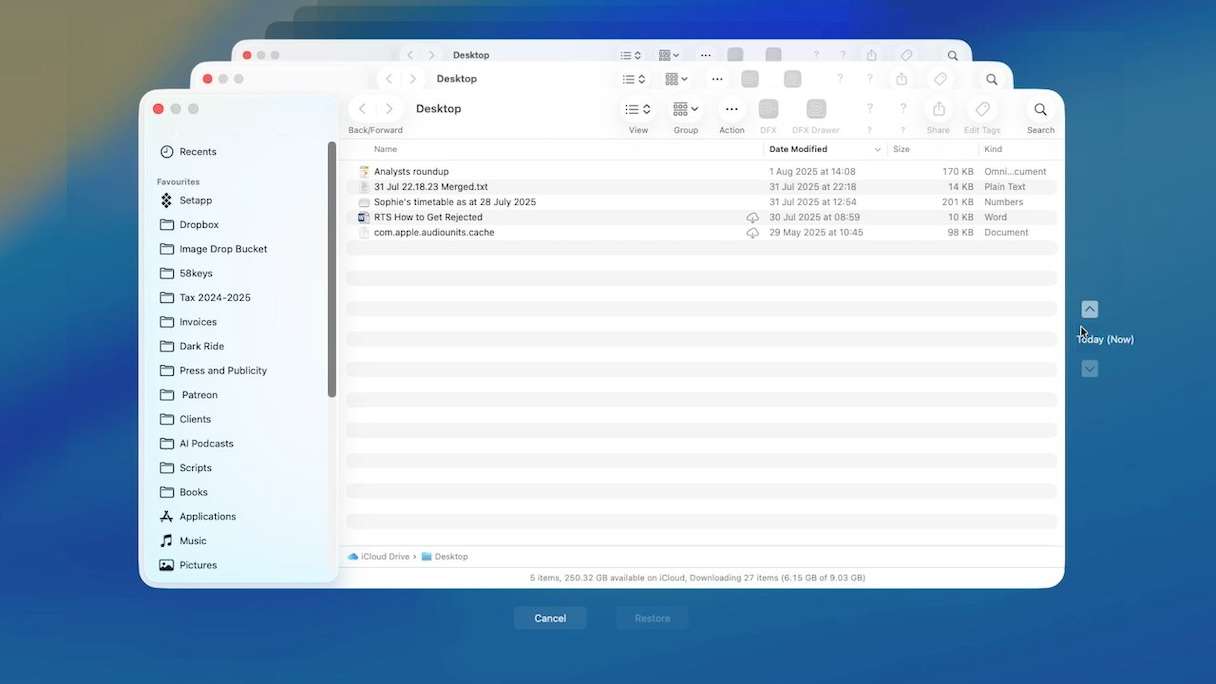
- To restore individual files, click Time Machine in the menu bar and choose Browse Time Machine Backups. You’ll see a 3D representation of Finder windows, with the front-most window representing the most recent backup and those behind it, older backups.

- To navigate, click either on the up arrow to the right of the Finder window or the title bar of a window, or click and drag on the timeline at the right of the screen. You’ll see the time and date of each backup is displayed as you bring it to the front.
- When you’ve found the backup you want to restore from, click in the Finder window and navigate to the file or folder you want to restore from, just as you would if you were navigating the Finder normally.
- Select the file or folder and press the spacebar to invoke Quick Look and preview the file. If it’s the one you want, click Restore. That file or folder will now replace the current version, or if you deleted it, it will be restored.
- You can repeat the process as often as you need to for any file or folder you need to restore.


To restore your entire Mac from a Time Machine backup, you need to boot from recovery partition.
- Boot your Mac into recovery mode:
Intel-based: Restart your Mac and hold down Command-R. When you see the macOS Utilities window, select Restore from Time Machine Backup and navigate to the backup you want to restore from.
Apple silicon: Shut down your Mac. Now, press and hold the power button until you see “Loading startup options,” click Options, click Continue, then follow the onscreen instructions. - In recovery mode, click Reinstall macOS [version] > Continue.
- After the reinstallation, Migration Assistant asks if you want to transfer information from another Mac or a Time Machine backup. Select Transfer from a Time Machine Backup > Continue.
Tip: On an Intel-based Mac, you do not have to use Migration Assistant; you can choose Restore from Time Machine instead. - Select the time and date of the backup you want to restore and follow the onscreen instructions.
- When it’s done and you restart, your Mac will have returned to the state it was at when the last Time Machine backup was run. If everything was working as it should, that would have been in the last hour before you restored.

How to copy files to a new Mac from a Time Machine backup
You can use a Time Machine backup to transfer files from one Mac to another — helpful if you don’t have access to your old Mac when you buy a new one, or if you erase it without first transferring data.
To transfer files to a new Mac using Time Machine, launch Migration Assistant from the Applications/Utilities folder on the new Mac and click Continue. You may be asked to type in your administrator password.

In the next window, choose ‘From a Mac, Time Machine backup or startup disk.’ In the window that opens, you’ll be asked to choose a Mac, Time Machine backup or startup disk. Click the icon for Time Machine backup. You should now see a list of backups. Choose the one you want to use and click Continue.
You’ll now see a list of information you can transfer. The content of the list will depend on what you’ve backed up but will usually contain an Applications folder, user accounts, other files and folders, and computer and network settings.
Select the checkboxes next to the information you want to transfer and click Continue. All that’s left to do now is wait until it’s done. You might want to go and make coffee, it could take a while!
Troubleshooting: How to fix main issues with Time Machine
- How do you speed up a slow Time Machine backup?
If Time Machine backup is slow, first, connect directly to the disk if possible. Also, use an APFS-formatted disk, disable antivirus software and cloud syncing (they may keep your Time Machine busy), and exclude large or unneeded files from the backup.
- What do you do when Time Machine backup failed?
A few quick solutions would be to restart your Mac, check cables to ensure proper connection, run First Aid for the drive (use Disk Utility for that), and delete the .inProgress file from the Backups.backupdb folder on the drive (you will then have to run a new backup). For more tips, check out this guide from Apple about what to do if Time Machine backup fails — it provides solutions for specific issues.
- How to fix it if Time Machine stuck on "Preparing backup" or "Creating backup" for hours?
It is often due to an interrupted previous backup, a disconnected drive, or corrupted system files. Fix it immediately by clearing stuck temporary files (the .inProgress file) and running First Aid. Also, make sure that the disk is properly connected or the network is stable, depending on the storage device you use.
- What to do if Time Machine says the backup disk is not available even when it's connected?
For external drives, check connections, remove and re-add the drive in Time Machine settings, run First Aid, and make sure that your drive is read and write (check Sharing & Permissions in the Get Info window). You can also use the Performance feature in CleanMyMac — it can quickly repair disk permissions. For NAS, verify network connection, re-authenticate, and check Bonjour/SMB settings.
Key takeaways
- Time Machine is incredibly useful for both backing up your Mac and allowing you to recover files you accidentally delete.
- Time Machine keeps hourly backups for 24 hours, daily backups for a month, and weekly backups for previous months.
- When Time Machine runs out of space on your storage drive, it deletes the oldest backups. However, because Time Machine only saves the changes made to a file since the last backup, it doesn’t fill up your drive as quickly as you might think.
- To prepare for a Time Machine backup, format your drive as APFS, declutter your Mac, and stop resource-intensive processes.
- To restore a specific file, enter Time Machine from menu bar.
- If you need to restore a Mac, you will have to use Migration Assistant. You can restore a new Mac by using the Time Machine backup of an old Mac.
Frequently asked questions
What is the difference between backing up to a directly connected drive vs a NAS?
Backing up your Mac to a directly connected external drive is faster, cheaper, and relies on a physical cable, while a Network-Attached Storage (NAS) allows for wireless, automatic backups over Wi-Fi and supports backups from multiple computers simultaneously.
How do you set up Time Machine to back up to a Synology NAS over SMB?
To set up Time Machine on your Mac to back up to a Synology NAS using SMB, you first need to prepare a dedicated shared folder on your NAS. Then, you must broadcast the folder via Bonjour and connect to it from your Mac’s Time Machine settings. You can learn more in this guide from Synology.
Should you turn off Time Machine while doing CPU/disk-intensive work like video editing, audio recording, or running VMs?
Yes. For heavily demanding, mission-critical workloads like heavy 4K video editing, high-track audio recording, or running virtual machines, it is highly recommended to pause Time Machine backups and disable automatic backups in the backup frequency setting. Mainly, it is needed to avoid disk bottlenecks, corrupted backups, data loss, or hardware throttling due to thermal buildup.
How to move a Time Machine backup to a new drive without losing backup history?
First, disable automatic backups. Then, format your new drive using Disk Utility. Finally, copy the Backups.backupdb folder from your old drive to the new one. You can then delete this folder from your old drive to reclaim space.
How to delete Time Machine backups to reclaim space on the backup drive?
You can use the Time Machine menu in the menu bar or run a few commands in Terminal. To learn more, jump to this guide.
There is a known compatibility issue between macOS Tahoe and Samba versions 4.21–4.22 that causes Time Machine backups to NAS devices to fail. How to fix it?
Upgrading your NAS to Samba 4.23+ (or at least 4.22.6) is the recommended fix to restore seamless Time Machine backups. If you cannot upgrade right away, try these: downgrade Samba to 4.20 or override SMB signing.