Usually, finding a folder on Mac is easy, but some of them are hidden. One such folder is var folder. In this article, we'll show you how to unhide it and how to hide it again as well as how to access all of your folders. Let's go!
What is a var folder?
Although there is little information online, it's clear that the var folder was designed to improve operating security. It was designed to improve permissions (rwxr-xr-x) over previous temp and cache locations, such as the /Library/Caches and /tmp folders. According to Apple developer information, the var folder refers to "per-user temporary files and caches."
This means that this is a temporary or cache file that is not in the Home folder. This way, cache data — which Apple is keen to store — is not transferring data over a network. It makes cache data more secure and keeps everything in one place instead of scattered around multiple files and folders.
var folders store an awful lot of data. Although there are some suggestions that these folders are emptied every three days, other research suggests that isn't true. You could be at risk of a huge cache of data sitting on your hard drive, and some of that might contain personal user information. Instead of letting that sit around and take up space, some users choose to locate and delete this cache every few weeks or even days.

How to access the var folder?
One of the easiest ways to permanently uncover the var and other hidden folders is to use Terminal.
- Go to Terminal from Applications > Utilities.
- Type in the following command:
defaults write com.apple.Finder AppleShowAllFiles YES - After this command, type
killall Finderand press Return. This will relaunch Finder.

Now, this should show every hidden folder, including var. Once you are ready to hide them again, go to Terminal and input the following commands, pressing Return after each of them: defaults write com.apple.Finder AppleShowAllFiles NO and then killall Finder

There's another way to access the var folder by using the Finder.
- Open the Finder.
- Press Command-Shift-G to open the dialogue box.
- Input the following path:
/varor/private/var/foldersand press Return. - Now, you should have temporary access, so you should be able to drag it into the Finder favorites if you want it to stay visible.

Either way, now you should be able to gain access to the hidden var folders. With this access, you can delete any unwanted cache files that take up too much space. But always be careful when deleting anything: if you aren't sure what it does, it is probably best to leave it alone. Reboot or restart your Mac, as that should automatically clear out bloated cache files and folders.
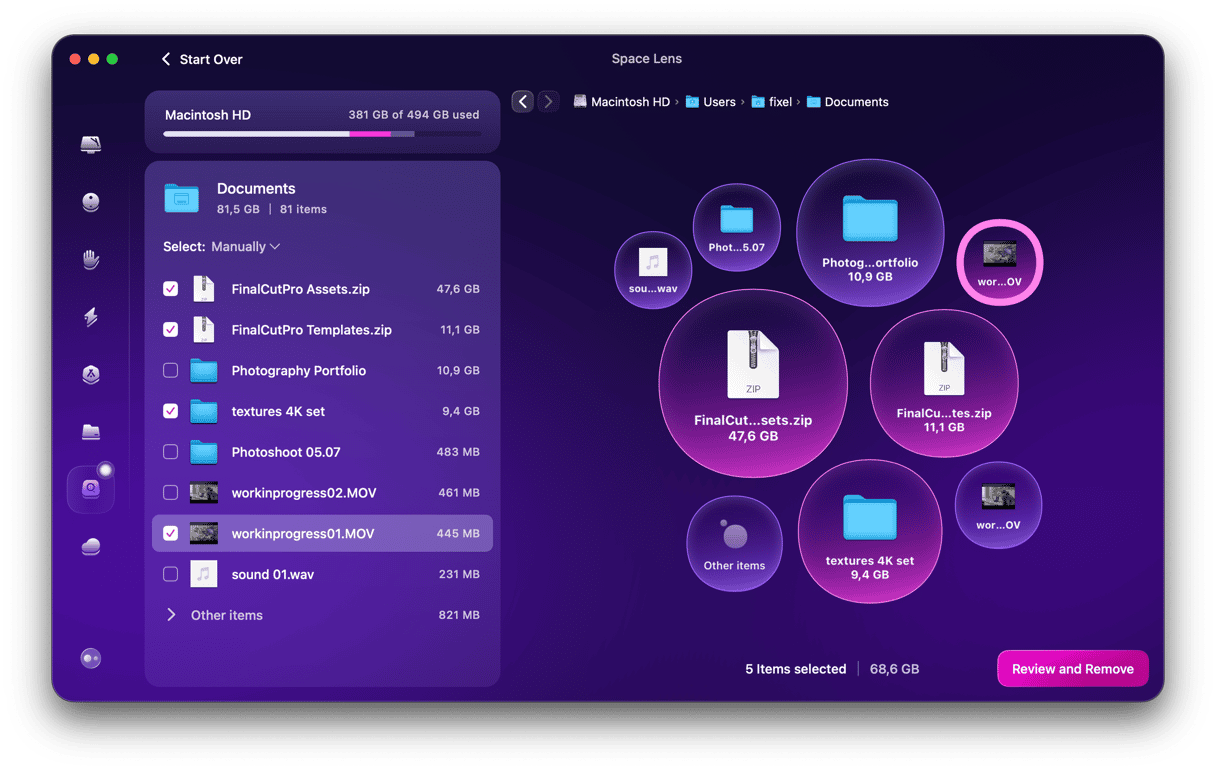
How to access all your folders with Space Lens
You can reliably gain the space and processing power needed to improve your Mac's performance by downloading CleanMyMac. It has the Space Lens feature that can build your storage map in a matter of seconds and show you all the files and folders on your Mac.

Here's how to use it:
- Get your free CleanMyMac trial — enjoy full app functionality for 7 days at zero cost.
- Click Space Lens and run a scan.
- Review your files and folders. Select files you no longer need and click Review and Remove.
- Once happy with the selection, click Remove.