Apple’s AirPods, AirPods Pro, and AirPods Max are brilliant Bluetooth earphones. One cool feature that makes them so handy for users of multiple Apple devices is that they connect automatically to the closest device.
However, occasionally things go wrong, and your AirPods won’t connect when they should. This article will explain what to do when your AirPods won’t connect to your Mac.
Why won’t my AirPods connect to my Mac?
There are some possible reasons your AirPods may have difficulty connecting to your Mac. Some of them are:
- Bluetooth is not enabled on your Mac.
- There is a problem with Bluetooth on your Mac.
- The AirPods are low on or out of charge.
- The AirPods are not within range of your Mac.
- There is a problem with the AirPods.
Let’s look at the ways to fix these problems, starting with the most accessible and proven solutions.
How to fix when AirPods won’t connect to your Mac
1. Check if your AirPods are charged
If the AirPods are low on battery, they might not connect. If you use your AirPods with an iPhone or Apple Watch, you can check the charge level by opening the case, going to Control Centre, and tapping the battery icon. If the charge is low, charge the case with the AirPods in it for a couple of hours and try connecting them again.
2. Ensure your Bluetooth is enabled on Mac
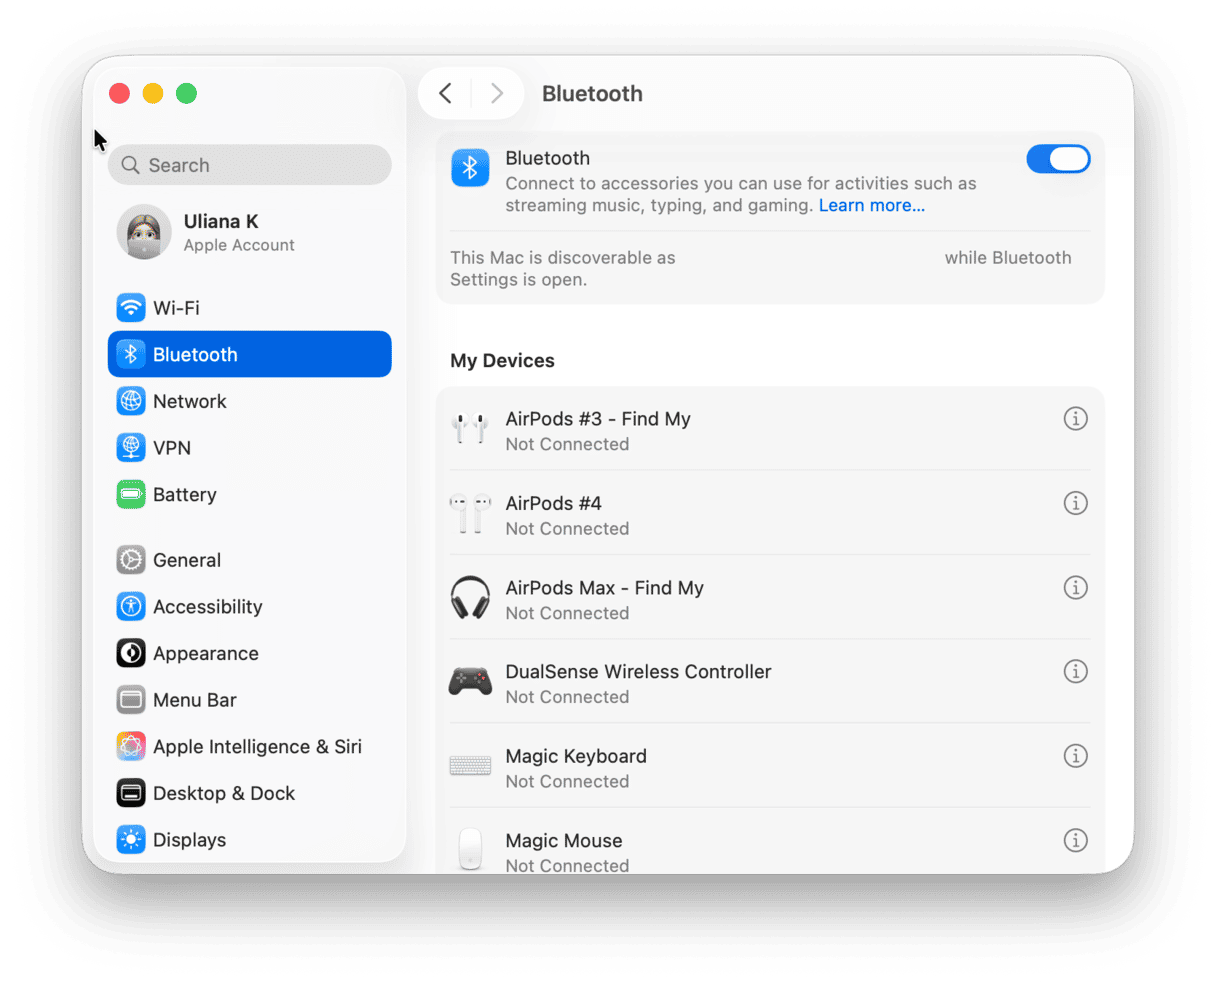
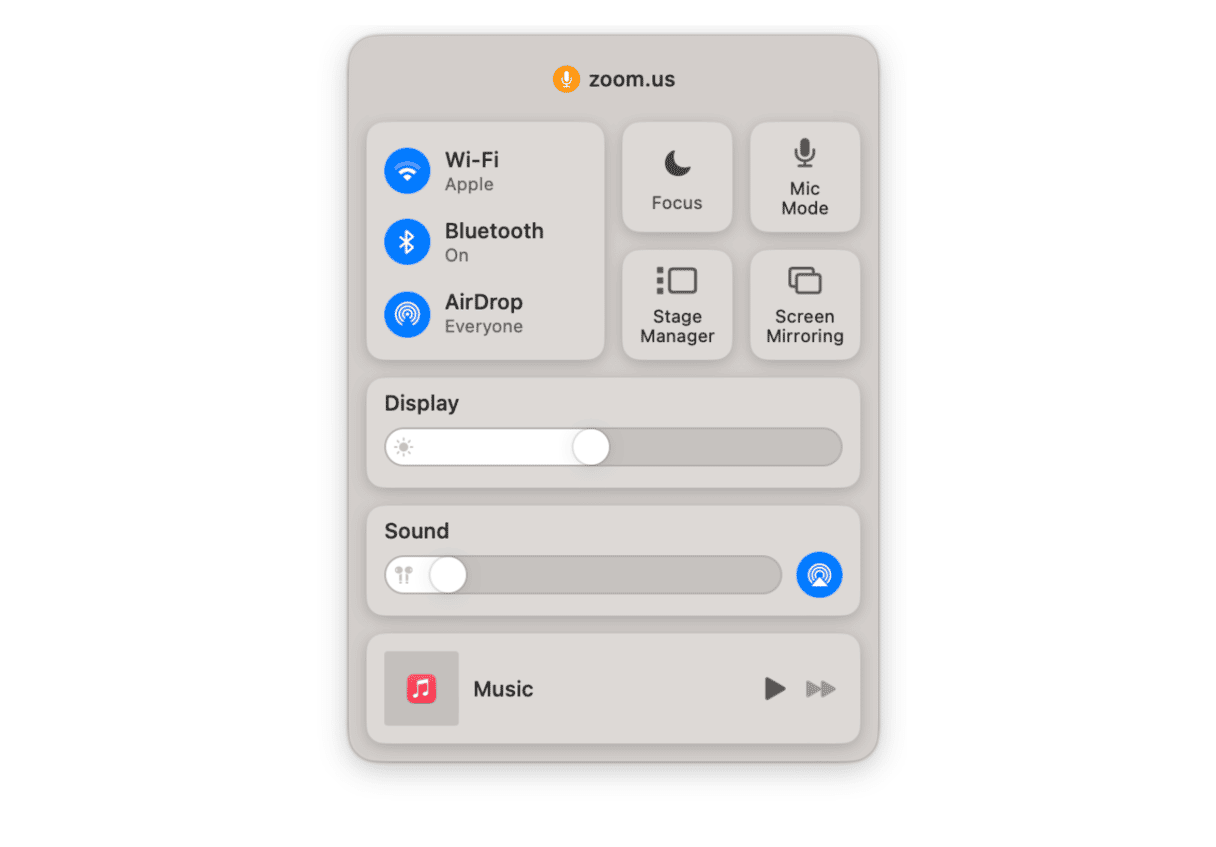
Click on the Control Center icon in the menu bar. The Bluetooth icon should be blue and ‘On.’ You should notice your AirPods listed beneath the toggle switch. If Bluetooth is enabled, try switching it off and then on again.
3. Restart your Mac
Sometimes a restart is all that’s needed to fix a minor problem like this. Restarting your Mac flushes cache files, removes temporary files, and clears RAM. And if you have a Mac with Apple silicon, it also resets the system management controller. Any of these may help resolve a problem with AirPods connectivity.
4. Update your macOS
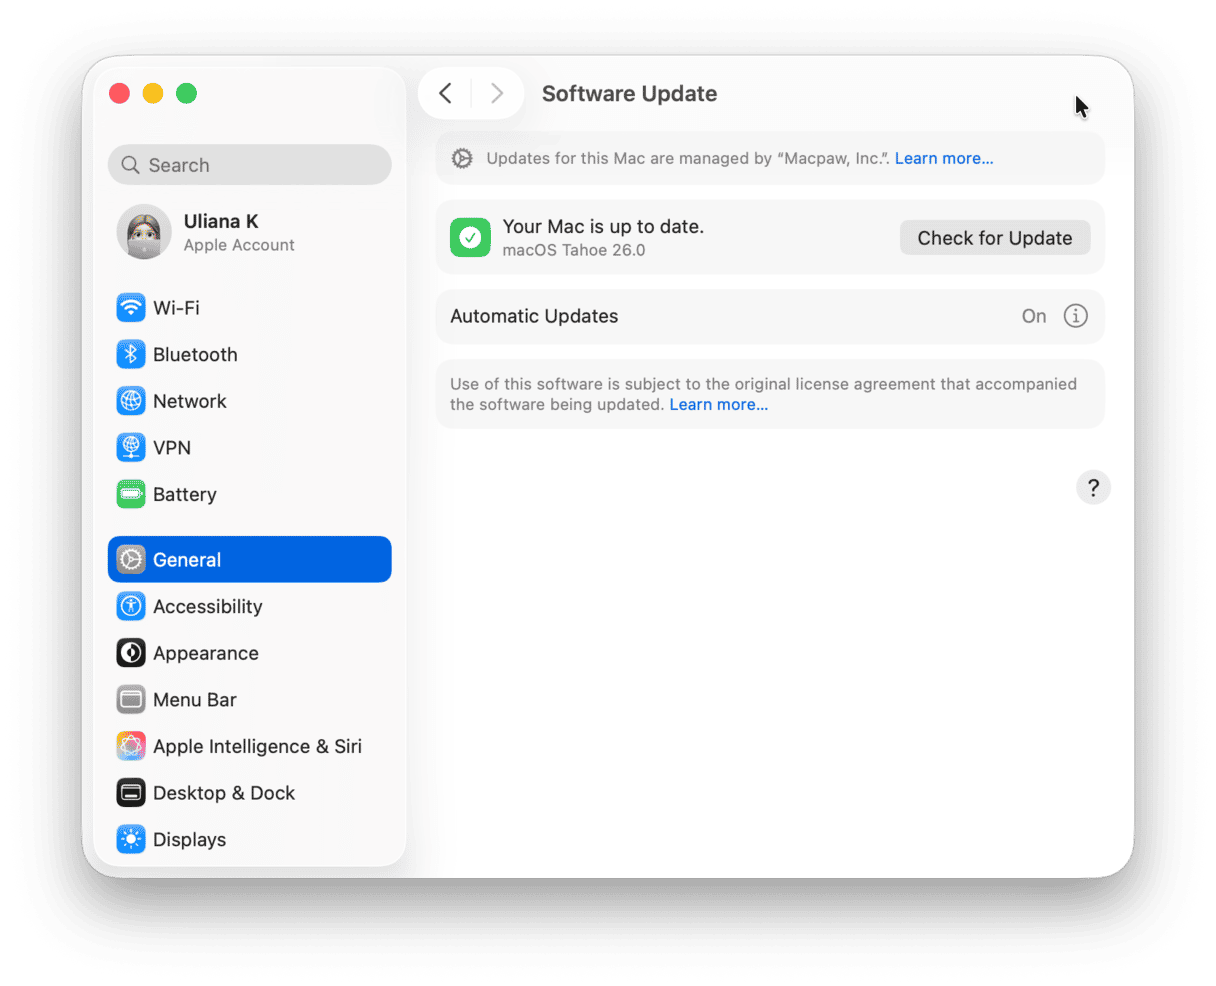
If restarting your Mac doesn’t fix the problem, the next step is to check for an OS update. There may be a bug in the version of macOS that your Mac is running. In this case, the update should fix it. Go to the Apple menu > System Settings > General > Software Update. If there is an update available, follow the on-screen instructions to install it.
5. Make sure your devices use the same Apple ID
If you use AirPods with several devices, they all need to be signed with the same Apple ID. If not, they won’t connect automatically.
Click on the Apple menu, choose System Settings, and then Apple ID. Click Overview in the sidebar. If the button at the bottom says, Sign In, you are not signed in. If it says Sign Out, make sure your Apple ID is the same on all your devices.
6. Remove and re-add your AirPods
If none of the steps above work, try removing your AirPods on Mac and adding them again.
- Click on the Apple menu and choose System Settings.
- Select the Bluetooth pane, hover over AirPods, then choose Disconnect.
- Open the AirPods charging case with the AirPods inside and place them near your Mac.
- Press and hold the setup button on the case.
- When they appear on the screen, click Connect.
7. Clean the AirPods and AirPods case
The AirPods case is used to connect AirPods with Mac. Thus, it needs to be clean and taken care of to prevent connectivity interruption between the AirPods and the case. For the same reason, your AirPods need to be dust and dirt-free to connect with the case correctly.
8. Reset your AirPods
You’ll need an iPhone, Mac, or iPad already connected to your AirPods to reset them.
- Put the AirPods in their case and close the lid.
- Wait 30 seconds, then open the lid.
- On the iOS device, tap Settings, then Bluetooth.
- Tap the ‘i’ next to your AirPods and choose Forget this Device. Tap again to confirm.
- Open the AirPods case, press and hold the setup button for 15 seconds. Wait for the light to flash from amber to white.
- Reconnect your AirPods by placing the case with the lid open near the iOS device and following the instructions on the screen.
AirPods should connect to your Mac automatically once you have set them up. Remember: your Mac needs to be signed into the same Apple ID as your other devices. Bluetooth must be switched on. Your AirPods must be within the range and out of the case (or with the case open). Still have problems connecting? AirPods won’t connect to your Mac? Follow the steps above, and you should get them working again.


