
There are many ways to backup your iPad, including setting up automatic backups using iCloud, backing up your iPad to iTunes, or backing it up to your computer. In some cases, you can even backup your iPad to an external hard drive.
Let’s take how to best backup your iPad to keep your data safe.
Why is it important to back up your iPad?
As with all of your digital devices, it’s important to back up your iPad in case it is ever lost, broken, or stolen. If you have data on your iPad that you wouldn’t want to lose, then a backup is crucial.
The easiest way to backup your iPad is to set up automatic backups on iCloud, which will ensure that your data is protected without you having to think about it. iCloud backups will include:
- Your device settings
- The way you’ve set up your home screen, including the organization of your apps
- Photos and videos
- Messages on iMessage, as well as SMS and MMS text messages
- All of your app data
- Notes
- Audio memos
How to prepare your iPad for backing up
The more data, photos, and videos you store on your iPad, the longer your backup will take. Amassing large amounts of files will also eat up storage quickly, making automatic iCloud backups difficult unless you pay for more storage space.
To manage digital clutter, I recommend downloading CleanMy®Phone, which helps make the tedious chore of managing your photo library on your iPad so much easier. It uses an advanced AI model to analyze and sort your media files, selecting those you may not want to keep any longer. Here’s how to use CleanMy®Phone to clean your photo clutter before backing up your iPad:
- Download CleanMy®Phone and open it on your iPad.
- Tap ‘Declutter’ and then ‘Scan’.
- After scanning is complete, your digital files will be sorted into categories.
- Choose a category and deselect any photos that you don’t want to delete.
- Tap ‘Clean’ to delete your unwanted photos.
- Continue until you’ve removed all of your iPad clutter.
- Empty the ‘Recently Deleted’ album in your Photos app on your iPad.

How to backup iPad to iCloud?
The easiest way to ensure that your data is protected is to set up automatic iPad backups to iCloud. If you ever need to replace your iPad, you can easily transfer your information to your new device.
Follow these steps to set up automatic backups using iCloud:
- Open your iPad and navigate to Settings.
- Tap your name > iCloud.
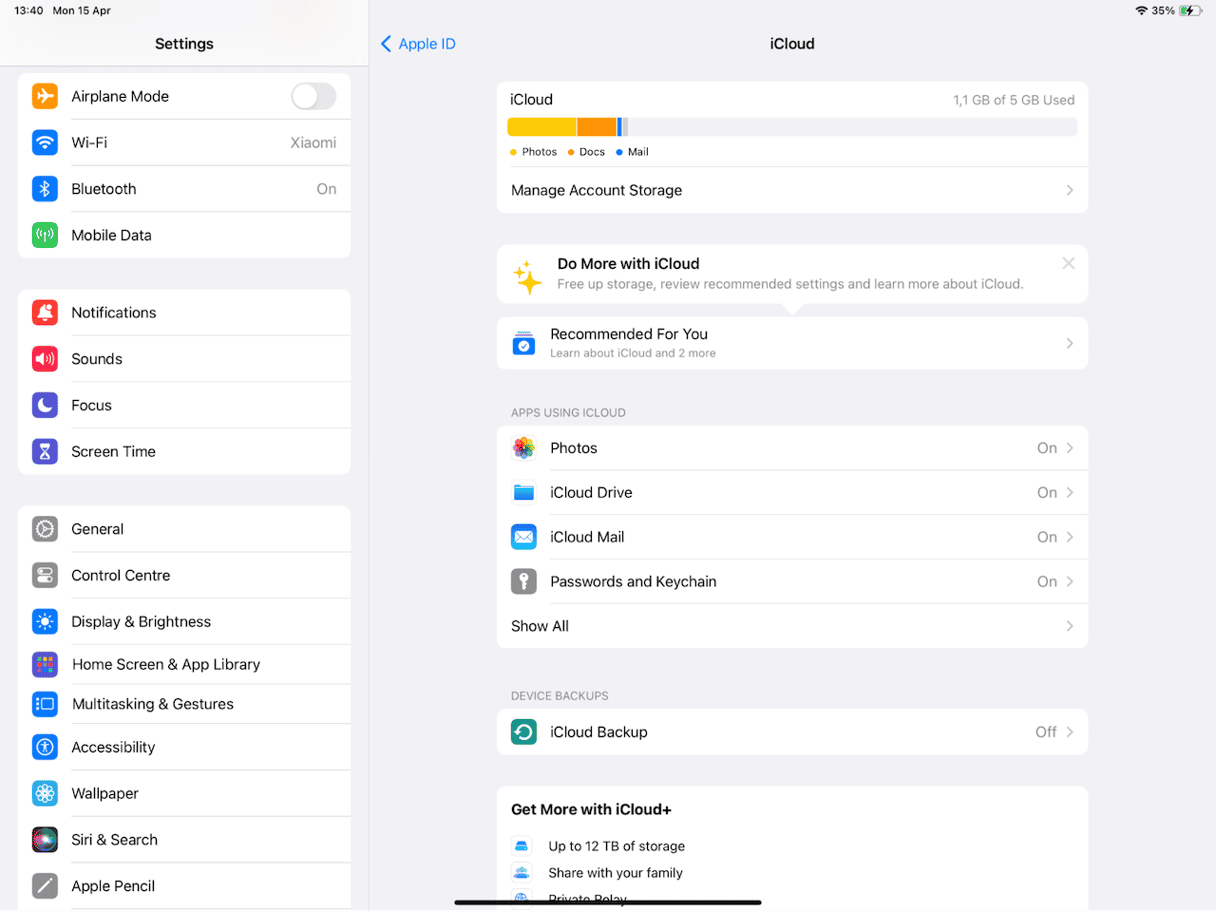
- Tap ‘iCloud Backup’.
- Toggle on iCloud Backup. Now, iCloud will automatically back up your iPad every day as long as it is connected to power and Wi-Fi and locked.
- To override an automatic backup and perform a manual backup, choose ‘Back Up Now’. This is useful if you know that you won’t be connected to power or Wi-Fi for an automatic backup.

Need to see your iCloud backups? Here’s how to access them:
- Go to Settings on your iPad.
- Tap your name.
- Tap ‘iCloud and then ‘Manage Account Storage’.
- Tap ‘Backups’.
- Choose a backup from the list.
But how to backup iPad without iCloud? Follow the steps below.
How to backup iPad to iTunes on a PC
If you have a Windows PC and don’t want to back up your iPad to iCloud, you will have to back up your iPad using iTunes. Before starting, download the iTunes app on your PC. Then, follow these steps to back up your iPad:
- Connect your iPad to your computer using the proper cable.
- Open iTunes on your PC and click the iPad button at the top left of the iTunes window.
- Click ‘Summary’.
- Below the Backups heading, click ‘Back Up Now.’
- At this point, you can choose to encrypt your backup by selecting ‘Encrypt local backup’ and typing in a password. Your backup will be saved on your computer.
To see your backups in iTunes, click ‘Edit’ and then ‘Preferences’. Click ‘Devices’ to see all of your backups for your device. If you’ve chosen to encrypt your backup, it will have a lock icon next to it.
To see the backups stored on your computer, choose Edit > Preferences, then click. Encrypted backups have a lock icon next to them.
How to backup iPad to computer
If you don’t want to backup your iPad to iCloud and have a Mac computer, you can easily perform manual backups to your computer. To use the Finder to backup your Mac, you must be using macOS 10.15 or later. If you are using an earlier version, you can backup your iPad using iTunes following the instructions above.
Follow these steps for backing up your iPad to your Mac:
- First, connect your iPad to your computer with the appropriate cable.
- Open Finder and choose your iPad from the sidebar menu.
- Click ‘General’.
- Click ‘Back up all of the data on your iPad to this Mac’. You can choose to encrypt your backup by selecting ‘Encrypt local backup’ and choosing a password.
- Click ‘Back Up Now’.
How to back up iPad to external drive
If you have an external hard drive that is compatible with your iPad, you can back up your files using FileBrowser. Here’s how to do it:
- Download FileBrowser on your iPad.
- Plug your USB drive into your iPad.
- Open the FileBrowser app and select ‘Add Location’.
- Choose ‘USB/Files’.
- From here, choose ‘Select Location’ and select your USB device.
- Drag and drop the files you want to move to the external hard drive.
With all the different methods for backing up your iPad, it’s important to make this a part of your digital organization system. Whether you choose automatic backups using iCloud or something else, make a plan today to safeguard your data on your iPad.


