iPhone users have long been plagued with space shortages. Even after clearing out unused apps and old text conversations, you often find yourself forced to start paying for iCloud. Now, thanks to Google Photos, you won’t have to anymore.
I know what you’re thinking, why do I need another app for my photos?
Boasting a suite of unique features, Google Photos for iPhone has one that’s arguably better than every other app’s offerings: cloud storage for all your pictures and videos for free.
Start using Google Photos on your iPhone
Let’s explore how to use Google Photos and discuss topics like handling duplicates and how secure it is to have your memories floating around in the cloud.
Here’s what you can do to prevent duplicates in Google Photos:
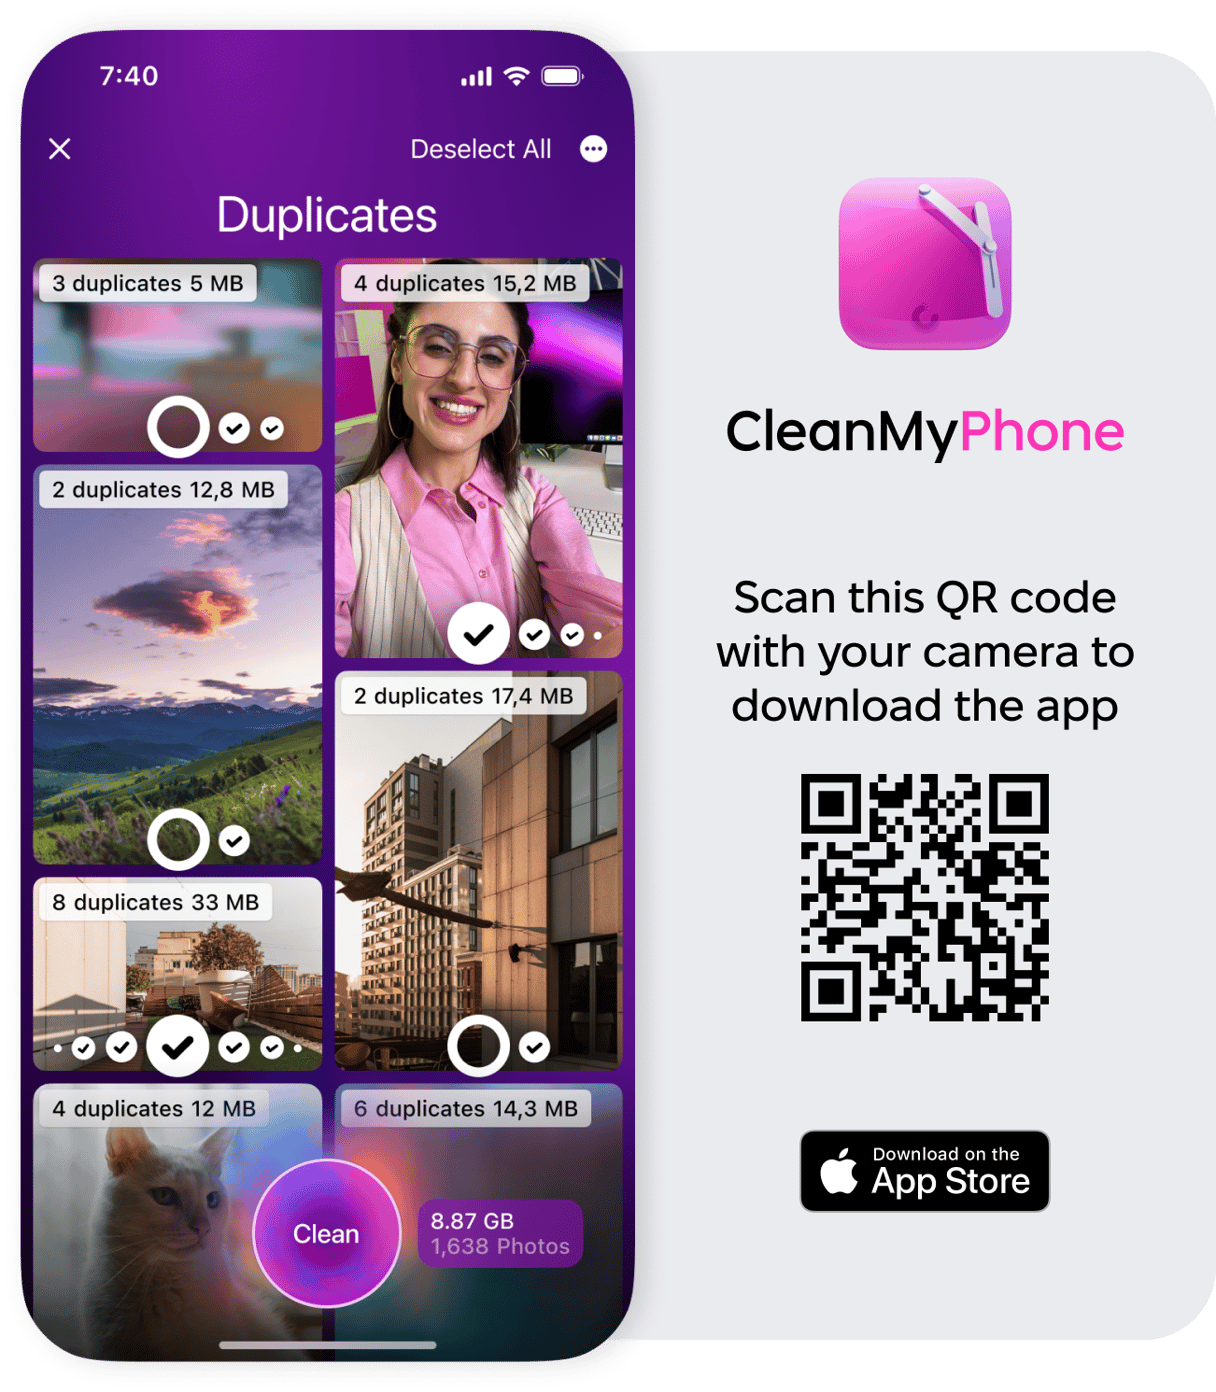
Before syncing your photos with Google Photos, it’s a good idea to tidy up your library so you don’t end up uploading photo clutter. Download CleanMy®Phone on your iPhone and let it scan for duplicates, blurry shots, screenshots, and other junk.
- Just tap Declutter.
- Scan, review what it finds, and clean up with a tap.
- Use the Organize tool to sort through similar photos by categories like Travel, Pets, and Portraits.
Once you’re done, don’t forget to empty the Recently Deleted album in the Photos app.
Once you’ve gone through all those photos, your library should be neat and ready to go to Google Photos. Once you’ve gone through all those photos, your library should be neat and ready to go to Google Photos. It’s important to run this cleanup before uploading your library because there’s no easy way to delete duplicates in Google Photos once they get there.
Download Google Photos app for iPhone
Google Photos works seamlessly on iPhones running iOS 17 or later. It’s one of the top-rated photo apps in the App Store, and for good reason: it automatically backs up your photos, keeps everything organized, and makes it easy to find what you need. If you’re looking for a simple way to manage your photo library, it’s definitely worth a try.
How to upload photos to Google Photos from iPhone
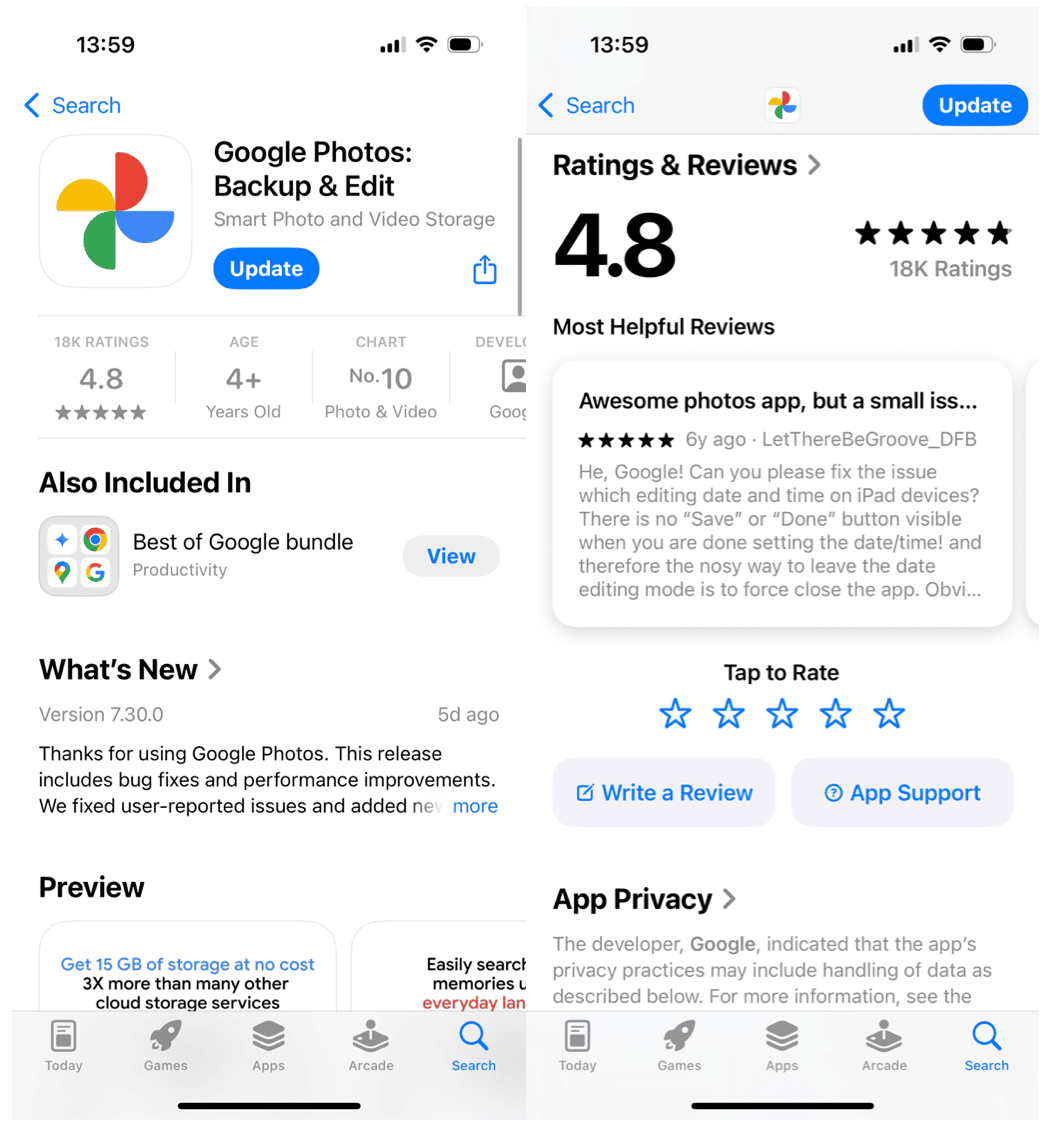
First and foremost, download and install the Google Photos app for iPhone. After you download and install the app on your iPhone, you’ll be prompted to do the following:
- Sign in with your Google Account. If you’ve used any other Google products, such as Gmail, you can use those same credentials to log in. Just make sure you use the account you want your photo library connected to.
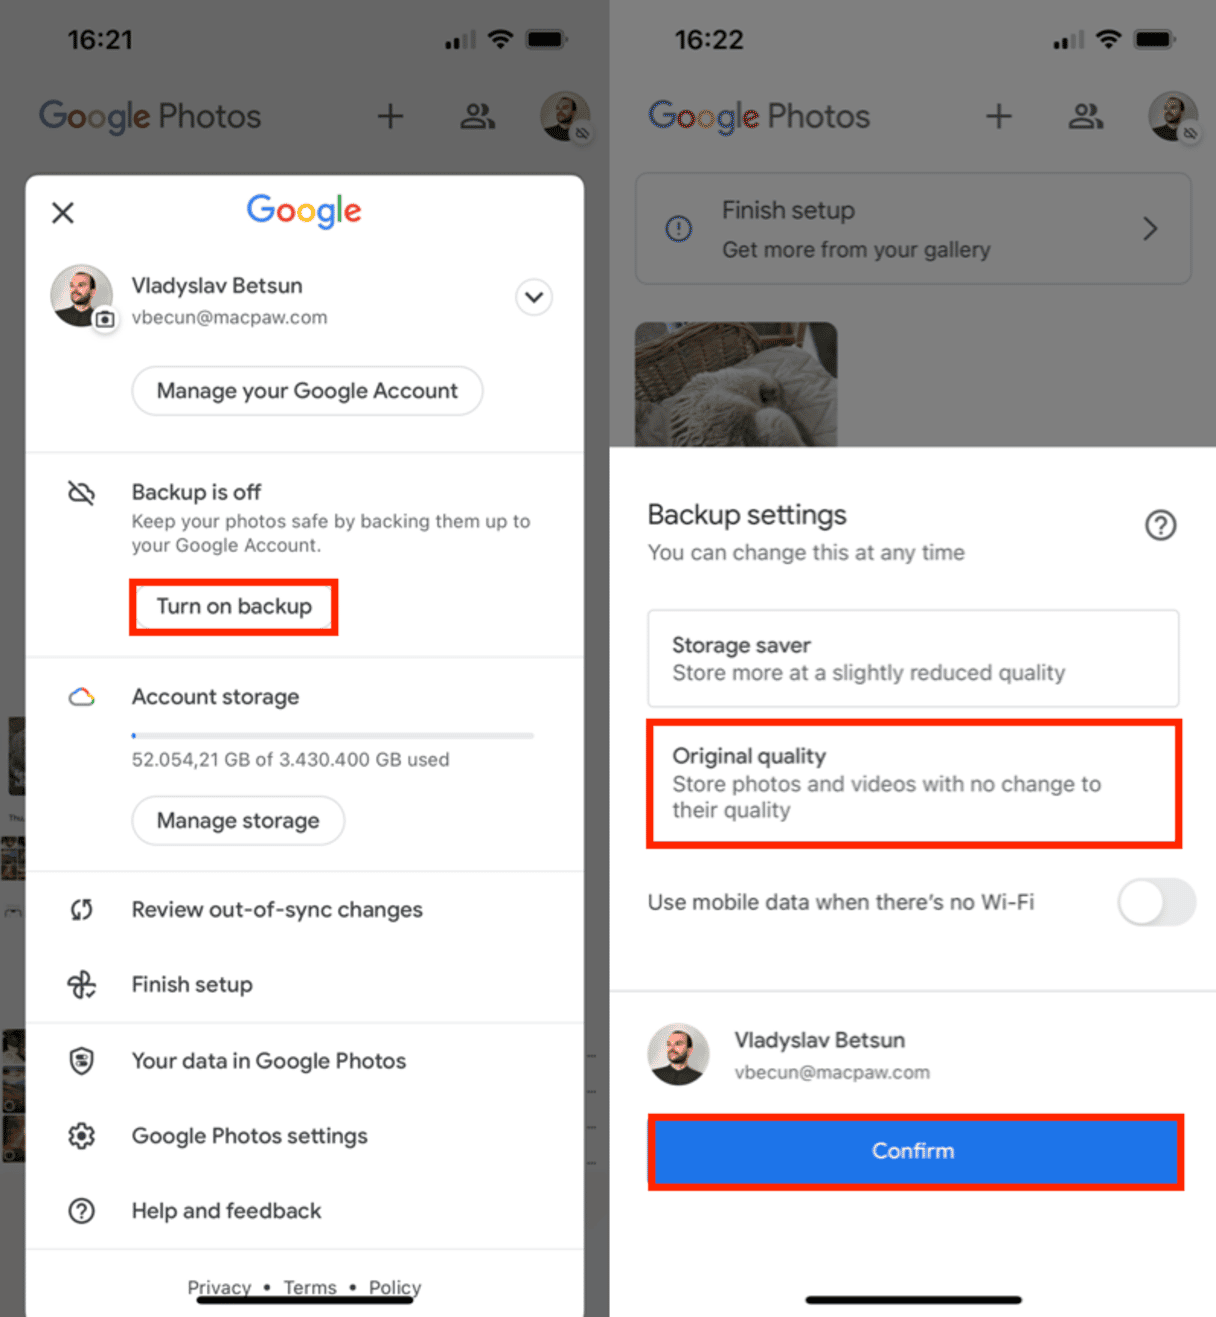
- Turn on Backup. This uploads your entire photo library and automatically uploads new pictures as you take them.
- Set the quality. You can only upload compressed, high-quality photos. If you upload photos to Google Photos at original quality, they will count towards your Google Drive storage limit.
- Tell it when to back up. You can give Google Photos permission to upload photos over a cellular connection using your data plan, or tell it to wait until you’re connected to Wi-Fi again.
If you have an extensive photo library, you might want to check a couple of things when you back up for the first time.
- For this first upload, turn off uploading over cellular so you don’t use up your data plan. You can always turn it back on afterward.
- This initial backup could take some time. Depending on the size of your photo library, you may need to wait patiently.
After your first Google Photos sync is over, you’ll want to confirm all your photos and videos are truly uploaded. A great way to do that is to check photos.google.com on another device.
Pics uploaded. Now, how do I use Google Photos on iPhone?
Now that you’ve got your library online, it’s time to check out the rest of Google Photos. When you open it up, you’ll see four tabs at the bottom of the screen:
- Photos
- Memories
- Library
- Search
In the Photos tab, you can view all your photos and videos chronologically. The Memories tab lets you revisit old photos and videos curated into collections based on events, people, and places. In the Library tab, you can organize your photos into albums, and access shared albums. Finally, the Search tab lets you quickly find specific photos by searching for people, places, or objects.
How to free up iPhone space using Google Photos
Now your photos are both in Google Photos and on your iPhone. If your initial goal was more iPhone storage, one final step is left: deleting pics from your device. Google Photos made it very easy to clear space on your iPhone:
- In Google Photos, tap on the menu icon in the top left corner.
- Tap Clear space.
- When prompted with a confirmation message, tap Delete.
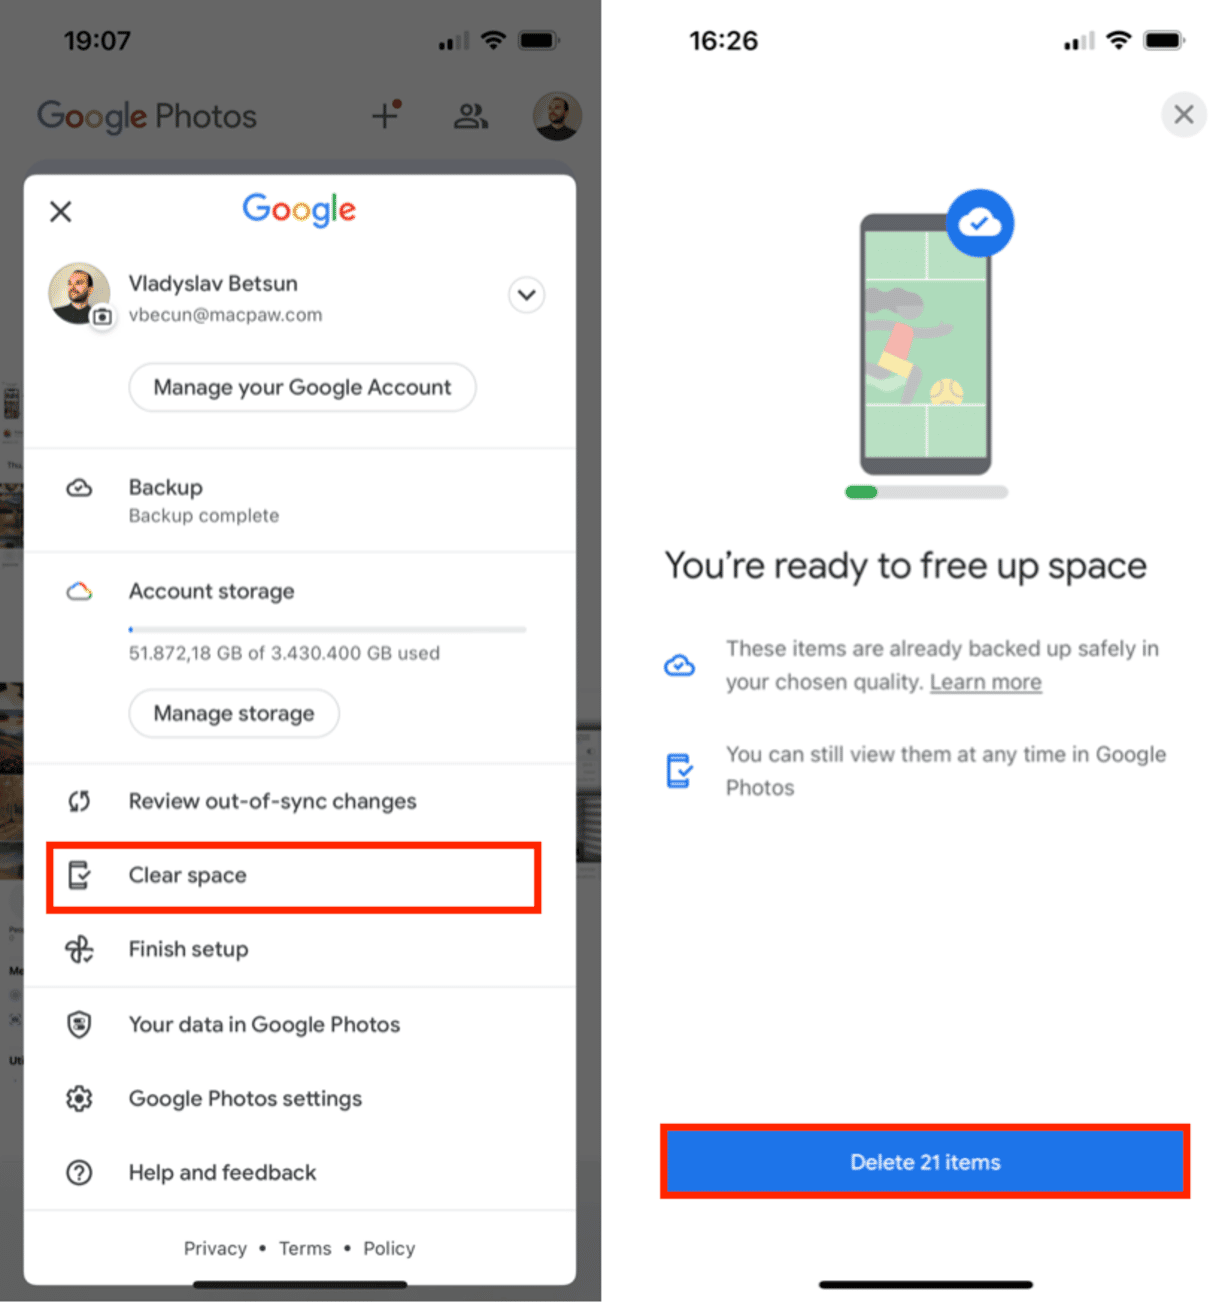
That’s it! You should repeat this process occasionally as you take new photos and videos.
Note: For those new pictures and videos, you might want to take an extra step and turn off iCloud Photo Library, so you’re not uploading everything to both iCloud and Google.
How to delete Google Photos without deleting from the iPhone
If you want to delete photos from Google Photos but keep them on your iPhone, follow these steps:
- Open Google Photos. Launch the Google Photos app on your iPhone.
- Disable Backup. Tap on your profile picture in the top right corner, go to Photos settings, and then Backup. Turn off the Backup option.
- Delete Photos from Google Photos. Go back to the main screen, select the photos you want to delete from Google Photos, and tap the trash can icon to delete them. This will remove the photos from Google Photos but keep them on your iPhone.
- Check Your iPhone Photos. Open the Photos app on your iPhone to ensure the photos remain.
Following these steps, you can manage your photo storage in Google Photos without losing pictures from your iPhone.
Sharing options in Google Photos
If using Google Photos up until this point has seemed easy, wait until you start using the Sharing features—it gets even easier!
How to share photos and albums in Google Photos
As mentioned earlier, sharing with Google Photos could not be easier.
To share a photo:
- Open Google Photos.
- Select the photo or video you want to share.
- Tap the Share button.
- Type in a contact’s name, phone number or email.
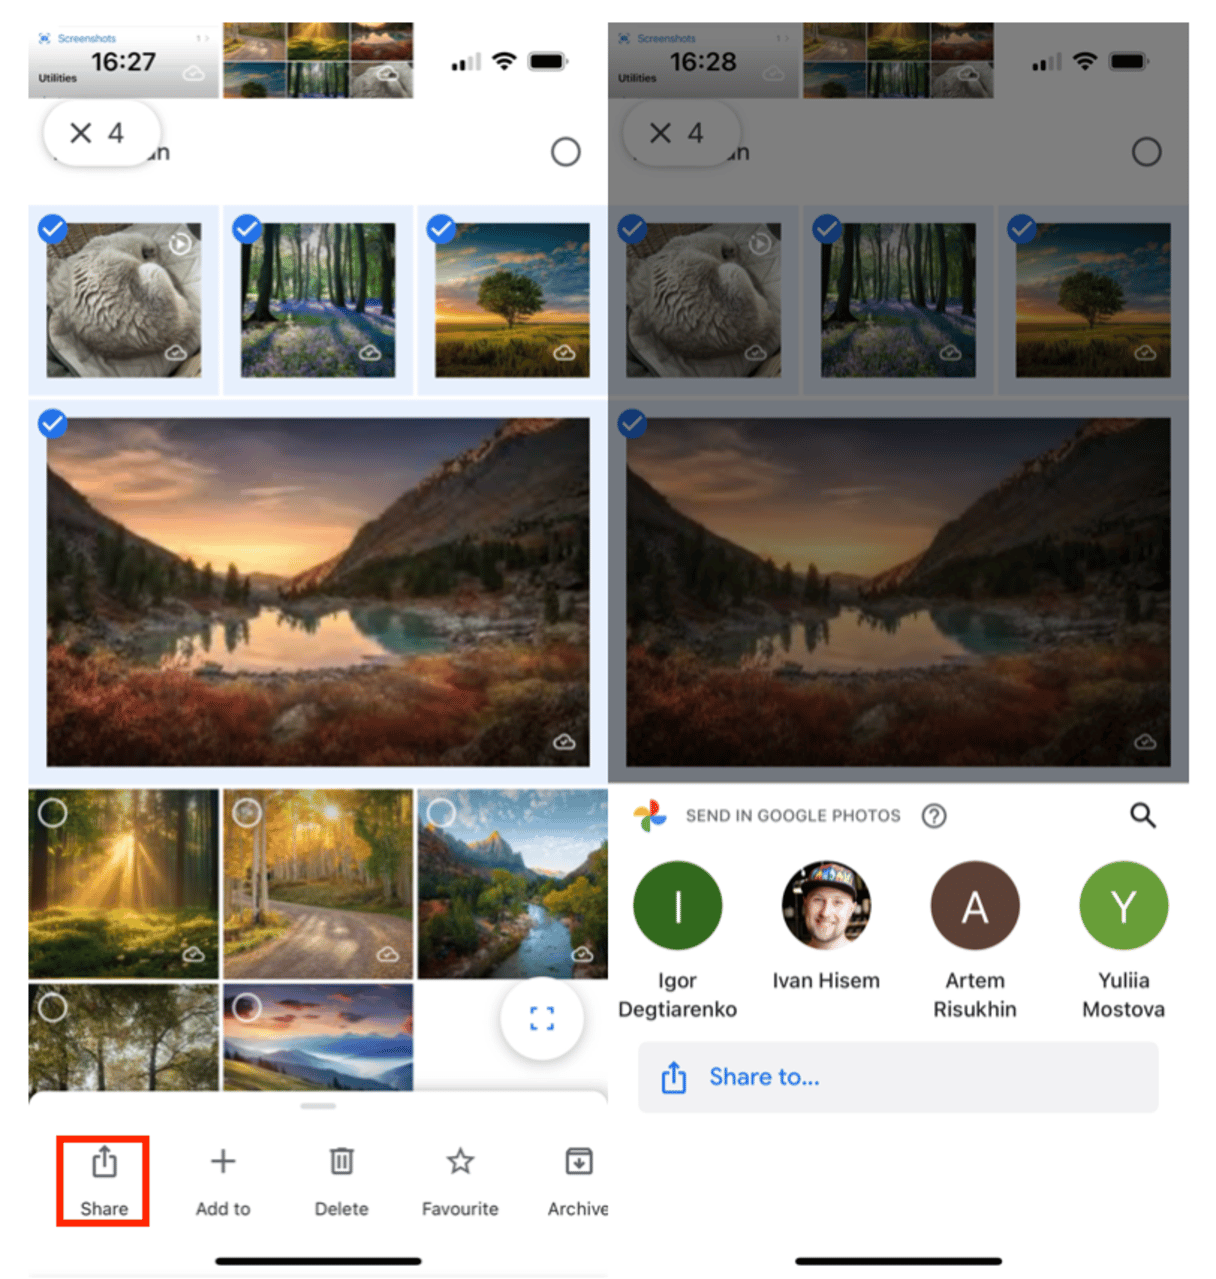
To share an album:
- Open Google Photos.
- Tap Libraries.
- Select the album you want to share.
- Tap the Share button.
- Type in a contact’s name, phone number, or email.
Google does offer the option to share your entire library with someone. However, there’s a limitation: you can only share it with one person. This is how you do it:
- Open Google Photos.
- Tap Sharing > … > Set up shared libraries > Get Started.
- Enter an email address. You can only invite someone with a Google account.
- Choose what you want to share:
- All photos
- Photos of specific people (lets you share photos that only feature that one person)
- Only show photos since this day
- Tap Select a Partner.
- Make sure everything looks good and then tap Invite a Partner.
How to stop sharing a Google Photos album
You may decide for whatever reason that you no longer want to share a specific album. To stop sharing a Google Photos album:
- Find the album either under Libraries or under Sharing
- Tap the ellipses in the top right-hand corner
- Tap Options and then turn off Share Album
When you stop sharing an album, it removes all photos and videos other people have added to it, removes all comments, and, obviously, makes the album private.
How to delete Google Photos
Maybe after all was said and done, you didn’t like Google Photos, it just wasn’t for you. That’s okay. But before you just delete the app and move on with your life, you might want to make sure you also delete everything you’ve already uploaded to Google Photos.
There are three steps to take before you delete Google Photos:
Step 1. Unsync your photos from Google Photos
Step 2. Delete the Google Photos app
Step 3. Delete all Google Photos content
How to unsync Google Photos from iPhone
To unsync the native Photos app on your iPhone from Google Photos:
- Open Google Photos on your iPhone.
- In the top right corner, tap your icone.
- Select Backup.
- Tap Back up photos and vides on this device automatically.
Unsyncing means you disconnect Google Photos from iPhone. As a result, you’re merely removing photos from the app on your iPhone.
The pictures and videos you previously synced still live in the cloud. If you want to leave them there, just in case one day you have a change of heart and return to Google Photos, then all that’s left for you to is delete the app from your iPhone.
How to stop Google Photos from Backing up
As mentioned above, unsyncing will also prevent Google Photos from backing up your photos. Follow the same steps to stop the automatic backup and unlink Google Photos from your iPhone.
By taking this action, you will prevent Google Photos from backing up your photos and you will unlink the app from your iPhone.
If you’d rather remove all traces of your content from the Google Photos system, read on to learn how to delete the rest of your photos.
How to delete all photos from Google Photos
This part may be quicker to do from a computer browser, but it can still be done from your iPhone browser:
- Open a browser (Safari, Chrome, etc.)
- Go to photos.google.com
- Select all the content you don’t want to keep in Google Photos
- Click the trash can in the top right-hand corner of the screen
- Click the menu icon in the top left-hand corner
- Go to Trash
- Click Empty Trash
Note: Google limits you to 500 photos at a time. So, you will more than likely have to delete photos from Google Photos in batches.
Can I delete my Google Photos account?
The short answer: no. There is no way to delete or turn off only the Photos functionality in your Google account. If you no longer wish to use Google Photos, your best option is to follow the steps above and delete all content from Google Photos. Just leave it empty and pretend it never existed.
Now that you’ve got a handle on using Google Photos, go do it! Play around with the app and check out all the clever features it has to offer. We’ve only barely scratched the surface here with what Google Photos is capable of doing. And the best part of it is, you don’t have to commit to anything to try it out. If you don’t like it, you know how to remove all your photos and delete the app. But then again, maybe you’ll really love it and use it as a free way to back up your photo collection.


