Whether you administer multiple Macs for a company or organization, or you just want to stop children in your household from accessing sites intended for adults, there is likely to be some time when you want to block websites on a Mac. Apple’s parental controls (in the built-in Screen Time app) can help, but they can also be a bit of a blunt tool, and there may be occasions when you want to block websites on Safari on your Mac without parental controls. We’ll show you how to do both in this article.
How to block sites on Mac with Screen Time
Screen Time was added to macOS fairly recently. And while its purpose is to limit website activity, it can just as effectively block sites from opening. The solution works for all browsers. It was originally meant to blacklist adult sites, but who said you couldn't modify it to block any site?
- Open System Preferences > Screen Time.
- Click on Content & Privacy.
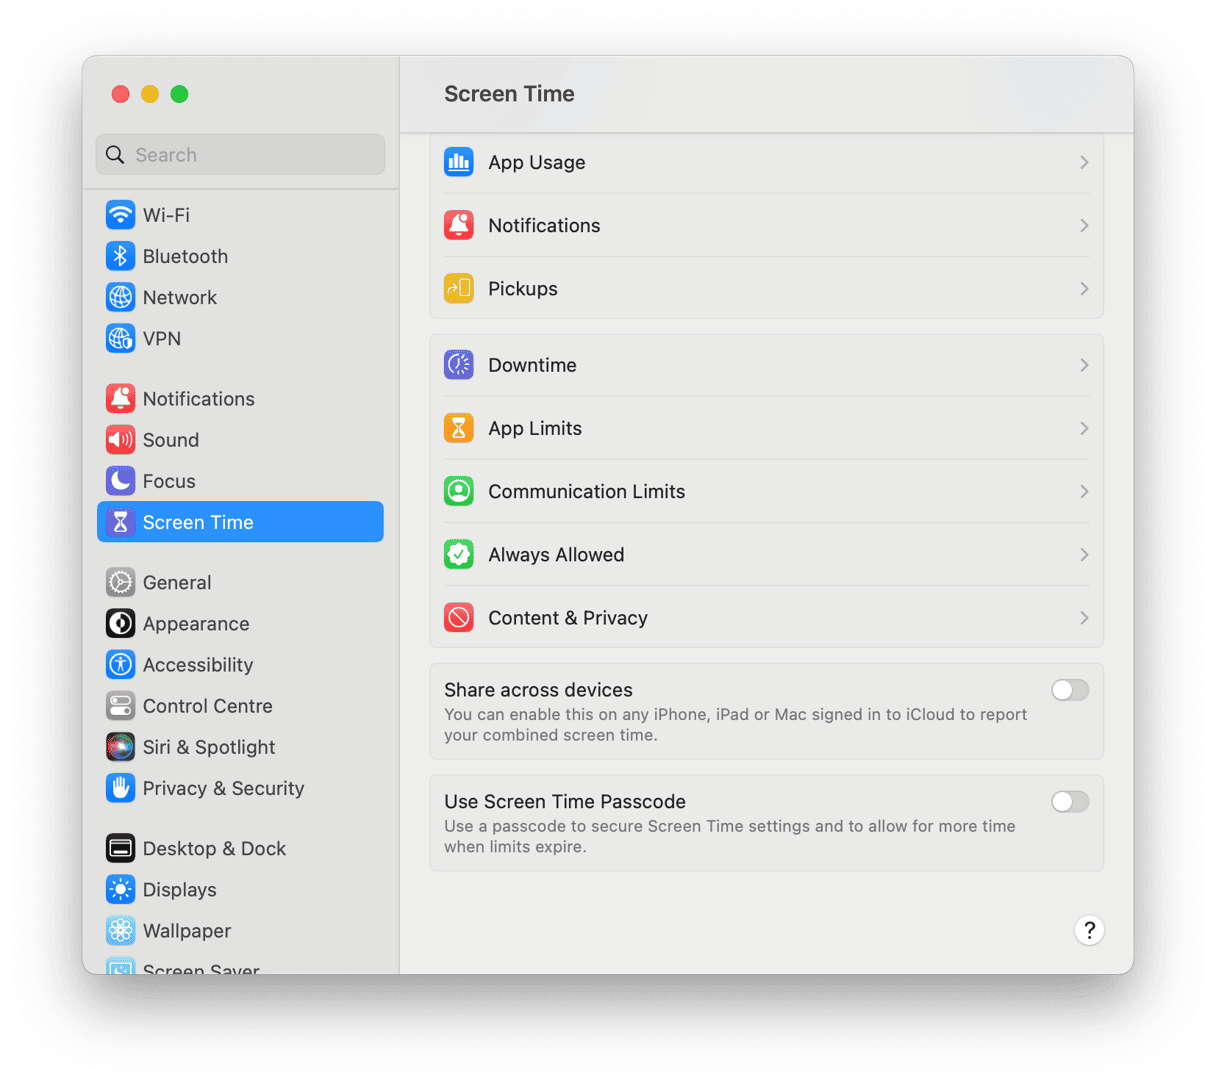
- Choose Limit adult websites > Customise.
- Add a site you'd like to block.
Now, let's see what will happen when Safari opens that site. Hurray, it looks like we've blocked it!
How to block websites on Safari on your Mac using Terminal
If you want to block specific websites in Safari, or any other browser you use on your Mac, you’ll need to try a different approach. If you’re comfortable using Terminal, you can use Unix commands.
IMPORTANT
The following method edits the host file on your Mac. This is the file web browsers use to find websites that you want to visit. Changing the file could cause significant problems, including making the web completely inaccessible. So, you should only use it if you are confident in Terminal. And, you should back up the host file first. Here’s how to do that.
- Go to Applications > Utilities and double-click Terminal to launch it.
- Type:
sudo /bin/cp /etc/hosts /etc/hosts-original - Hit Return and type in your admin password when prompted.
You now have a backup of your hosts file, so if anything does go wrong, you can restore that and regain access to websites. To block specific websites in the hosts file, follow the steps below carefully. It’s worth noting that when you type in a URL, only that URL is blocked. So, for example, if you type in Facebook.com, the ‘www’ version of the domain won’t be blocked. To block both, you need to type both URLs separately. Similarly, subdomains aren’t blocked, so mobile versions of sites (which usually start ‘m.’) and login pages that have a separate subdomain won’t be blocked. You will need to type those URLs separately, too.
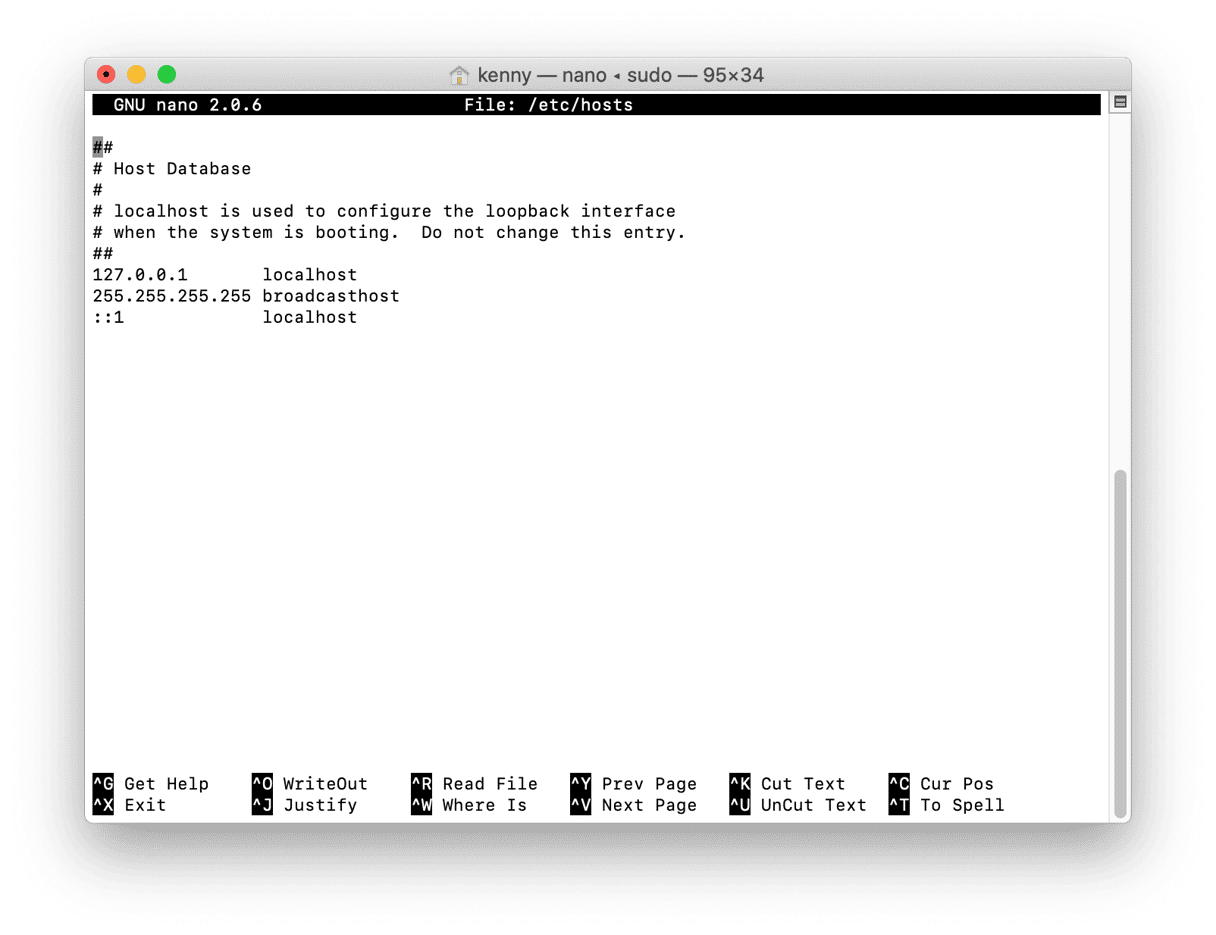
- Type:
sudo nano /etc/hosts - Make sure the cursor entry point is beneath all the text on-screen on a new line. You must not change any of the text already on screen.
- Type:
127.0.0.1 - That IP address is the local IP address; if any website is directed there, it won’t load, so now we need to direct those sites we want to block to that IP address.
- After typing in the IP address, hit Space and type in the URL of the site you want to block. Make sure you type it rather than paste it because pasting can introduce hidden characters that could cause problems
- Press Return.
- Type:
127.0.0.1again, then space, then the next URL, remembering that if you want to block subdomains or directories, you will need to type those separately. - Hit Return.
- Repeat steps 7 and 8 until you have typed all the URLs you want to block.
- When you’re finished, press Control-O and then Control-X to save the hosts file and then close it.
- Type:
dscacheutil -flushcachethen hit Return. That flushes the cache, meaning the web browser will have to refer to the hosts file.
The above steps will block the IPv4 versions of sites in all browsers, but not the IPv6 versions. If you find a site is still accessible, it may be connecting via IPv6. To block that, say for Facebook, type: www.facebook.com
How to block sites via browser extensions
Certain sites keep popping up on your Mac because you have previously installed them as extensions. It’s no news that extensions may have double-purpose. You may block such sites that bombard you with ads by disabling the extensions on your Mac.
My favorite way to get rid of extensions is again, to use CleanMyMac. Interestingly, it finds apps and plugins that I don’t normally see elsewhere.
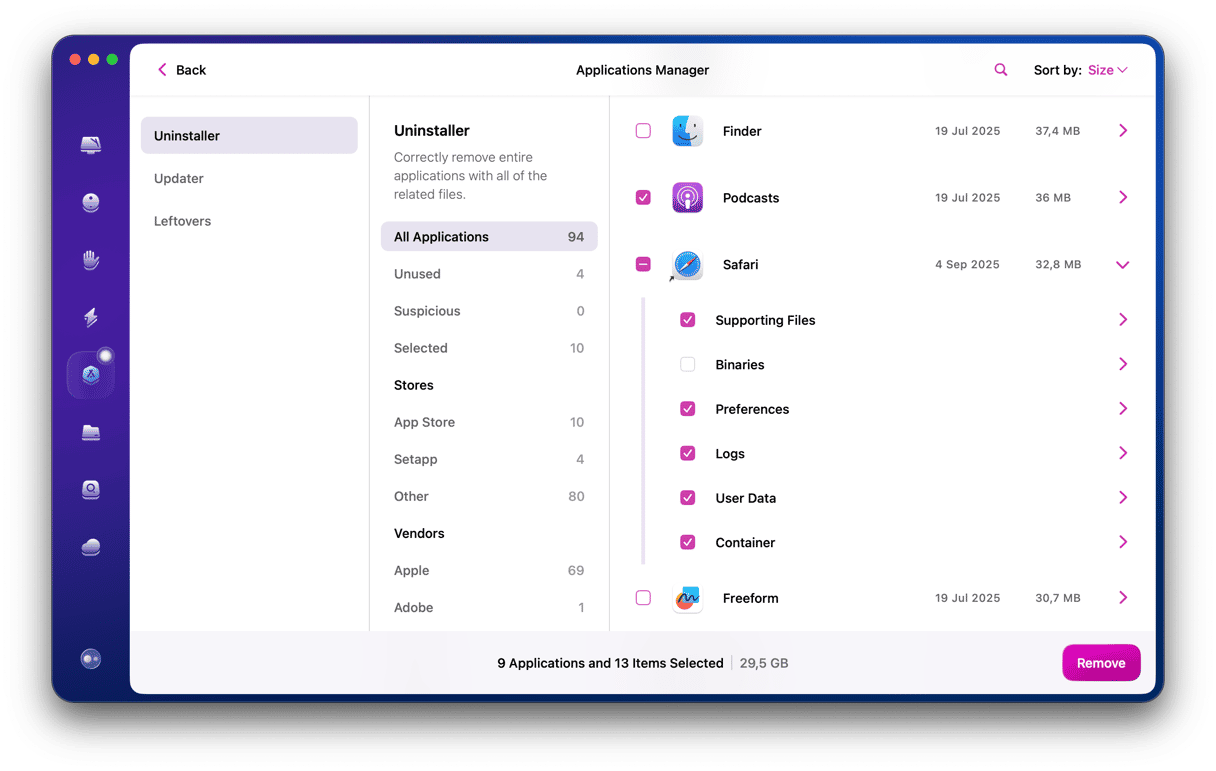
- Get a copy of CleanMyMac — there is a free version you can download
- Click Extensions in the sidebar
Block websites on your router
If you’re not comfortable editing the host file in Terminal, you may also be able to block websites on your broadband router, depending on its make and model. To access your router’s settings, do the following.
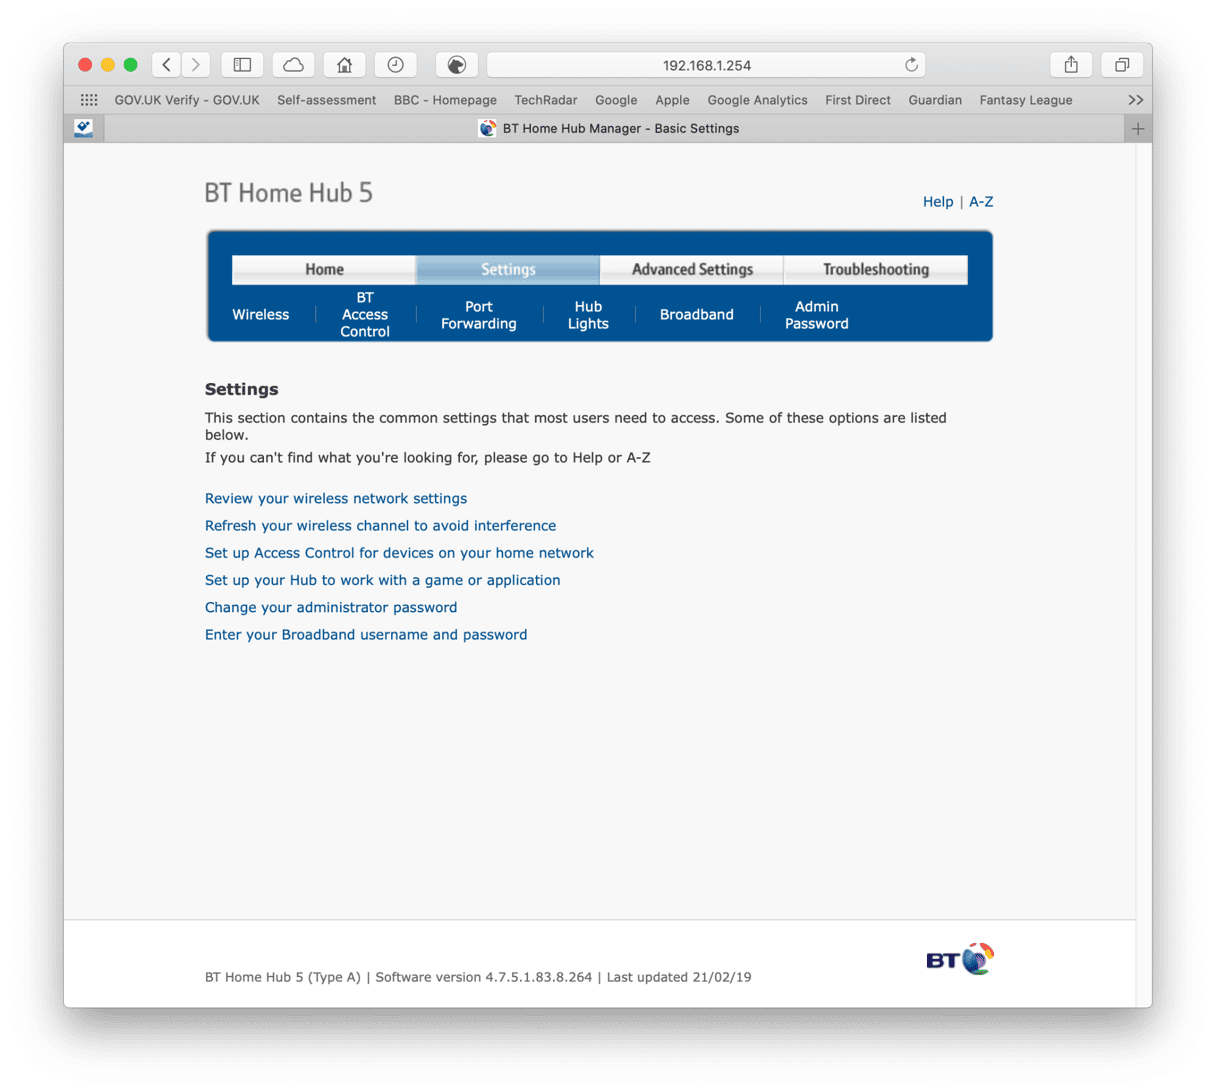
- Locate the router IP address. It may be on the bottom of the router itself. If not, go to System Preferences > Network > Wi-Fi > Advanced and click TCP/IP. Not the IP address next to ‘Router’.
- Type or paste the URL into your browser's address bar.
- Type in the admin name and password for your router when requested. (It may be on a sticker on the router.
- Navigate to the Settings page.
- Look for options to block sites and type in the URLs of the sites you want to block.
Block websites using third-party software
There are a number of third-party apps and browser extensions that allow you to block specific websites or types of content. For example, Focus allows you to block specific sites and types of content according to a schedule you set.
And browser extensions for Chrome, Firefox, and Safari can fulfill the same function, although these usually block access to sites you specify permanently rather than on a temporary basis.
When you choose a browser extension, you should properly assess it first. Read reviews of it and find out what other people think of it. Browser extensions are a favorite way for malware distributors to spread adware and potentially unwanted programs, and that’s the last thing you want to install on your Mac.
There are several ways to block websites on your Mac. The simplest is to use Screen Time (or Parental Controls if you're running an older version of macOS). However, that is a very blunt tool and doesn’t allow you to specify which sites to block. So, if you want to block specific sites, you will either have to edit the host file in Terminal following the steps above or use a third-party app or browser extension. If you’re worried about websites pushing malware onto your Mac, you can use CleanMyMac’s real-time protection tool to keep it safe.


