If you're interested in photography, you've probably seen those gorgeous Instagram portraits with beautifully blurred backgrounds. Maybe you've tried to achieve the same effect in your own photos. The good news is, you don't need a fancy DSLR camera to get a nice blurry background.
Newer iPhone models make it easy to blur backgrounds, and even older iPhones can do it with a few extra steps. If you've been wondering how to blur the background of an image on your iPhone, we have three easy ways to help you make it happen.
Method 1. Use iPhone’s Portrait mode
The simplest way to blur background — or bokeh effect — on your iPhone is to use the popular Portrait mode, but not every iPhone has this feature because it requires dual cameras to work properly. Starting with the iPhone 7 Plus, models feature an easy-to-use Portrait mode that automatically blurs the background in portraits.
Blur the background of a photo with Portrait mode
If you have one of the iPhone models listed above, you should definitely take advantage of Portrait mode. It is the easiest way to blur a photo on iPhone, and the results are stunning without a bit of editing. Here’s how to use Portrait mode to blur the background on your iPhone.
- Open the Camera app on your iPhone.
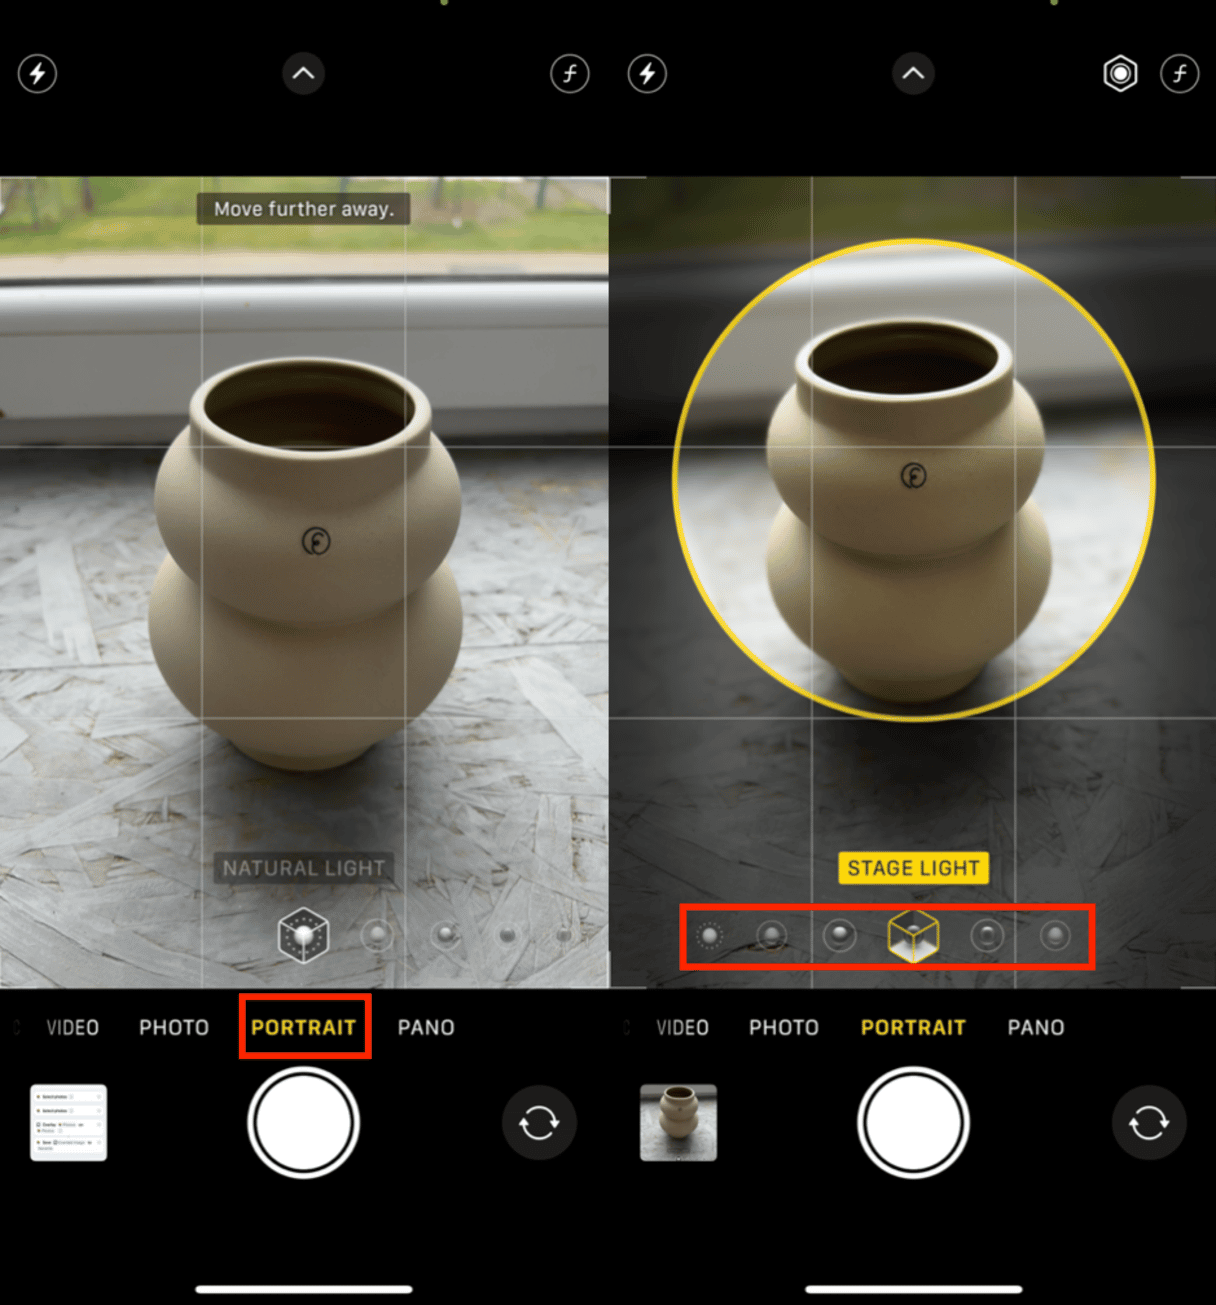
- Swipe through the menu above the shutter button and tap Portrait.
- An additional menu with different types of portrait lighting will appear above your shutter. Choose from studio light, natural light, contour light, and more.
- Point your phone’s camera at your subject and follow the instructions on the screen. Your iPhone may tell you to move closer or farther away from your subject.
- The lighting banner will turn yellow when Portrait mode determines your ideal composition.
- Press the shutter button.
How to adjust the background blur while taking a photo
With the newer iPhone models, such as the iPhone XS, iPhone XR, and all models of iPhone 11, you can take things a step further and adjust the amount of background blur in your photos using the Depth Control feature. Here’s how to do it.
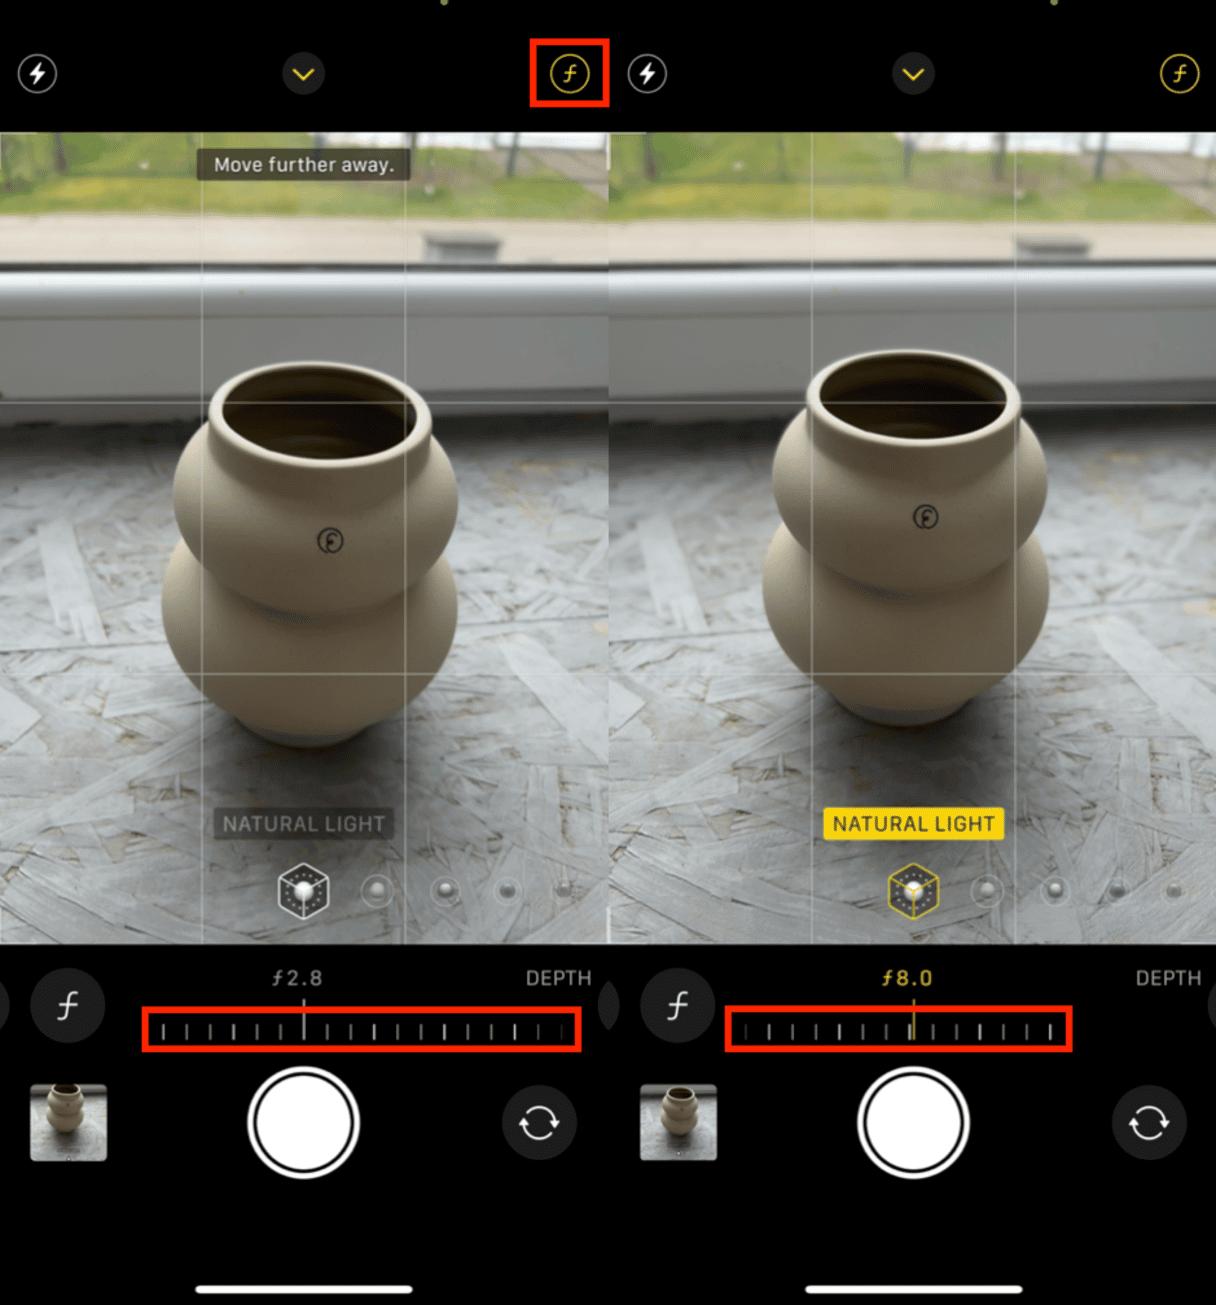
- Frame your photo in Portrait mode, follow the on-screen instructions, and wait for the yellow light.
- In the upper right corner, you will see the f-stop button (an f followed by a number). Tap on it to open the depth-of-field slider.
- A measuring line will appear above the shutter button on the screen.
- Slide it to the right to add more blur and to the left to add less blur.
- When you’re happy with the effect, tap the shutter button.
How to adjust the background blur after taking a photo
With the iPhone 11 and later models, you can adjust the background blur after taking your photo in portrait mode. Here are our step-by-step instructions.
- Take a photo using Portrait mode.
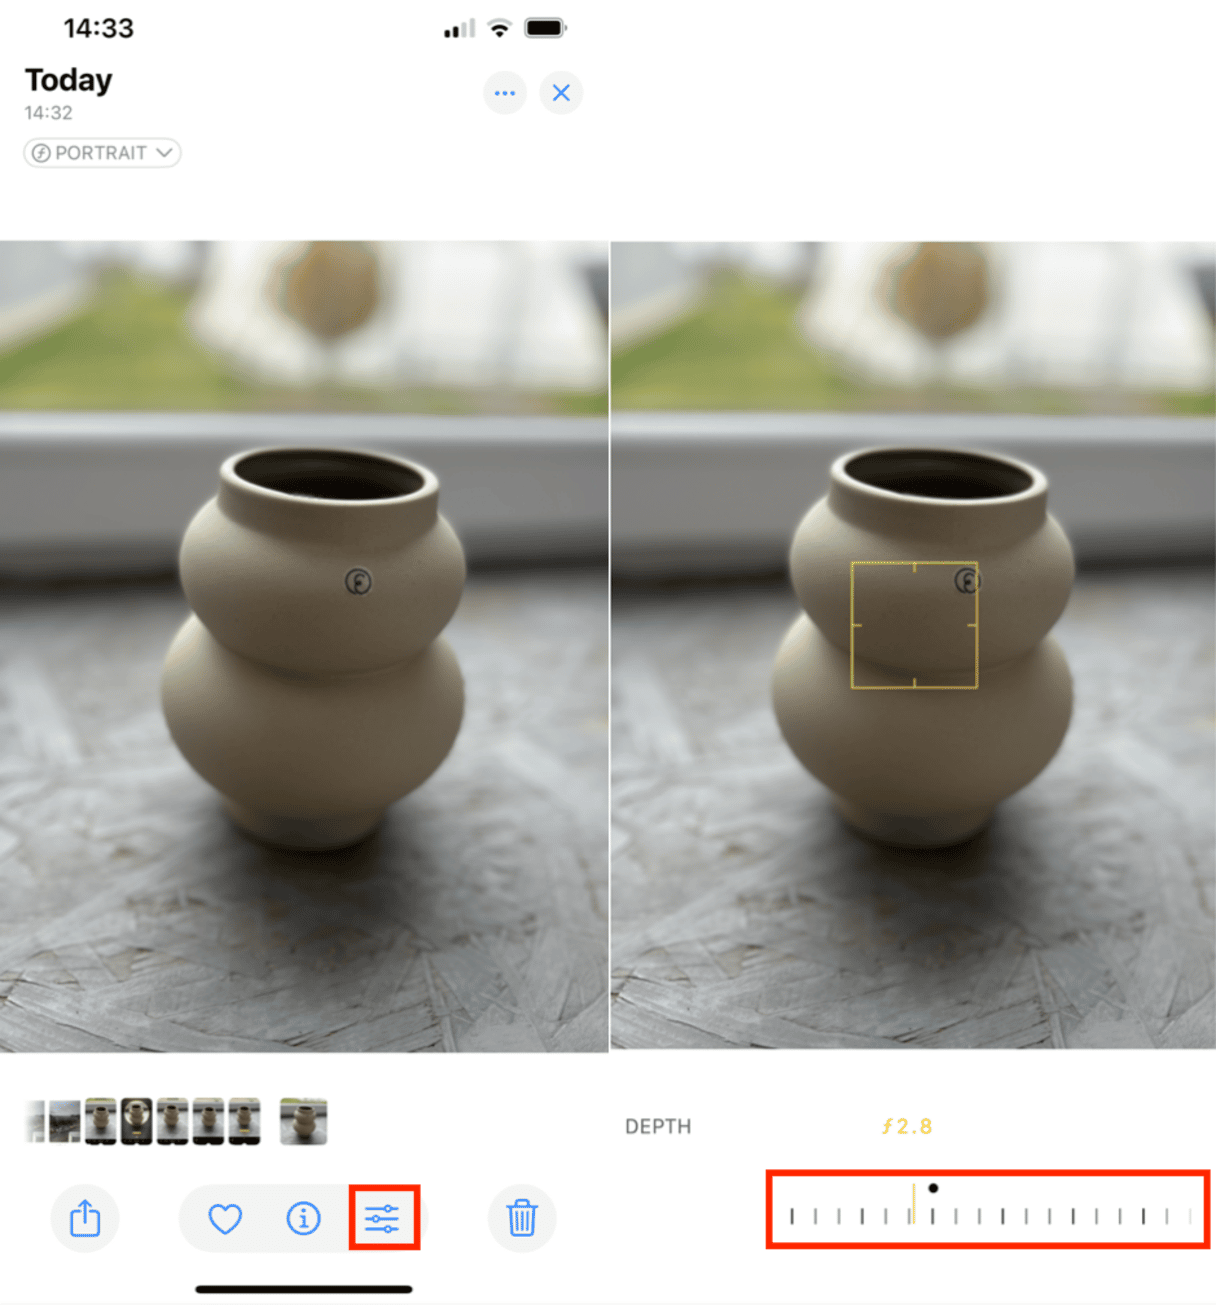
- Open the Photos app and tap Edit.
- The depth control slider will open along with your photo on the edit screen.
- Move the slider until the desired blur is achieved.
- Tap Done.
How to delete blurred photos on iPhone
Blurred photos can be a vibe, but most of them are just blah that can occupy your storage space. Unfortunately, the Photos app doesn't group blurred images in one category like Screenshots or Favourites. But you can quickly spot blurred pics using CleanMy®Phone.
Run a photo library scan and have your blurry photos rounded up. It takes a few seconds (or minutes), depending how many photos you have:
- Download CleanMy®Phone.
- Go to Declutter module.
- Scan your Photos and delete the clutter.
Method 2. Place the subject close to the lens
If you don’t have an iPhone with the Portrait mode feature, you can still get a decently blurred background simply by getting closer to your subject. This method tricks your iPhone into using a shallow depth-of-field because the closer you get to your subject, the smaller the focus area.
This method isn’t as intuitive or simple as Portrait mode but works on older iPhones. The secret is to find the sweet spot where your main subject is crisp, and the background is blurred.
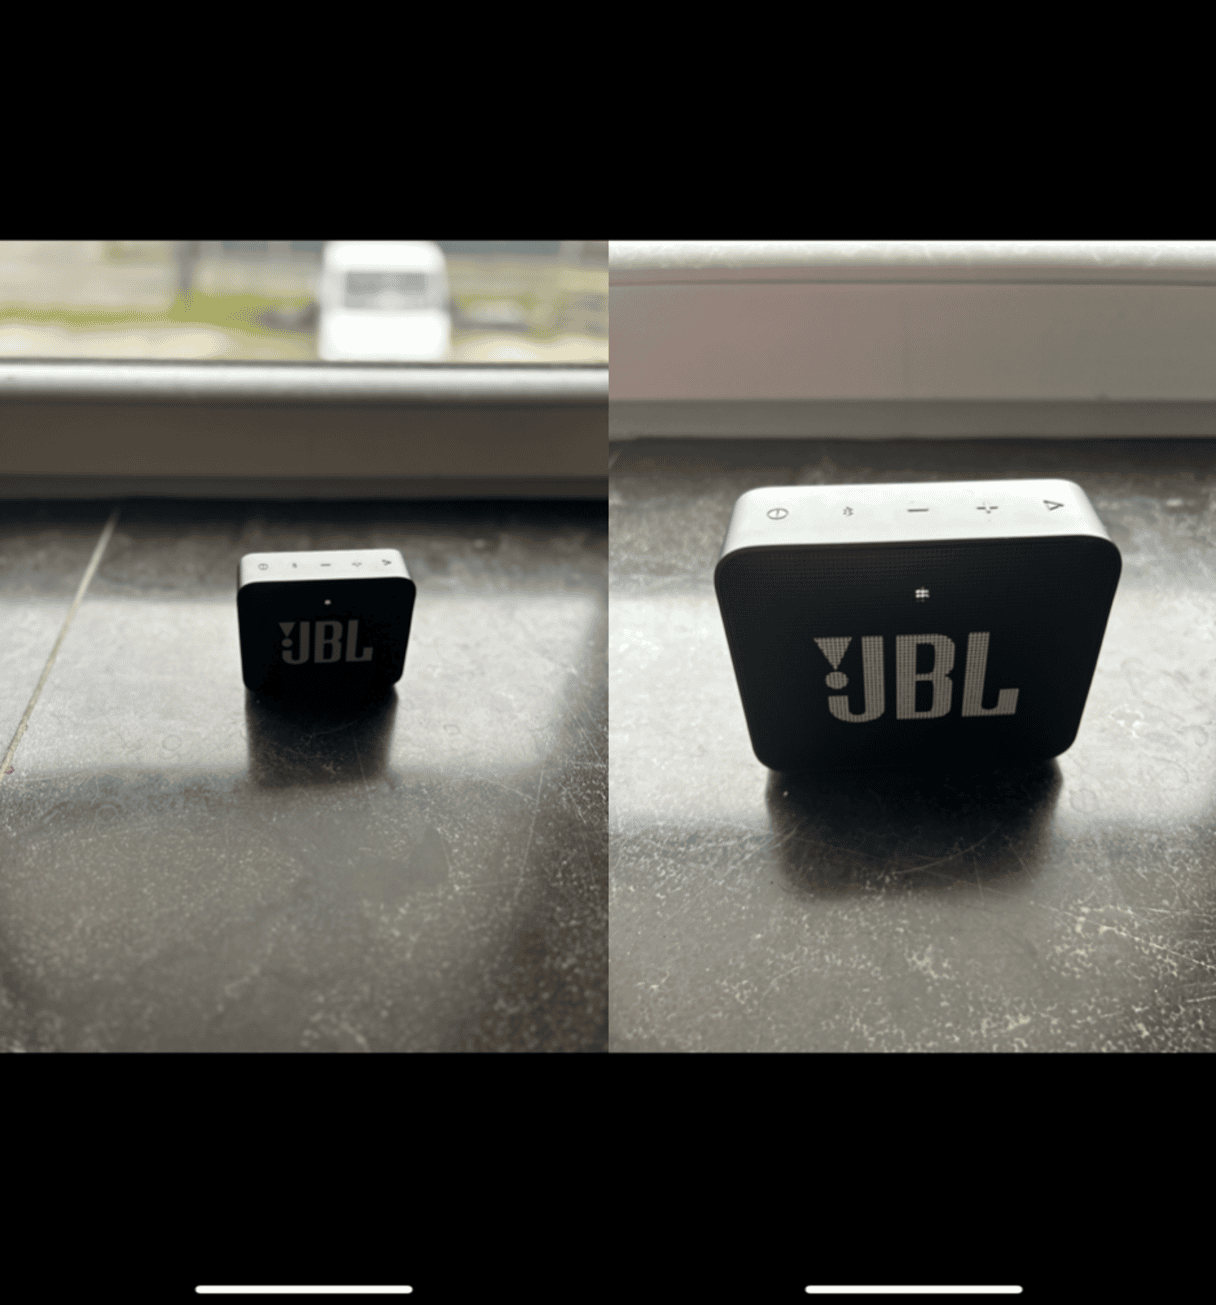
How to take a photo with a blurred background on older iPhones
Getting a nicely blurred background with an older iPhone just takes some experimenting. Here’s how to create a lovely blur on an older phone.
- Open your iPhone’s Camera app and find a nice subject to practice with.
- Stand about 4 feet from your subject and frame your shot on your screen.
- Tap the subject to create the best focus and lighting.
- Tap your camera’s shutter button.
- Move closer to your subject in increments, getting as close as possible without adding blur to your main subject.
- For best results, snap your photo when your subject is focused and your background is nicely blurred.
Method 3. Use a free app to blur the background
Our last option for blurring the background of your iPhone photo can be used no matter what model of iPhone you own. These apps apply tools that blur your background after you take your photo, so you can use them on photos taken years or minutes ago. Many different apps that can create a blur effect, but Snapseed is free and includes an array of photo editing tools.
How to blur photos on iPhone using Snapseed
- Download Snapseed and open it on your iPhone.
- Tap the screen to open your Photo library and choose a photo that you want to edit.
- Tap Tools and scroll through the options. Then tap Lens Blur.
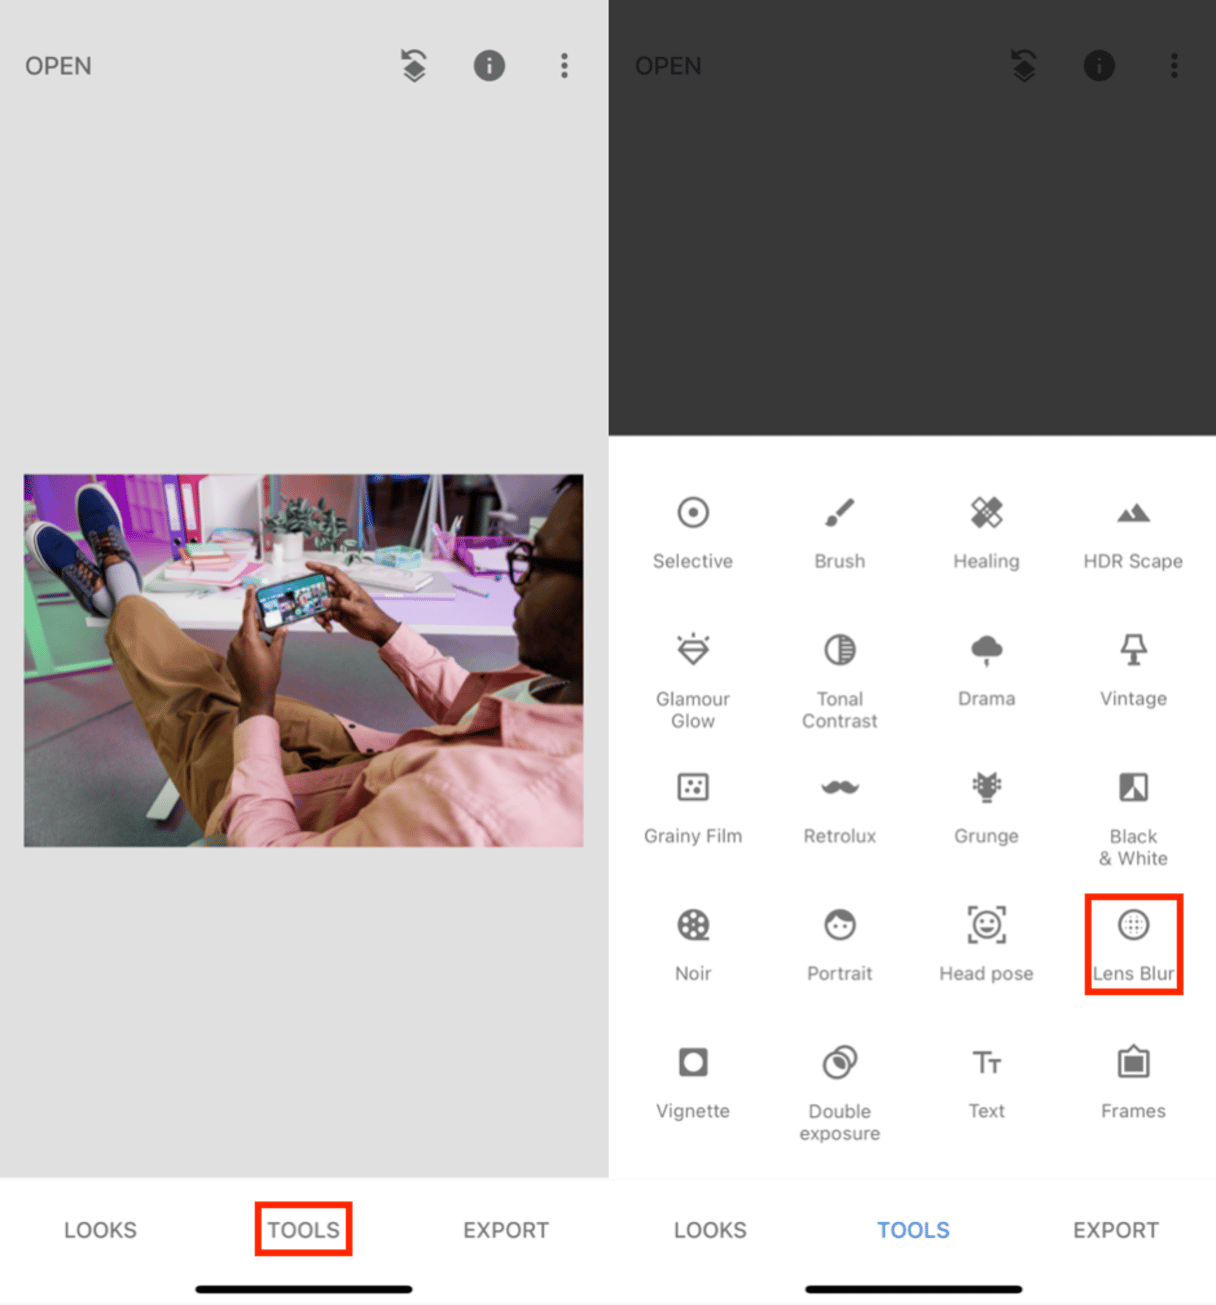
- Your photo will appear on the screen with a circle framing the area to keep in focus.
- Pinch your fingers together to make the circle smaller or to elongate it around your subject.
- Tap the edit slider at the bottom of the screen to make further adjustments, including the strength of the blur, the size of the transition, and the vignette strength.
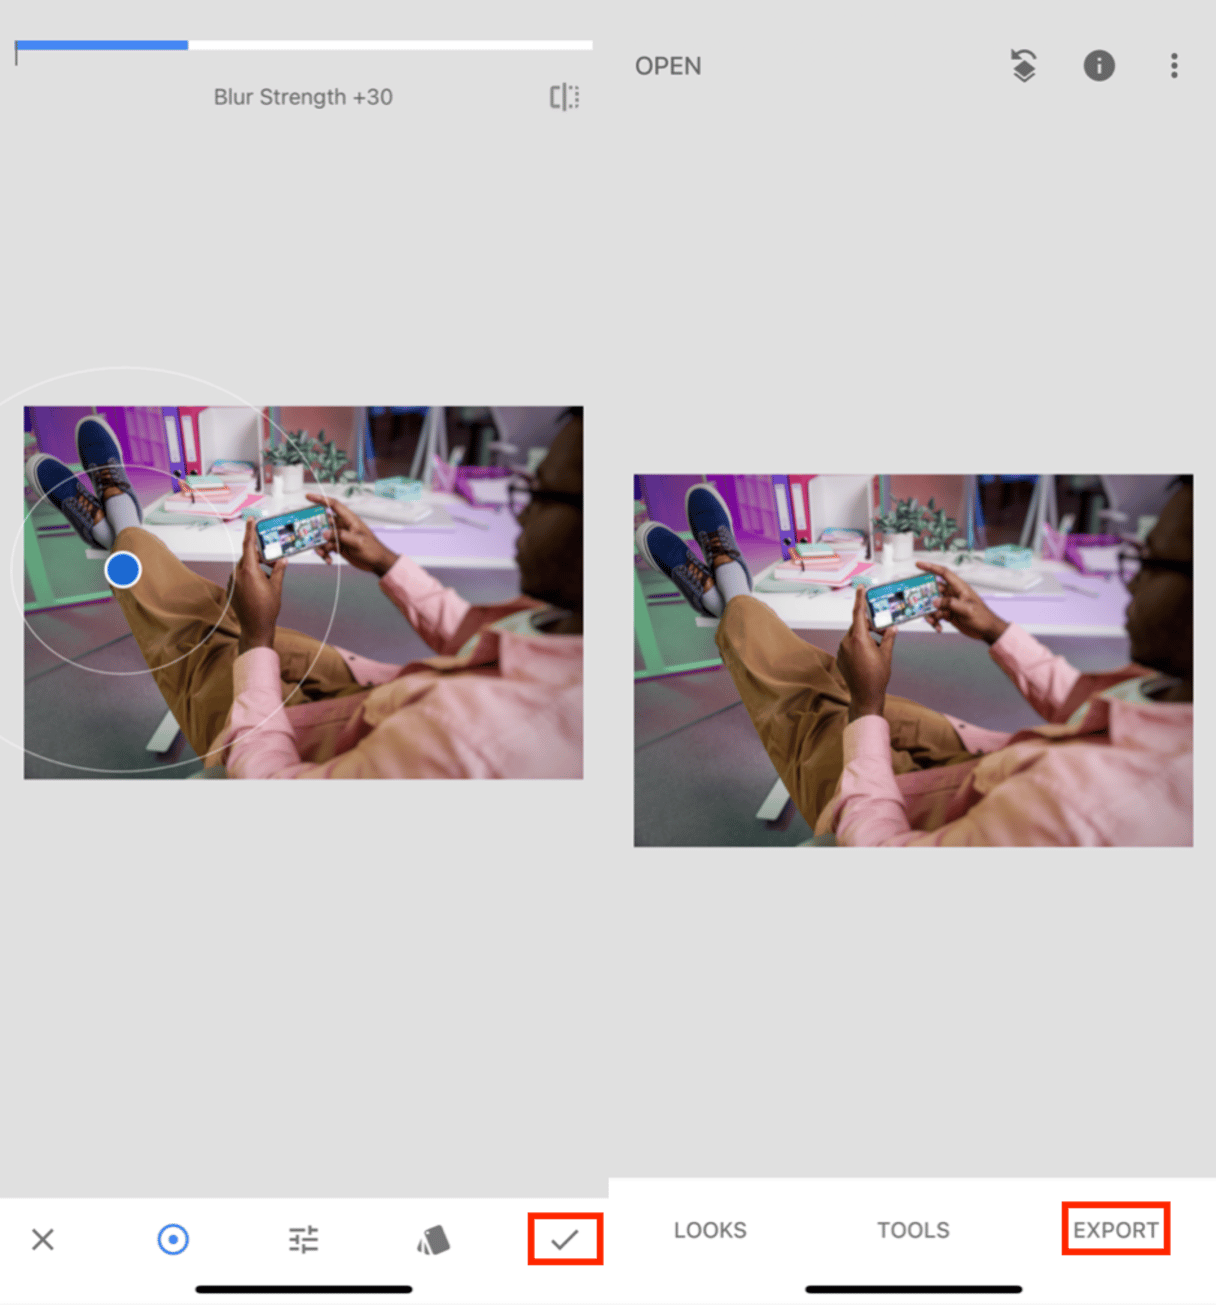
- When you are happy with the results, tap the checkmark in the lower right.
- Choose Export, then Share or Save.
Blurring the background is one of the best ways to create a stunning portrait or make your subject stand out. If you're using an iPhone camera, you have plenty of options to blur the background for awesome effects in all your photos. Keep in mind, it is all about using the right tools and having the right knowledge. We hope the piece above offers you both.


