Are you still shooting in auto mode? There’s nothing wrong with using the auto setting on your DSLR, but learning to use manual camera settings will give you more control over your photos, allow you to shoot in all types of lighting conditions, and encourage you to shoot more creatively.
DSLR settings are designed to give you, the photographer, ultimate control over how your camera captures images. The good news is that you don’t have to learn your digital camera settings all at once. You can take it one step at a time to see results. In this post, we’re going to look at the three major camera settings — shutter speed, ISO, and aperture.
How to use manual camera settings
While shooting in manual mode on your camera may seem daunting, it really just takes an understanding of exposure and a lot of practice. The three settings discussed in this article make up what’s commonly referred to as the exposure triangle. ISO, shutter speed, and aperture all are used to change how much light enters your camera’s lens to properly expose a shot.

Switching to manual mode on your camera
When your camera is set to automatic mode, it reads the scene you’re shooting and makes adjustments to the aperture, shutter speed, and ISO to capture an accurately exposed photo. For the most part, your camera does an excellent job choosing which settings to use for any given situation.
Manual mode, by contrast, allows you to to take creative control of your photos. Changing just one aspect of the exposure triangle allows you to shoot portraits with beautiful bokeh and a shallow depth-of-field, create motion blur when shooting waterfalls, freeze action when shooting wildlife or sporting events, and capture low-light scenes with ease. How to actually change your settings and use your camera in manual mode will depend on your camera’s make and model, so your homework is to read your camera’s manual and figure out how to manually adjust your settings.
Before you start experimenting in manual mode, make sure you have a system for keeping your photo collection under control. As you learn your camera’s settings, you will likely take hundreds of photos. A duplicate finder like Gemini 2 for Mac will let you easily get rid of unneeded similar shots that you take while trying various settings. It’s free to download, so go ahead and give it a try.
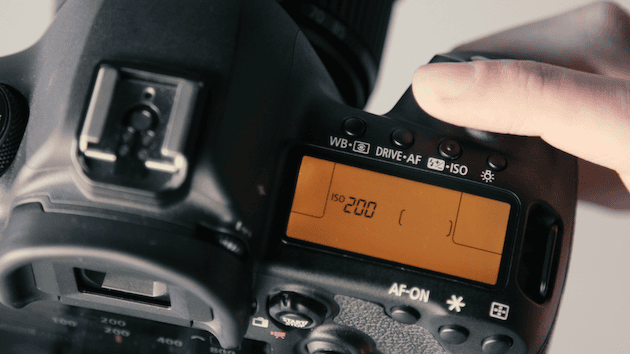
ISO: Your camera’s sensitivity to light
ISO stands for International Organization for Standardization. It’s a governing body that standardizes sensitivity ratings for cameras. Adjusting the ISO setting on your camera will allow you to shoot in different lighting conditions with ease, but depending on the size of your camera’s sensor, adjusting to a higher ISO may come at a cost.
What is ISO?
The term ISO was carried over from the days of film cameras, when you had to buy a certain film speed, depending on what type of photos you were shooting. Thanks to digital technology, film speed is a thing of the past, but we’ve kept ISO to enable photographers to adjust the camera’s sensitivity to light.
What ISO setting should I use?
This is the million-dollar question, and of course, the answer to which ISO camera setting you should use is: it depends. As a general rule, the darker your environment, the higher your ISO setting should be. Typical DSLR settings have an ISO sensitivity that ranges from 100, which is low sensitivity, to 12,000 or more, which is highly sensitive.
Higher ISO settings will affect image quality, especially if you’re shooting with a cropped sensor. A high ISO setting will often result in a noisy or grainy image, and it will also affect the dynamic range and color of your photo.
Learning which ISO to use in a given situation will take some experimentation, but in general, you should use the lowest ISO setting you can get away with. The more light you have to work with, the lower your ISO setting can be. Using a tripod will allow you to use a lower ISO setting when shooting in low light. Here are some general guidelines for ISO settings in different situations.
- 100 - 200 ISO: for sunny days
- 300 - 500 ISO: for cloudy days or indoor shots with bright window light
- 600-1,000 ISO: for indoor shots with natural light or evening shots with low light
- 1,000 + ISO: for handheld indoor shots in low light and shots taken after sunset without a tripod.
How to set ISO on a camera
The steps you need to take to change the ISO sensitivity varies depending on your camera. You can’t change ISO settings in automatic mode or any of the preset scene modes, so the first thing you will have to do is to change your camera over to manual, aperture priority, shutter priority, or program mode. Some DSLR cameras will have a dedicated ISO button or wheel. If your camera doesn’t, you will have to change the ISO setting in your menu or quick menu.
Shutter speed: How long your shutter stays open
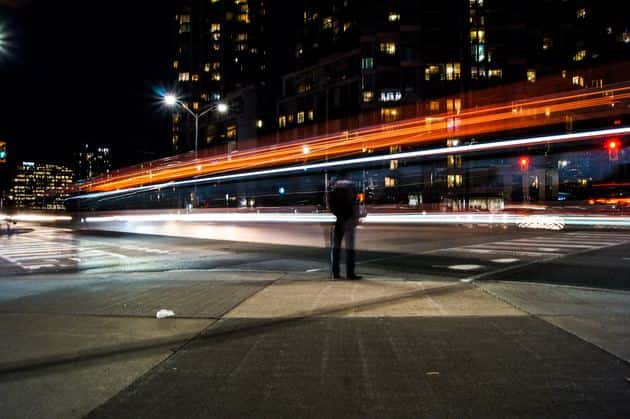
The longer your shutter is open, the more light you will let into your camera’s sensor. Changing your shutter speed is very useful for freezing action, creating blur, and shooting at night. Let’s take a look at how shutter speed can affect your photos.
What is shutter speed?
Shutter speed is basically how long your shutter is open when you click the shutter button. It’s measured in seconds and fractions of seconds. The larger the denominator, the faster your shutter. Most DSLRs can shoot up to 1/4000 of a second. When you’re working with very slow shutter speeds, they will be measured in seconds and look like a number with a “ after it. Shooting with a shutter speed greater than about 1/30 of a second will require using a tripod or setting your camera on a sturdy surface to avoid camera shake.
How do I choose shutter speed?
The shutter speed you choose will depend on the effect you’re hoping to achieve and the amount of movement you’re capturing. The longer your shutter is open, the more likely your camera is to shake and blur your photo.
- For capturing everyday scenes such as landscapes, portraits, and architecture, you’ll probably use 1/60 of a second or faster.
- If you’re shooting a sporting event or a street scene with lots of movement, you’ll want to increase your shutter speed to freeze the action. Faster shutter speeds will allow less light to hit your camera’s sensor, which means you may need to adjust to a higher ISO so that your photos aren’t underexposed.
- Slower shutter speed is great for capturing movement, too — just in a different way, turning it into beautifully blurred scenes. Those silky-smooth waterfall shots that adorn catalogs and greeting cards? They were probably shot with a 1/10 or slower to blur the water.
- Slow shutter speeds are also great for night shots when you want to let in as much light as possible, so that your scenes are properly exposed. Most night shots using a slow shutter speed require a tripod to produce a crisp image.

How to change shutter speed
Most DSLR cameras have a dedicated wheel for changing shutter speed, allowing you to adjust it on the fly. However, that setting is available only in manual and shutter priority modes. In shutter priority mode, when you adjust the shutter speed, your camera automatically adjusts the aperture, which is the next camera setting we’ll be covering.
Aperture: How big the opening in the lense is
Of the three basic camera settings mentioned here, aperture is the least understood. Learning to use aperture correctly when taking photos will allow you a lot of creative control over your images. Adjusting aperture will enable you to create beautiful bokeh and blurred backgrounds, adding depth to your photos.
What is aperture on a camera?
Like shutter speed, aperture focuses on how much light hits your camera’s sensor. But while shutter speed refers to how long your shutter stays open, aperture refers to the size of the opening in your camera’s lens. When you press the shutter button, a hole in your camera’s lens opens up and allows the lens to capture the scene. A smaller hole will allow less light into your camera, and a larger hole will allow more. Aperture settings are measured in f-stops, and on most DSLR cameras they range from f-1.4 to f-29.
Ready for the tricky part? Setting your camera to a lower f-stop means that it’s set to a higher aperture and larger opening. Setting your camera to a higher f-stop decreases the aperture and the opening. The lower the f-stop number, the more light will hit your camera’s sensor.
Using aperture to change your depth of field
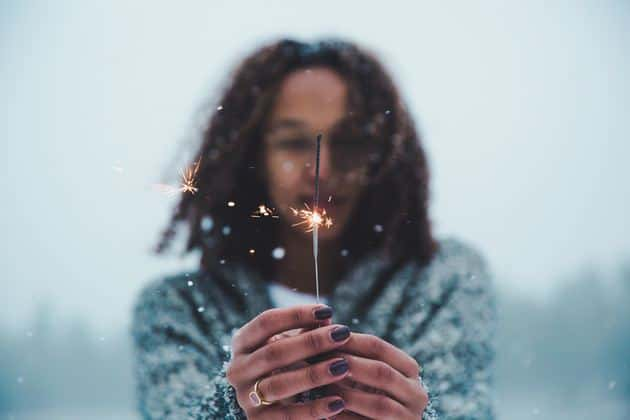
Depth of field is the share of your shot that is in focus in your frame, from front to back. A large depth of field will keep most of your photo in focus — foreground, middle ground, and background. A shallow depth of field will allow you to selectively focus on your subject, and keep the rest of the frame blurry, or out of focus. You can change your depth of field with the aperture setting. The lower the aperture (higher f-stop), the larger the depth of field.
In short, this is how your camera’s aperture setting affects depth of field:
- Higher aperture = lower f-stop = larger depth of field (entire frame in focus)
- Lower aperture = higher f-stop = more shallow depth of field (blurred background)

What should my aperture setting be?
When choosing your aperture setting for a given shot, there are two things you should consider. The first is depth of field, mentioned above. If you’re shooting a portrait and want to blur the background, opt for a larger aperture. If you want all of your scene to be crisp and clear, as in a street scene or a landscape, opt for a smaller aperture.
The second thing you should consider when choosing aperture is your subject and the lighting. A larger aperture will let more light into your camera, which means you can shoot at a faster shutter speed. Low aperture settings are useful when combined with a fast shutter speed for capturing action shots. A large aperture is also useful in low-light situations, because it lets in more light to properly expose your shot.
If you set your camera to aperture priority mode, your camera will automatically adjusts the shutter speed as you adjust the aperture, allowing for proper exposure. This is very useful if you’re still learning or don’t have time to change all of your settings between shots.
How to increase and decrease aperture
Where you find the aperture setting on your camera will depend on its make and model. Entry-level DSLRs may require you to hold down a button while turning the shutter-speed wheel. Higher-end DSLRs will have a dedicated wheel for aperture, so you can quickly change it along with your shutter speed. Check in your camera’s manual to find learn more about aperture settings on your model.
The exposure triangle settings — ISO, shutter speed, and aperture — are all related. Generally speaking, when you increase one, you should decrease one or both of the others to achieve a properly exposed shot. Juggling these manual settings on your camera may seem confusing at first, but the more you experiment, the more confident you’ll become.


