If you’ve decided to install macOS Sequoia, you may know that there are several options for doing it. You could head to Software Update in System Settings, or you could download it from the App Store and download it there. When you do that, the installer launches automatically and walks you through the process of upgrading. The problem with those two options is that, while they are easy to do, they install macOS Sequoia over the top of your existing OS. That means that any file conflicts or other problems will remain and may impact Sequoia. The solution is to clean install Sequoia. We’ll show you how to do that.
What is a clean install?
When you install a new version of macOS using Software Update or the App Store, it installs the new OS on top of the old one. Settings files, old cache files, and other data you don’t need remain on your Mac. When you clean install, you delete your Mac’s startup disk completely before you install the new version. In other words, you start with a clean slate. That means that any problems you were having previously shouldn’t reoccur.
It’s worth noting that when you erase your Mac, all the fingerprints you use with Touch ID and all the card details and passwords you have stored will be deleted. If you sync passwords and card data with iCloud, they will be re-synced. However, you will have to set up Touch ID again from scratch.
Before you clean install macOS Sequoia
If the reason you want to clean install macOS Sequoia is that your Mac is misbehaving and you think the solution is to wipe everything and start again, there is one thing you should try first. Scan your Mac for junk files, opportunities to optimize performance, and malware. Junk files include temporary files that were never deleted, old cache files, and settings files for apps that are no longer on your Mac. They don’t just take up lots of space; they can cause conflicts with other files, meaning your Mac slows down or becomes unstable. And we all know the kind of problems malware can cause. Optimizing performance means running some maintenance tasks.
Doing all that manually would be very time-consuming and difficult to do because you’d have to hunt down all those junk files yourself. Thankfully, you don’t have to do it manually. CleanMyMac’s Smart Care feature can do it for you. It scans your Mac, looking for junk files, malware, and speedup tasks. And, importantly, when it’s done, you can either click the Run button or choose what to delete and which speedup tasks to run. You can download CleanMyMac for free here.

How to clean install macOS Sequoia
If you still want to reinstall macOS Sequoia and give it a fresh start, choose the way that works best for you.
Back up your Mac
The most important step in this process is the first one. Back up your Mac. If you don’t, you will lose all the data on it. It’s best to use Time Machine for this because it makes it easier to restore files later. But you can use any backup tool.
Create a bootable installer
Once you’ve backed up your Mac, the next step is to create a bootable macOS Sequoia. That way, when you’ve deleted everything on your startup disk, you can boot from the USB installer.
- Grab a USB stick with a capacity of at least 16GB. Connect it to your Mac and use Disk Utility to erase it, formatting it as APFS and naming it ‘macOS Sequoia installer’.
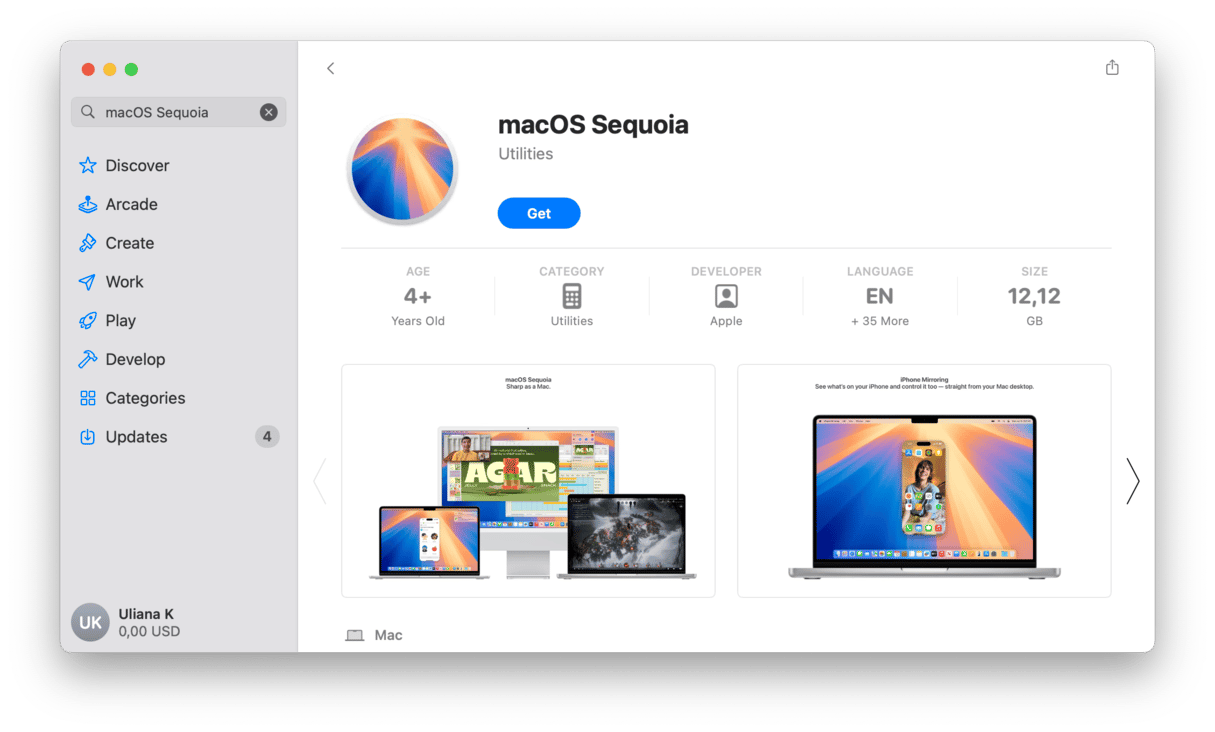
- Next, open App Store and search for ‘macOS Sequoia’. Click Get and wait for it to download.

- When the installer has finished downloading, it will open automatically. Press Command-Q to quit.
- The installer file will remain in your Applications folder.
- Go to Applications > Utilities and open Terminal.
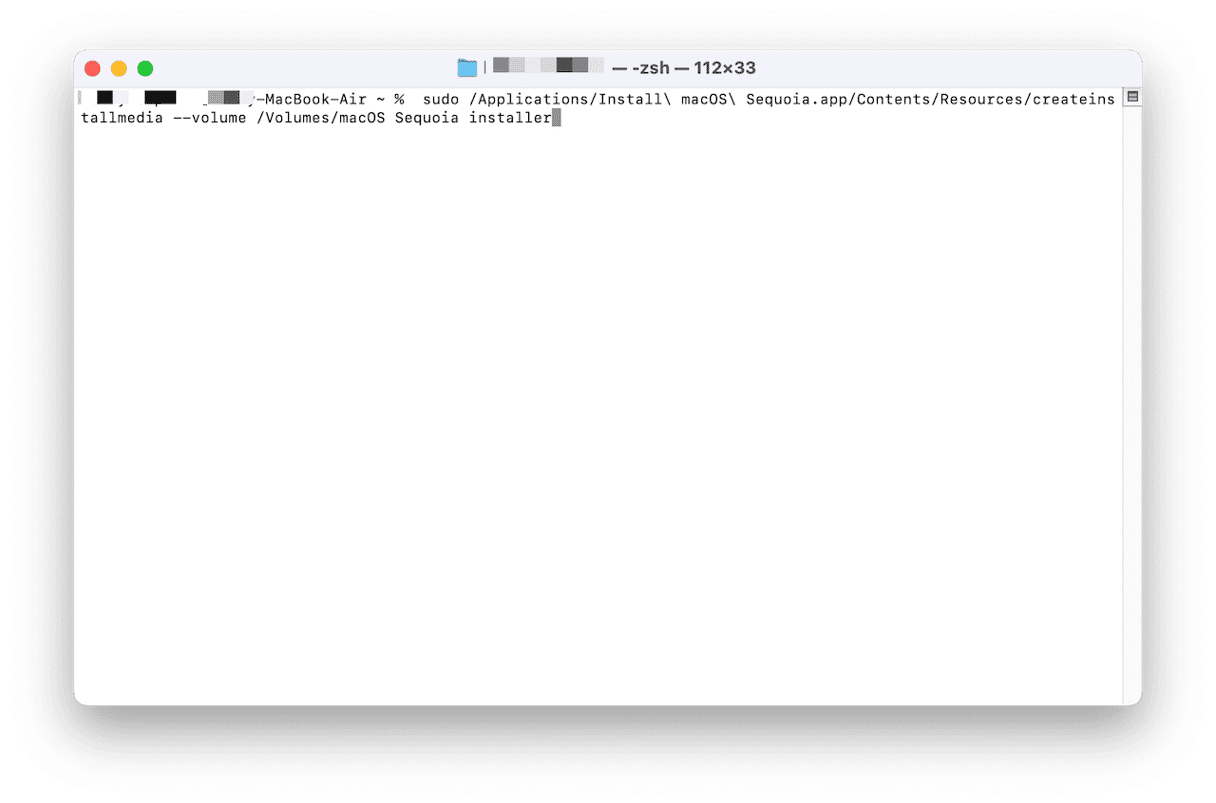
- Type or paste the following command:
sudo /Applications/Install\ macOS\ Sequoia.app/Contents/Resources/createinstallmedia --volume /Volumes/macOS Sequoia installer - Press Return.
- Type in your admin password if requested.
- Wait for the installer to be created.

Once the Terminal command has been executed successfully, you will have a bootable macOS Sequoia installer on the USB stick.
Erase your Mac
Now that you’ve created the bootable installer and backed up your Mac, it’s time to wipe your startup disk. The process for doing that is different for Intel-based and Apple silicon Macs. If you have an Intel Mac with a T2 chip, follow the steps for Apple silicon.
Apple Silicon and Intel Macs with T2 security chip
- Click the Apple menu and choose System Settings.
- Go to General > Transfer and Reset.
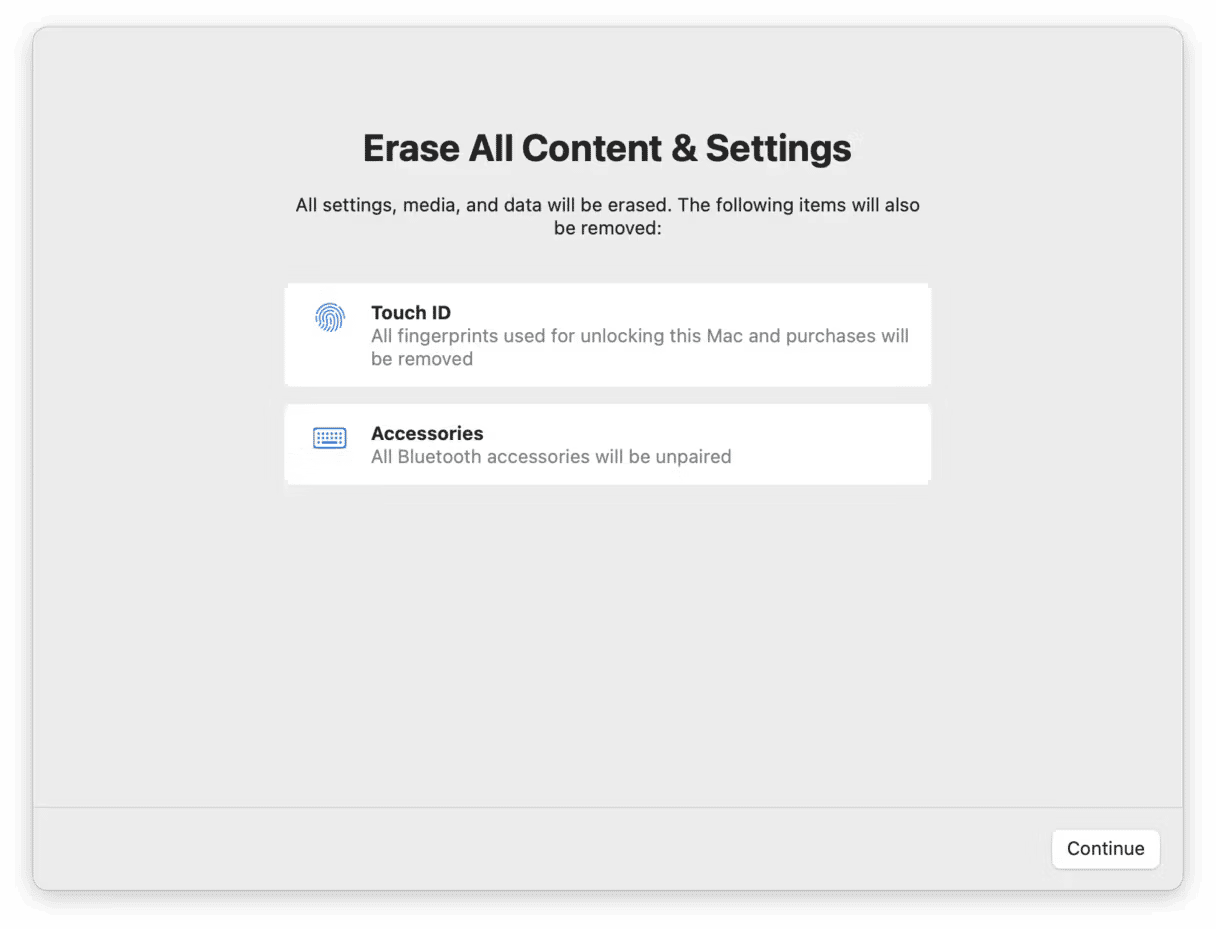
- Choose Erase all Content and Settings.
- Follow the instructions on the screen to erase your Mac.

Intel-based Mac
- Shut down your Mac.
- Press Command-R and the power button to boot into recovery mode.
- When your Mac has booted, choose Disk Utility from macOS Utilities.
- Select your startup disk in the sidebar.
- Click Erase and format the disk as APFS.
Install macOS Sequoia
Once you have erased your Mac, make sure the USB stick with the installer on it is connected to your Mac.
- Reboot your Mac. On a Mac with Apple silicon, press and hold the power button until you see the startup options screen and choose the USB installer. On an Intel-based Mac, hold down Option when you press the power button and choose the USB installer when asked.
- Wait for your Mac to boot.
- The installer will start automatically.
- Follow the instructions on the screen to install macOS Sequoia and set up your Mac.
How to reinstall macOS Sequoia
If you need to reinstall macOS Sequoia in the future, you can either boot from the USB installer you just made and reinstall from there or boot your Mac in recovery mode and choose ‘Reinstall macOS Sequoia’.
And that’s how to clean install macOS Sequoia. There are quite a few steps, but it’s not difficult, despite the need to use Terminal. Just make sure you back up your Mac before you start.


