Every year, when Apple launches a new version of macOS, it also lists which Macs the new OS is supported to run on. And every year, a few older Macs drop off that list. Some Macs that were supported to run Sonoma are not on the list for Sequoia. That’s not Apple being mean; it’s just a fact of technology — each new OS is more demanding on resources than the one before, and, at some point, developers have to focus resources on new features and newer Macs instead of making accommodations for older models. However, just because a Mac isn’t supported to run a new OS doesn’t mean it can’t. You may still be able to install it using a workaround. In this article, we’ll show you how to install macOS Sequoia on an unsupported Mac.
Should you install macOS Sequoia on an unsupported Mac?
That’s a question only you can answer. Apple clearly doesn’t think so. On some Macs that are not supported to run Sequoia, the decision to drop them may have been because the resources required to provide that support were considered too great. For other Macs, it may be that they are genuinely incapable of running it. There’s no way of knowing which applies to your Mac. It could be that you follow the instructions below, and your Mac won’t boot or that it boots but crashes all the time. You should be prepared to take that risk if you proceed.
Before you start
- Back up your Mac. Don’t proceed any further without doing that. There is a serious risk of data loss. It’s best to use Time Machine, because it makes it much easier to restore later on if you need to.
- Prevent problems before you upgrade. You can’t eliminate every potential issue when you install macOS Sequoia on an unsupported Mac. But you can minimize the risk by preparing your Mac before you start. That means clearing out junk files to free up space and prevent possible conflicts in the future, scanning for malware, and optimizing performance by running maintenance tasks. The easiest way to do that is to use CleanMyMac’s Smart Care feature. With one click, it scans your Mac and allows you to get rid of all the junk and any malware it finds with a couple of clicks. It also performs speedup tasks. You can download CleanMyMac for free here.

How to install macOS Sequoia on an unsupported Mac
You’ve probably already realized that you can’t just go to Software Update or the App Store and download macOS Sequoia on an unsupported Mac. First, you need to install another piece of software — OpenCore Legacy Patcher. It patches your Mac so that it bypasses the checks Apple makes to ensure you’re installing macOS on a supported Mac.
You will also need a Mac that is supported to run Sequoia in order to download the installer. And a USB stick with a capacity of 16GB. Here’s what you need to do:
- Plug the USB stick into your Mac, open Disk Utility, select the USB stick in the sidebar, and click Erase. Format the stick as MacOS Extended (Journaled) and name it Sequoia.
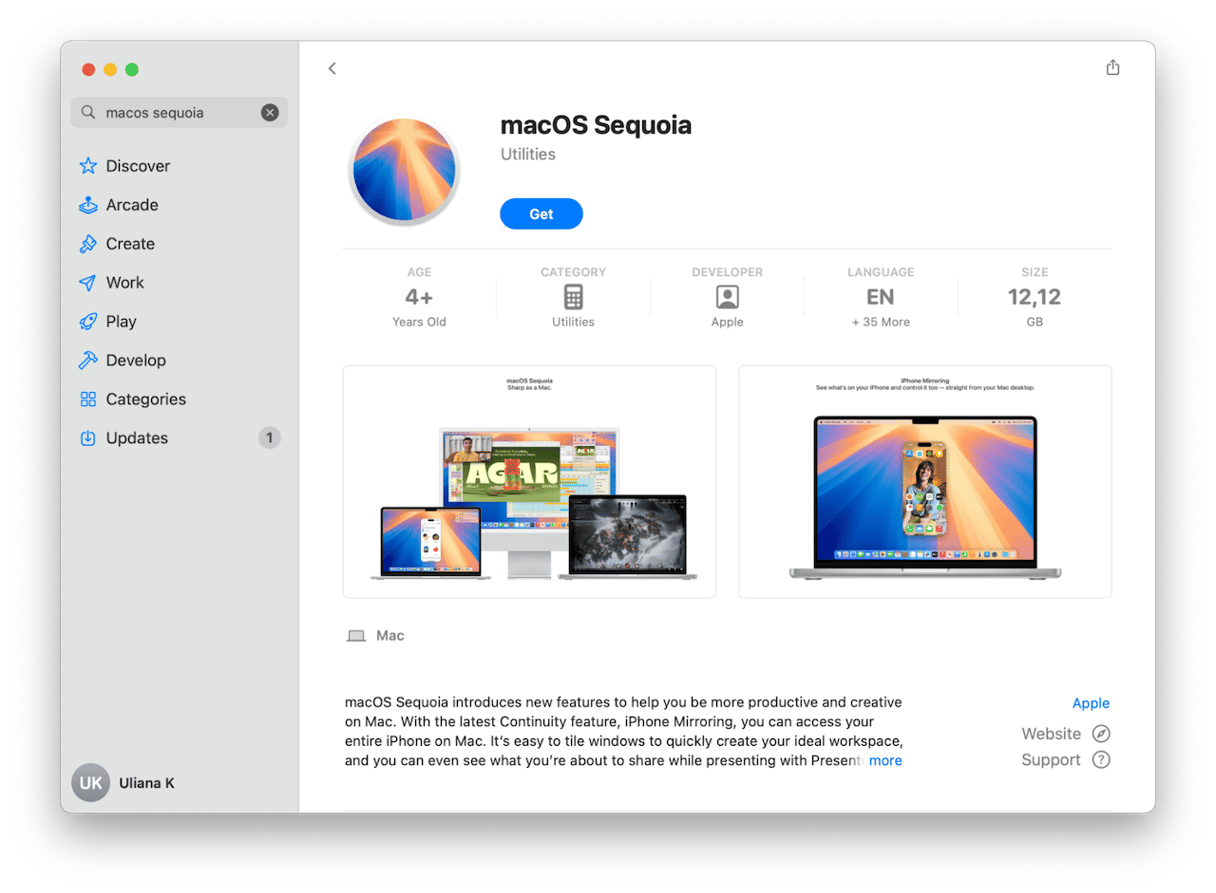
- On the Mac that is supported to run Sequoia, open the App Store app and search for Sequoia. When you find the macOS Sequoia installer, click Get.
- When the installer has downloaded, it will launch automatically. Quit it as soon as it does and then go to your Applications folder to check if the installer file is there.
- Go to the OpenCore Legacy page here and click Getting Started to download it.
- With the USB stick plugged in, launch OpenCore Legacy when it has downloaded and choose Build OpenCore.

- Follow the instructions on the screen to build the OpenCore package for your Mac. If you need to, you can check the model of your Mac in Apple menu > About This Mac. Here, it’s the model of the Mac on which you want to install Sequoia you need.
- When it’s finished, go to Install OpenCore.
- Follow the instructions on the screen to create a bootable installer on the USB stick.
- When the installation has finished, you will have a bootable USB installer that will bypass the usual checks on the hardware configuration of your Mac, so you can use it to install Sequoia on any Mac. Eject the USB stick and disconnect it.


Now, take the Mac on which you want to install Sequoia and follow these steps:
- Plug the USB stick into your Mac.
- Shut down the Mac and then start it while holding the Option key.
- When you’re asked to choose a startup disk, choose the USB stick.
- When you see macOS Utilities, choose Install macOS.
- Select your Mac’s internal disk and follow the instructions on the screen to install Sequoia.
When the installation has finished, your Mac will restart, and you will be taken through the usual steps to create a user account, connect to a Wi-Fi network, and complete all the other tasks you usually have to complete when you set up a new Mac. Once you’ve set it up, you should be able to use Sequoia, though you might have to make some adjustments, like reducing the animations in System Settings > Desktop & Dock. Remember that Sequoia is likely to place significant demands on your Mac’s resources, so it’s a good idea to only have a couple of apps open at any time and to keep the number of browser tabs you have open to a minimum.
Installing macOS Sequoia on an unsupported Mac is complicated and not without risk. You should only do it on a Mac you don’t need to use for work or anything else that’s important. Treat it as an experiment and see how it goes.