If you use Google’s Chrome web browser on your Mac, you’ll know that it’s an excellent browser because it’s fast, widely compatible, and integrated with Google’s other web services like Google Docs and Sheets. And if you log into your Google account while you use it, you can sync bookmarks and history with other devices on which you’re logged in. You’ll also know that Chrome can be very resource-hungry and use lots of memory and CPU cycles. It can also stop working properly sometimes. One way to fix those problems is to delete cache and cookie files. We’ll show you how to do that.
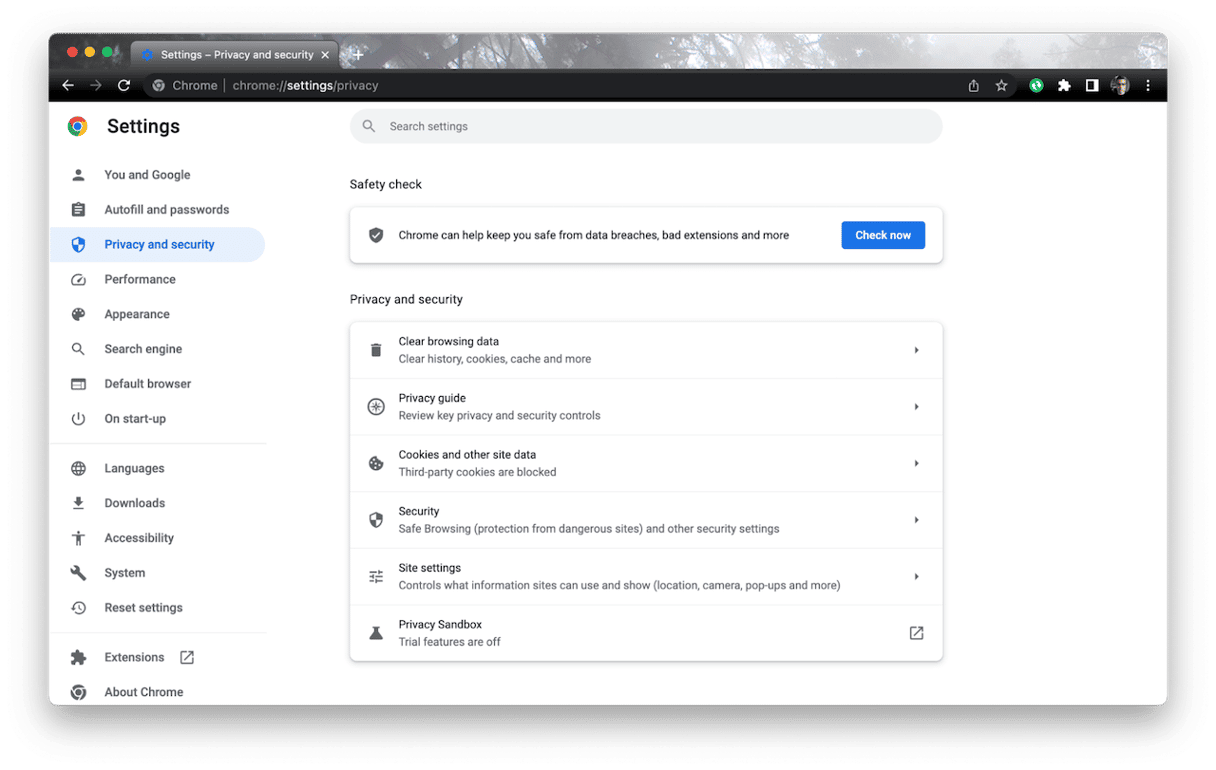
What is cache?
Cache files are data stored on your Mac by websites. They store assets from web pages, like images, so when you next visit the web page, instead of having to download the assets from the web server, Chrome can use the ones found on your Mac, which makes loading pages much quicker.
What are cookies?
Cookies are small text files placed on your Mac by websites you visit. They are used to store information about what you do on the website so that when you return another time, the information can be used to give you a more ‘personalized’ experience. Cookies can also be used to store information about you in order to show you adverts that reflect your interests. For example, cookies store information about your username on a site, the contents of a shopping basket, and any preferences you set while browsing the site.
How to delete cache and cookies on Mac Chrome the easy way
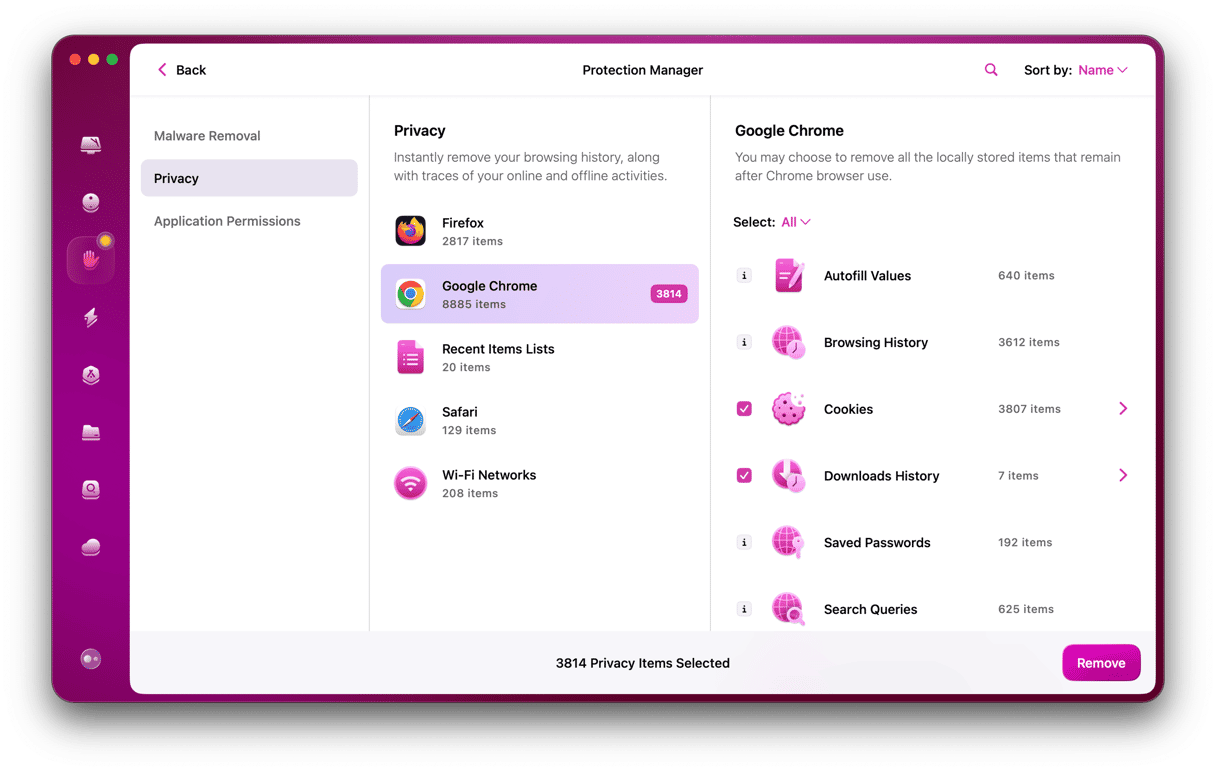
The easiest way to get rid of cookies in Chrome, as well as Safari and Firefox, is to use the Privacy module in CleanMyMac. It will also help you delete other browser data like saved autofill values, search history, and browser history. As a bonus, it can clear the list of Recent Items in the Finder, get rid of all the saved public Wi-Fi networks your Mac has saved, and manage permissions for apps to access things like your camera and microphone, giving a notable boost to your privacy. You can download CleanMyMac for free here and try it for yourself:
- Open CleanMyMac and select Privacy from the sidebar.
- Click Scan and wait for it to scan your Mac.
- When it’s finished, click Chrome and then select the box next to Cookies.
- Click Remove.
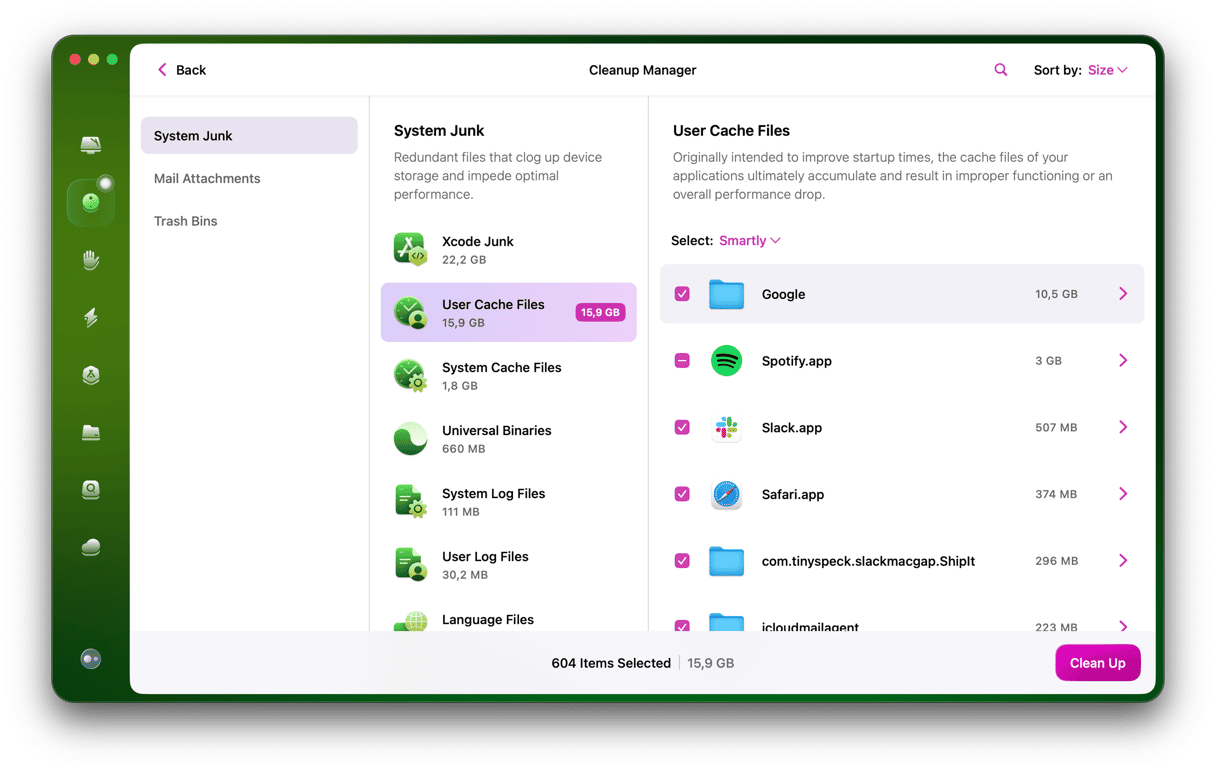
Now, to removing cache in Chrome on Mac. You can use another module that comes with CleanMyMac to do it with a few clicks — System Junk. It finds and safely removes all junk files from your Mac, such as language files you don’t use, system log files, universal binaries, document versions, and other unneeded files. Here’s how to use it:
- With CleanMyMac open, click System Junk > Scan.
- Wait for the scan to complete and click Review Details.
- To remove Chrome cache only, click User Cache Files and find Google Chrome.app cache. You can use search top right.
- Select it and click Clean.
- Alternatively, you can click Clean without reviewing details and give your Mac a thorough junk cleanup. Worry not, only the files that can be safely deleted are preselected for removal.
If you’d like to try manual cookies and cache removal, keep on reading.
How to clear Chrome cache manually
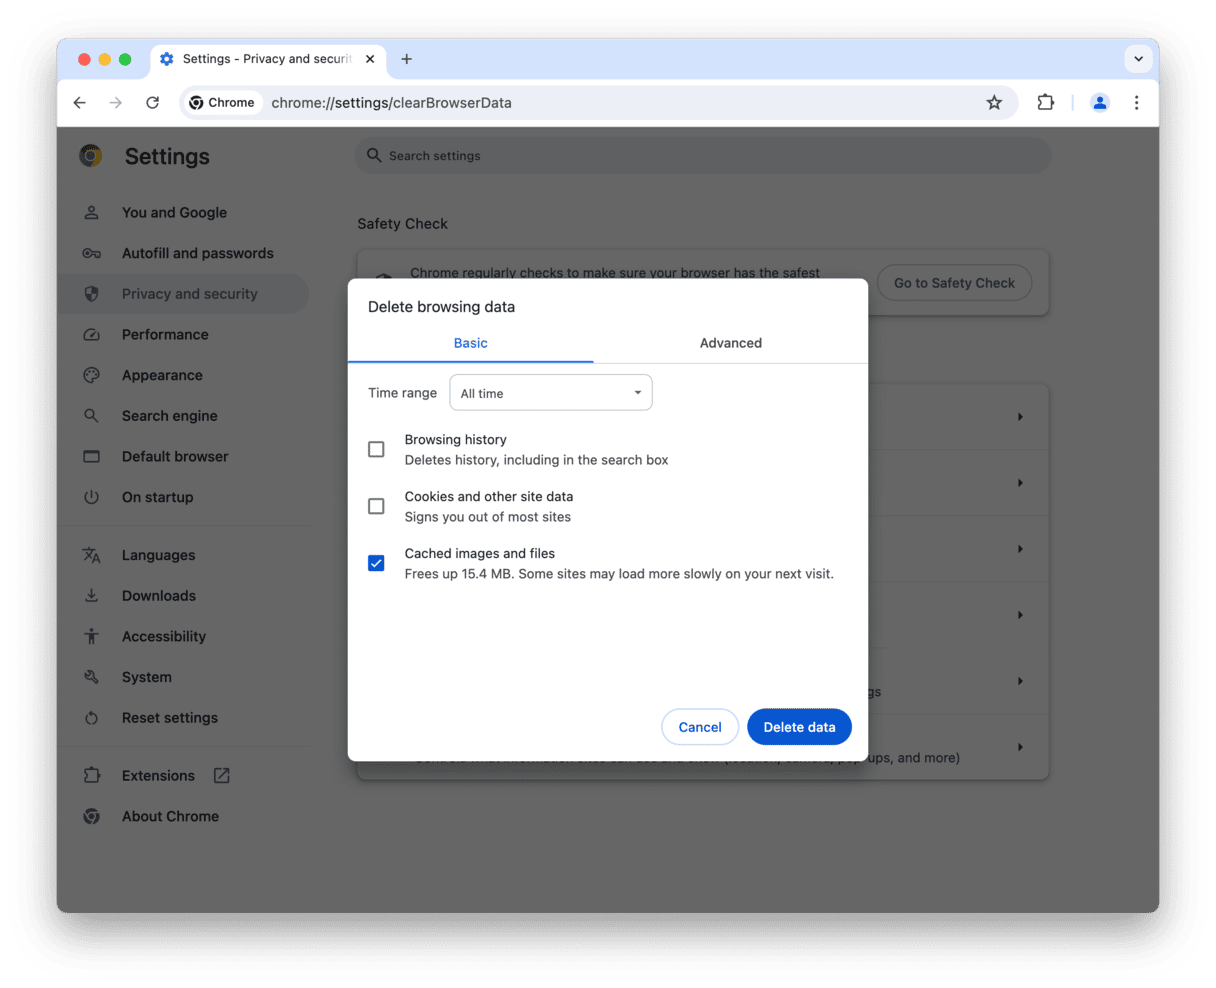
First, let’s remove cache from Chrome. Here’s what you need to do:
- In Chrome, click the three dots next to the address bar and go to Settings.
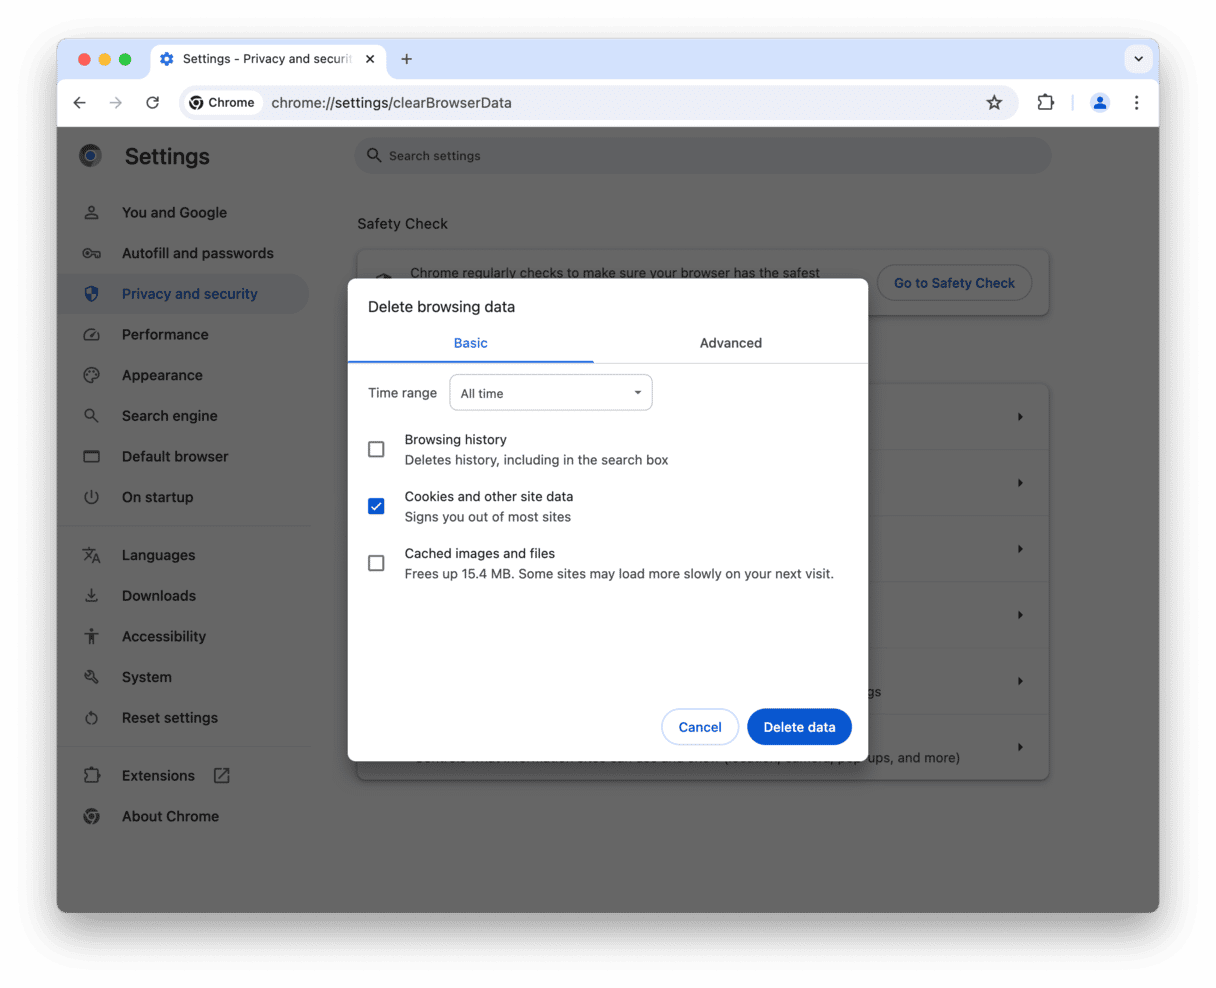
- Select Privacy and security, then Delete browsing data.
- Select the box next to Cached images and files.
- Click Delete data.
Now, to removing cookies in Chrome. The steps are just as simple as deleting cache.
How to clear Chrome cookies manually
Like with cache, it’s possible to remove Chrome cookies manually. Just follow these steps:
- Open Chrome and click the three dots at the right of the address bar.
- Choose Settings.
- Select Privacy and security in the sidebar.
- Click Delete browsing data.
- Select the box next to Cookies and other side data.
- Click Delete data.
Now that you know how to clear Chrome cache and cookies on Mac both manually and automatically, we have one final tip for you. Keep on reading to learn how to manage site data in Chrome.
How to manage cache and cookies preferences in Chrome
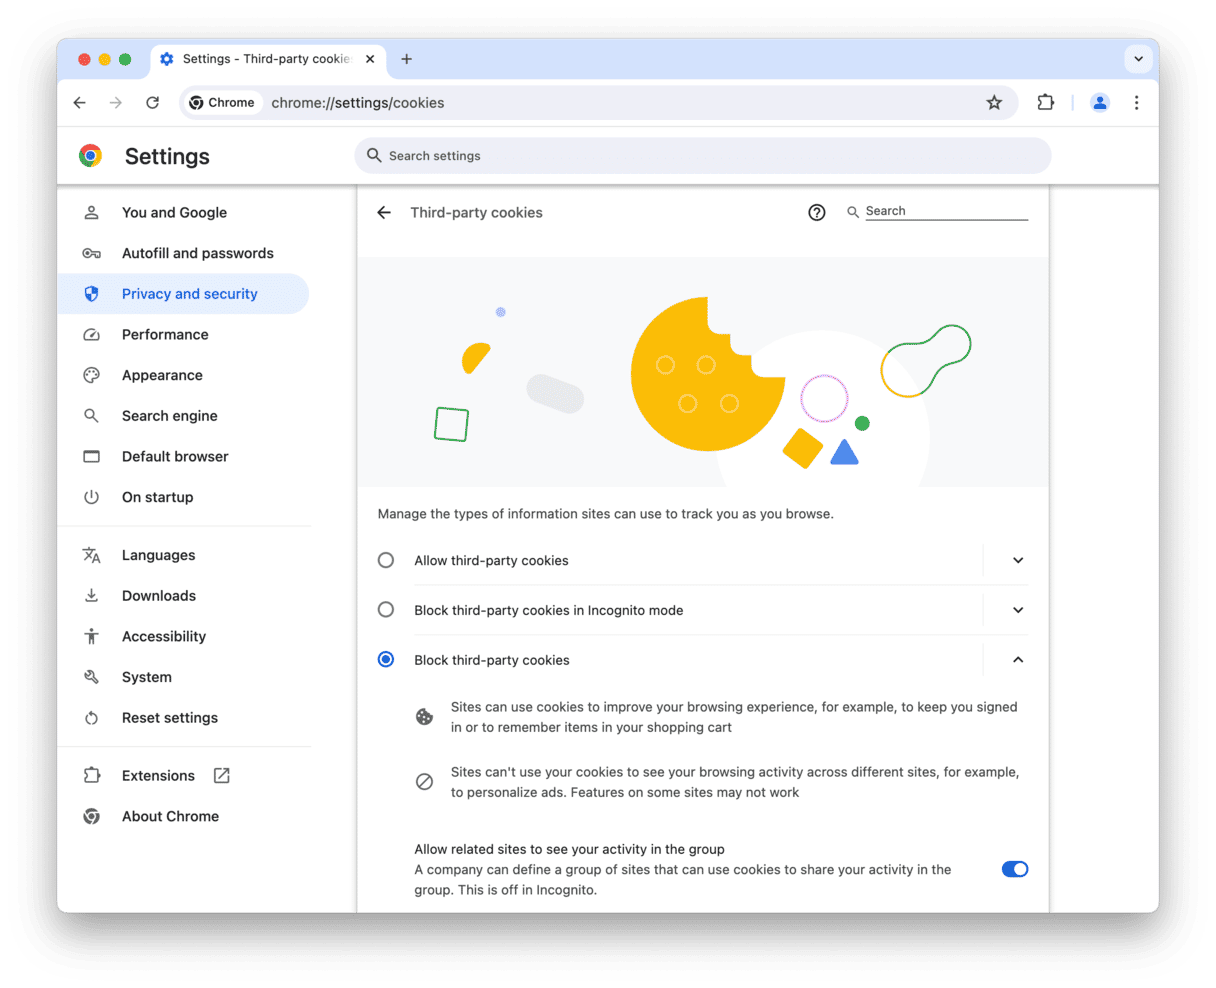
You can’t stop Chrome from caching files from websites to improve performance. And if you did, it would slow down your web browsing significantly, so there would be no reason to do it. All you can do is clear cache files using the steps above if it becomes a problem. You can, however, choose whether to allow cookies and which cookies to allow. In fact, Chrome gives you a great deal of control over cookies:
- Click the three dots at the right of the address bar in Chrome.
- Choose Settings.
- Select Privacy and security.
- Click Third-party cookies.
- Go through the options and decide which cookies to block and which to allow.
Chrome is an excellent browser that works very well most of the time. Occasionally, though, it can run into problems and perform very slowly or not load web pages at all. When that happens, clearing cache files can help. In addition to cache files, Chrome stores cookies on your Mac. These are text files that hold information about your activity on a website. You can delete these files if you’re worried about privacy online. Hopefully, after reading this article, you no longer wonder how to clear cache and cookies in Chrome.
Frequently asked questions
If I clear cache and cookies in Chrome, will it log me out of websites?
Yes, when you remove site data, login information is also deleted. So, after clearing out cache and cookies, you will have to enter your credentials once again and log in to all websites you need.
How often should I clear cache and cookies in Chrome?
Well, it all depends. If you are concerned about your privacy, you can do it once or twice a month. Or even after each browsing session, should you want to. If performance is more of an issue, do it every time you notice that Chrome gets slow or sluggish.
If I delete cache and cookies in Chrome, will it remove my saved passwords?
No, although it logs you out of all websites, it does not remove saved passwords that are stored in autofill data. You can manage those in Chrome Settings > Autofill and Passwords > Google Password Manager > Passwords.


