Whether you are using Apple’s Safari browser for business, education, or leisure, browsing safely and securely ensures that your privacy and information are protected.
One simple approach to protecting your privacy is to use Safari’s Private Browsing feature. This feature is already built into the application making it easy to surf the web securely on all your Apple devices.
Here, we’ll discuss a number of ways to ensure that your Safari browsing is kept private. We’ll also give some helpful security tips, from password safety to password-protecting your bookmarks.
What is a browser cookie?
A cookie is a small data file stored on your computer by a website. Websites use cookies to store unique data particular to a user and website. This information can be stored and used across multiple sessions and multiple websites. Why do this? The websites you’ve visited will load faster as well as provide you with a tailored and personalized experience based on your browsing history.
While having your browsing information stored across multiple sites may seem a bit alarming at first, cookies come in handy for many experiences, such as browsing e-commerce websites (like Amazon), as they provide a smoother online shopping experience.
However, there may be instances in which you’d prefer not to have your browsing history tracked. Maybe you’d like to add an extra layer of security and peace of mind. That’s where Safari’s Private Browsing feature comes into the picture.
(You can also check out our article on clearing your cookies from a normal Safari session)
How to block third-party cookies in Safari
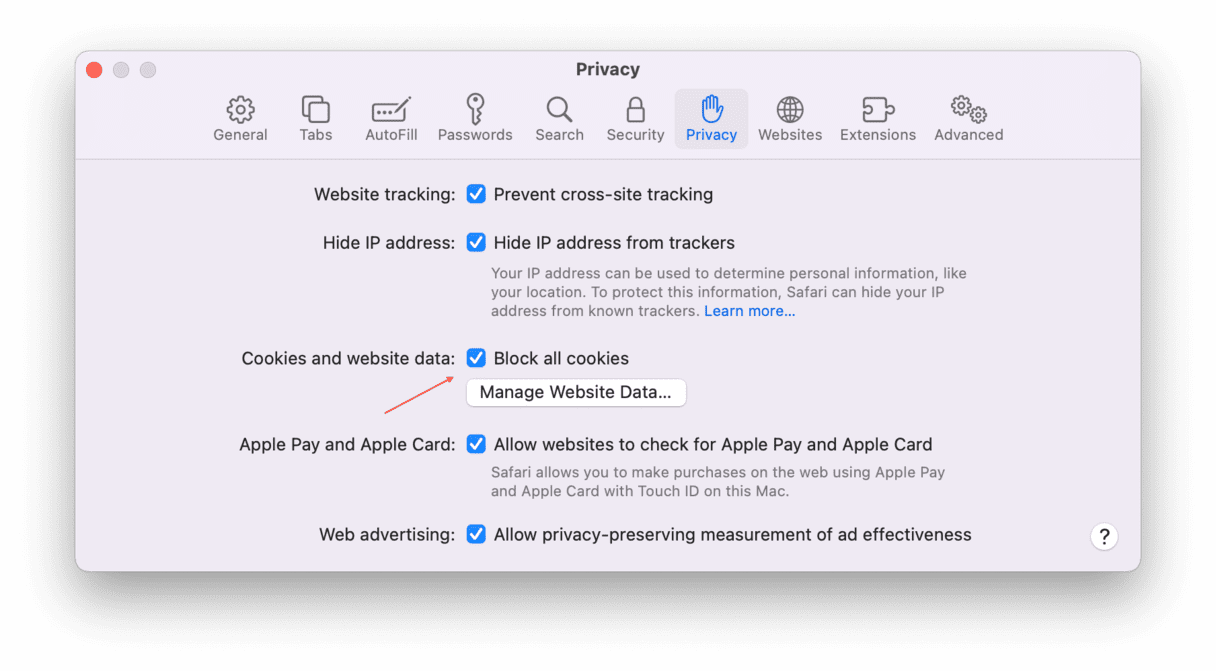
The Safari browser has an antidote to cookies. In Preferences, you can prevent the collection of tracking data along with all cookies from any website. That’s a bold move from Safari browser — in your face, Chrome!
- Choose Safari > Preferences > Privacy.
- Check “Block all cookies.”

What is Private Browsing in Safari?
When using Private browsing in Safari, the details and information of your browsing session are not saved on your local device or website servers. Additionally, the websites you visit are not shared with your other Apple devices — such as an iPhone or iPad — through the handoff option. This includes browsing data, website cookies, AutoFill information, and more.
You can easily use Private Browsing to protect your private information while surfing the web and help keep your online activities much safer. When you end your session and close the Safari browser, all your browsing data is deleted.
How to use Private Browsing in Safari
Whether you are working on a Mac or a mobile Apple device, such as an iPhone or iPad, you can easily use Private Browsing in the Safari application in a few simple steps. Here’s how:
If you are on a Mac:
- Open the Safari application.
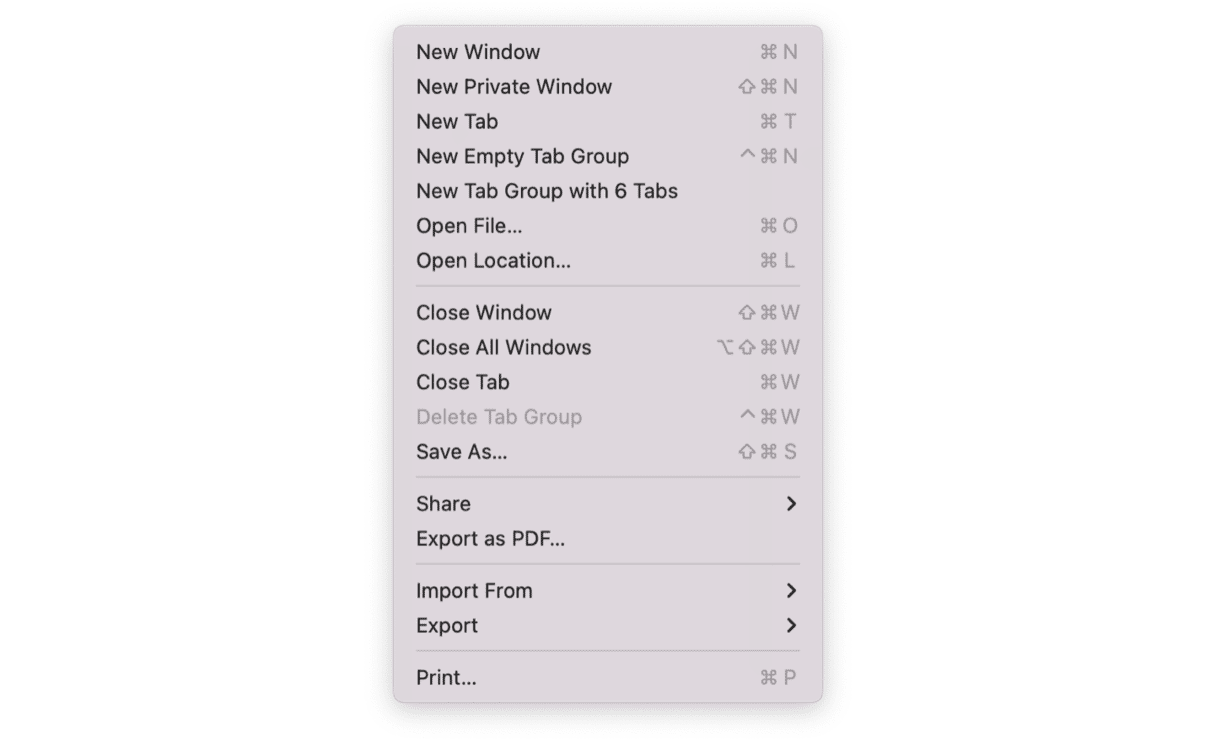
- Click File in the top Navigation Bar.
- Click New Private Window.

If you are on an iPhone or iPad:
- Open the Safari application.
- Select the New Tab icon at the bottom right.
- Select Private on the bottom left.
Just like that, you’re now browsing Safari in Private Mode! None of your browsing history or data will be saved.
Safari password tips
One of the best ways to ensure your privacy across any website is to use secure passwords.
It’s important to use complex passwords that can’t easily be guessed. A combination of uppercase and lowercase letters, numbers, and special characters is a great strategy when creating a secure and unique password. Generally, the longer and more complex a password is, the more secure it will be. Here are some best practices for you:
- Use passphrases instead of passwords.
- Each time you sign up for a service, add the name of that website to your password.
- Use a password manager.
Additionally, it’s important to avoid using the same password across multiple applications and websites. This will prevent your accounts from being compromised, especially if one of your accounts is ever compromised in a hack or data breach. While it may be convenient to only have to remember one password, it’s much safer to use a different one for every site you visit.
Password protect your Safari bookmarks
In addition to using Private Browsing and secure passwords, you can take an extra step to ensure your security by password-protecting your Safari Bookmarks. This provides an added layer of privacy and protection for frequently used websites. Whether this includes social media accounts, personal or business email accounts, or financial sites, taking an additional step to protect your privacy can be beneficial.
In order to password-protect your bookmarks, you’ll need to download a third-party application (usually a browser add-on) that offers this ability. Luckily, there are many highly rated options for keeping your Safari bookmarks private, most of which can be installed in a few simple steps.
Delete caches and ad cookies from Safari
Advertisers don’t like people deleting their tracking cookies — but that’s what we’re about to do. You can think of Safari as a giant log book to collect your entire online footprint. Here are some things you can and should delete regularly:
- Browsing history
- Cookies
- Chat data
- Recent items list
- Downloads history
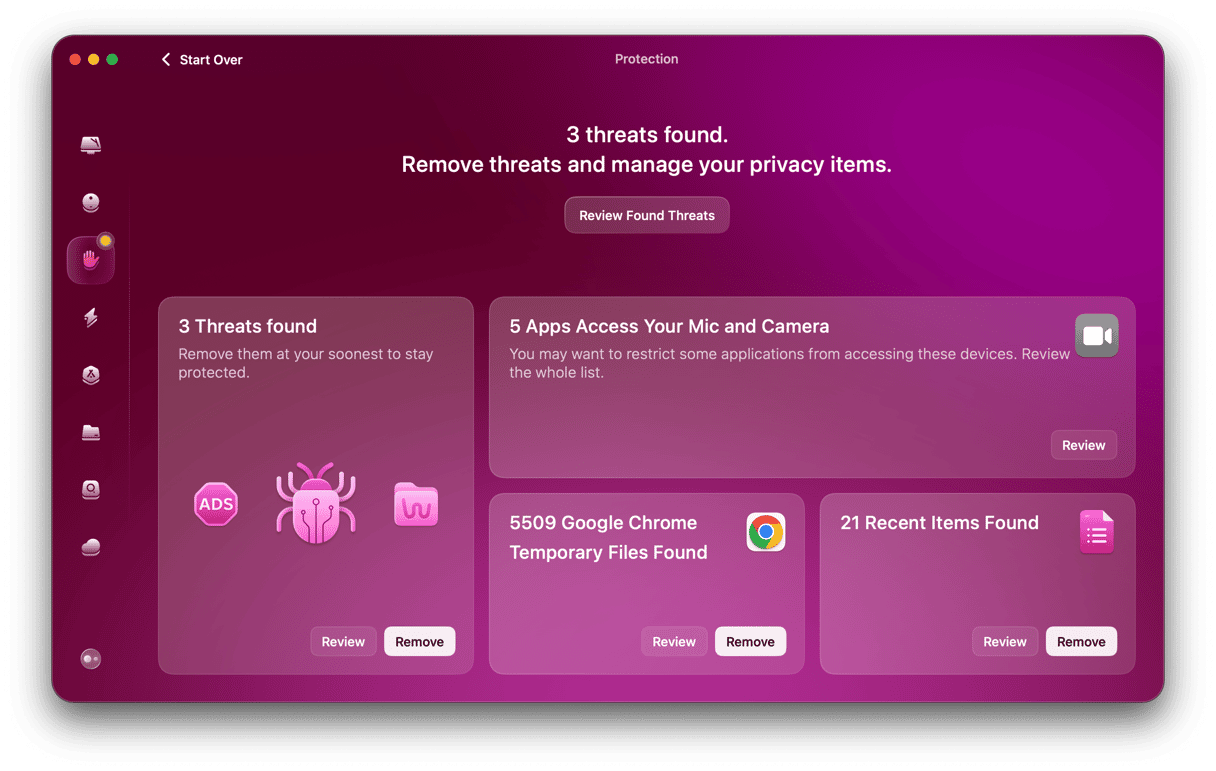
Many tech experts like Bob LeVitus recommend using CleanMyMac for this purpose. This app is notarized by Apple and effectively erases Safari’s digital traces.
You can download a free version of CleanMyMac here — it will do the job. After you’ve installed the app, click on the Privacy tab to get started.

After you’ve finished your cleanup, your Safari will become a blank slate again.
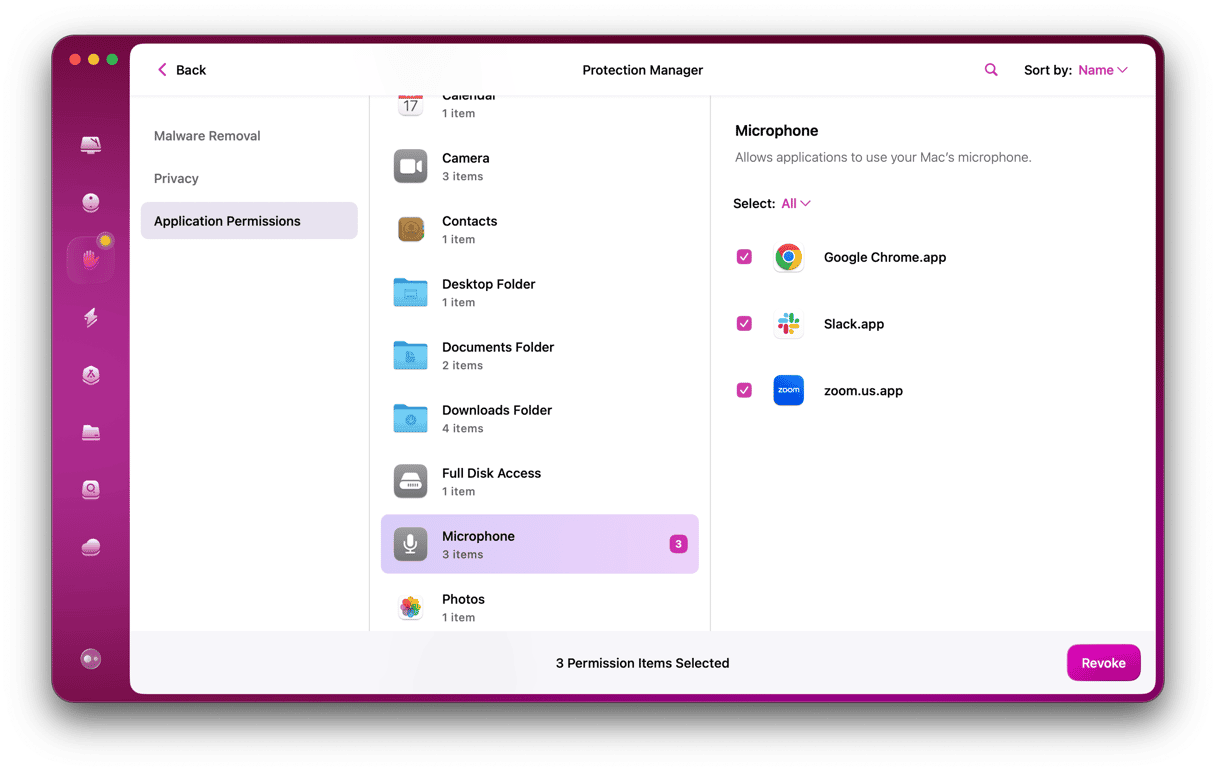
The Privacy module also shows you all applications’ permissions, including access to your camera, microphone, files, and folders. This allows you to review all granted permissions and remove them if needed.

Protecting your personal data while browsing the internet is only a start of a cleaner and more productive experience on your Mac. With CleanMyMac, you can easily free up disk space, improve your application efficiency, and increase your boot time.


