We make sure our files are always backed up, but sometimes that isn’t enough.
If your Mac is out of action, even temporarily, and you’re forced to work from another computer, backed-up files are a saving grace — but it isn’t quite the same as using your own machine. Having a backed-up drive is like transferring your Mac to another — perfect for when you don’t want to waste time setting up a new machine.
A cloned drive is also useful for resetting your Mac to an earlier version if you’re at risk of suffering a serious computing failure.
How to prepare an external drive for cloning
- Connect the external drive to your Mac.
- Click the magnifying glass icon to open the Spotlight function and type ‘Disk Utility.’
- Double-click on the Disk Utility app to open it.
- Locate the drive under the ‘External’ section. It will typically be named after the company that made it if you haven’t previously formatted it with it a new name.
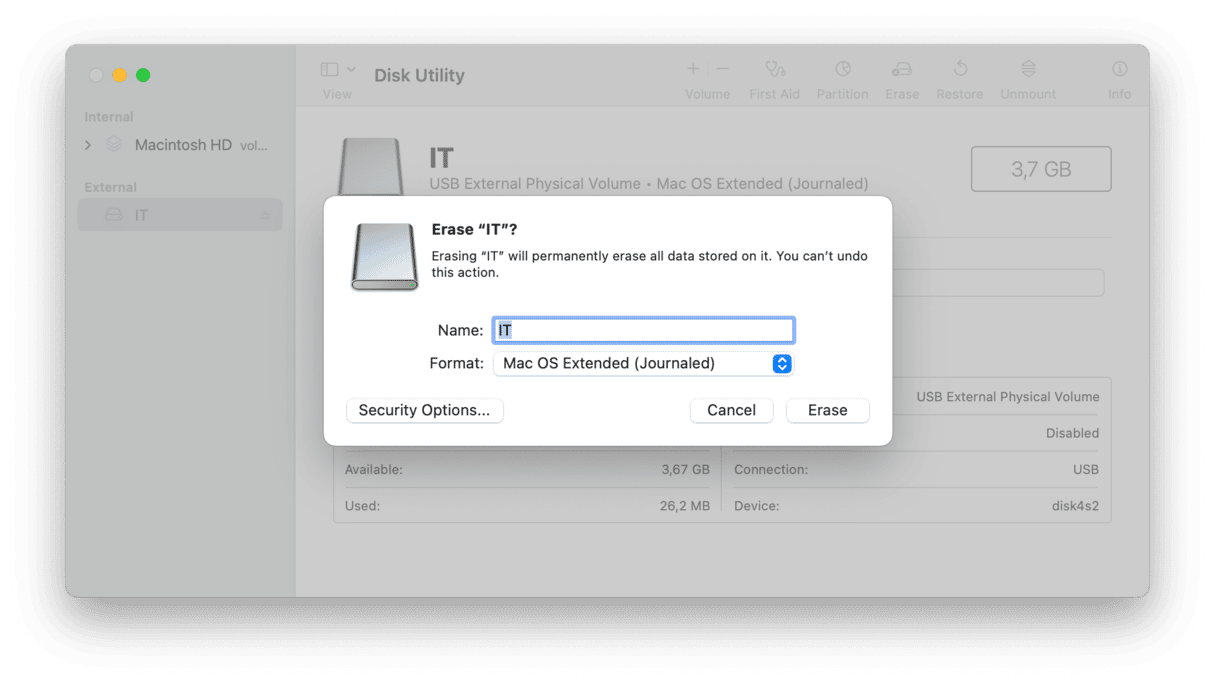
- To give the drive a new name, select ‘Erase’ at the top of the window and then enter something easy to remember — you will need to know the name for booting the clone.
- From the format list, select ‘macOS Extended (Journaled)’ and then click ‘Erase.’
- Once the process is complete, click ‘Done’ and close the Disk Utility window.

To ensure you can recover deleted files, create a disk image. This can be done with Disk Drill:
- Open the app and choose Backup from the toolbar > Backup into DMG image.
- In the new window that opens, click OK, Let’s do it.
- Choose the boot disk and click Backup > save disk image.
- Navigate to the drive you’ve erased and click Save.
Now, you have a copy of your boot drive saved as a disk image, which allows running file recovery whenever you need it.
How to clone your Mac drive
If you want to copy the entire drive or specific files, it’s a good idea to use Get Backup Pro for the job. Once it’s installed, it can be scheduled to perform automatic backups — so even if your Mac breaks down unexpectedly, you have a recent copy.
- Make sure your formatted drive is connected and that it has enough space for a copy of your full Mac drive.
- Open Get Backup Pro and select whether you want a full clone or only selected files.
It is also useful to clean your Mac of files you don’t need. You may use a powerful Mac cleaner like CleanMyMac to ensure that you aren’t wasting space by copying multiple versions of the same file.

- Select your drive in the top right bar as a source to clone to. You can also synchronize with another Mac, so you can begin work on a second device without wasting time restoring the data from the drive.
- Use the menu on the bottom left of the system window to begin cloning.
How to restore your Mac from a clone
If you’re using Get Backup Pro to synchronize with another Mac, your clone will be ready to go whenever you are. However, if you’re booting from a removable hard drive or SSD, it will take a few more steps.
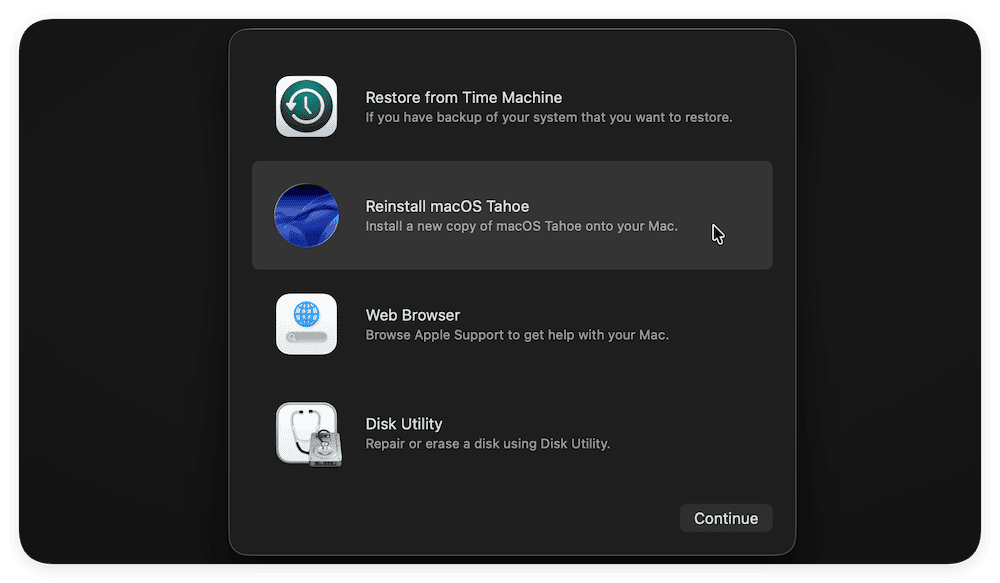
First, boot into recovery mode.
For Intel-based Mac:
- Go to Apple menu > Restart.
- Immediately press and hold Command+R.
- Don’t release the keys until you hear Mac’s startup sound or until the Apple logo appears.
For Mac with Apple silicon:
- When turning on your Mac, press and hold the Power button.
- Keep it pressed until you see startup options.
- Click the Gears icon (Options) and hit Continue.
- You may be asked to select a user and enter their administrator password. Follow on-screen instructions and press Next after any action you take.

Once done, follow the next steps:
- Select ‘Disk Utility’ and click ‘Continue.’
- Select your drive.
- Click ‘Restore’ from the top of the Disk Utility window.
- At the ‘Restore From’ tab, select your external drive.
- At the ‘Restore to’ tab, select your Mac’s drive.
- Click ‘Restore’ and, once the process is complete, restart your Mac.
How to boot your clone on another Mac without erasing the original
You might want to work on another Mac — either a backup device or someone else’s — but you don’t want to overwrite the first system.
To use yours as well, you have to first partition the drive so that there can be more than one drive on the system.
- Open the Finder application on the Mac you want to partition.
- Go to Applications > Utilities > Disk Utility.
- Select your drive: It will be called something like ‘Macintosh HD’ or ‘Fusion.’
- Click the ‘Partition’ tab and then click the ‘+’ button. Choose ‘Add Partition.’
- Drag the circle to adjust what size partition you would like to create.
- Name the new partition and then click ‘Apply.’
The disk will then be checked and changed, which will take a few minutes.
You will then have a partitioned drive, meaning that there is a separate space for another system. To upload your own clone into the free partition:
- Turn off the Mac you wish to upload the clone to.
- Connect the external drive with the clone on it.
- For an Intel-based Mac, turn on the Mac and hold down the Option key as soon as you hear the startup chime. For a Mac with Apple silicon, do not release the power button until you see ‘Loading Startup Options’ on the screen.
- A list of systems to start your Mac will appear: select the external drive to boot from your clone.
That’s it. You don’t have to be limited to one machine when your entire system can be transferred.


