Apple has introduced several features in recent years to improve security and privacy on its devices without making them difficult to use or inconveniencing users too much. Two-factor authentication is one of those features, adding an extra layer of security to your Apple ID account. However, if, for some reason, you get locked out of your account, the process for regaining access is a long one and can take up to several days. There is an alternative, though — using a recovery key Apple has also introduced. In this article, we’ll show you how to create an Apple ID recovery key.
What is an Apple recovery key?
Normally, if you lose access to your Apple ID, you have to either take your Mac to an Apple Store Genius Bar or apply to Apple online, and that process can take several days to sort out. If you create a recovery key — a randomly generated 28-character code — beforehand, you can use that to regain access to your account.
It’s worth noting, though, that while creating a recovery key is more convenient than going through the recovery process if you do create one, using the online recovery process will no longer be an option. You are responsible for keeping a record of your recovery key, and if you lose it, you will be locked out of your account permanently. Apple advises keeping multiple copies in different places or giving a copy to a friend or family member.
How to create an Apple recovery key on Mac
- Click the Apple menu and select System Settings.
- Click on your name and then navigate to Password & Security.
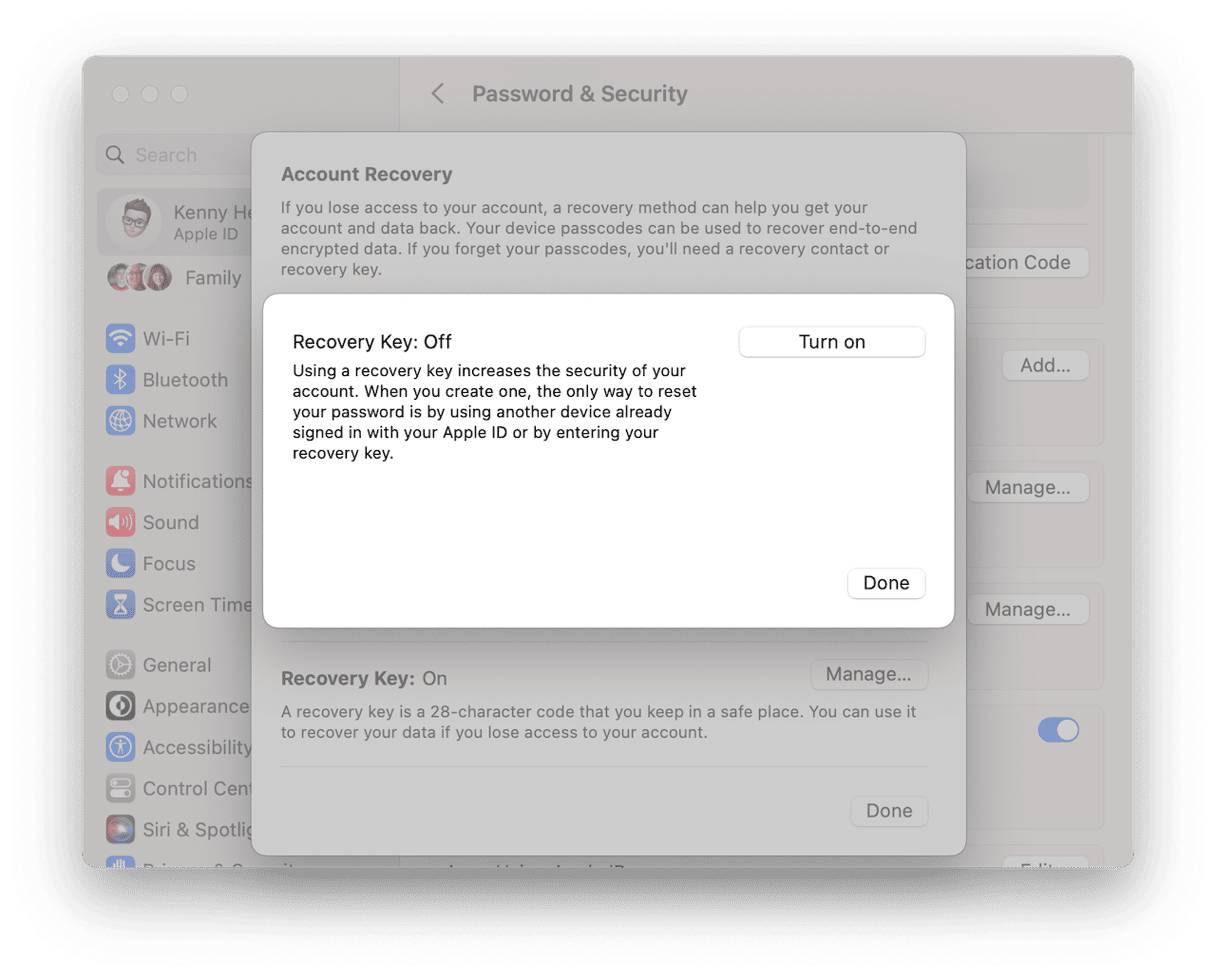
- Scroll down to the Account Recovery section and click Manage.
- Next to Recovery Key, click Manage.
- Click Turn On, then Done.

If you decide to stop using a recovery key in the future, you can follow the steps above and click Turn Off.
How to protect your privacy and security on your Mac
The recovery key is all about keeping your Apple devices secure. Choosing to use a key means that you are the only person who can regain access to your Mac, iPhone, or iPad if you’ve forgotten your Apple ID password or have been locked out for another reason.
But there are lots of other things you can do to improve your privacy and security on your Mac. For example, it’s a good idea to review the permissions you’ve given apps to access your Desktop and Documents folders, camera, microphone, and other parts of the system. You can then revoke permissions that are not needed. You can also clear your Recent Items list, browser history, and record of public Wi-Fi networks you’ve connected to.
Doing all that manually would take a lot of time and effort. Fortunately, you don’t have to — CleanMyMac’s Privacy module can do it for you. It scans your Mac, gathers information on which apps have permissions set, and enables you to review and change them easily. It also allows you to clear the browser cache, cookies, your recent items list, and the list of Wi-Fi networks with the click of a button. You can download it for free here. Then, once the app is installed, all you have to do is go to Privacy from the sidebar and click Scan. Then, CleanMyMac will show what can be removed to help you improve privacy with a click.

How to create an Apple recovery key on iPhone
As well as creating a recovery key on your Mac, you can create one on iPhone:
- Open the Settings app and tap on your name.
- Choose Password & Security.
- Tap Account Recovery.
- Tap Recovery Key.
- Toggle the switch to On.
An Apple recovery key is a 28-character code that you generate on your Mac, iPhone, or iPad. You can create one even when you’re offline. Once you’ve created one, you can use it to prove your identity if you ever lose access to your Apple ID. However, if you lose the recovery key, you may be permanently locked out of your Apple ID. Follow the steps above to create an Apple recovery key and make sure you keep it safe.


