Is it time to start cleaning up your Mac? Are you trying to be more organized with your files? Or maybe it feels like you have pictures everywhere on your computer, and you’re not sure which one is safe to delete. Don’t worry. This article is going to show you how to delete multiple photos on your Mac and more. So, keep reading!
How to select all photos on Mac
If you don’t have an app like Photos managing your pictures, then that means they’re probably saved all over your hard drive – spread out in various folders. Forget about trying to clean them up; the first thing you’ll spend hours doing is finding them.
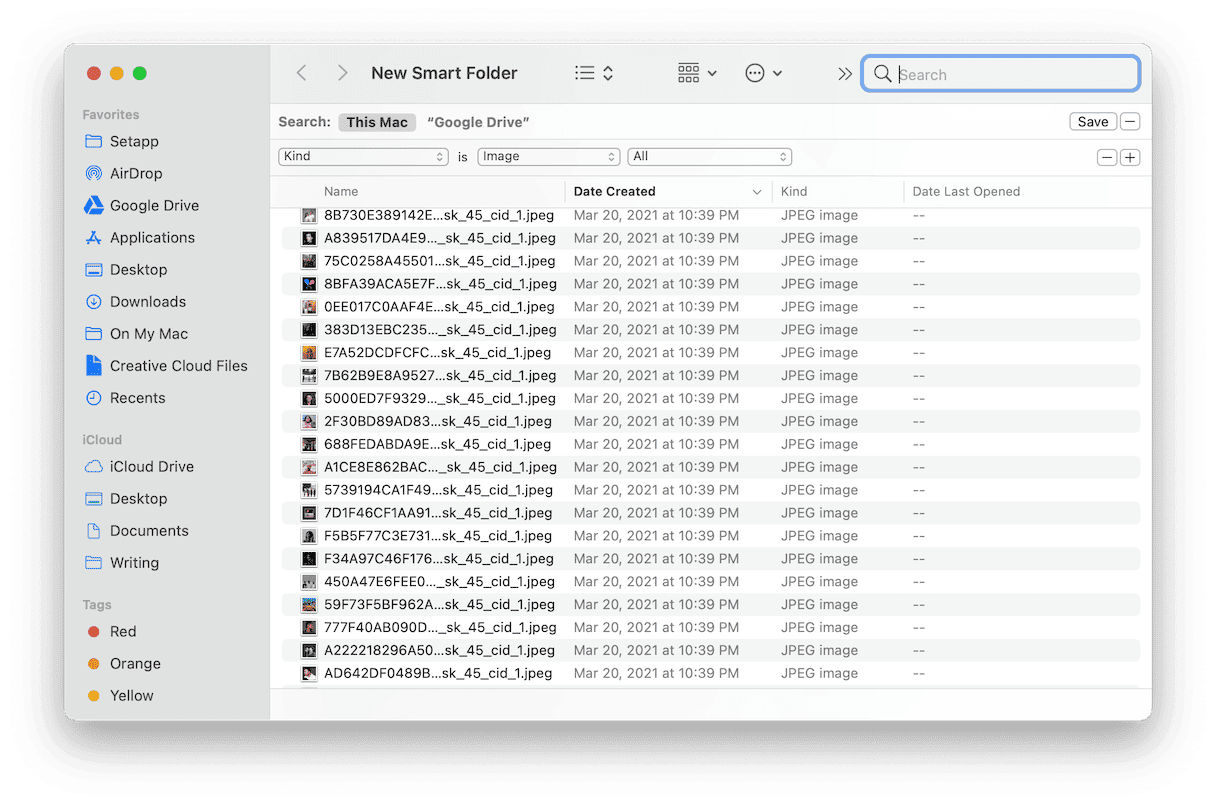
But thankfully, you don’t have to look for each picture manually. You can use the macOS feature, Smart Folders, to collect all the images saved on your computer. All you need to do is follow these steps:
- Open a new Finder window.
- Click File > Smart Folder.
- Make sure “This Mac” is selected.
- Then, click +.
- Leave the first drop-down menu set to “Kind” and change the second one to “Image.”

And that’s it. The downside is that Smart Folders will show every image on your Mac. Including ones that are part of apps or were emailed to you – which isn’t the end of the world. It’s just something that you should keep in mind when you’re cleaning up files and deleting them. If you accidentally delete an image that’s part of one of your apps, it could cause it not to run correctly. So, just make sure you’re confident about the files you’re deleting.
How to delete photos on macOS
Fortunately, there are a couple of different ways you can go about deleting pictures from your computer.
If you’re just saving your pictures in folders on your hard drive, then you’ll want to use the Smart Folders method you read about earlier. Once you can see your photos in one Finder window, then you can just drag and drop them onto the Trash icon in your dock.
But, if you’re using the Photos app to manage your library, don’t worry. You’re not out of luck. You can read about how to remove those pictures next—followed by an even faster method to clean up your photo library using the CleanMyMac app.
How to delete photos from photo library
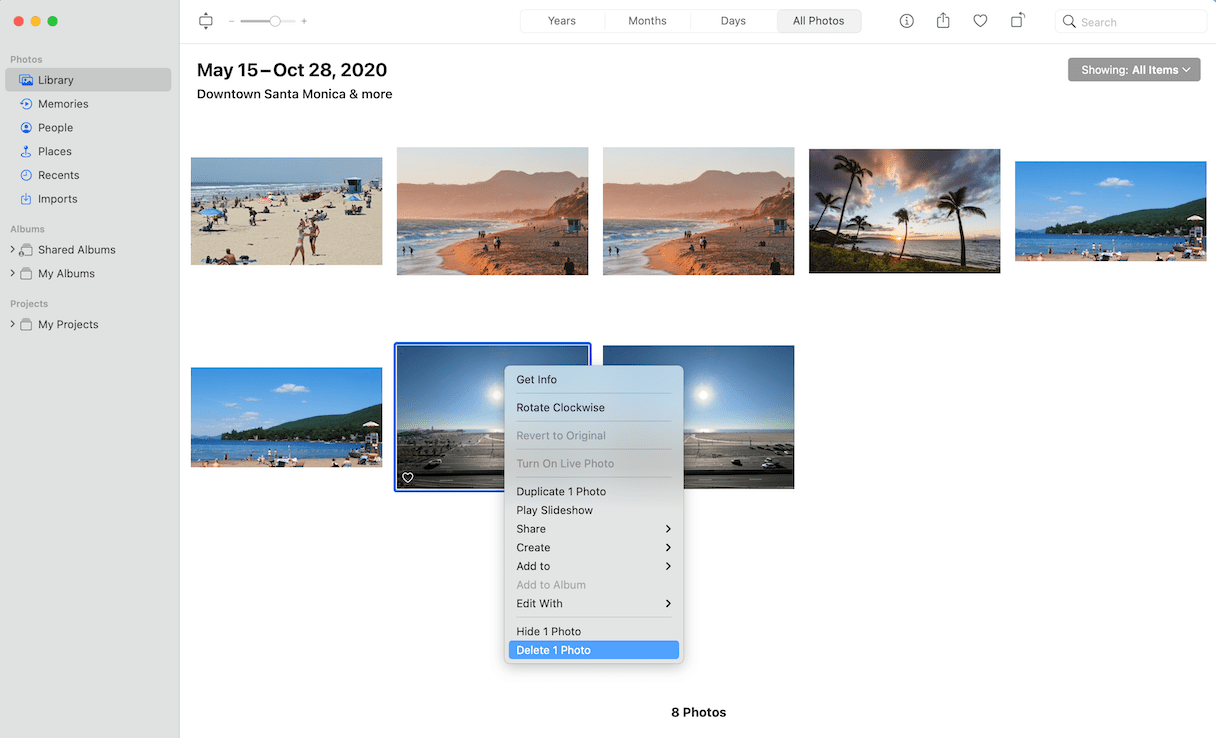
One of the great features of the Photos app is that it will try to stop you from importing duplicates into your library. But, occasionally, one or two will slip in. While the app does its best, it still doesn’t account for similar-looking pictures. Maybe you had to take five versions of the same image just to get the perfect shot. If your photo library is plagued with those types of pictures, here’s how you can remove them:
- Open Photos.
- Find the picture(s) you want to delete and click on it.
- Note: To select multiple images, click on one photo and then hold down shift before clicking on the last photo within a range.
- Then, press the Delete key on your keyboard.

After you delete the pictures from your library, you’ll need to right-click on the Trash icon in your dock and click Empty to remove them from your hard drive.
Clean up your photo library automatically
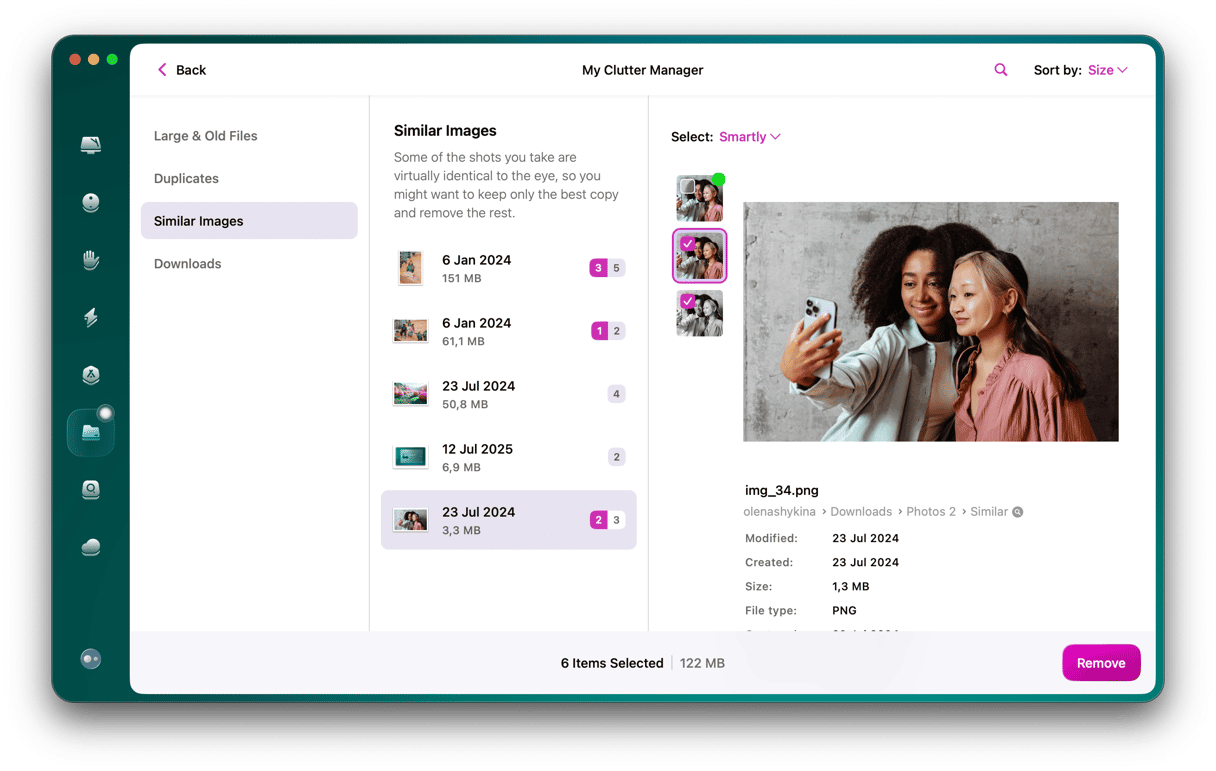
Now, if your main goal for all of this is to clean up the duplicate and similar pictures that are wasting space on your hard drive, then you’ll want to check out CleanMyMac. It’s an app that scans your computer for those files and lets you remove them to organize your storage. Once you start your free CleanMyMac trial, this is all you need to do:
- Open CleanMyMac.
- Go to My Clutter and run a scan.
- Click Review All Files.
- Look through duplicates and similar images found and remove any you don't want to keep.

How to delete entire photo library
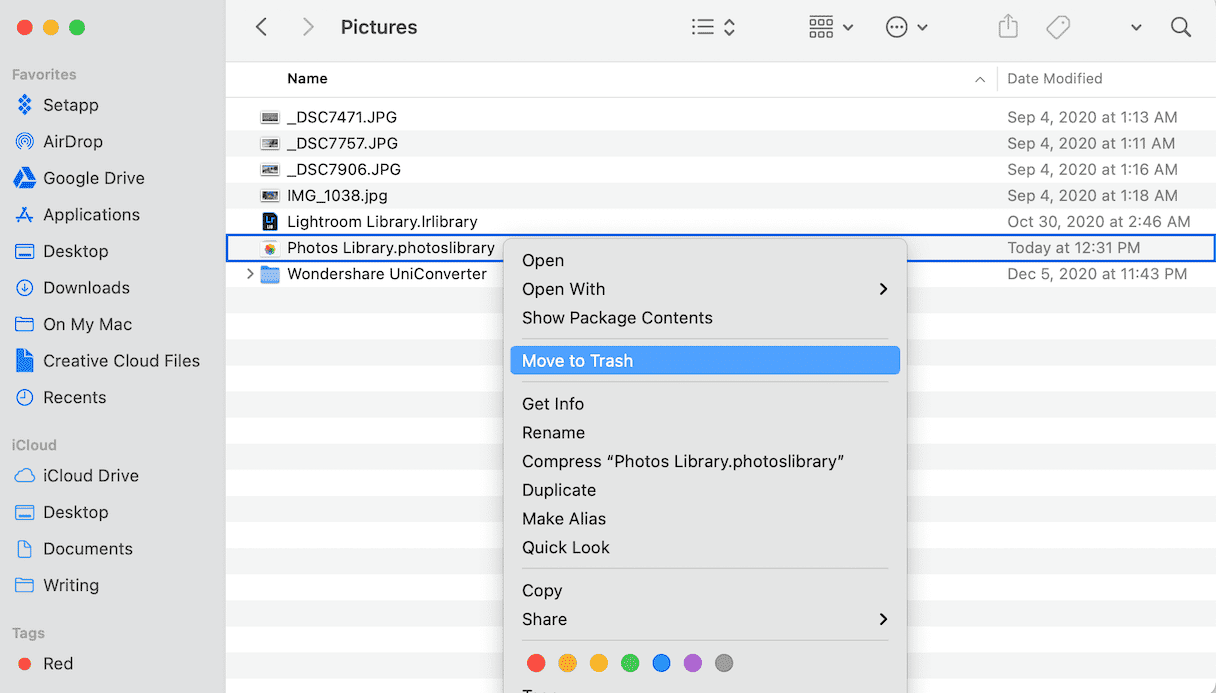
Maybe you want to purge your photo library and start fresh. That’s probably the easiest and quickest way to free up space on your hard drive. Follow these steps to delete your entire photo library:
- Open a Finder window.
- Click Go > Home > Pictures.
- Select your Photos Library file.
- Then, right-click and select Move to Trash.

That’s all there is to it. The next time you open Photos, it will recreate a new, fresh library file with nothing in it.
It’s important to remember that you’ll need to empty the trash in your dock to remove the file from your hard drive.
What to do if you can’t delete photos on Mac
If you’re trying to delete pictures but they’re not really going away, a couple of common causes include:
- Deleting in Album view. If you’re in Album view versus Photos view, deleting a picture will only delete it from that specific photo album. So, even though the pic has been deleted, it still lives in your photo library.
- Deleting from Photo Stream. For iCloud users, Photo Stream is a feature that’s supposed to help you transfer pictures between devices. But, like albums, if you delete an image from photo stream, it’s possible for it to still live in your library.
It’s pretty uncanny just how fast you can accumulate pictures and videos on any of your devices. And if you don’t do the upfront legwork putting them into Photos, things can get out of hand very quickly. But there’s always a silver lining. In this case, that’s the fact that once you know how to find your photos, it’s not difficult to delete them. The whole process is even easier if you use an app like CleanMyMac to scan for duplicates for you.
While cleaning up your photo library can feel like a daunting task. Hopefully, you feel a little more confident as you start to work on this.


