iMovie has become a very powerful video editor and is capable of producing everything from home movies to low-budget indie films. However, as it’s become more powerful and added more features, it’s also become more tricky to use. It’s not difficult to get to grips with, but does take a little patience and perseverance. The best place to start is right here, with our iMovie tips and guide to using iMovie on the Mac. We’ll assume that you’ve already shot some footage on your iPhone or iPad and are ready to begin editing. We’ve added some tips on how to choose a camera, accessories and how to shoot at the end of the article.

How to edit videos in iMovie
Once you’ve shot all the clips you need, it’s time to edit them in iMovie.
Tip: Working with video can take up lots of disk space on your Mac. If you need to free up space, we recommend using CleanMyMac. It can uninstall apps and all there data, clear out system junk and other files you no longer need, and give you back several gigabytes of disk space very quickly and easily. You can test it for free for 7 days — get your free trial here.
Now, let's get down to work!
- Open iMovie on your Mac.
- Tap the Projects tab and click the ‘+’ to create a new project. Choose Movie.

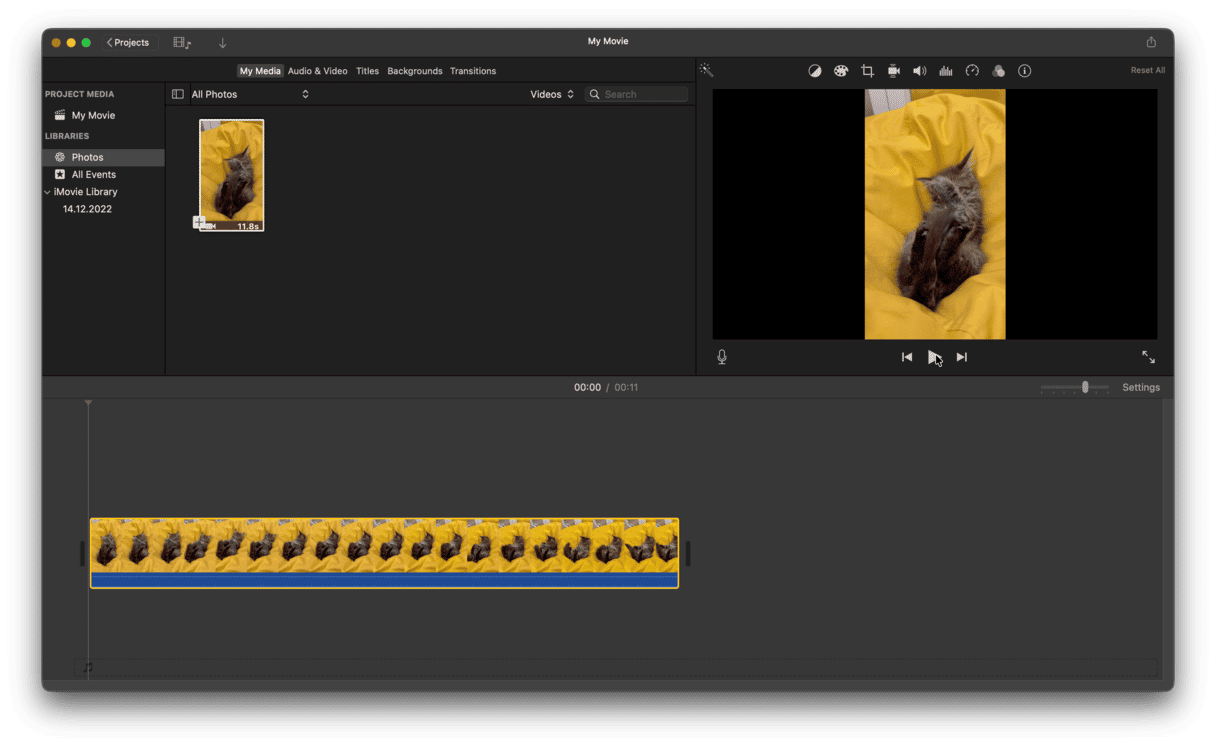
- In the left sidebar, click Photos under Libraries and choose All Photos — you’ll see your photos appear in the library window. At the top right of that window, next to the search box, click the menu and choose Videos.
- Scroll to the bottom of the thumbnails of video clips to find the ones you’ve just shot. Click one and watch it play in the viewer. Repeat until you find a clip you want to use.
- Click the first one you want to use in your movie and drag and drop it onto the timeline at the bottom of the iMovie window.


Congratulations! You’ve just added your first clip to your movie. Now, you could go wild here and start playing with effects and transitions and making the clip look exactly how you want it to. But it’s much better to sketch out the whole thing first by assembling a rough cut.

How to cut video in iMovie
- Click the clip you’ve just added to the timeline and watch it playback in the viewer.
- If you don’t want to use all of it, drag the handles at the left and right edges of the clip towards the centre to trim off what you don’t want.
- If you only want to keep a small section of the clip, hold down the R key and drag across the portion you want to keep. Hold the Control key and click on the clip, then choose Trim selection.
- If there are multiple sections of the clip you want to keep, mark them by moving the playhead to the beginning of a section, then pressing Command-B to split the clip. Move the playhead to the end of the section you want and repeat. Continue for each section of the clip you want to keep.
- When you’re finished splitting the clip, click on the sections you don’t want and click Delete.
- You can trim down the sections that are left by following Step 3.
Once you’ve gone through the process above for each piece of footage you’ve recorded, you can re-order them in the timeline by clicking on a clip and then dragging it to a new position.
You now have a rough cut of your movie! The next step is to add transitions.
- Click the Transitions tab in the library and choose one. Cross-Dissolve is a good place to start.
- Drag the transition and drop it between the first two clips.
- To edit the length of a transition, double-click it in the timeline and type in a new value for the time.
- To finely tune where a clip ends and a new one comes in, Control-click on the transition and choose Show Precision Editor.
- You can now drag the clips on the top and bottom left or right to change when one ends and the other begins.
- Repeat the process for every clip.

You can now adjust the color, lighting, audio, and speed of each clip by doing this:
- Click the clip in the timeline.
- In the toolbar above the viewer, click the icon relating to the thing you want to adjust. So, to add a video or audio filter, click the filters icon (three circles).
- Make the adjustment you want and move on to the next clip.
You can now add titles by clicking on the Titles tab in the Library and dragging one of the titles thumbnails to the beginning or end of your movie. Then type your text into the box and adjust the font and type size if you want.
Add music or sound effects in the same way as titles and transitions.
Tip: You can slow down sections of a clip, create an instant replay, mute the audio, or add a freeze-frame by clicking on a clip, holding the R key, dragging over the section you want, and then going to the Modify menu and choosing the item you want.
When you’re finished, go to the file menu and save your project. Then go to the File menu again and choose Share. To save the movie as a file, choose File and select the options you want from the window that opens. Click Next, give it a name, and navigate to where you want to save it, then press Save. Now you know how to use iMovie on your Mac!
iMovie is great fun to use and, though it take a bit of patience, very easy to get to grips with. Follow our tips here, and you’ll have made your first movie in no time. And don’t forget to use CleanMyMac to free up space on your drive!

How to choose a camera and other equipment
Choosing your camera
Not so long ago, if you wanted to make even a half-decent home movie, you’d have to invest several hundred dollars in a digital video camera and then hook that up to your Mac, or use an SD card, to transfer footage. That’s no longer the case. Your phone is now capable of shooting video that’s every bit as good as the high-definition cameras of just a few years ago. It’s also much easier to transfer footage from an iPhone to your Mac.
You could use an iPad as well, of course, but iPad cameras aren’t quite as good as those in the most recent iPhones and an iPad is much less convenient to carry around. The iPad’s one advantage is that it has a larger screen than the iPhone, so if you’re recording something that you need to monitor carefully, such as an interview under artificial lighting, an iPad on a tripod may be preferable to an iPhone.
Additional equipment to consider
Your iPhone on its own will do a great job of recording video. However, if you want to make the most of it and grab the best possible footage you can, there are one or two accessories you could add.
- External microphone
This will improve the audio quality of your video hugely. There are lots of external microphones designed for the iPhone and which will cut out background noise and wind, as well as boost the audio you want to capture.
- Tripod or steady-grip
Holding an iPhone still for any length of time is very difficult. If you’re shooting something that doesn’t require the camera to be moved — say, your child’s school show — you should use a tripod. If you need to move the camera, some kind of handle or grip would really help.
- Additional lenses
The one benefit a digital video camera or SLR that shoots video has over your iPhone is that it as an optical zoom lens. If you zoom into a scene on your iPhone, it’s done digitally, meaning that it crops into the image and makes the pixels bigger. It’s not a disaster, but it’s not ideal. If you think you’re going to use the zoom a lot, it’s worthwhile considering adding a longer lens designed for the iPhone.
- Specialist case
All those attachments need a way of being attached to the iPhone. The solution is a case that has mounts for tripods, lenses, etc. That way, you can keep the accessories attached to the case and just put the iPhone in the case when you want to shoot video.
Tips before you begin shooting
Video takes up quite a bit of space on your iPhone, so you’ll need to make sure you have enough storage capacity. If you assume 10GB is needed for every hour of video you shoot, you should be able to estimate how much you’ll need. If you don’t have enough, you’ll need to delete apps or other items to make room. Launch the Settings app, tap General > iPhone Storage to see what’s taking up the most space. You can quickly reclaim space by tapping Offload Unused apps – which will remove the apps but retain their data, and Auto Delete Conversations that removes conversations more than a year old. To remove individual apps, tap the app and tap Delete App.
You should also enable iCloud Photo Library, so that when you shoot your video and it’s saved in Photos, it will sync with iCloud and will be accessible within iMovie. Go to Settings, tap Apps > Photos, and then toggle iCloud Photo Library to on.
Thank you for reading! Stay tuned!


