YouTube is one of the biggest platforms and the go-to site to share your videos online. Unlike other social media apps, YouTube makes your videos easily accessible to anyone, not just those in your circle of friends or followers. And thanks to high-end cameras and a plethora of apps, you can now shoot, edit, and upload using only your iPhone.
If you’re new to creating video content, keep reading this article, and we’ll walk through everything you need to know from concept to finished video.
How to plan your YouTube video
As tempting as it may be to just open up the Camera app and start recording, there’s a couple of questions to answer first.
What do you want to say?
This might seem like a no-brainer, but it’s an important one to answer and not lose sight of throughout the process. Figure out what you’re trying to communicate with your video. It might be helpful to try and write it out. And once you’ve got it, ask yourself what the clearest and most concise way to say it would be. Can you get it down to one sentence?
Who is your video for?
Once you have what you want to say figured out, the next question to answer is who do you want to say it to? Who is the audience for your video? The answer will help you figure out things like what type of video you’re making or how you’ll make it. It will also determine what your thumbnail will look like, how you’ll name your video, and so on.
What type of video are you making?
After you answer the first two questions, it’s time to get into the nitty-gritty of the video that you’re creating. Are you trying to review something, explain a concept, or maybe create a funny reaction video? Figuring that out will help you decide how long your video should be or whether you should write a script.
Don’t worry if this all feels like a lot before you even start filming anything. It’ll get easier the more you do it, and you’ll begin to understand your audience and your voice better.
How to record a video for YouTube with your iPhone
Once it comes down to actually filming your YouTube videos, technically, all you need is your iPhone. But there are a couple of things to consider that could help improve the quality of your videos. Things like what app you’re using to record or whether you need additional lighting can affect how your video looks.
Try more advanced camera apps
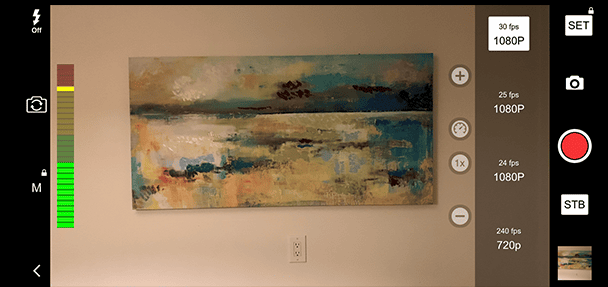
While you can use both the iOS Camera app and the YouTube app to record your videos, you might find them to be limiting. You only have control over certain functionality, so if you want a bit more, then you should look to third-party apps for help.
- Filmmaker Pro - A free app that bills itself as a video editor, but also gives you a ton of control over features like stabilization or audio when you’re recording. The caveat with this app is that to unlock more features.
- FilmicPro - While you have to pay for the app upfront, you do get access to more features out of the gate. For example, you can control things like white balance and shutter speed.
Gear up for better quality of footage
It’s common that when you start filming your videos, you’ll see things that you want to make better. To do that you may need additional equipment other than just your iPhone. Again, you don’t need these things to make your videos, but they will help the overall product.
- Tripod/Stand - This will help stabilize your phone, so it’s not shakey or doesn’t fall over if you prop it up. Here are some of the best iPhone tripods for different purposes.
- Lighting - You don’t have to get expensive or professional lighting, any old household lamp can help brighten up the frame.
- Microphone - Good audio can make or break a video. And if you’re filming your video in a quiet space, then the built-in mic is fine, but there are other instances when you’ll probably benefit from having an external microphone.
How to edit a YouTube video on iPhone
When you're done filming your video, it's time to edit it. As long as you're running iOS 13 or later, you can do this directly in the Photos app. Here’s how you can edit your YouTube video with the native editor:
- Open the Photos app.
- Select the video you want to edit.
- Tap Edit.
- Tap on the Camera icon at the bottom to trim the video. You can also turn off the audio by tapping the speaker in the top left corner.
- Tap on the Knob icon at the bottom to adjust settings like exposure or contrast.
- Tap on the Circles at the bottom to add a filter to your video.
- Tap on the Crop tool in the lower left to resize or rotate the video.
- Tap Done.
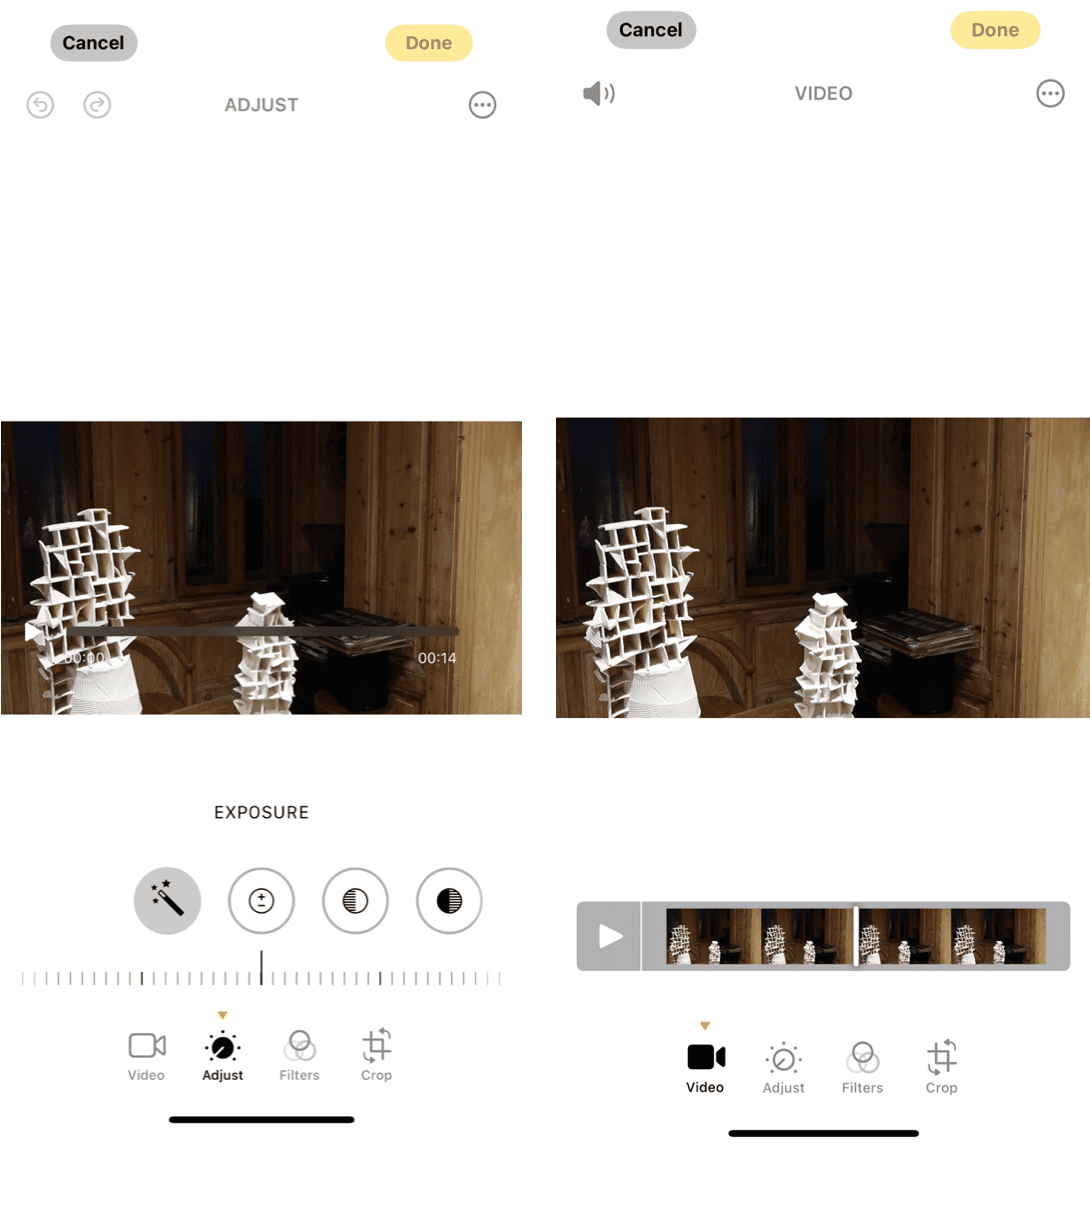
If you’re hoping to do a little more to your videos, like combining two clips together, check out the free iMovie or other editing apps on the App Store. And for more details on shortening your video or cutting out unwanted footage, here's how you can trim a video on iPhone.
How to put your video on YouTube
After you’ve finished shooting and editing your video, the only thing left to do is upload the video to YouTube. To put your video on YouTube:
- Tap the Camera icon at the top.
- Select the video you want to upload.
- Use the built-in YouTube editor if you want to make some more edits:
- Tap on the Scissors in the bottom right, to trim your video so it starts later or ends sooner.
- Tap on the Wand at the bottom to add a filter to the video.
- Tap on the Music Note in the bottom right to add background music.
- When you’re done making your edits, tap Next.
- Add a Title, Description, and Thumbnail.
- Set the Privacy and Location.
- Tap Upload.
It’s important to have a relevant and punchy title and description, because that’s how viewers will find your video and decide whether or not they want to watch it. Try to use keywords and common phrases when you’re writing them. The best thing to do is put yourself in the viewer’s seat and ask yourself what you would type if you wanted to search and find your video.
And don’t forget to give your thumbnail some love. That’s the first thing people will see when they’re searching for it. The more eye-catching and exciting it is, the more likely someone will click on it.
There’s a lot of thought and planning that can go into making videos for YouTube, but the good news is you can get away with just the iPhone in your pocket. Hopefully, this article was able to help you think about ways to make your videos better and maybe inspire you to try something new.


