Keeping your Mac up to date with the latest version of whichever OS you’re running, as well as having the latest versions of the applications you use, is important in order to have it running smoothly and safe from malware. Most of the time, updating the OS is very straightforward. You can either set it to update automatically, in which case the update will take care of itself, or you can do it manually. Either way, it usually runs smoothly. But what should you do if an update fails? You may, for example, see the error message that macOS ‘failed to personalize software update.’ We’ll explain all you need to know about this issue in this article.

Why do software updates fail?
There are a number of reasons why you might see an error message like ‘failed to personalize software update.’ It could be a problem with your internet connection, a lack of space on your boot drive, a conflict with other files on your Mac, or a bug in the update itself. The error message itself doesn’t really give a clue about the cause of the issue, so to fix it, we need to go through a step-by-step process eliminating possible causes.
How to update all the applications on your Mac easily.
Keeping the applications installed on your Mac up to date is important in order to take advantage of new features, help your Mac run smoothly, and keep it safe from malware. Instead of updating each app manually, use CleanMyMac’s Updater tool. It scans your Mac, finds installed apps, and shows available updates. You can select which to install and do it all with a single click. Get your free CleanMyMac trial.

How to fix it when a macOS update fails
If you see the error message ‘failed to personalize software update’ or get any other error message when you’re trying to update macOS, don’t panic. It’s not uncommon for OS updates to fail, and, as we said above, it could be something as simple as your internet connection dropping out. Follow the steps below in order to identify the problem and fix it. We’ve started with the most likely problems and straightforward fixes.
- Read the error message. Some error messages don’t help at all, while others do. So, read the error message carefully. If it recommends a next step, such as freeing up storage space, do that first.
- Check your internet connection. Even if the updater has already been downloaded to your Mac, you need a working internet connection to install the update so that it can get firmware and other information about your Mac. Check both your broadband connection and Wi-Fi network to make sure they’re working.
- Try installing an update in safe mode. Booting your Mac in safe mode prevents all but essential extensions from loading, performs checks on your disk, and deletes some system caches. The steps for booting in safe mode differ for Intel-based and Apple silicon Macs. You can find them on Apple’s website here.
- Repair your boot disk with Disk Utility. There may be a problem with your startup disk that’s causing the update to fail. To repair your startup disk with Disk Utility, you’ll need to reboot in recovery mode. Again, this is different for Intel-based and Apple silicon Macs. You can find out how to do it on Apple’s website here. Once you’ve repaired the disk, try running the installer again.
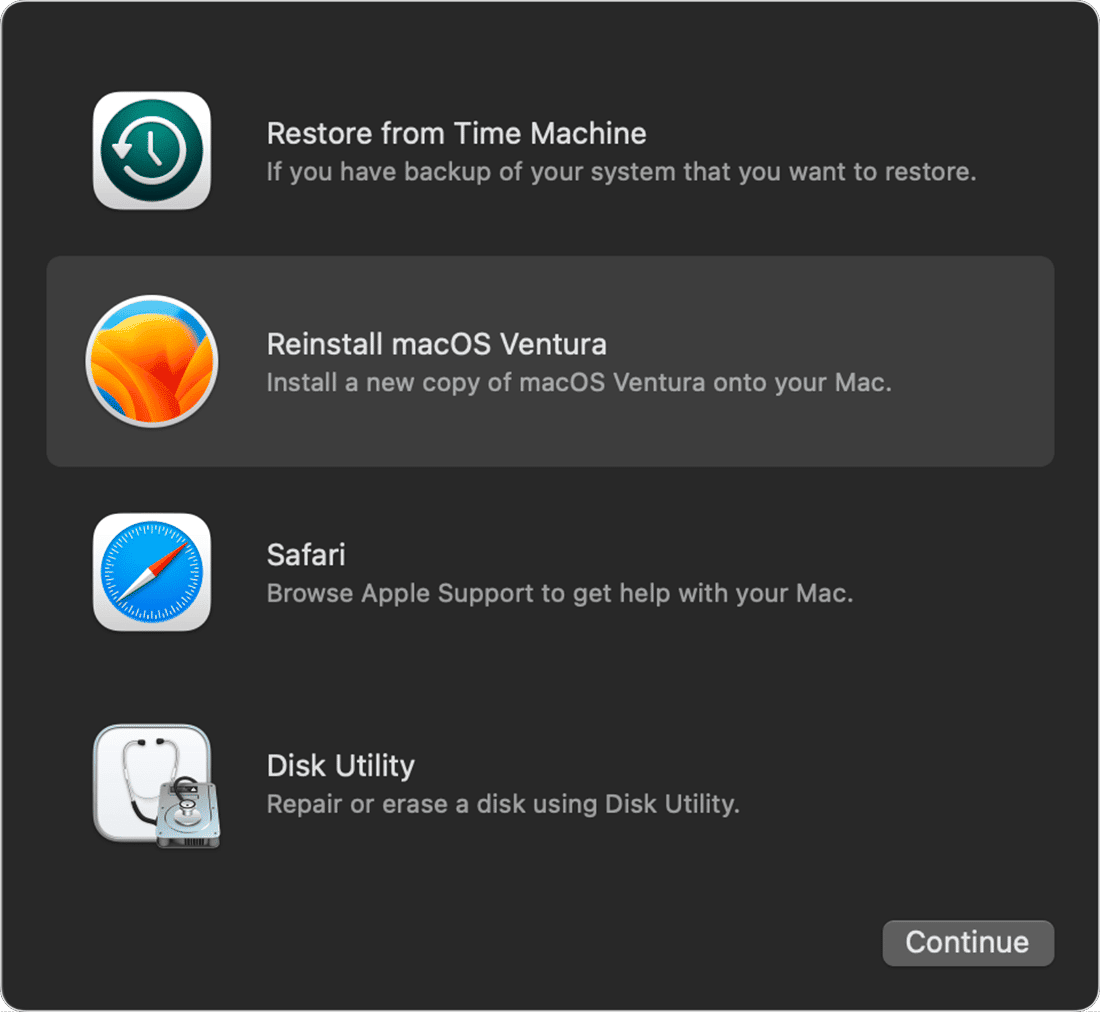
- Install from macOS Recovery. This is similar to step 4, except instead of running Disk Utility in recovery mode, you choose Reinstall macOS from the menu. This will install the latest version of the OS that is installed on your Mac, including the update.
- The last step to follow if installing macOS over the existing installation doesn’t work is to perform a clean install of macOS. A clean install deletes everything on your boot disk, so you should back it up first. Then follow the instructions here for a Mac with Apple silicon or here for an Intel-based Mac.
How to fix it when an app update fails
If the app was downloaded from the Mac App Store, try the following:
- Drag the app from your Applications folder to the Trash.
- Empty the Trash.
- Re-download it from the App Store.
If the above steps don’t work, sign out of your account on the App Store, then sign back in again and restart your Mac.
If the app was downloaded from the developer’s website, first of all, make sure the latest version is compatible with your Mac. If it is, try these steps:
- Look for the update installer in your Downloads folder and drag it to the Trash. Then empty the Trash.
- Restart your Mac.
- Open the app and check whether the update really did fail or whether you’re now running the latest version.
- If the update failed, use ‘Check for updates’ to download and install the update.
- If that doesn’t work, uninstall the app — you can use CleanMyMac’s Uninstaller to make it easier.
- Download the latest version of the app from the developer’s website and install it.
Seeing an error message like ‘failed to personalize software update’ when you’re updating macOS can be very disconcerting, especially if you don’t know why it happened. However, it’s usually not serious and can be fixed quite easily. Follow the steps above to identify the problem and fix it. Application updates can also fail for similar reasons, and we’ve explained how to fix that problem above. Remember, it’s good practice to keep both macOS and your applications up to date at all times in order to have your Mac running smoothly and safe from malware.


